Fujitsu Fi-5110EOX2 Getting Started - Page 11
Connecting the Scanner - scansnap
 |
View all Fujitsu Fi-5110EOX2 manuals
Add to My Manuals
Save this manual to your list of manuals |
Page 11 highlights
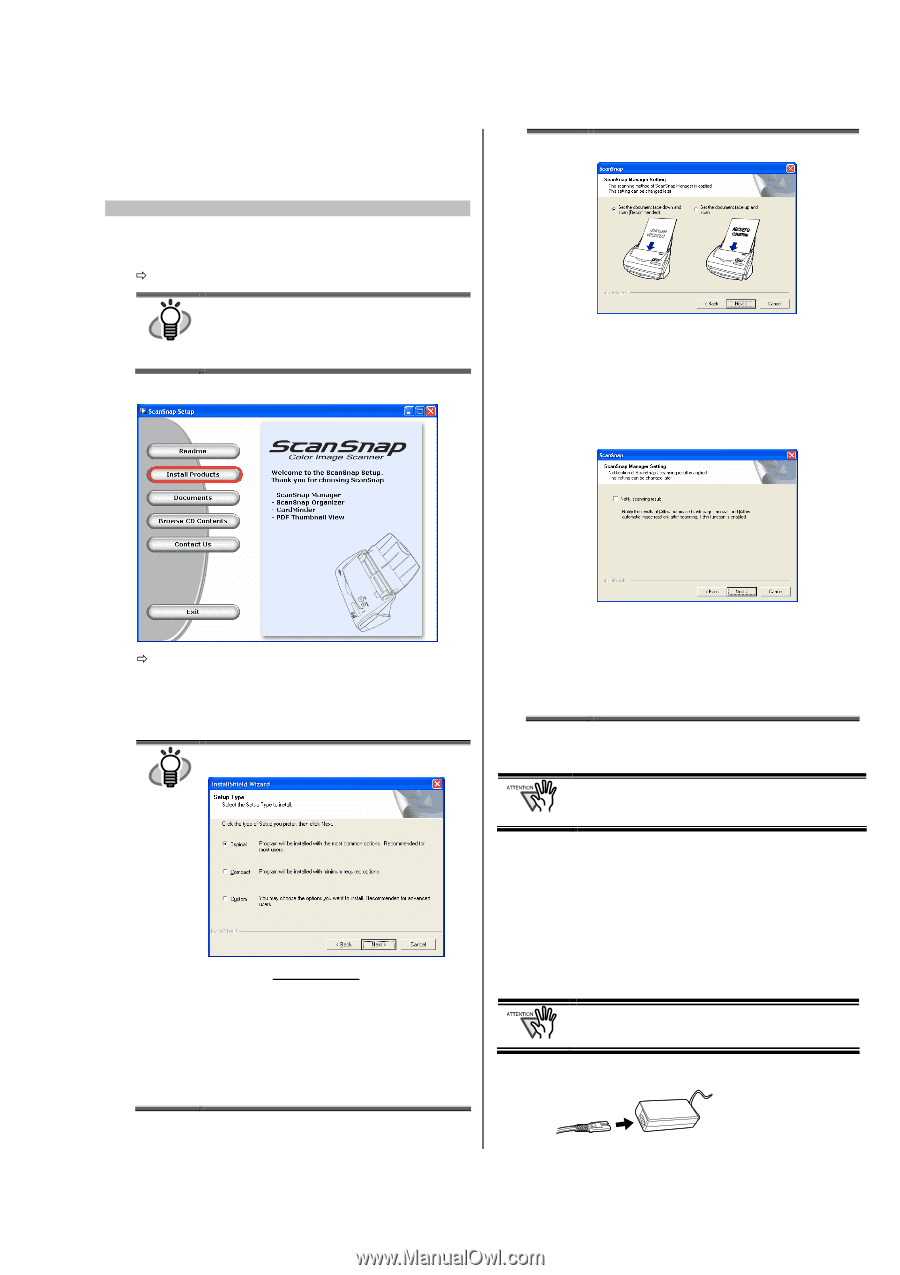
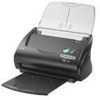
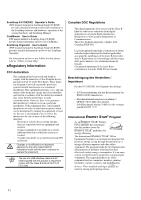
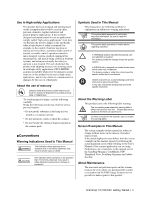
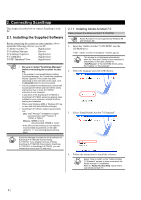
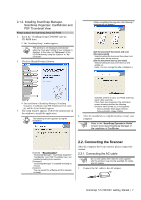
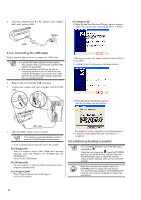
2.1.2. Installing ScanSnap Manager, ScanSnap Organizer, CardMinder and PDF Thumbnail View Please prepare the ScanSnap Setup CD-ROM. 1. Insert the "ScanSnap Setup CD-ROM" into the CD-ROM drive. Ö The "ScanSnap Setup" window appears. This window is not displayed automatically HINT when the "Auto play" setting of your computer is disabled. In this case, run "Setup.exe" of this CD-ROM directly using the "Explore" or "My computer". 2. Click the [Install Products] button. (When reinstalling the programs, the following 2 windows will not appear.) [Set the document face-down and scan (Recommended)] Selects loading the document face-down and upside-down on the scanner. [Set the document face-up and scan] Selects loading the document face-up and upside up. (Note: You can change this after installation.) Ö The installation of ScanSnap Manager, ScanSnap Organizer, CardMinder and PDF Thumbnail View starts up, and the wizard window appears. 3. The setup window appears. Follow the instructions on the window to install the application. HINT The following window appears during the installation. Specifies whether to carry out "Notify scanning result" after scanning. If the check box is selected, the notification screen showing whether the following functions were carried out or not appears. Allow automatic blank page removal Allow automatic image rotation 4. After the installation is completed, please restart your computer. Refer to the "ScanSnap Operator's Guide" to learn more about ScanSnap Manager or the installation of CardMinder. [Typical] "ScanSnap Manager", "ScanSnap Organizer", "CardMinder" and "PDF Thumbnail View" are installed including their manuals. [Compact] "ScanSnap Manager" is installed including its manual. [Custom] You can select the software and the manuals to install. 2.2. Connecting the Scanner After the computer has been restarted, please connect the scanner. 2.2.1. Connecting the AC cable Do not use cables other than the ones supplied with this product. Use only the specified AC cables and AC adapter. 1. Connect the AC cable to the AC adapter. ScanSnap fi-5110EOX2 Getting Started | 7
-
 1
1 -
2
-
3
-
4
-
5
-
 6
6 -
 7
7 -
 8
8 -
 9
9 -
 10
10 -
 11
11 -
 12
12 -
 13
13 -
 14
14 -
 15
15 -
 16
16 -
17
-
18
-
19
-
20
-
21
-
22
-
23
-
24
-
25
-
26
-
27
-
28
-
29
-
30
-
31
-
32
-
33
-
34
-
35
-
36
-
37
-
38
-
39
-
40
-
41
-
42
-
43
-
44
-
45
-
46
-
47
-
48
-
49
-
50
-
51
-
52
-
53
-
54
-
55
-
56
-
57
-
58
-
59
-
60
-
61
-
62
-
63
-
64
-
65
-
66
-
67
-
68
-
69
-
70
-
71
-
72
-
73
-
74
-
75
-
76
-
77
-
78
-
79
-
80
-
81
-
82
-
83
-
84
-
85
-
86
-
87
-
88
-
89
-
90
-
91
-
92
-
93
-
94
-
95
-
96
-
97
-
98
-
99
-
100
-
101
-
102
-
103
-
104
-
105
-
106
-
107
-
108
-
109
-
110
-
111
-
112
-
113
-
114
-
115
-
116
-
117
-
118
-
119
-
120
-
121
-
122
-
123
-
124
-
125
-
126
-
127
-
128
-
129
-
130
 |
 |