Fujitsu Fi-5110EOX2 Quick Installation Guide
Fujitsu Fi-5110EOX2 - ScanSnap! - Document Scanner Manual
 |
View all Fujitsu Fi-5110EOX2 manuals
Add to My Manuals
Save this manual to your list of manuals |
Fujitsu Fi-5110EOX2 manual content summary:
- Fujitsu Fi-5110EOX2 | Quick Installation Guide - Page 1
hardware and driver prior to connecting fi-5110EOX2 scanner. • When using Windows® 2000 or Windows® XP, log on as administrator. • Adobe Acrobat 7.0 is not supported by Windows® 98, Windows® 98 SE and Windows® Me Windows® 95 and Windows NT® 4.0 • Do not use cables other than the ones supplied with
-
 1
1
 |
 |

1. Check the Contents of the Package
Please read this instruction guide prior to
installation of this product.
While unpacking the scanner, check for the following
contents.
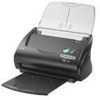
Scanner and Accessories
Scanner
Stacker
Getting Started
AC adapter
AC cable
USB cable
ScanSnap
TM
Setup
CD-ROM
Adobe
®
Acrobat
®
CD-ROM
Warranty Registration Card
Warranty Summery Card
Quick Installation Guide
Carrier Sheet
Note:
•
Install
“ScanSnap
Manager,
Adobe
®
Acrobat
®
,
CardMinder and PDF Thumbnail View” before
connecting the scanner to PC. If the scanner is
connected before installing above software, the
“Found New Hardware Wizard”, click the [Cancel]
button to close the wizard.
•
fi-5110EOX2 and fi-4110EOX2 can not be installed at
the same time. Remove fi-4110EOX2 hardware and
driver prior to connecting fi-5110EOX2 scanner.
•
When using Windows
®
2000 or Windows
®
XP, log on
as administrator.
•
Adobe Acrobat 7.0 is not supported by Windows
®
98,
Windows
®
98 SE and Windows
®
Me Windows
®
95 and
Windows NT
®
4.0
•
Do not use cables other than the ones supplied with
this product. Use only the specified AC cables and AC
adapter.
•
Once the scanner is detected the "ScanSnap
Manager" icon in the task tray is displayed as
S
.
When the icon remains as
, restart the scanner by
press the [POWER] button on the scanner.
2. SOFTWARE INSTALLATION
Installing ScanSnap
TM
Manager, Organizer,
CardMinder & PDF Thumbnail View
Follow below procedure to complete software installation
for ScanSnap
TM
product:
1.
Insert the “ScanSnap Setup CD-ROM” into the
CD-ROM drive. “ScanSnap Setup” window appears.
Click [Install Products] button. The installation of
ScanSnap
Manager,
ScanSnap
Organizer,
CardMinder and PDF Thumbnail View starts up.
ScanSnap
TM
fi-5110EOX2 Quick Installation Guide
2.
Installshield wizard’s window will appears, select
[Typical], click on [Next>] and follow the instructions
on the screen to complete installation.
3.
Restart your PC once the installation is completed.
Installing Adobe
®
Acrobat
®
Please prepare Adobe
®
Acrobat
®
CD-ROM.
1.
Insert “Adobe
®
Acrobat
®
CD-ROM” into the CD-ROM
drive.
“Adobe
®
Acrobat
®
AutoPlay” is displayed.
If this window is not displayed automatically when
"Auto play" setting of your PC is off, please run
“AutoPlay.exe” on this CD-ROM directly using
“Windows
Explorer”.
2.
Select [Install Adobe
®
Acrobat
®
].
3.
Select language and click [OK] to proceed with
installation.
After the setup window is displayed, continue the
installation by following the instructions on the window.
4.
Select the next button
5.
Select finish button and restart the computer.
3. Connecting the Scanner
Connecting the AC cable
1.
Connect the AC cable to the AC adapter.
2.
Insert the connectors of the AC adapter to the
scanner inlet and power outlet.
Connecting USB cable
1.
Connect the USB cable to the Interface connector on
the back of the scanner. Insert the other end of the
USB cable into the USB port on the Computer.
2.
The scanner will be detected automatically.
4. ScanSnap
TM
INSTALLATION
Installing ScanSnap
TM
Hardware
Follow below procedure to complete
ScanSnap
TM
installation:
1.
Follow step 2 to install scanner software.
2.
Restart the PC.
3.
Follow step 3 to connect the scanner.
4.
Scanner will be automatically detected.
For Windows
®
98
Windows
®
98 CD-ROM is required to complete the
installation. When the message appeared, insert the OS
installation CD into the CD-ROM drive and click [OK] to
continue.
For Windows
®
Me
The new hardware is detected and the installation
Completes automatically.
For Windows
®
2000
When [Digital Signature not Found] appears, click the
[Yes] button.
For Windows
®
XP
1.
If [Found New Hardware Wizard] appears, select [No,
not this time] and click the [Next>] button, otherwise
go to next step
2.
When [Hardware Installation] appears, click the
[Next>] button.
3.
Click the [Finish] button when the installation
completed.
Contact Information
FUJITSU COMPUTER PRODUCTS OF
AMERICA, INC.
2904 Orchard Parkway, San Jose, CA
95134-2009, U.S.A.
Phone:
(800) 626-4686
(408) 432-6333
Web site: http://www.fcpa.fujitsu.com/
E-mail:
USB cable
Outlet
Inlet