Fujitsu S6520 S6520 User's Guide - Page 175
Configuring the WLAN Using Windows XP, Connection to the network
 |
UPC - 611343085946
View all Fujitsu S6520 manuals
Add to My Manuals
Save this manual to your list of manuals |
Page 175 highlights
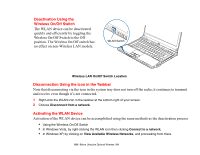
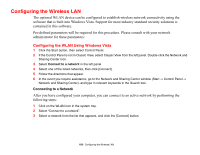
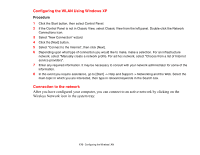
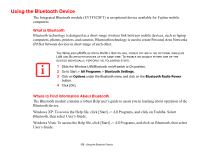
Configuring the WLAN Using Windows XP Procedure 1 Click the Start button, then select Control Panel. 2 If the Control Panel is not in Classic View, select Classic View from the left panel. Double-click the Network Connections icon. 3 Select "New Connection" wizard. 4 Click the [Next] button. 5 Select "Connect to the Internet", then click [Next]. 6 Depending upon what type of connection you would like to make, make a selection. For an infrastructure network, select "Manually create a network profile. For ad hoc network, select "Choose from a list of Internet service providers". 7 Enter any required information. It may be necessary to consult with your network administrator for some of the information. 8 In the event you require assistance, go to [Start] -> Help and Support -> Networking and the Web. Select the main topic in which you are interested, then type in relevant keywords in the Search box. Connection to the network After you have configured your computer, you can connect to an active network by clicking on the Wireless Network icon in the system tray: 170 - Configuring the Wireless LAN
-
 1
1 -
2
-
3
-
4
-
5
-
6
-
7
-
8
-
9
-
10
-
11
-
12
-
13
-
14
-
15
-
16
-
17
-
18
-
19
-
20
-
21
-
22
-
23
-
24
-
25
-
26
-
27
-
28
-
29
-
30
-
31
-
32
-
33
-
34
-
35
-
36
-
37
-
38
-
39
-
40
-
41
-
42
-
43
-
44
-
45
-
46
-
47
-
48
-
49
-
50
-
51
-
52
-
53
-
54
-
55
-
56
-
57
-
58
-
59
-
60
-
61
-
62
-
63
-
64
-
65
-
66
-
67
-
68
-
69
-
70
-
71
-
72
-
73
-
74
-
75
-
76
-
77
-
78
-
79
-
80
-
81
-
82
-
83
-
84
-
85
-
86
-
87
-
88
-
89
-
90
-
91
-
92
-
93
-
94
-
95
-
96
-
97
-
98
-
99
-
100
-
101
-
102
-
103
-
104
-
105
-
106
-
107
-
108
-
109
-
110
-
111
-
112
-
113
-
114
-
115
-
116
-
117
-
118
-
119
-
120
-
121
-
122
-
123
-
124
-
125
-
126
-
127
-
128
-
129
-
130
-
131
-
132
-
133
-
134
-
135
-
136
-
137
-
138
-
139
-
140
-
141
-
142
-
143
-
144
-
145
-
146
-
147
-
148
-
149
-
150
-
151
-
152
-
153
-
154
-
155
-
156
-
157
-
158
-
159
-
160
-
161
-
162
-
163
-
164
-
165
-
166
-
167
-
168
-
169
-
 170
170 -
 171
171 -
 172
172 -
 173
173 -
 174
174 -
 175
175 -
 176
176 -
 177
177 -
 178
178 -
 179
179 -
 180
180 -
181
-
182
-
183
-
184
-
185
-
186
-
187
-
188
-
189
-
190
-
191
-
192
-
193
-
194
-
195
-
196
-
197
-
198
-
199
-
200
-
201
-
202
-
203
 |
 |