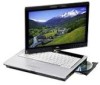
Fujitsu T5010 T5010 Recovery Manual for Configuration A2Q
Fujitsu T5010 - LifeBook Tablet PC Manual
 |
UPC - 611343085182
View all Fujitsu T5010 manuals
Add to My Manuals
Save this manual to your list of manuals |
Fujitsu T5010 manual content summary:
- Fujitsu T5010 | T5010 Recovery Manual for Configuration A2Q - Page 1
hard disk drive 3) Restoring Factory Image to hidden partition 4) Operating System Restoration 12. Click [Next], then click [Execute] to start the recovery process. 13. "1. Recovery Disc Check" will be in bold and the rest will be grayed out. Follow the instructions and "Insert the Recovery Disc - Fujitsu T5010 | T5010 Recovery Manual for Configuration A2Q - Page 2
and 3rd party applications are not included in the recovery image. You will need to install them from the discs supplied with your system. Installation from Drivers and Applications Restore (DAR) disc: 1. Insert the DAR disc in your DVD drive. 2. Select [Run Setup.exe] in "AutoPlay" dialog. If the
-
 1
1 -
 2
2
 |
 |

Fujitsu, the Fujitsu logo, and LifeBook are registered
trademarks of Fujitsu Ltd. Microsoft and Windows are
either registered trademarks or trademarks of Microsoft
Corporation in the United States and/or other countries.
All other trademarks mentioned herein are the property of
their respective owners.
B6FJ-3041-01EN-02
Restoring Microsoft
Windows
®
7 Edition
In the event that you want to overwrite the existing operating system (OS) on your com-
puter and/or you would like to install Windows 7, please perform the following proce-
dures.
Restoration of Windows 7 Image:
IMPORTANT NOTE:
Prior to beginning the following procedure, be sure to back up the
data on your hard disk. Any data not backed up prior to performing this procedure will be
lost.
1.
Power on your system. When the Fujitsu logo appears on the screen, press the
[Enter] key or click on the left mouse or touchpad button; a SecureCore™ Menu will
appear.
2.
Select Boot Menu from the SecureCore Menu.
3.
Highlight the CD/DVD option.
4.
Insert the bootable disc in your DVD drive, then click [OK].
5.
When the System Recovery Options dialog opens, select a new keyboard layout, if
necessary, then click [Next].
6.
The next System Recovery Option dialog box will have two bullet option. Select the
"Use Recovery Tools ..." bullet, then click [Next].
7.
Click on <Recovery and Utility>.
8.
Click the Recovery tab in the Recovery and Utility window, then select
Restoring the
Factory Image (full hard drive recovery)
icon.
9.
Click [Execute].
10.
Read the precautions, then select "I Agree".
11.
Click [Next]. The step-by-step process will be displayed:
1)
Recovery Disc Check
2)
Initializing hard disk drive
3)
Restoring Factory Image to hidden partition
4)
Operating System Restoration
12.
Click [Next], then click [Execute] to start the recovery process.
13.
“
1. Recovery Disc Check
” will be in bold and the rest will be grayed out.
Follow the instructions and “Insert the Recovery Disc #1”. In some cases, you may
prompted to “Insert the Recovery Disc #2”, depending upon the size of the Recovery
Image.
14.
Click [Next] to begin the check. Click [Next] again when the check is
complete.
15.
“
2. Initializing hard disk drive
” will be in bold with the message “Please insert the
Bootable Disc into your optical drive”. Insert the bootable disc. Click [Next] to pro-
ceed. A dialog box appears, with a checking disc message.