Garmin Forerunner 101 Owner's Manual
Garmin Forerunner 101 - Running GPS Receiver Manual
 |
UPC - 753759044114
View all Garmin Forerunner 101 manuals
Add to My Manuals
Save this manual to your list of manuals |
Garmin Forerunner 101 manual content summary:
- Garmin Forerunner 101 | Owner's Manual - Page 1
Forerunner® 101 personal trainer owner's manual - Garmin Forerunner 101 | Owner's Manual - Page 2
Site address: www.garmin.com Garmin®, Personal Navigator®, Forerunner®, Auto Lap®, and Auto Pause® are registered trademarks, and Virtual Partner™ is a trademark of Garmin Ltd. or its subsidiaries and may not be used without the express permission of Garmin. February 2006 Part Number 190-00317-00 - Garmin Forerunner 101 | Owner's Manual - Page 3
YOURSELF Fun is now on the run! Strap this personal trainer to your wrist and let it do all the work, except the running of course. Welcome to the world of the Forerunner 101; a compact, lightweight, waterproof GPS sensor that provides you accurate pace/speed, distance, and time data during your - Garmin Forerunner 101 | Owner's Manual - Page 4
& Cautions vi Maintenance vii Unit Overview viii Wrist Strap ix Installing Batteries x GETTING STARTED 1 What is GPS 1 Turning on your Forerunner 2 Main Modes 3 TIMER MODE 3 Using Timer Mode 3 Data Screens 4 MENU MODE 5 Using Menu Mode 5 History: Last Run 6 History: By Day 6 History - Garmin Forerunner 101 | Owner's Manual - Page 5
to repair or replace the unit or software or offer a full refund of the purchase price at its sole discretion. SUCH REM- EDY SHALL BE YOUR SOLE AND EXCLUSIVE REMEDY FOR ANY BREACH OF WARRANTY. To obtain warranty service, call your local Garmin authorized dealer. Or call Garmin Product Support at - Garmin Forerunner 101 | Owner's Manual - Page 6
. • Consult the dealer or an experienced radio/TV technician for help. The Forerunner 101 does not contain any user-serviceable parts. Repairs should only be made by an authorized Garmin service center. Unauthorized repairs or modifications could result in permanent damage to the equipment, and void - Garmin Forerunner 101 | Owner's Manual - Page 7
LICENSE AGREEMENT BY USING THE FORERUNNER 101, YOU AGREE TO BE BOUND BY THE TERMS AND CONDITIONS OF THE FOLLOWING SOFTWARE LICENSE AGREEMENT. PLEASE READ THIS AGREEMENT CAREFULLY. Garmin grants you a limited license to use the software embedded in this device (the "Software) in binary executable - Garmin Forerunner 101 | Owner's Manual - Page 8
property damage and personal injury. CAUTION: Use the Forerunner 101 at your own risk. To reduce the risk of unsafe operation, carefully review and understand all aspects of this Owner's Manual. When in actual use, carefully compare indications from the Forerunner 101 to all available navigation - Garmin Forerunner 101 | Owner's Manual - Page 9
finitely in the units memory without battery. WATER IMMERSION The Forerunner 101 is waterproof to IEC Standard unit (including the battery compartment) before reuse. To resolve problems that cannot be remedied using this guide, contact Garmin Customer Support in the U.S.A. at 800/800.1020 or Garmin - Garmin Forerunner 101 | Owner's Manual - Page 10
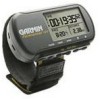
Introduction Unit Overview Back View (without strap) Built-in GPS Antenna Front View LCD Display (with Backlight) Battery Cover Serial Number Speaker viii mode reset enter lap start/stop POWER MODE RESET ENTER DOWN UP BACKLIGHT LAP START/STOP - Garmin Forerunner 101 | Owner's Manual - Page 11
your wrist. For best performance, wear the Forerunner like a watch, with the top face of the unit oriented towards the sky. A strap extension provides additional length and easily attaches to the existing strap. To fasten the Forerunner to your wrist: 1. With the strap open, place the Forerunner on - Garmin Forerunner 101 | Owner's Manual - Page 12
ficantly reduce battery life. -+ +- INSTALLING BATTERIES The Forerunner 101 operates on two AAA alkaline batteries (not included), which are placed in the back of the unit. Rechargeable alkaline, NiMH, NiCad, or lithium batteries may be used. See page 30 for instructions on selecting battery type - Garmin Forerunner 101 | Owner's Manual - Page 13
GPS receiver's view of the sky generally determines how fast you get a location fix, or if you get a fix at all. GPS signals are relatively weak and do not travel through rocks, buildings, people or metal, so remember to keep a clear view of the sky at all times for best performance. Your Forerunner - Garmin Forerunner 101 | Owner's Manual - Page 14
battery life for indoor practice. Selecting 'No' prompts another question asking if the unit has been moved hundreds of miles. Choose 'Yes' to have the unit Autolocate the satellite signals (Also use this option if you are having problems receiving satellites the first time you use the Forerunner - Garmin Forerunner 101 | Owner's Manual - Page 15
RESET for 3 seconds to reset all workout data. The unit automatically stores Last Run and History information. NOTE: A manual stop and restart of the Timer automatically starts a new lap. You can also setup the Forerunner to automatically lap and/or pause at a specific distance and/or speed (pg. 9-10 - Garmin Forerunner 101 | Owner's Manual - Page 16
Dist(ance), appears (see page 9). You can also utilize the Timer (stop watch) in this mode. By using a combination of the GPS and the Timer, you can start running anywhere you want and let the Forerunner 101 track your speed, distance, and time. Timer Mode Buttons The MODE Button: • Press to go - Garmin Forerunner 101 | Owner's Manual - Page 17
Virtual Partner (10-11) Interval Training (12-13) Pace (Speed) Alert (15) Back to Start (23) Orient Map North/Ahead (23-24) Settings (24-31) Set Time (22-25) Set Units (26-27) Set Custom Page (27-28) Set Profile (28) Set Display (29) Set System (30) Restore Settings (31) About Forerunner (31) Time - Garmin Forerunner 101 | Owner's Manual - Page 18
set to 'SPEED (BIKING), calories are calculated for for biking. 6 HISTORY The Forerunner 101 stores up to 5000 laps in memory. A run may contain any number of laps. The 10 most recent runs have a basic track log of up to 250 saved points. Your most recent run (one you have not reset) contains the - Garmin Forerunner 101 | Owner's Manual - Page 19
the Options menu. 5. Select 'VIEW ON MAP' to review your workout or select 'DELETE LAP/ENTIRE RUN' to erase that workout. By Week Like 'By Day', total distance, average speed, and total calories burned for that week. Once you select the week you want to review, the Forerunner 101 breaks the week - Garmin Forerunner 101 | Owner's Manual - Page 20
Menu Mode History: History Totals and Delete History Totals Selecting this option allows you to see an overview of your total workouts combined. To view the History Totals mode: 1. With 'HISTORY' highlighted in the Menu Mode, press ENTER. 2. Highlight 'HISTORY TOTALS' and press ENTER. Delete This - Garmin Forerunner 101 | Owner's Manual - Page 21
use) an auto pause and auto lap, use a virtual partner, use interval training, use a pace /speed alert, and use a time/distance alert. Auto Pause/Lap The Forerunner 101 The stop watch indicator flashes when the timer is paused. The Auto Lap is useful if you want the Forerunner 101 to keep track of - Garmin Forerunner 101 | Owner's Manual - Page 22
of the Forerunner 101. You have the option to set up a Virtual Partner to help you obtain your workout goals. The Virtual Partner always completes the goal you set. Your job is to keep up with are complete or select 'END PARTNER RUN' from the Training Assistant menu and a summary screen displays. - Garmin Forerunner 101 | Owner's Manual - Page 23
set your own time. 8. Highlight 'DONE' and press ENTER. 9. When you are ready to begin your workout press the START button. To set Time & Pace/Speed: 1. Highlight 'TRAINING ASSISTANT' in the Menu Mode and press ENTER. 2. Highlight 'VIRTUAL PARTNER' and press ENTER. 3. Highlight 'SET TIME & PACE - Garmin Forerunner 101 | Owner's Manual - Page 24
to select. You can choose 'CUSTOM' to set your own pace/speed. 8. Highlight 'DONE' and press ENTER. 9. When you are ready to begin your workout press the START button. To set Distance & Pace/Speed: 1. Highlight 'TRAINING ASSISTANT' in the Menu Mode and press ENTER. 2. Highlight 'VIRTUAL PARTNER - Garmin Forerunner 101 | Owner's Manual - Page 25
speeds. You may choose to set an exercise distance & a rest time, set an exercise distance & a rest distance, set an exercise time & a rest time, or set an exercise time & rest distance. To start Interval Training: 1. From the Training change, stop and press ENTER. Using the DOWN or UP button, - Garmin Forerunner 101 | Owner's Manual - Page 26
Interval Training is activated, Auto Pause and Auto Lap settings are ignored. Distance and Pace Alerts still function, except during rest periods. When the number of Reps you specified have completed, a Finished page displays. If you wish to review the Last Run History (pg. 6), you must first RESET - Garmin Forerunner 101 | Owner's Manual - Page 27
and press ENTER. 5. Select from a quick option menu 'SPRINT', 'RUN', 'JOG', 'SPEED WALK', 'WALK', or 'CUSTOM' and press ENTER. 6. Press the MODE button to return to the Training Assistant. To set Slow Pace/Speed Alert: 1. Highlight 'TRAINING ASSISTANT' in the Menu Mode and press ENTER. 2. Highlight - Garmin Forerunner 101 | Owner's Manual - Page 28
Pace/Speed Alert, you can set an alarm to sound when you reach a certain time or a certain distance. To set Time Alert: 1. Highlight 'TRAINING on, highlight the 'ALERT AT:' field and press ENTER. 5. Select from '1/2 MARATHON', '10 MILE', '10K', '5 MILE', '5K', '1 MILE' or 'CUSTOM'. Press the DOWN - Garmin Forerunner 101 | Owner's Manual - Page 29
taken to the Map Mode where you can view your position, workout, or locations. It is not possible to load detailed map data into the Forerunner 101. The Map Mode shows where you (the animated figure) are and provides a picture of where you have traveled. As you travel, the animated figure 'walks - Garmin Forerunner 101 | Owner's Manual - Page 30
Forerunner 101 can remember a location (latitude/longitude) to which you want to return later by using the 'Mark Location' option. The Forerunner 101 saves your location using to highlight the 'MARK LOCATION' option and press ENTER. The Review Location appears. (Flag with symbol, name, and location) - Garmin Forerunner 101 | Owner's Manual - Page 31
button to highlight the 'MARK LOCATION' option and press ENTER. The 'Review Location Mode appears. (Flag with symbol, name, and location) 3. Press (ATION):' field and press ENTER. 4. Scroll through the elevation position places using the DOWN or UP buttons (UP button moves the cursor right to left, - Garmin Forerunner 101 | Owner's Manual - Page 32
'MARK LOCATION' option and press ENTER. The Review Location appears. (Flag with symbol and name) want to change, stop, and press ENTER. Using the DOWN or UP button, scroll through the from your current position to the saved location. The Forerunner 101 creates a straight line (as the crow flies) - Garmin Forerunner 101 | Owner's Manual - Page 33
the desired location. Press ENTER. Press the DOWN or UP button to select the desired location. Press ENTER. The Review Location appears. To delete a location: 1. In the Review Location mode, press the DOWN or UP button to highlight 'DELETE'. Press the ENTER button. A confirmation message box - Garmin Forerunner 101 | Owner's Manual - Page 34
button. The selected location is displayed on the map. You can use the DOWN/UP buttons to zoom in and out on the map. 2. With 'OK' highlighted, press ENTER to switch back to the Review Location Mode. To start a 'GOTO': 1. In the Review Location mode, press the DOWN or UP button to highlight 'GOTO - Garmin Forerunner 101 | Owner's Manual - Page 35
is oriented in the direction you are currently moving. The animated figure is stationary while the map rotates as you change direction with the Forerunner 101. To select Orient Map North: 1. In the 'NAVIGATION' mode, press the DOWN or UP button to highlight 'ORIENT MAP NORTH'. Press ENTER. The Map - Garmin Forerunner 101 | Owner's Manual - Page 36
units, set the custom page, set your profile, set the display, set the system, restore settings to the manufacturer's default, and check the software version of the Forerunner 101 AM and 12-hour PM cycles. The 24-hour option sets the Forerunner 101 to display a 24-hour cycle (Military Time). To change - Garmin Forerunner 101 | Owner's Manual - Page 37
Savings Daylight savings time can be set to 'Automatic', which automatically changes the clock settings for daylight savings. You can choose 'Yes' to manually add daylight savings or 'No' to remain on standard time. To change the Daylight Savings Field: 1. Highlight 'SETTINGS' in the Menu Mode and - Garmin Forerunner 101 | Owner's Manual - Page 38
You may also hold down the MODE button to quickly switch between 'PACE (RUNNING)' and 'SPEED (BIKING)' from any screen. This setting affects calorie calculations (pg. 6). 26 Set Units The Forerunner 101 allows you to select statute (feet, miles, and miles per hour) or metric (meters, kilometers - Garmin Forerunner 101 | Owner's Manual - Page 39
of workout • AVG LAP TIME -average time of all the laps • BEST PACE - fastest speed of workout • CALORIES - total calories burned since timer started (see also Pace/Speed Mode pg. 26) • DISTANCE - training distance • ELEVATION - current altitude • GRADE - % slope of terrain • LAP DISTANCE - distance - Garmin Forerunner 101 | Owner's Manual - Page 40
mode of your choice. Set Profile This feature lets you personalize the Forerunner with weight (in order to calculate the calories burned. See also Pace/Speed Mode pg. 26.) and performance data customized to you. This data is also used for the Training Assistant pace and settings. To change the profile - Garmin Forerunner 101 | Owner's Manual - Page 41
Set Display This option allows you to change the backlight setting and the contrast of the screen. To change the backlight setting: 1. From the Menu Mode press the DOWN or UP button to highlight 'SETTINGS'. Press ENTER. 2. Press the DOWN or UP button to highlight the 'SET DISPLAY' field and press - Garmin Forerunner 101 | Owner's Manual - Page 42
Menu Mode Settings: Set System 30 Set System This option allows you to change the beeper setting, select the language of your choice, and select battery type. To change the beeper setting: 1. From the Menu Mode press the DOWN or UP button to highlight 'SETTINGS'. Press ENTER. 2. Press the DOWN or - Garmin Forerunner 101 | Owner's Manual - Page 43
ONLY. Data and settings in other menus, such as HISTORY and TRAINING ASSISTANT, are not affected. To restore factory settings: 1. From the highlight your selection and press ENTER. About Forerunner Displays the software version of your Forerunner. To view the software version: 1. From the Menu Mode - Garmin Forerunner 101 | Owner's Manual - Page 44
temperatatures. 3Alkaline batteries lose a significant amount of their capacity as temperature increases. Use Lithium batteries when operating the Forerunner 101 in below-freezing conditions. Extensive use of screen backlighting significantly reduces battery life. Different brands of battery vary in - Garmin Forerunner 101 | Owner's Manual - Page 45
Forerunner 31 Add/remove map mode 17 Auto Lap 10, 14 Auto Pause 4, 9, 14 B Backlight 29 Back to Start 23 Batteries GPS 1, 2, vi H History 6, 7, 8 History: By Day 6 History: By Week 7 History: Delete 8 History: History Totals 8 History: Last Run 6, 14 I Interval Training 13, 14 L Language 30 Last Run - Garmin Forerunner 101 | Owner's Manual - Page 46
26 Software License v Software Version 31 Specifications 33 Speed/Pace Alert 15 Speed Mode 26 Storage vii T Table of Contents ii Time 25 Timer Mode 3, 4 Timer Screen 4 Time Alert 16 Time Format 24 Time Goals 11 Time Zone 24, 25 Track Log 6, 23 Training Assistant 9, 10, 11, 12, 13, 14, 15, 16 U Units - Garmin Forerunner 101 | Owner's Manual - Page 47
Run Notes 35 - Garmin Forerunner 101 | Owner's Manual - Page 48
Run Notes - Garmin Forerunner 101 | Owner's Manual - Page 49
Run Notes - Garmin Forerunner 101 | Owner's Manual - Page 50
Run Notes - Garmin Forerunner 101 | Owner's Manual - Page 51
- Garmin Forerunner 101 | Owner's Manual - Page 52
free software updates (excluding map data) throughout the life of your Garmin products, visit the Garmin Web site at www.garmin.com. © Copyright 2004-2006 Garmin Ltd. or its subsidiaries Garmin International, Inc. 1200 East 151st Street, Olathe, Kansas 66062, U.S.A. Garmin (Europe) Ltd. Unit 5, The
-
 1
1 -
 2
2 -
 3
3 -
 4
4 -
 5
5 -
 6
6 -
 7
7 -
8
-
9
-
10
-
11
-
12
-
13
-
14
-
15
-
16
-
17
-
18
-
19
-
20
-
21
-
22
-
23
-
24
-
25
-
26
-
27
-
28
-
29
-
30
-
31
-
32
-
33
-
34
-
35
-
36
-
37
-
38
-
39
-
40
-
41
-
42
-
43
-
44
-
45
-
46
-
47
-
48
-
49
-
50
-
51
-
52
 |
 |

owner’s manual
Forerunner
®
101
personal trainer