Garmin GPSMAP 296 Pilot's Guide - Page 133
Setting Up the Sonar Map Split Sonar Detail
 |
View all Garmin GPSMAP 296 manuals
Add to My Manuals
Save this manual to your list of manuals |
Page 133 highlights
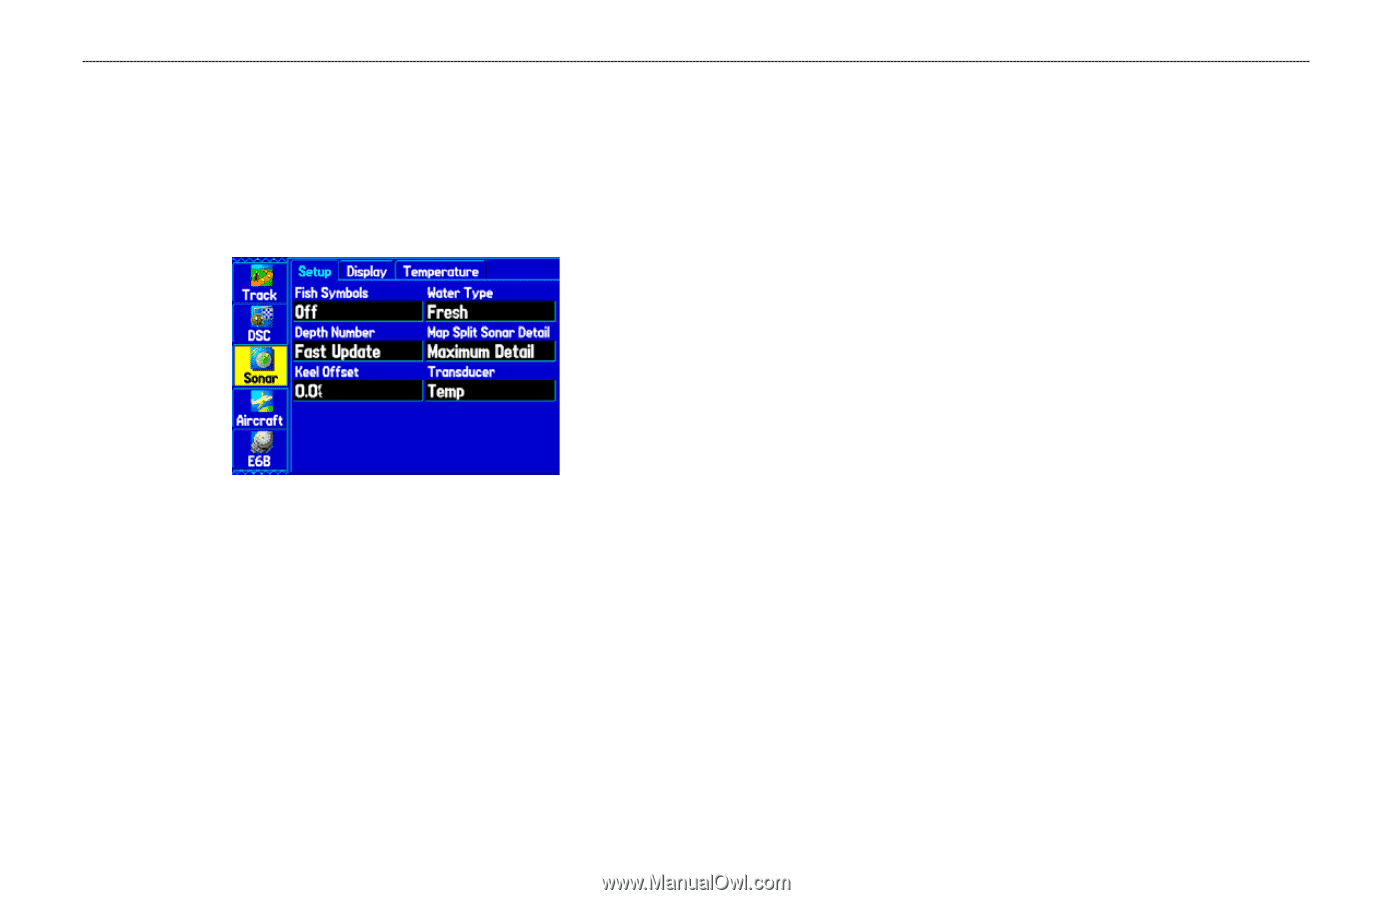
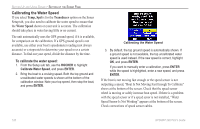
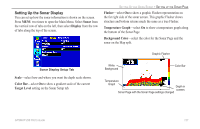
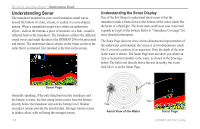
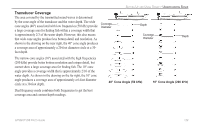
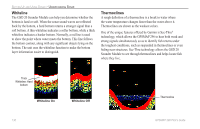
Setting Up the Sonar Page Use the Sonar tab in the Main Menu to set up the Sonar Page. Press MENU two times to open the Main Menu. Select Sonar from the vertical row of tabs on the left, then select Setup from the row of tabs along the top of the screen. Sonar Tab of the Main Menu Fish Symbols-select how the Sonar Page shows underwater targets and background information. If you select Off, the unit shows all of the available information about the underwater environment. If you select a fish symbol, the Sonar Page shows only the information related to that symbol. Water Type-select the proper water type you are boating in. Since sound waves travel through Fresh and Salt water at different rates, it is necessary to select the Water Type to ensure accurate readings on the unit. GPSMAP 296 Pilot's Guide SETTING UP AND USING SONAR > SETTING UP THE SONAR PAGE Depth Number-select how efficient the digital depth update rate is. Fast Sonar update updates quicker and is recommended for lownoise water deeper than 50 feet. Auto is best for shallow water or high-noise areas, has a slower screen update, and is best used if you travel a wide variety of depths. If the unit is unable to track the bottom for any reason, the digits in the depth window flash on and off to alert you that the unit is not tracking the bottom. Map Split Sonar Detail-select how much detail is shown on the Map Page with the sonar shown. Full Range shows data using the Range setting of the Sonar Page, regardless of Zoom or Bottom Lock. Maximum Detail shows any Zoom or Bottom Lock data from the Sonar Page. Keel Offset-enter the surface reading for the depth of a keel. This makes it possible to measure depth from the bottom of your keel instead of from the transducer's location. Enter a positive number to offset for a keel. It is also possible to enter a negative number to compensate for a large vessel that draws several feet of water. The Keel Offset is reflected in the depth reading. Transducer-select the type of transducer that you are using. If you are using a speed-capable transducer/sensor, select Temp, Spd. 125
-
 1
1 -
2
-
3
-
4
-
5
-
6
-
7
-
8
-
9
-
10
-
11
-
12
-
13
-
14
-
15
-
16
-
17
-
18
-
19
-
20
-
21
-
22
-
23
-
24
-
25
-
26
-
27
-
28
-
29
-
30
-
31
-
32
-
33
-
34
-
35
-
36
-
37
-
38
-
39
-
40
-
41
-
42
-
43
-
44
-
45
-
46
-
47
-
48
-
49
-
50
-
51
-
52
-
53
-
54
-
55
-
56
-
57
-
58
-
59
-
60
-
61
-
62
-
63
-
64
-
65
-
66
-
67
-
68
-
69
-
70
-
71
-
72
-
73
-
74
-
75
-
76
-
77
-
78
-
79
-
80
-
81
-
82
-
83
-
84
-
85
-
86
-
87
-
88
-
89
-
90
-
91
-
92
-
93
-
94
-
95
-
96
-
97
-
98
-
99
-
100
-
101
-
102
-
103
-
104
-
105
-
106
-
107
-
108
-
109
-
110
-
111
-
112
-
113
-
114
-
115
-
116
-
117
-
118
-
119
-
120
-
121
-
122
-
123
-
124
-
125
-
126
-
127
-
 128
128 -
 129
129 -
 130
130 -
 131
131 -
 132
132 -
 133
133 -
 134
134 -
 135
135 -
 136
136 -
 137
137 -
 138
138 -
139
-
140
-
141
-
142
-
143
-
144
-
145
-
146
-
147
-
148
-
149
-
150
-
151
-
152
-
153
-
154
-
155
-
156
-
157
-
158
-
159
-
160
-
161
-
162
-
163
-
164
-
165
-
166
-
167
-
168
 |
 |