Garmin StreetPilot 7200 Quick Reference Guide
Garmin StreetPilot 7200 - Automotive GPS Receiver Manual
 |
UPC - 753759047993
View all Garmin StreetPilot 7200 manuals
Add to My Manuals
Save this manual to your list of manuals |
Garmin StreetPilot 7200 manual content summary:
- Garmin StreetPilot 7200 | Quick Reference Guide - Page 1
Getting Ready Congratulations on purchasing a StreetPilot 7200/7500! Follow the mounting and setup steps in this guide to get started. See the back of this sheet to start using your StreetPilot. For more information, see the owner's manual that came in the box. What's in the Box Remove the following - Garmin StreetPilot 7200 | Quick Reference Guide - Page 2
XM Smart Antenna, the StreetPilot can receive and use traffic information. When there is a traffic event on your current route, the map page displays a . Touch the to avoid the traffic. Touch the traffic event you want to avoid and then touch Detour Around. Playing XM Radio Using a Garmin GXM 30 Smart
-
 1
1 -
 2
2
 |
 |
➊
Attach the mounting plate to your dashboard.
1. Clean the area where you want to place the mount with
rubbing alcohol. Dry with a clean dry cloth.
2. Remove the liner from the bottom of the mounting plate.
3. Place the mounting plate in the selected location.
4. Bend the edges of the mounting plate to fit the surface.
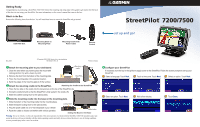
➋
Attach the mounting cradle to the StreetPilot.
1. Place the two tabs on the cradle into the two grooves on the top of the StreetPilot. (A)
2. Swing the cradle forward so that the StreetPilot is fully seated in the cradle. (B)
3. Slide the cradle’s locking lever to the right (locked).
➌
Slide the mounting cradle into the base on the mounting plate.
1. Slide the bottom of the mounting cradle into the mounting base.
2. Slide the base’s locking lever to the right (locked).
3. Plug the power cable into a 12-Volt receptacle in your vehicle.
4. Route the cable so it does not interfere with vehicle operation.
Getting Ready
Congratulations on purchasing a StreetPilot 7200/7500! Follow the mounting and setup steps in this guide to get started. See the back
of this sheet to start using your StreetPilot. For more information, see the owner’s manual that came in the box.
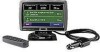
What’s in the Box
Remove the following items from the box. You will need these items to mount the StreetPilot and get started.
Remote
Control
MENU
MAP
BACK
SPEAK
IN
OUT
PAGE
ZOOM
1
ABC
2
DEF
3
GHI
4
JKL
5
MNO
6
PQRS
7
TUV
8
WXYZ
9
0
VOL
Mounting Cradle with
Power Cable
Mounting Base on
Mounting Plate
7200/7500 Unit
➍
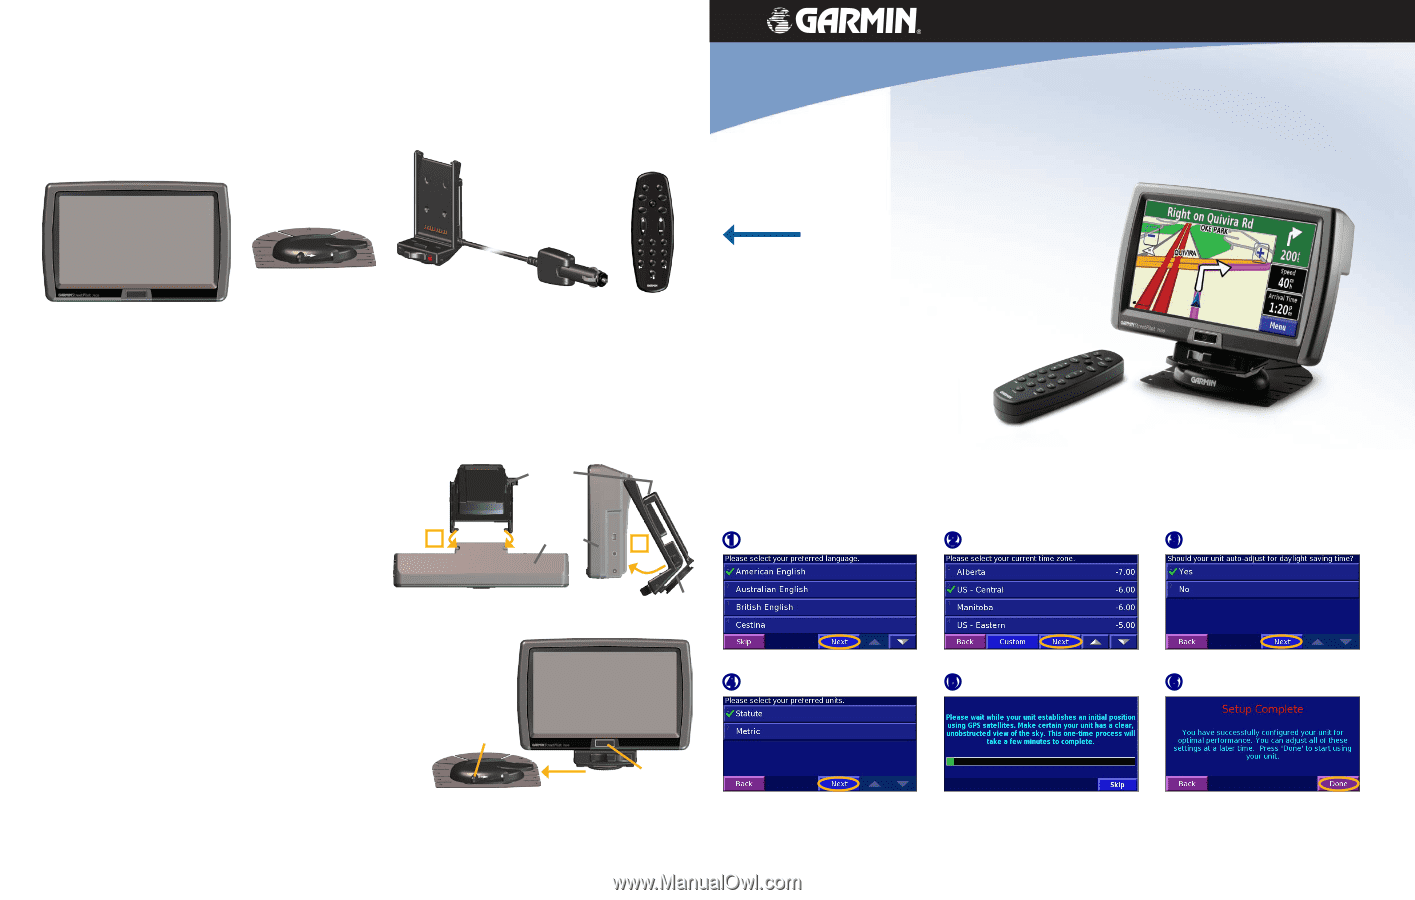
Configure your StreetPilot
If necessary, turn the key in the ignition to apply power to the StreetPilot. Follow the screen prompts to set up your
StreetPilot:
➊
Select a language. Touch
Next
.
➋
Touch a time zone. Touch
Next
.
➏
Touch
Done
.
➍
Select an option. Touch
Next
.
➌
Select an option. Touch
Next
.
➎
Wait a few minutes.
StreetPilot
®
7200/7500
Warning
: For use in vehicles, it is the sole responsibility of the owner/operator of a vehicle with the StreetPilot 7200/7500 installed to place and
secure the device so it does not interfere with the vehicle operating controls and safety devices, obstruct the driver’s view of driving conditions,
or cause personal injury in the event of an accident.
© Copyright 2005–2006 Garmin Ltd. or its subsidiaries
May 2006
1
90-00454-01 Rev.
B
Printed in Taiwan
set up and go!
Sliding the Mount in the Base
Power button
Locking lever
StreetPilot
Puck
Mounting
cradle
Attaching the Cradle to the StreetPilot
A
B