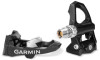
Garmin Vector Owner's Manual
Garmin Vector Manual
 |
View all Garmin Vector manuals
Add to My Manuals
Save this manual to your list of manuals |
Garmin Vector manual content summary:
- Garmin Vector | Owner's Manual - Page 1
Vector™ Owner's Manual August 2013 190-01450-00_0A Printed in Taiwan - Garmin Vector | Owner's Manual - Page 2
www.garmin.com for current updates and supplemental information concerning the use of this product. Garmin®, Edge®, and the Garmin logo are trademarks of Garmin Ltd. or its subsidiaries, registered in the USA and other countries. ANT +™, ANT Agent™, Garmin Connect™, USB ANT Stick™, and Vector™ are - Garmin Vector | Owner's Manual - Page 3
2 Entering the Crank Length 2 Setting the Installation Angle 2 Performing a Static Zero Calibration 2 Calibrating Vector Before Each Ride 2 Customizing the Data Fields 3 Training 3 Pedal-Based Power 3 Maintenance Tips 3 Vector Data 3 Sending Your Ride to Garmin Connect 3 Garmin Connect - Garmin Vector | Owner's Manual - Page 4
- Garmin Vector | Owner's Manual - Page 5
an outstanding experience of owning a precision power measurement system for your bike. Vector is simple, accurate, and easy to use. For software updates, video tutorials, and everything you need to get years of service out of your Vector, go to www.garmin.com/ vectorowner. Now it's time to - Garmin Vector | Owner's Manual - Page 6
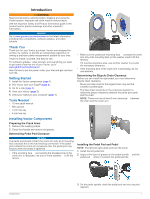
. You can customize a data field to display Vector data. Your First Ride Before you ride with Vector for the first time, you must enter the crank length, set the install angle of the sensors inside the pedals, and calibrate the static zero reference. You must also calibrate the system if you move - Garmin Vector | Owner's Manual - Page 7
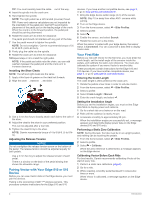
This procedure contains instructions for the Edge 810, 800, and 510 devices. If you have another compatible device, see page 5. 1 Hold a data field to change it. 2 Select a category. 3 Select a data field. Training Pedal-Based Power Vector measures pedal-based power. Vector measures the - Garmin Vector | Owner's Manual - Page 8
of time, Garmin recommends removing Vector and storing it in the product box. Vector Specifications Battery type Battery life Operating temperature range Water resistance User-replaceable CR2032, 3 volts Minimum 175 hours of riding time NOTE: The pedal pod used on the right crank will drain the - Garmin Vector | Owner's Manual - Page 9
. After you replace the pedal pod battery, you must set the installation angle on your Edge (page 2). Appendix Registering Vector Help us better support you by completing our online registration today. • Go to www.garmin.com/ vectorowner. • Keep the original sales receipt, or a photocopy, in - Garmin Vector | Owner's Manual - Page 10
7) based on your FTP or custom settings. Troubleshooting Updating the Software Using Vector Updater Before you can run the Vector Updater application, you must have a USB ANT Stick (included), an internet connection, and the pedal pods must have functioning batteries installed. 1 Go to www.garmin - Garmin Vector | Owner's Manual - Page 11
replacing 5 type 4 C calibrating 2, 5, 6 cleaning the device 3 cleats 2 compatibility 6 customizing the device 3, 6 D data storing 3 transferring 3 data fields 3, 6 E Edge 2, 5 G Garmin Connect 3 storing data 3 H history 3 sending to computer 3 I installing 1, 2 M memory 3 P pairing 2, 5 pedal pods - Garmin Vector | Owner's Manual - Page 12
www.garmin.com/support 913-397-8200 1-800-800-1020 +32 2 672 52 54 +49 (0)180 6 USA Garmin (Europe) Ltd. Liberty House, Hounsdown Business Park Southampton, Hampshire, SO40 9LR UK Garmin Corporation No. 68, Zhangshu 2nd Road, Xizhi Dist. New Taipei City, 221, Taiwan (R.O.C.) © 2013 Garmin Ltd.
-
 1
1 -
 2
2 -
 3
3 -
 4
4 -
 5
5 -
 6
6 -
 7
7 -
8
-
9
-
10
-
11
-
12
 |
 |

Vector
™
Owner’s Manual
August 2013
190-01450-00_0A
Printed in Taiwan