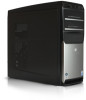
Gateway GT5620 8512418 - Gateway Reference Guide
Gateway GT5620 Manual
 |
View all Gateway GT5620 manuals
Add to My Manuals
Save this manual to your list of manuals |
Gateway GT5620 manual content summary:
- Gateway GT5620 | 8512418 - Gateway Reference Guide - Page 1
REFERENCEGUIDE ® - Gateway GT5620 | 8512418 - Gateway Reference Guide - Page 2
- Gateway GT5620 | 8512418 - Gateway Reference Guide - Page 3
Chapter 1: About This Reference 1 About this guide 2 Accessing the online User Guide 2 Gateway contact information 3 Microsoft Certificate of Authenticity 3 repetitive strain . . 14 Preparing power connections 14 Protecting from power source problems 14 Checking the voltage selection 15 - Gateway GT5620 | 8512418 - Gateway Reference Guide - Page 4
37 Replacing the side panel 37 Replacing the color panel 38 Installing memory 40 Adding or replacing an optical disc drive 43 Replacing the memory card reader 45 Adding or replacing a hard drive 46 Replacing the 60 Cleaning the mouse 61 Cleaning optical discs 61 Updating Windows 62 ii - Gateway GT5620 | 8512418 - Gateway Reference Guide - Page 5
67 Moving from your old computer 68 Transferring files and settings automatically 68 Transferring files and settings manually 69 Chapter 6: Troubleshooting 71 Safety guidelines 72 First steps 72 Troubleshooting 73 Add-in cards 73 Audio 73 CD or DVD drives 73 Diskette drive 75 Display 76 - Gateway GT5620 | 8512418 - Gateway Reference Guide - Page 6
93 Recovering pre-installed software and drivers 94 Using Microsoft System Restore 99 Recovering your system to its factory condition . . . . . 102 Recovering your system using the Windows DVD . . . . 103 Telephone support 104 Before calling Gateway Customer Care 104 Telephone numbers 105 - Gateway GT5620 | 8512418 - Gateway Reference Guide - Page 7
CHAPTER1 About This Reference • About this guide • Accessing the online User Guide • Gateway contact information • Microsoft Certificate of Authenticity • For more information 1 - Gateway GT5620 | 8512418 - Gateway Reference Guide - Page 8
's label. The Support page also has links to additional Gateway documentation and detailed specifications. Accessing the online User Guide In addition to this guide, your User Guide has been included on your hard drive. Your User Guide is an in-depth, easy-to-read manual that includes information - Gateway GT5620 | 8512418 - Gateway Reference Guide - Page 9
computer contains information that identifies your computer model and serial number. Gateway Customer Care will need this information if you call for assistance. Serial number Technical Support telephone number Microsoft Certificate of Authenticity The Microsoft Certificate of Authenticity label - Gateway GT5620 | 8512418 - Gateway Reference Guide - Page 10
CHAPTER 1: About This Reference 4 - Gateway GT5620 | 8512418 - Gateway Reference Guide - Page 11
CHAPTER2 Checking Out Your Computer • Front • Back 5 - Gateway GT5620 | 8512418 - Gateway Reference Guide - Page 12
Front CHAPTER 2: Checking Out Your Computer Memory card reader DVD/CD drive IEEE 1394/ FireWire™ port Diskette or removable hard drive (optional) Headphone jack Microphone jack Power button/ power indicator USB ports DVD/CD drive (optional) Video jack (optional) Audio left jack (optional) Audio - Gateway GT5620 | 8512418 - Gateway Reference Guide - Page 13
gateway.com Component Icon Memory card reader Optical disc drive IEEE 1394 port Description Insert a memory card from a digital camera, MP3 player, PDA, cellular telephone, or other device into the memory ) Headphone jack Microphone jack Power button/power indicator USB ports Video, Audio - Gateway GT5620 | 8512418 - Gateway Reference Guide - Page 14
CHAPTER 2: Checking Out Your Computer Back Important Your computer's hardware options and port locations may vary from this illustration. Voltage switch Power connector PS/2 keyboard port Headphone/front speaker jack USB ports S/PDIF jack (optional) Mic jack Case cover thumbscrew PS/2 mouse port - Gateway GT5620 | 8512418 - Gateway Reference Guide - Page 15
www.gateway.com Component Icon USB ports S/PDIF output jack (optional) Microphone jack ) into this jack. For more information, see "Learning about the Internet" in the online User Guide. Plug your center speaker and subwoofer into this jack. For more information, see "Configuring the audio jacks" - Gateway GT5620 | 8512418 - Gateway Reference Guide - Page 16
CHAPTER 2: Checking Out Your Computer Component Icon Rear speaker jack (black plug) Audio input (Line in) jack (blue plug) -ORSide speaker jack Video card (optional) Audio card (optional) TV tuner card Modem jack (optional, not shown) Telephone jack (optional, not shown) Description Plug your - Gateway GT5620 | 8512418 - Gateway Reference Guide - Page 17
Up and Getting Started • Working safely and comfortably • Preparing power connections • Connecting to a broadband modem or network • Connecting the keyboard • Using the mouse • Using optical drives • Using the memory card reader • Using the diskette drive • Adjusting the volume • Configuring the - Gateway GT5620 | 8512418 - Gateway Reference Guide - Page 18
CHAPTER 3: Setting Up and Getting Started Working safely and comfortably Before using your computer, follow these general guidelines for setting up a safe and comfortable work area and avoiding discomfort and strain: • Keep hands and arms parallel to the floor. • Adjust the screen so it is - Gateway GT5620 | 8512418 - Gateway Reference Guide - Page 19
www.gateway.com and light shining directly into your eyes. Reduce glare by installing shades or curtains on windows, and by installing a glare screen filter. • Use soft, indirect lighting in your the chair so it supports the lower curve of your spine. You can use a pillow or cushion to - Gateway GT5620 | 8512418 - Gateway Reference Guide - Page 20
tasks. Preparing power connections Protecting from power source problems Warning High voltages can enter your computer through both the power cord and the reaching your computer. An uninterruptible power supply (UPS) supplies battery power to your computer during a power failure. Although you cannot - Gateway GT5620 | 8512418 - Gateway Reference Guide - Page 21
power supply, a component built into your computer, provides power to the system board, add-in cards, and peripheral devices. The power supply's voltage selection for your location is typically set at the factory, but you can change it to match the electrical service your online User Guide. You can - Gateway GT5620 | 8512418 - Gateway Reference Guide - Page 22
computer: 1 Connect the power, network, mouse, and keyboard cables to your computer according to the setup poster. 2 Press the power button on the front are starting your computer for the first time, follow the on-screen instructions to select the language and time zone and to create your first user - Gateway GT5620 | 8512418 - Gateway Reference Guide - Page 23
see "Using Windows" and "Customizing Windows" in your online User Guide. Waking up your computer Tip For more information about changing the power button mode, in the power supply and system board remain energized. In order to remove all electrical power from your computer, unplug the power cord and - Gateway GT5620 | 8512418 - Gateway Reference Guide - Page 24
arrow next to the lock icon, then click Shut Down. The computer turns off. 2 To completely disconnect all power (such as for servicing internal components), also disconnect the power cord. Restarting (rebooting) your computer If your computer does not respond to keyboard or mouse input, you may need - Gateway GT5620 | 8512418 - Gateway Reference Guide - Page 25
www.gateway.com Using the keyboard Premium multimedia keyboard features The keyboard has Feature Editing buttons Function keys Internet buttons Audio playback buttons Navigation keys Indicators Windows keys Application key Directional keys Numeric keypad Icon Description Press these buttons to - Gateway GT5620 | 8512418 - Gateway Reference Guide - Page 26
with other keys to open utilities like F (Find/Search), R (Run), and E (Computer). Press this key to access shortcut menus and help assistants in Windows. Directional keys Numeric keypad Press these keys to move the cursor up, down, right, or left. Press these keys to type numbers when the numeric - Gateway GT5620 | 8512418 - Gateway Reference Guide - Page 27
www.gateway.com Feature Icon Sleep button Function keys Application buttons Audio playback buttons Indicators Windows keys Application key Editing buttons Navigation keys Numeric keypad Description Press this button to activate your computer's Sleep (power-saving) mode. Press these keys to - Gateway GT5620 | 8512418 - Gateway Reference Guide - Page 28
CHAPTER 3: Setting Up and Getting Started Using the mouse Scroll wheel Right button Left button The mouse is a device that controls the pointer movement on the computer display. This illustration shows the standard mouse. As you move the mouse, the pointer (arrow) on the display moves in the same - Gateway GT5620 | 8512418 - Gateway Reference Guide - Page 29
www.gateway.com You can use the scroll wheel on the mouse to move through a document. This feature is or left-hand configuration, and other mouse settings, see the "Customizing" chapter in your online User Guide. For instructions on how to clean the mouse, see "Cleaning the mouse" on page 61. 23 - Gateway GT5620 | 8512418 - Gateway Reference Guide - Page 30
CHAPTER 3: Setting Up and Getting Started Using optical drives Features Your optical drive has the following basic components: Flip-down door Activity indicator Eject button Loading an optical disc To insert an optical disc: 1 Press the eject button on the optical disc drive. Important When you - Gateway GT5620 | 8512418 - Gateway Reference Guide - Page 31
www.gateway.com Identifying optical drive types Your computer may contain one of the following drive types. Press the drive's eject button, then Look on the front - Gateway GT5620 | 8512418 - Gateway Reference Guide - Page 32
(CD) can hold an entire album of digital songs and can be played on a CD player or your computer's CD drive. Use a music program or Windows Media Player on your computer to: • Play music CDs • Create MP3 music files from your music CDs • Edit music track information • Use your music files - Gateway GT5620 | 8512418 - Gateway Reference Guide - Page 33
www.gateway.com Playing a DVD A Digital Versatile Disc (DVD) is similar to a standard , create video DVDs, and more. For more information about creating CDs and DVDs, see your online User Guide. Creating audio and video files You can create audio and music files, either from scratch or from music CDs - Gateway GT5620 | 8512418 - Gateway Reference Guide - Page 34
your online User Guide. Using the memory card reader You can use the optional memory card reader to memory card reader may look different.) Activity indicator Memory card reader slots Memory card types The memory card reader supports several memory card types. To determine which types are supported - Gateway GT5620 | 8512418 - Gateway Reference Guide - Page 35
www.gateway.com 2 To access a file on the memory card, click (Start), then click Computer. Double-click the drive letter (for example, the E: drive), then double-click the file name. To remove a memory card: • Wait for the memory card reader access indicator to stop blinking, then pull the memory - Gateway GT5620 | 8512418 - Gateway Reference Guide - Page 36
3: Setting Up and Getting Started Adjusting the volume You can adjust volume using your speakers' controls or the Windows volume controls. You can also adjust the volume of specific sound devices in your computer. To adjust the overall volume using hardware controls: • If you are using external - Gateway GT5620 | 8512418 - Gateway Reference Guide - Page 37
gateway.com 4 To adjust device volume levels, click Mixer. The Volume Mixer dialog box opens, where you can click and drag sliders for individual devices. Tip Adjust the Windows the window to close it. Help For more information about adjusting the volume, click Start, then click Help and Support. - Gateway GT5620 | 8512418 - Gateway Reference Guide - Page 38
jack(s). 2 Click (Start), then click Control Panel. The Control Panel window opens. 3 Click Hardware and Sound, Sound, the Playback tab, then click taskbar. The Realtek dialog box opens. 4 Follow the on-screen instructions to configure the audio jacks for your speaker setup. Installing a printer - Gateway GT5620 | 8512418 - Gateway Reference Guide - Page 39
www.gateway.com IEEE 1394 and USB ports support plug-and-play and hot-swapping, which means time. Help For more information about installing peripheral devices, click Start, then click Help and Support. Type installing devices in the Search box, then press ENTER. Parallel and serial port devices - Gateway GT5620 | 8512418 - Gateway Reference Guide - Page 40
CHAPTER 3: Setting Up and Getting Started 34 - Gateway GT5620 | 8512418 - Gateway Reference Guide - Page 41
• Preventing static electricity discharge • Opening the case • Closing the case • Replacing the color panel • Installing memory • Adding or replacing an optical disc drive • Replacing the memory card reader • Adding or replacing a hard drive • Replacing the heat sink and processor • Adding or - Gateway GT5620 | 8512418 - Gateway Reference Guide - Page 42
do not insert any object into the vent holes of the power supply. The components inside your computer are extremely sensitive to static a bare metal surface on the back of the computer. • Unplug the power cord and the modem and network cables. Caution ESD can permanently damage electrostatic - Gateway GT5620 | 8512418 - Gateway Reference Guide - Page 43
to dangerous electrical voltages and moving parts, turn off your computer, then unplug the power cord and modem cable before opening the case. To remove the side panel: 1 Follow the instructions in "Preventing static electricity discharge" on page 34. 2 Shut down your computer, then disconnect - Gateway GT5620 | 8512418 - Gateway Reference Guide - Page 44
CHAPTER 4: Upgrading Your Computer Removing the front bezel To remove the front bezel: 1 Remove the side panel by following the instructions in "Removing the side panel" on page 35. 2 Press the three bezel retention tabs, then swing the left side of the bezel away from the - Gateway GT5620 | 8512418 - Gateway Reference Guide - Page 45
www.gateway.com Closing the case Replacing the front bezel To replace the front bezel: 1 Slide the tabs on the right side of the bezel into the - Gateway GT5620 | 8512418 - Gateway Reference Guide - Page 46
the back edge of the side panel, then reconnect the cables and power cord. Replacing the color panel To replace the color panel on the front (This procedure shows the bezel removed.) To remove the front bezel, follow the instructions in "Removing the front bezel" on page 35. 1 Find the panel release - Gateway GT5620 | 8512418 - Gateway Reference Guide - Page 47
www.gateway.com 2 Press firmly on the lower left and lower right parts of the color panel to release the panel from the front bezel. You should - Gateway GT5620 | 8512418 - Gateway Reference Guide - Page 48
CHAPTER 4: Upgrading Your Computer 4 Slide the tabs of the new color panel up into the slots on the front bezel. 5 Press firmly on the lower left and lower right parts of the color panel to engage the panel's internal locking tabs. You should press the two points against the computer until you hear - Gateway GT5620 | 8512418 - Gateway Reference Guide - Page 49
www.gateway.com Installing memory When you upgrade the computer memory, make sure that you install the correct type of memory module for your computer. Your computer uses DIMM memory. To install or replace DIMM memory: 1 Remove the side panel by following the instructions in "Removing the side panel - Gateway GT5620 | 8512418 - Gateway Reference Guide - Page 50
the memory module automatically. When the module is secure, you hear a click. 6 Replace the side panel by following the instructions in "Replacing the side panel" on page 37. 7 Return your computer to its upright position. 8 Reconnect the cables and the power cord. 9 Turn on your computer. Windows - Gateway GT5620 | 8512418 - Gateway Reference Guide - Page 51
gateway.com Adding or replacing an optical disc drive Tools You need a Phillips screwdriver to add or replace a CD or DVD drive. To add replace an optical drive: 1 Remove the side panel by following the instructions drive. Drive data cable Drive power cable 5 Note any jumper settings on the old - Gateway GT5620 | 8512418 - Gateway Reference Guide - Page 52
, then replace the two drive retention screws. 9 Reconnect the drive cables using your notes from Step 4, or according to the manufacturer's instructions. 10 Replace the front bezel by following the instructions in "Replacing the front bezel" on page 37. 11 Replace the side panel by following the - Gateway GT5620 | 8512418 - Gateway Reference Guide - Page 53
www.gateway.com Replacing the memory card reader Tools You need a Phillips screwdriver to replace the memory card reader. To replace the memory card reader: 1 Remove the side panel by following the instructions in "Removing the side panel" on page 35. 2 Remove the front bezel by following the - Gateway GT5620 | 8512418 - Gateway Reference Guide - Page 54
on top of the computer, then slide bezel toward the back of the computer until it clicks into place. 9 Reinstall the bezel by following the instructions in "Replacing the front bezel" on page 37. 10 Reinstall the computer case's side panel by following the - Gateway GT5620 | 8512418 - Gateway Reference Guide - Page 55
www.gateway.com Adding or replacing a hard drive To add or replace a hard drive: Tools You need a Phillips screwdriver to add or replace a hard drive. 1 Remove the side panel by following the instructions in "Removing the side panel" on page 35. 2 Disconnect and label all hard drive cables, noting - Gateway GT5620 | 8512418 - Gateway Reference Guide - Page 56
and set the jumper on the new drive to be the same. - OR - If you are adding a new drive, set the jumper as instructed by the drive's user guide. 8 Slide the new hard drive into the cage, then secure it to the cage using either the four screws you removed previously or - Gateway GT5620 | 8512418 - Gateway Reference Guide - Page 57
gateway the side panel by following the instructions in "Replacing the side panel" on page 37. 13 Reconnect all external cables and the power cord. 14 Turn on your computer. 15 If you are using the new hard drive as your primary drive, install Windows using the - Gateway GT5620 | 8512418 - Gateway Reference Guide - Page 58
CHAPTER 4: Upgrading Your Computer 4 Loosen the four captive screws that secure the heat sink and fan assembly to the system board, then remove the assembly and place it on a stable surface with the flat surface of the heat sink (the side with the thermal grease) up. (The four screws cannot be - Gateway GT5620 | 8512418 - Gateway Reference Guide - Page 59
www.gateway.com 8 If this is a new heat sink, remove the strip on the or replacing an expansion card To add or replace an expansion card: 1 Remove the side panel by following the instructions in "Removing the side panel" on page 35. 2 If you are replacing an expansion card, disconnect any cables - Gateway GT5620 | 8512418 - Gateway Reference Guide - Page 60
Step 2. If you have added a new expansion card, connect its cables according to its user guide. 7 Press the card retention lever back into place. 8 Replace the side panel by following the instructions in "Replacing the side panel" on page 37. Replacing the system battery Warning Danger of explosion - Gateway GT5620 | 8512418 - Gateway Reference Guide - Page 61
www.gateway.com To replace the battery: 1 Restart your computer. 2 During the restart will return to their factory defaults. 4 Shut down your computer. 5 Remove the side panel by following the instructions in "Removing the side panel" on page 35. 6 For more stability, place your computer on its side. - Gateway GT5620 | 8512418 - Gateway Reference Guide - Page 62
following the instructions in "Replacing the side panel" on page 37. 11 Reconnect all external cables and the power cord. memory modules by following the directions in "Installing memory" on page 40. 4 Disconnect all the power and power supply to your computer, then slide it out of your computer. 54 - Gateway GT5620 | 8512418 - Gateway Reference Guide - Page 63
www.gateway.com 6 Remove the eight power supply to the case. 11 Connect all power and data cables using your notes from Step 4. 12 Reinstall any memory modules you removed previously. 13 Reinstall any expansion cards you removed previously. 14 Replace the side panel by following the instructions - Gateway GT5620 | 8512418 - Gateway Reference Guide - Page 64
CHAPTER 4: Upgrading Your Computer 56 - Gateway GT5620 | 8512418 - Gateway Reference Guide - Page 65
CHAPTER5 Maintaining Your Computer • Setting up a maintenance schedule • Caring for your computer • Cleaning your computer • Updating Windows • Using BigFix • Managing hard drive space • Scheduling maintenance tasks • Moving from your old computer 57 - Gateway GT5620 | 8512418 - Gateway Reference Guide - Page 66
Use the following table to set up a regular maintenance schedule. Maintenance task Weekly Monthly When needed Check for viruses X X X Run Windows Update X X Manage hard drive space X Clean up hard drives X X Scan hard drive for errors X X Defragment hard drive X X Back up files - Gateway GT5620 | 8512418 - Gateway Reference Guide - Page 67
.gateway.com Caring for your computer To extend the life of your computer: • Be careful not to bump or drop your computer, and do not put any objects on top of it. The case, although strong, is not made to support . • When storing your computer for an extended period of time, unplug AC power. 59 - Gateway GT5620 | 8512418 - Gateway Reference Guide - Page 68
turns off, but some electrical current still flows through it. To avoid possible injury from electrical shock, unplug the power cord, modem cable, and network cable from the wall outlets. • Always turn off your computer and other peripheral devices before cleaning any components. • Use a damp, - Gateway GT5620 | 8512418 - Gateway Reference Guide - Page 69
www.gateway.com 2 If you spill liquid on the keyboard, turn off your computer and turn the keyboard upside down. Let the liquid drain, then let the - Gateway GT5620 | 8512418 - Gateway Reference Guide - Page 70
Update can also be controlled through the Windows Security Center. For more information, see "Protecting Your Computer" in your online User Guide. Help For more information about Windows Update, click Start, then click Help and Support. Type windows update in the Search Help box, then press ENTER - Gateway GT5620 | 8512418 - Gateway Reference Guide - Page 71
taskbar icon. To fix the problem, click on that icon to open BigFix. To start BigFix: 1 Click (Start), All Programs, Accessories, System Tools, then click BigFix. 2 To learn more about BigFix, click Help, then click Tutorial. Managing hard drive space Windows provides several utilities you can use - Gateway GT5620 | 8512418 - Gateway Reference Guide - Page 72
hard drive space To check hard drive space: Shortcut Start Ö Computer Ö right-click drive Ö Properties 1 Click (Start) then click Computer. The Computer window opens. 2 Right-click the drive that you want to check for available file space, then click Properties. Drive space information appears. 64 - Gateway GT5620 | 8512418 - Gateway Reference Guide - Page 73
www.gateway.com Deleting unnecessary files Delete unnecessary files, such as temporary files and files in the Recycle Bin, more information about keeping the hard drive free of unnecessary files, click Start, then click Help and Support. Type disk cleanup in the Search Help box, then press ENTER. 65 - Gateway GT5620 | 8512418 - Gateway Reference Guide - Page 74
drive later (the next time you restart your computer). If you see this prompt, click Schedule disc check. After Windows has finished checking the drive for errors, it provides a summary of the problems that it found. 4 Correct any problems that are found by following the on-screen instructions. 66 - Gateway GT5620 | 8512418 - Gateway Reference Guide - Page 75
www.gateway.com 5 Click OK. Help For more information about checking the hard drive for errors, click Start, then click Help and Support. Type checking for disk errors in the Search Help box, then press ENTER. Defragmenting the hard drive When working with files, sometimes Windows divides the file - Gateway GT5620 | 8512418 - Gateway Reference Guide - Page 76
about defragmenting the hard drive, click Start, then click Help and Support. Type defragmenting in the Search Help box, then press ENTER. can visit the Accessories Store at www.gateway.com. To back up files: 1 Click (Start) then click Computer. The Computer window opens. 2 Right-click the drive that - Gateway GT5620 | 8512418 - Gateway Reference Guide - Page 77
www.gateway.com 4 Follow the on-screen instructions to select a backup storage location and the files and folders to back up. Help For more information about backing up files, click Start, then click Help and Support. Type backup in the Search Help box, then press ENTER. Scheduling maintenance tasks - Gateway GT5620 | 8512418 - Gateway Reference Guide - Page 78
, then click Windows Easy Transfer. The Windows Easy Transfer dialog box opens. 3 Click Next, click Start a new transfer, then follow the on-screen instructions to complete the transfer. Help For more information about transferring files, click Start, then click Help and Support. Type transferring - Gateway GT5620 | 8512418 - Gateway Reference Guide - Page 79
www.gateway.com Transferring files and settings manually You can manually transfer your personal data files by copying C:\ drive icon. 3 Double-click the Documents or My Documents folder. The My Documents window opens and displays many of your saved personal data files. 4 Copy your personal data - Gateway GT5620 | 8512418 - Gateway Reference Guide - Page 80
Find or Search to locate other personal data files. For more information, see "Using Windows" in your online User Guide. You can often identify different data file types by looking at the file's extension (the part of the file name following the last period). For - Gateway GT5620 | 8512418 - Gateway Reference Guide - Page 81
CHAPTER6 Troubleshooting • Safety guidelines • First steps • Troubleshooting • Recovering your system • Telephone support 71 - Gateway GT5620 | 8512418 - Gateway Reference Guide - Page 82
devices, review the installation procedures you performed and make sure that you followed each instruction. • If an error occurs in a program, see the program's printed documentation or the online help. Help For more information about troubleshooting, click Start, then click Help and Support. Type - Gateway GT5620 | 8512418 - Gateway Reference Guide - Page 83
www.gateway.com Troubleshooting Troubleshooting topics are drive types" on page 24. • Your computer may be experiencing some temporary memory problems. Shut down and restart your computer. • Some music CDs have copy protection instructions in the drive documentation. • Reinstall the device driver. 73 - Gateway GT5620 | 8512418 - Gateway Reference Guide - Page 84
CHAPTER 6: Troubleshooting An audio CD does not produce sound • Make sure that the • Clean the disc. For more information, see "Cleaning optical discs" on page 61. • Reinstall the appropriate device drivers. A DVD movie will not play • Make sure that you have a DVD drive. To identify your drive type - Gateway GT5620 | 8512418 - Gateway Reference Guide - Page 85
www.gateway.com Diskette drive The diskette drive is not recognized • Shut down and restart your computer. You cannot save a file to diskette or you see the - Gateway GT5620 | 8512418 - Gateway Reference Guide - Page 86
Troubleshooting "Customizing Windows" chapter in your online User Guide. The If the display is turned on, the power LED should be lit. • Make sure to your computer. • Reinstall the device driver. The color is not uniform • click Start, then click Help and Support. Type the phrase screen resolution in - Gateway GT5620 | 8512418 - Gateway Reference Guide - Page 87
www.gateway.com Ethernet You cannot see the other computers on your network • the documentation that came with your router. • If you are using a router, try rebooting it by unplugging its power cord, waiting five seconds, then plugging it back in. • Make sure that all computers on your network have - Gateway GT5620 | 8512418 - Gateway Reference Guide - Page 88
CHAPTER 6: Troubleshooting Your Ethernet network is running slower than you expect • If card. File management Help For more information about restoring deleted files, click Start, then click Help and Support. Type the keyword/phrase System Restore in the Search Help box, then press ENTER. A file was - Gateway GT5620 | 8512418 - Gateway Reference Guide - Page 89
instructions on deleting unnecessary files, see "Deleting unnecessary files" on page 64. Help For more information about file management, click Start, then click Help and Support To fix hard drive problems, run the error checking program. For instructions on fixing hard drive problems, see "Checking - Gateway GT5620 | 8512418 - Gateway Reference Guide - Page 90
with your Internet service provider (ISP) is set up correctly. Contact your ISP technical support for help. • Make sure that you do not have a problem with your modem. For more information, "Modem (dial-up)" on page 85. Help For more information about troubleshooting Internet connections, click - Gateway GT5620 | 8512418 - Gateway Reference Guide - Page 91
gateway.com Connecting to a Web site takes too long Many factors can affect Internet performance: • The condition of the telephone lines in your residence or at your local telephone service service provider (ISP) is set up correctly. Contact your ISP for technical support keyboard device driver. A - Gateway GT5620 | 8512418 - Gateway Reference Guide - Page 92
section only covers problems relating to Media Center mode. Media Center mode is available only on Windows Vista Home Premium and Ultimate versions. To view Media Center troubleshooting information that is not covered in this section, go to the Gateway support Web Site at www.gateway.com. Help For - Gateway GT5620 | 8512418 - Gateway Reference Guide - Page 93
problems and affect the video quality. Gateway recommends using high-quality video cables that can be purchased from www.gateway see the "Customizing Windows" chapter in the online User Guide. • Size of a better quality picture, and support higher screen resolutions. The Media Center video display will - Gateway GT5620 | 8512418 - Gateway Reference Guide - Page 94
CHAPTER 6: Troubleshooting • Type of TV (interlaced or progressive scan) Many CRT (tube , contrast, hue, and saturation. For more information, see the Gateway support Web site at www.gateway.com or see the display's user guide. You need to burn programs that were recorded with your computer - Gateway GT5620 | 8512418 - Gateway Reference Guide - Page 95
Windows XP with Service Pack (SP) 1 or 2, Windows Media Player 9 or later, and the Windows patch manually updating the Program Guide, see your online User Guide. Memory Help For more information about troubleshooting memory errors, click Start, then click Help and Support. Type the phrase memory - Gateway GT5620 | 8512418 - Gateway Reference Guide - Page 96
documentation that came with your modem for additional troubleshooting information. Modem (dial-up) See also "Internet" service. Also make sure that the modem dialing properties are set correctly. To check the dialing properties: 1 Click (Start), then click Control Panel. The Control Panel window - Gateway GT5620 | 8512418 - Gateway Reference Guide - Page 97
in the telephone wall jack are secure. You can also call your telephone service and have the telephone line checked for noise or low line levels. • support. • See if the modem works with a different communications program. The problem may be with just one program. • Review the troubleshooting - Gateway GT5620 | 8512418 - Gateway Reference Guide - Page 98
Troubleshooting Your 56K modem does not connect at 56K Current FCC regulations restrict actual data transfer rates over public telephone lines to 53K. Other factors, such as line noise, telephone service supports problems with the modem connection. • Shut down and restart your computer. • Run Windows - Gateway GT5620 | 8512418 - Gateway Reference Guide - Page 99
gateway more information about modem troubleshooting, click Start, then click Help and Support. Type the phrase modem troubleshooting in the Search Help volume: 1 Click (Start), then click Control Panel. The Control Panel window opens. 2 Click Hardware and Sound, then click Phone and Modem Options. - Gateway GT5620 | 8512418 - Gateway Reference Guide - Page 100
to a broadband modem or network" on page 15, your online User Guide, or "Ethernet" on page 77. Help For more information about network troubleshooting, click Start, then click Help and Support. Type the phrase network troubleshooting in the Search Help box, then press ENTER. Passwords Your computer - Gateway GT5620 | 8512418 - Gateway Reference Guide - Page 101
www.gateway.com Power Your computer will not turn on • Make sure that the power cord is connected to an AC power source and to your computer, and that your computer is turned on. • If your computer is plugged into a surge protector, make sure that the surge protector is connected securely to a power - Gateway GT5620 | 8512418 - Gateway Reference Guide - Page 102
CHAPTER 6: Troubleshooting 3 Right-click the printer you want to be the default printer, then click Set as Default Printer. • Reinstall the printer driver. See the guide that came with your printer for instructions on installing the printer driver. You see a "Printer queue is full" error message • - Gateway GT5620 | 8512418 - Gateway Reference Guide - Page 103
most computer problems by following the information in "Troubleshooting" on page 73 or in the technical support pages at www.gateway.com. Problem solving may of software and driver recovery discs as soon as possible. For instructions, see "Preparing for software and device driver recovery" on page 94 - Gateway GT5620 | 8512418 - Gateway Reference Guide - Page 104
"Recovering pre-installed software and drivers" on page 94. For instructions on reinstalling software and drivers that were not pre-installed, see that product's documentation or support Web site. • If re-installing software or drivers does not help, then the problem may be solved by returning your - Gateway GT5620 | 8512418 - Gateway Reference Guide - Page 105
.gateway.com Preparing for software and device driver recovery You can usually recover your pre-installed software and drivers from your hard drive. However, if you ever re-install Windows from the Windows DVD or install a new hard drive, you need to recover your pre-installed software and drivers - Gateway GT5620 | 8512418 - Gateway Reference Guide - Page 106
6: Troubleshooting 4 Important Use a permanent marker to label each disc "Software and Driver Recovery," along with a short description of which computer the when prompted. 7 When the process is finished, the Congratulations! window opens. 8 Click Finish. 9 Remove your final disc, then label all - Gateway GT5620 | 8512418 - Gateway Reference Guide - Page 107
-installed software and drivers using Gateway Recovery Center To recover specific drivers and software: 1 Click (Start), All Programs, Gateway Recovery Center, then click Gateway Recovery Center. The Gateway Recovery Center opens. Important If you have recently reinstalled Windows or installed a new - Gateway GT5620 | 8512418 - Gateway Reference Guide - Page 108
CHAPTER 6: Troubleshooting 3 Click the software or driver you want to recover, then click Next. Recovering pre-installed software and drivers using recovery discs If you created a multiple-disc set of recovery discs, each disc contains a unique set of software and drivers. If a recovery disc does - Gateway GT5620 | 8512418 - Gateway Reference Guide - Page 109
. - OR To recover pre-installed device drivers, click Device driver recovery, then click the type of driver you want to recover. 3 Click Next. 4 If the software or driver is not shown on the list, and you have a multiple-disc set of recovery discs, close Gateway Recovery Center and try another disc - Gateway GT5620 | 8512418 - Gateway Reference Guide - Page 110
you install software or device drivers. You can also create a restore point manually. For instructions, see "Manually creating a restore point" on page 101. Help For more information about using Microsoft System Restore, click Start, then click Help and Support. Type windows system restore in the - Gateway GT5620 | 8512418 - Gateway Reference Guide - Page 111
www.gateway.com 2 On the left side of the window, click Repair Windows using System Restore, then click Next. The Choose a process may take several minutes, and may restart your computer. Manually creating a restore point To manually create a restore point: 1 Click (Start), Control Panel, System - Gateway GT5620 | 8512418 - Gateway Reference Guide - Page 112
Troubleshooting 2 On the left side of the window, Recovering your system to its factory condition If your computer's problems are not solved by any of the other recovery options, you hard drive, then reinstalls Windows and any pre-installed software and device drivers. If you can access important - Gateway GT5620 | 8512418 - Gateway Reference Guide - Page 113
account's password (if any), then click Next. The System Recovery Options menu opens. 6 Click Restore Application. The Welcome to Gateway System Recovery window opens. 7 Click Next. 8 To perform a recovery with data backup (recommended), click Recovery with automatic data backup, then click Next - Gateway GT5620 | 8512418 - Gateway Reference Guide - Page 114
devices appears. 4 Press the arrow keys to select the drive containing the Windows DVD, then press ENTER and follow the on-screen instructions. 5 After Windows is completely re-installed, use the software and driver recovery discs you created to recover your computer's pre-installed software and - Gateway GT5620 | 8512418 - Gateway Reference Guide - Page 115
www.gateway.com Telephone support Before calling Gateway Customer Care If you have a technical problem with your computer, follow these recommendations before contacting Gateway Customer Care: • Make sure that your computer is connected correctly to a grounded AC outlet that is supplying power. If - Gateway GT5620 | 8512418 - Gateway Reference Guide - Page 116
CHAPTER 6: Troubleshooting Telephone numbers Gateway offers a wide range of customer service, Customer Care, and information services. Automated troubleshooting system Service description Use an automated menu system and your telephone keypad to find answers to common problems. How to reach 800- - Gateway GT5620 | 8512418 - Gateway Reference Guide - Page 117
online documentation for Gateway-supplied hardware can be found in our Web site's Documentation Library. • This Reference Guide and your online User Guide. • The software publisher's Web site. Help For more how-to information about Windows, click Start, then click Help and Support. Type the keyword - Gateway GT5620 | 8512418 - Gateway Reference Guide - Page 118
CHAPTER 6: Troubleshooting 108 - Gateway GT5620 | 8512418 - Gateway Reference Guide - Page 119
APPENDIXA Legal Notices • Important safety information • Regulatory compliance statements • Environmental information • Notices 109 - Gateway GT5620 | 8512418 - Gateway Reference Guide - Page 120
follow these instructions to help guard against personal injury and damage to your Gateway system. Your Gateway system is on a stable work surface. • The product should be operated only from the type of power source indicated on the rating label. • If your computer has a voltage selector switch, make - Gateway GT5620 | 8512418 - Gateway Reference Guide - Page 121
com Care during use Warning Do not use Gateway products in areas classified as hazardous locations. refer servicing to qualified personnel if: • The power cord or plug is damaged. • Liquid has been spilled into the system. • The system does not operate properly when the operating instructions are - Gateway GT5620 | 8512418 - Gateway Reference Guide - Page 122
FCC declaration of conformity Responsible party: Gateway, Inc. 7565 Irvine Center Drive which is Part 68-compliant. See installation instructions for details. The Ringer Equivalence Number ( service may be required. The telephone company may request that you disconnect the equipment until the problem - Gateway GT5620 | 8512418 - Gateway Reference Guide - Page 123
www.gateway.com When cases, the inside wiring associated with a single-line individual service may be extended by means of a certified connector assembly. The their own protection, that the electrical ground connections of the power utility, telephone lines, and internal metallic water pipe system - Gateway GT5620 | 8512418 - Gateway Reference Guide - Page 124
fitted with TV/cable TV tuner cards) External television antenna grounding Important The instructions are for the person who installs cable to the system. Gateway assumes you are qualified in the servicing of computer equipment and trained in recognizing hazards in products with electric shock - Gateway GT5620 | 8512418 - Gateway Reference Guide - Page 125
not locate the antenna near overhead light or power circuits, or where it could fall into such power lines or circuits. 7 6 5 4 3 1 2 Antenna and satellite grounding Reference Grounding component 1 Electric service equipment 2 Power service grounding electrode system (NEC Art 250, Part - Gateway GT5620 | 8512418 - Gateway Reference Guide - Page 126
Gateway to see if this program is available in your area. • If you need further assistance in recycling, reusing, or trading in your "end of life" product, you may contact us at the Customer Care number listed in your product's user guide writing from Gateway. The information in this manual has been - Gateway GT5620 | 8512418 - Gateway Reference Guide - Page 127
Spot Design are trademarks or registered trademarks of Gateway, Inc. in the U.S. and other countries. Intel, Intel Inside logo, and Pentium are registered trademarks and MMX is a trademark of Intel Corporation. Microsoft, MS, MS-DOS, and Windows are trademarks or registered trademarks of Microsoft - Gateway GT5620 | 8512418 - Gateway Reference Guide - Page 128
APPENDIX A: Legal Notices 118 - Gateway GT5620 | 8512418 - Gateway Reference Guide - Page 129
Index A AC power connector 8 accessories memory card 28 installing memory card 28 removing memory card 28 replacing expansion 51 slots 28 troubleshooting add-in card 78 troubleshooting Ethernet 77 troubleshooting expansion 78 troubleshooting memory card 85 TV tuner 10 types of memory cards supported - Gateway GT5620 | 8512418 - Gateway Reference Guide - Page 130
73 CD drive adding 43 identifying 25 locating drive 7 replacing 43 See also optical drive troubleshooting 73 cellular phone memory cards 28 Certificate of Authenticity 3 cleaning audio CD 61 case 60 CD 61 computer screen 60 DVD 61 keyboard 60 LCD panel 60 mouse 61 - Gateway GT5620 | 8512418 - Gateway Reference Guide - Page 131
port 7, 9 DIMM See memory directional keys 20, 21 Disk Cleanup 64 Disk Defragmenter 65 diskette troubleshooting 75 diskette drive 7 identifying 29 troubleshooting 75 using 29 display cleaning 60 troubleshooting 76 documentation User Guide 2 double-clicking 23 dragging 23 drivers recovery discs 94 - Gateway GT5620 | 8512418 - Gateway Reference Guide - Page 132
opening 23 fragmentation 65 front bezel removing 37 replacing 37 function keys 19, 21 G Gateway contact information 3 model number 3 serial number 3 Support 2 Gateway Recovery Center re-installing drivers 96 re-installing programs 96 re-installing software 96 H hard drive adding 46 backing up - Gateway GT5620 | 8512418 - Gateway Reference Guide - Page 133
67 media card reader 7 media reader See memory card reader memory adding 40 installing 40 replacing 40 troubleshooting 84 memory card reader 7 inserting card 28 locating 6 memory card types supported 28 removing card 29 replacing 45 using 28 Memory Stick 28 microphone jack 7, 9 Microsoft Certificate - Gateway GT5620 | 8512418 - Gateway Reference Guide - Page 134
troubleshooting 90 PDA memory cards 28 peripheral devices 32 playing audio CD 26 Blu-ray Disc 27 DVD 26 HD-DVD 27 Plug and Play devices IEEE 1394 support for 32 USB support for 32 pointer moving 22, 23 ports See connections power button 7 connector 8 Hibernate mode 7 indicator 7 source problems - Gateway GT5620 | 8512418 - Gateway Reference Guide - Page 135
www.gateway.com Standby/Resume 7 troubleshooting 90 turning off computer 17 turning on computer 16 power button 7 power supply 15 printer installing 32 setting default 91 troubleshooting 91 USB port 7, 9 programs closing unresponsive 18 opening 23 recovery discs 94, 97 re-installing 93, 94 PS/2 - Gateway GT5620 | 8512418 - Gateway Reference Guide - Page 136
Schdeuler 67 techinal support Support 2 technical support automated troubleshooting 105 Technical Support 106 tips before contacting 104 tutorial service 106 telephone jack 10 telephone support 104 training CD 107 classroom 107 Gateway Learning Libraries 107 Learn With Gateway 107 transferring files - Gateway GT5620 | 8512418 - Gateway Reference Guide - Page 137
Windows Product Key Code 3 Windows Easy Transfer 68 Windows key 20, 21 Windows Media Center troubleshooting 82 Windows System Restore 93 creating restore point 101 Windows Update 62 wired Ethernet troubleshooting 77 working safely 12 X xD 28 U uninterruptible power supply (UPS) 14 updating Windows - Gateway GT5620 | 8512418 - Gateway Reference Guide - Page 138
Index 128 - Gateway GT5620 | 8512418 - Gateway Reference Guide - Page 139
- Gateway GT5620 | 8512418 - Gateway Reference Guide - Page 140
MAN GERSHWIN HW REF GDE R3 5/07
-
 1
1 -
 2
2 -
 3
3 -
 4
4 -
 5
5 -
 6
6 -
 7
7 -
8
-
9
-
10
-
11
-
12
-
13
-
14
-
15
-
16
-
17
-
18
-
19
-
20
-
21
-
22
-
23
-
24
-
25
-
26
-
27
-
28
-
29
-
30
-
31
-
32
-
33
-
34
-
35
-
36
-
37
-
38
-
39
-
40
-
41
-
42
-
43
-
44
-
45
-
46
-
47
-
48
-
49
-
50
-
51
-
52
-
53
-
54
-
55
-
56
-
57
-
58
-
59
-
60
-
61
-
62
-
63
-
64
-
65
-
66
-
67
-
68
-
69
-
70
-
71
-
72
-
73
-
74
-
75
-
76
-
77
-
78
-
79
-
80
-
81
-
82
-
83
-
84
-
85
-
86
-
87
-
88
-
89
-
90
-
91
-
92
-
93
-
94
-
95
-
96
-
97
-
98
-
99
-
100
-
101
-
102
-
103
-
104
-
105
-
106
-
107
-
108
-
109
-
110
-
111
-
112
-
113
-
114
-
115
-
116
-
117
-
118
-
119
-
120
-
121
-
122
-
123
-
124
-
125
-
126
-
127
-
128
-
129
-
130
-
131
-
132
-
133
-
134
-
135
-
136
-
137
-
138
-
139
-
140
 |
 |

®
REFERENCE
GUIDE