Gateway MX6750 8511340 - Gateway Notebook Hardware Reference
Gateway MX6750 Manual
 |
View all Gateway MX6750 manuals
Add to My Manuals
Save this manual to your list of manuals |
Gateway MX6750 manual content summary:
- Gateway MX6750 | 8511340 - Gateway Notebook Hardware Reference - Page 1
HARDWARE REFERENCE Gateway Notebook - Gateway MX6750 | 8511340 - Gateway Notebook Hardware Reference - Page 2
- Gateway MX6750 | 8511340 - Gateway Notebook Hardware Reference - Page 3
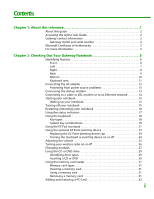
1: About this reference 1 About this guide 2 Accessing the online User Guide 2 Gateway contact information 2 Gateway model and serial number 2 Microsoft Certificate of Authenticity 3 For more information 3 Chapter 2: Checking Out Your Gateway Notebook 5 Identifying features 6 Front 6 Left - Gateway MX6750 | 8511340 - Gateway Notebook Hardware Reference - Page 4
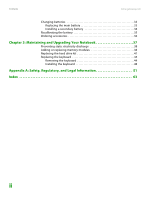
Contents www.gateway.com Changing batteries 33 Replacing the main battery 33 Installing a secondary battery 34 Recalibrating the battery 35 Ordering accessories 36 Chapter 3: Maintaining and Upgrading Your - Gateway MX6750 | 8511340 - Gateway Notebook Hardware Reference - Page 5
CHAPTER 1 About this reference • About this guide • Accessing the online User Guide • Gateway contact information • Microsoft Certificate of Authenticity • For more information 1 - Gateway MX6750 | 8511340 - Gateway Notebook Hardware Reference - Page 6
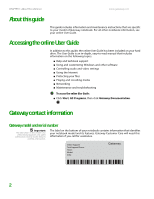
instructions that are specific to your model of Gateway notebook. For all other notebook information, see your online User Guide. Accessing the online User Guide In addition to this guide, the online User Guide has been included on your hard drive. The User Guide is an in-depth, easy-to-read manual - Gateway MX6750 | 8511340 - Gateway Notebook Hardware Reference - Page 7
www.gateway.com Microsoft Certificate of Authenticity Microsoft Certificate of Authenticity The Microsoft operating system. For more information For more information about your notebook, visit Gateway's Support page at support.gateway.com or the Web address shown on your notebook's label. The - Gateway MX6750 | 8511340 - Gateway Notebook Hardware Reference - Page 8
CHAPTER 1: About this reference www.gateway.com 4 - Gateway MX6750 | 8511340 - Gateway Notebook Hardware Reference - Page 9
CHAPTER 2 Checking Out Your Gateway Notebook • Identifying features • Connecting the AC adapter • Connecting the dial-up modem • Connecting to a cable or DSL modem or to an Ethernet network • Starting your - Gateway MX6750 | 8511340 - Gateway Notebook Hardware Reference - Page 10
CHAPTER 2: Checking Out Your Gateway Notebook Identifying features Front www.gateway.com Speaker LCD panel release latch Headphone jack Battery charge Microphone jack indicator Power indicator Speaker Component Icon Speakers LCD panel release latch Battery charge - Gateway MX6750 | 8511340 - Gateway Notebook Hardware Reference - Page 11
www.gateway.com Left Identifying features Kensington lock slot S-Video out television, into this jack. For more information, see Viewing the display on a television in the online User Guide. Helps cool internal components. Warning: Do not work for long periods with the notebook resting on your lap. - Gateway MX6750 | 8511340 - Gateway Notebook Hardware Reference - Page 12
CHAPTER 2: Checking Out Your Gateway Notebook Right www.gateway.com PC Card slot Memory card information, see "Using the memory card reader" on page 31. The memory card reader supports Memory Stick®, Memory Stick Pro®, MultiMediaCard™, Secure Digital™, Mini Secure Digital®, and RS-Multimedia - Gateway MX6750 | 8511340 - Gateway Notebook Hardware Reference - Page 13
www.gateway.com Back Identifying features Power connector Component Power connector Monitor port Monitor port Icon Description Plug the AC adapter cable into monitor or projector into this port. For more information, see "Viewing the display on a projector or monitor" in the online User Guide. 9 - Gateway MX6750 | 8511340 - Gateway Notebook Hardware Reference - Page 14
Notebook Bottom Battery latch Docking port Battery Customer Care label Hard drive bay Website: Online Support: Tech Support Phone: Hours: www.gateway.com Battery lock Memory bay System label Modular bay latch Component Icon Docking port Battery Battery lock Memory bay System label Modular - Gateway MX6750 | 8511340 - Gateway Notebook Hardware Reference - Page 15
www.gateway.com Keyboard area Identifying features Optional EZ Point pointing device the power button mode, see "Changing Power-Saving Settings" in the online User Guide. Provides all the features of a full-sized, computer keyboard. For more information, see "Using the keyboard" on page 18. - Gateway MX6750 | 8511340 - Gateway Notebook Hardware Reference - Page 16
replaceable or user-serviceable parts inside. The AC adapter has dangerous voltages that can cause serious injury or death. Contact Gateway about returning indicator does not turn blue after three hours, contact Gateway Customer Care at support.gateway.com. You can run your notebook using an AC - Gateway MX6750 | 8511340 - Gateway Notebook Hardware Reference - Page 17
www.gateway.com Connecting the dial-up modem 4 When you finish using your notebook for the first time, turn off your notebook and leave your notebook connected to AC power until the battery charge indicator turns blue. Protecting from power source problems Warning High voltages can enter your - Gateway MX6750 | 8511340 - Gateway Notebook Hardware Reference - Page 18
CHAPTER 2: Checking Out Your Gateway Notebook www.gateway.com Connecting to a cable or DSL modem or to an Ethernet network Your notebook has a network jack that you can use to connect to a cable - Gateway MX6750 | 8511340 - Gateway Notebook Hardware Reference - Page 19
gateway for the first time, follow the on-screen instructions to set up your notebook. Waking up your see "Changing power modes" in the online User Guide. When you have not used your notebook for for some reason you cannot use the Turn Off Computer option in Windows to turn off your notebook, - Gateway MX6750 | 8511340 - Gateway Notebook Hardware Reference - Page 20
CHAPTER 2: Checking Out Your Gateway Notebook www.gateway.com Restarting (rebooting) your notebook Important If your notebook does not turn off immediately, complete the following steps until the notebook turns off: 1. Press and - Gateway MX6750 | 8511340 - Gateway Notebook Hardware Reference - Page 21
www.gateway.com Using the status indicators Using the status indicators Important If none of the indicators are on, you may need to press FN+F1 to - Gateway MX6750 | 8511340 - Gateway Notebook Hardware Reference - Page 22
Gateway Notebook www.gateway.com Using the keyboard Tips & Tricks You can attach an external keyboard to the notebook using a USB port. You do not need to shut down the notebook to connect a USB keyboard. Your notebook features a full-size keyboard that functions the same as a desktop computer - Gateway MX6750 | 8511340 - Gateway Notebook Hardware Reference - Page 23
www.gateway.com Using the keyboard System key combinations When you press the FN button to leave Standby mode. For more information, see "Changing Power-Saving Settings" in your online User Guide. Toggle the notebook display in the following order: ■ The LCD ■ An external monitor or projector (a - Gateway MX6750 | 8511340 - Gateway Notebook Hardware Reference - Page 24
CHAPTER 2: Checking Out Your Gateway Notebook www.gateway.com Press and hold FN, then press this system key... To... Increase the brightness of the display. Decrease the brightness of the display. Mute the - Gateway MX6750 | 8511340 - Gateway Notebook Hardware Reference - Page 25
www.gateway.com Using the EZ Pad touchpad Using the EZ Pad touchpad Tips & Tricks For instructions on how to adjust the double-click speed, pointer speed, right-hand or left-hand configuration, and other touchpad settings, see "Changing the mouse or touchpad settings" in the online User Guide. - Gateway MX6750 | 8511340 - Gateway Notebook Hardware Reference - Page 26
or open a file or folder. Access a shortcut menu or find more information about an object on the screen. Move an object on the screen. www.gateway.com Move your finger around on the touchpad. If you run out of space and need to move the pointer farther, lift your finger, move - Gateway MX6750 | 8511340 - Gateway Notebook Hardware Reference - Page 27
Point pointing device Important Your notebook was sent from Gateway with the pointing device turned on. For instructions on how to turn the pointing device on or off see "Changing the mouse or touchpad settings" in the online User Guide The EZ Point™ consists of a pointing device and two buttons. - Gateway MX6750 | 8511340 - Gateway Notebook Hardware Reference - Page 28
and replace it with one of the spares included with your notebook. If you need to purchase additional caps, visit the Accessory Store at accessories.gateway.com. Turning the touchpad or pointing device on or off Tips & Tricks Both the touchpad and pointing device can be turned on at the same - Gateway MX6750 | 8511340 - Gateway Notebook Hardware Reference - Page 29
.gateway.com 3 Click the Device Settings tab. Adjusting the volume 4 Select the device you want to turn on or turn off, then click Enable or Disable. Adjusting the volume Tips & Tricks For instructions on how to adjust the volume in Windows, see "Adjusting the Volume" in the online User Guide - Gateway MX6750 | 8511340 - Gateway Notebook Hardware Reference - Page 30
where the risk of interference to other devices or services is harmful or perceived as harmful, the option to for authorization prior to using or turning on the wireless device. Your Gateway notebook may have a factory-installed wireless networking mini-PCI card. To " in the online User Guide. 26 - Gateway MX6750 | 8511340 - Gateway Notebook Hardware Reference - Page 31
www.gateway.com Changing modules Changing modules Your notebook's modular bay supports different bay modules, such as a CD drive, combination DVD/CD-RW drive, DVD±RW/CD-RW drive, a second hard drive, a diskette drive, or a secondary battery. - Gateway MX6750 | 8511340 - Gateway Notebook Hardware Reference - Page 32
CHAPTER 2: Checking Out Your Gateway Notebook www.gateway.com 6 Remove the security screw if your notebook has one. Security screw 7 Slide the bay module release latch. The module moves out slightly. 8 Slide the - Gateway MX6750 | 8511340 - Gateway Notebook Hardware Reference - Page 33
or DVD drive Using the CD or DVD drive You can use your notebook to enjoy a wide variety of multimedia features. Identifying drive types Your Gateway notebook may contain one of the following drive types. Look on the front of the drive for one or more of the following logos: If - Gateway MX6750 | 8511340 - Gateway Notebook Hardware Reference - Page 34
DVD [ www.gateway.com Important When you place a single-sided disc in the tray, make sure that the label side is facing up. If the disc has two playable sides, place the disc so the name of the side you want to play is facing up. Eject button Manual eject hole To - Gateway MX6750 | 8511340 - Gateway Notebook Hardware Reference - Page 35
gateway that is available with the media. The memory card reader supports Memory Stick®, Memory Stick Pro®, MultiMediaCard™, Secure Digital™, Mini To access a file on a memory card: 1 Click Start, then click My Computer. 2 Double-click the drive letter (for example, the E: drive), then double- - Gateway MX6750 | 8511340 - Gateway Notebook Hardware Reference - Page 36
2: Checking Out Your Gateway Notebook www.gateway.com Adding and removing a PC Card Your notebook has a PC Card slot (also known as a PCMCIA card slot). This slot accepts one Type II card. You do not need to restart your notebook when changing most cards because your notebook supports hot-swapping - Gateway MX6750 | 8511340 - Gateway Notebook Hardware Reference - Page 37
Replacing the main battery Warning Danger of explosion if battery is incorrectly replaced. Replace only with a battery specifically manufactured for your Gateway notebook. Discard used batteries according to local hazardous material regulations. The battery used in this device may present a fire or - Gateway MX6750 | 8511340 - Gateway Notebook Hardware Reference - Page 38
Replace only with a battery specifically manufactured for your Gateway notebook. Discard used batteries according to local hazardous battery: ■ Swap the secondary battery for a bay module by following the instructions in "Changing modules" on page 27. Caution If your notebook is connected to - Gateway MX6750 | 8511340 - Gateway Notebook Hardware Reference - Page 39
www.gateway.com Recalibrating the battery Recalibrating the battery Important Do not interrupt the battery recalibration process. If now displays an accurate battery charge. If the battery charge indicator does not show an accurate charge, contact Gateway Customer Care at support.gateway.com. 35 - Gateway MX6750 | 8511340 - Gateway Notebook Hardware Reference - Page 40
device cap Order replacement caps for the EZ Point pointing device from Gateway. Memory Large programs, such as multimedia games or graphics programs, expansion features not included with your notebook. See the user guide for the port replicator for more information about using a port computer. 36 - Gateway MX6750 | 8511340 - Gateway Notebook Hardware Reference - Page 41
CHAPTER 3 Maintaining and Upgrading Your Notebook • Preventing static electricity discharge • Adding or replacing memory modules • Replacing the hard drive kit • Replacing the keyboard 37 - Gateway MX6750 | 8511340 - Gateway Notebook Hardware Reference - Page 42
surface on your workbench or other grounded object. Adding or replacing memory modules Important Use only memory modules designed for your Gateway notebook. Tools Required You need a small Phillips screwdriver to replace memory modules. Your notebook uses memory modules called SO-DIMMs (Small - Gateway MX6750 | 8511340 - Gateway Notebook Hardware Reference - Page 43
www.gateway.com Tips & Tricks The screw hole is marked with a K. Adding or replacing memory modules 5 Disconnect all peripheral devices connected to the notebook and remove any - Gateway MX6750 | 8511340 - Gateway Notebook Hardware Reference - Page 44
CHAPTER 3: Maintaining and Upgrading Your Notebook www.gateway.com 10 If you are removing a module, gently press outward on the clip at each end of the memory module until the module tilts upward. 11 Pull the memory module out of the slot. 40 - Gateway MX6750 | 8511340 - Gateway Notebook Hardware Reference - Page 45
www.gateway.com Replacing the hard drive kit Tips & Tricks The screw Create a Drivers and Applications Recovery disc. For more information, see "Creating Drivers and Applications Recovery discs" in the online User Guide. 2 Print the "Recovering Your System" chapter from the online User Guide for - Gateway MX6750 | 8511340 - Gateway Notebook Hardware Reference - Page 46
CHAPTER 3: Maintaining and Upgrading Your Notebook www.gateway.com 6 Disconnect from the optional port replicator. 7 Disconnect the AC adapter, modem cable, and network cable if they are connected to the notebook. 8 Disconnect all - Gateway MX6750 | 8511340 - Gateway Notebook Hardware Reference - Page 47
www.gateway.com Replacing the hard drive kit 13 Remove the four screws that secure power adapter, modem cable, and network cable 20 Turn on your notebook. 21 For instructions on installing Windows, your drivers, and your applications, see the "Recovering Your System" chapter you printed in Step 2. - Gateway MX6750 | 8511340 - Gateway Notebook Hardware Reference - Page 48
.com Replacing the keyboard Important Replace the keyboard only with a similar keyboard provided by Gateway. If your keyboard becomes damaged, you can replace it with a similar keyboard obtained from Gateway. Tools Required You need a small Phillips and a small flat-blade screwdriver to replace - Gateway MX6750 | 8511340 - Gateway Notebook Hardware Reference - Page 49
www.gateway.com 9 Remove the two keyboard cover screws. Replacing the keyboard Screw Screw 10 Insert the small flat-blade screwdriver or non-marring tool under the - Gateway MX6750 | 8511340 - Gateway Notebook Hardware Reference - Page 50
CHAPTER 3: Maintaining and Upgrading Your Notebook www.gateway.com 14 Gently lift the back edge of the keyboard. ■ If the keyboard does not lift, go to Step 15. ■ If the keyboard lifts, go - Gateway MX6750 | 8511340 - Gateway Notebook Hardware Reference - Page 51
www.gateway.com Important Depending on the keyboard features, one of both of these screws may be absent. 18 Remove the two optional keyboard screws. Replacing the - Gateway MX6750 | 8511340 - Gateway Notebook Hardware Reference - Page 52
CHAPTER 3: Maintaining and Upgrading Your Notebook www.gateway.com 22 Lift the black keyboard connector clip and optional EZ Point clip, then remove the cables. Be careful not to touch or damage any - Gateway MX6750 | 8511340 - Gateway Notebook Hardware Reference - Page 53
www.gateway.com Replacing the keyboard 4 Insert the tabs on the front edge of the keyboard into the slots under the palm rest. You may need to - Gateway MX6750 | 8511340 - Gateway Notebook Hardware Reference - Page 54
CHAPTER 3: Maintaining and Upgrading Your Notebook www.gateway.com 50 - Gateway MX6750 | 8511340 - Gateway Notebook Hardware Reference - Page 55
APPENDIX A Safety, Regulatory, and Legal Information • Important safety information • Regulatory compliance statements • Environmental information • Notices 51 - Gateway MX6750 | 8511340 - Gateway Notebook Hardware Reference - Page 56
APPENDIX A: Safety, Regulatory, and Legal Information www.gateway.com Important safety information Warning Always follow these instructions to help guard against personal injury and damage to your Gateway system. Warning Do not use Gateway products in areas classified as hazardous locations. Such - Gateway MX6750 | 8511340 - Gateway Notebook Hardware Reference - Page 57
www.gateway.com ■ Unplug the notebook from the wall outlet and refer servicing to qualified personnel if: ■ The power cord or plug is damaged. ■ Liquid has been spilled into the notebook. ■ The notebook does not operate properly when the operating instructions are followed. ■ The notebook was - Gateway MX6750 | 8511340 - Gateway Notebook Hardware Reference - Page 58
device will void the authorization to use it. Please contact Gateway for service. Caution Only use drivers approved for the country in which the device will be used. See the Gateway System Restoration Kit, or contact Gateway Customer Care for additional information. Important Every country has - Gateway MX6750 | 8511340 - Gateway Notebook Hardware Reference - Page 59
a wireless device will void the authorization to use it. Contact Gateway for service. Caution The transmitting device embedded in this notebook may not be and, if not installed and used in accordance with the instructions, may cause harmful interference to radio or television reception. However - Gateway MX6750 | 8511340 - Gateway Notebook Hardware Reference - Page 60
Gateway E-8000 series ■ Gateway M460 ■ Gateway M465 ■ Gateway MX6000 series ■ Gateway NX550 ■ Gateway 47) rules. On the computer or modem card is . See installation instructions for details. service may be required. The telephone company may request that you disconnect the equipment until the problem - Gateway MX6750 | 8511340 - Gateway Notebook Hardware Reference - Page 61
Protection Act of 1991 makes it unlawful for any person to use a computer or other electronic device to send any message via a telephone fax machine wireless device will void the authorization to use it. Contact Gateway for service. Caution The transmitting device embedded in this notebook may not - Gateway MX6750 | 8511340 - Gateway Notebook Hardware Reference - Page 62
A: Safety, Regulatory, and Legal Information www.gateway.com Warning To avoid electrical shock or equipment of connection. In some cases, the inside wiring associated with a single-line individual service may be extended by means of a certified connector assembly. The customer should be aware - Gateway MX6750 | 8511340 - Gateway Notebook Hardware Reference - Page 63
. Should the unit ever need servicing, contact an authorized service location. EPA ENERGY STAR ENERGY STAR As an ENERGY STAR® Partner, Gateway has determined that this product meets the ENERGY STAR guidelines for energy efficiency when used with a computer equipped with a Display Power Management - Gateway MX6750 | 8511340 - Gateway Notebook Hardware Reference - Page 64
. No part of it may be reproduced or transmitted by any means or in any form, without prior consent in writing from Gateway. The information in this manual has been carefully checked and is believed to be accurate. However, changes are made periodically. These changes are incorporated in newer - Gateway MX6750 | 8511340 - Gateway Notebook Hardware Reference - Page 65
www.gateway.com Macrovision statement If your notebook has a DVD drive and an analog TV Out port, the following paragraph applies: This product incorporates copyright protection technology - Gateway MX6750 | 8511340 - Gateway Notebook Hardware Reference - Page 66
APPENDIX A: Safety, Regulatory, and Legal Information www.gateway.com 62 - Gateway MX6750 | 8511340 - Gateway Notebook Hardware Reference - Page 67
keys 20 C cable lock 7 cable modem 8, 14 Caps Lock indicator 17 cards inserting memory card 31 inserting PC Card 32 memory card slot 8 memory cards supported 31 PC Card slot 8 removing memory card 31 removing PC Card 32 slots 31, 32 carrying case 36 CD inserting 30 CD drive See DVD - Gateway MX6750 | 8511340 - Gateway Notebook Hardware Reference - Page 68
replacement 36 F fan 7 files opening 22, 23 Firewire port 8 Fn key 18, 19 folders opening 22, 23 function keys 18 G Gateway model number 2, 10 serial number 2 Support 3 H hard drive bay 10 indicator 17 installing 27, 41 replacing 41 second hard drive 7, 27 headphone jack 6 hot-swapping 32 I i.Link - Gateway MX6750 | 8511340 - Gateway Notebook Hardware Reference - Page 69
www.gateway.com 33, 35 button 11, 19 connector 9, 12 indicator 6, 15 source problems 13 Standby mode 15, 19 status indicator 6 turning off notebook 15 turning label 2, 10 system keys combinations 19 locating 18 T technical support Support 3 television (S-Video out) jack 7 touchpad buttons 21 - Gateway MX6750 | 8511340 - Gateway Notebook Hardware Reference - Page 70
Index video monitor port 9 projector port 9 S-Video out jack 7 VGA port 9 volume adjusting 20, 25 controls 25 muting 20, 25 system keys 20 W waking up notebook 15 Windows key 18 Product Key Code 3 wireless network button 19 turning off 26 turning on 26 www.gateway.com 66 - Gateway MX6750 | 8511340 - Gateway Notebook Hardware Reference - Page 71
- Gateway MX6750 | 8511340 - Gateway Notebook Hardware Reference - Page 72
MAN MYSTIQUE C HW REF R1 2/06
-
 1
1 -
 2
2 -
 3
3 -
 4
4 -
 5
5 -
 6
6 -
 7
7 -
8
-
9
-
10
-
11
-
12
-
13
-
14
-
15
-
16
-
17
-
18
-
19
-
20
-
21
-
22
-
23
-
24
-
25
-
26
-
27
-
28
-
29
-
30
-
31
-
32
-
33
-
34
-
35
-
36
-
37
-
38
-
39
-
40
-
41
-
42
-
43
-
44
-
45
-
46
-
47
-
48
-
49
-
50
-
51
-
52
-
53
-
54
-
55
-
56
-
57
-
58
-
59
-
60
-
61
-
62
-
63
-
64
-
65
-
66
-
67
-
68
-
69
-
70
-
71
-
72
 |
 |

HARDWARE REFERENCE
Gateway Notebook