Gateway GT5426E 8512041 - Gateway Hardware Reference Guide (5-bay uATX Case) - Page 50
If you are adding a new drive, set the jumper
 |
View all Gateway GT5426E manuals
Add to My Manuals
Save this manual to your list of manuals |
Page 50 highlights
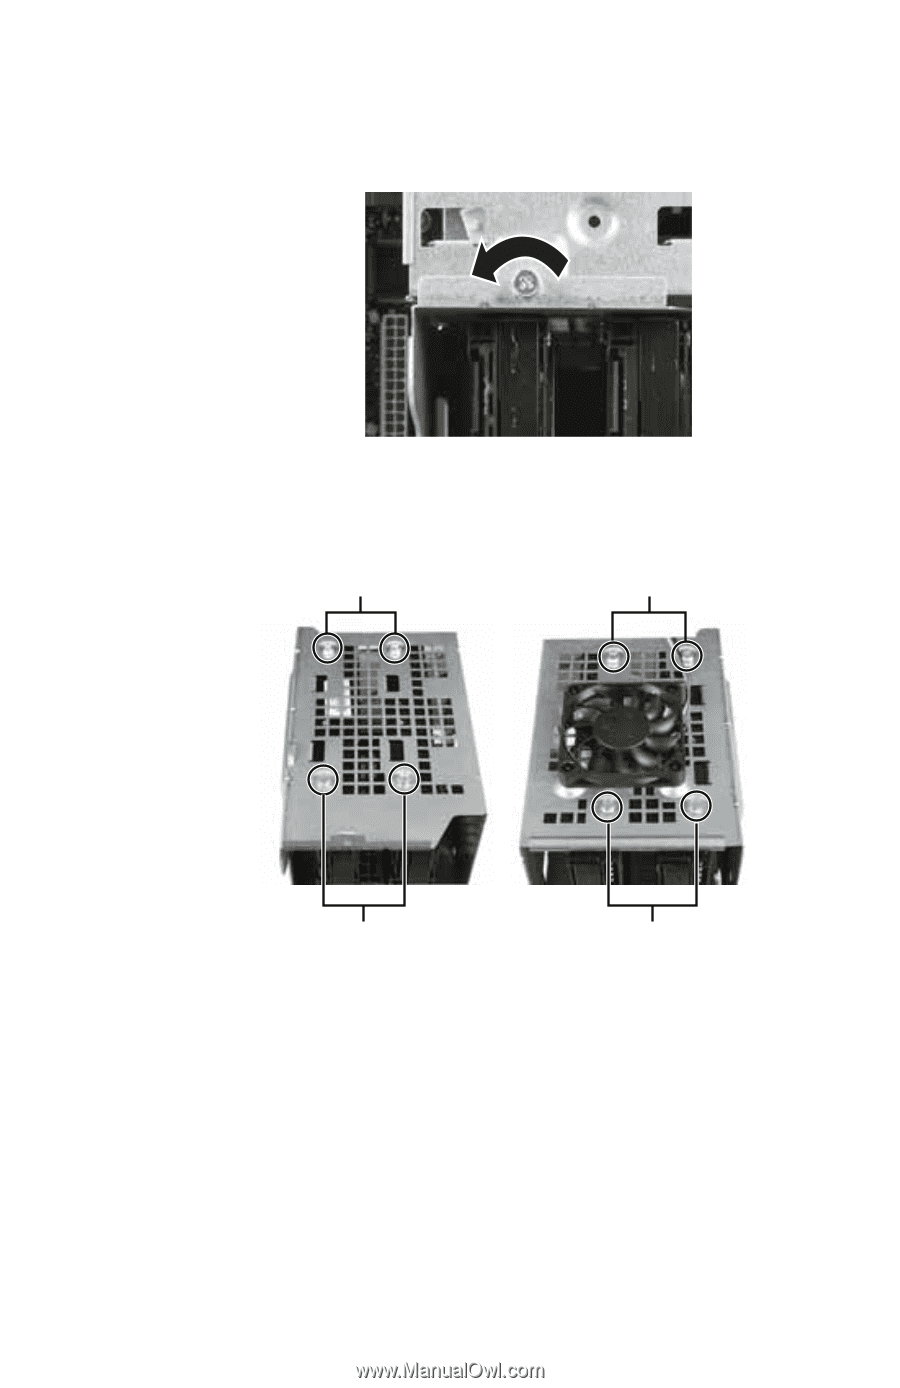
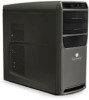
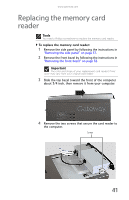
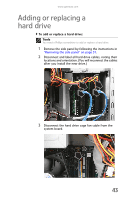
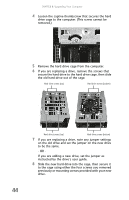
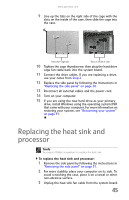
CHAPTER 4: Upgrading Your Computer 4 Loosen the captive thumbscrew that secures the hard drive cage to the computer. (This screw cannot be removed.) 5 Remove the hard drive cage from the computer. 6 If you are replacing a drive, remove the screws that secure the hard drive to the hard drive cage, then slide the old hard drive out of the cage. Hard drive screws (top) Hard drive screws (bottom) Hard drive screws (top) Hard drive screws (bottom) 7 If you are replacing a drive, note any jumper settings on the old drive and set the jumper on the new drive to be the same. - OR - If you are adding a new drive, set the jumper as instructed by the drive's user guide. 8 Slide the new hard drive into the cage, then secure it to the cage using either the four screws you removed previously or mounting screws provided with your new drive. 44
-
 1
1 -
2
-
3
-
4
-
5
-
6
-
7
-
8
-
9
-
10
-
11
-
12
-
13
-
14
-
15
-
16
-
17
-
18
-
19
-
20
-
21
-
22
-
23
-
24
-
25
-
26
-
27
-
28
-
29
-
30
-
31
-
32
-
33
-
34
-
35
-
36
-
37
-
38
-
39
-
40
-
41
-
42
-
43
-
44
-
 45
45 -
 46
46 -
 47
47 -
 48
48 -
 49
49 -
 50
50 -
 51
51 -
 52
52 -
 53
53 -
 54
54 -
 55
55 -
56
-
57
-
58
-
59
-
60
-
61
-
62
-
63
-
64
-
65
-
66
-
67
-
68
-
69
-
70
-
71
-
72
-
73
-
74
-
75
-
76
-
77
-
78
-
79
-
80
-
81
-
82
-
83
-
84
-
85
-
86
-
87
-
88
-
89
-
90
-
91
-
92
-
93
-
94
-
95
-
96
-
97
-
98
-
99
-
100
-
101
-
102
-
103
-
104
-
105
-
106
-
107
-
108
-
109
-
110
-
111
-
112
-
113
-
114
-
115
-
116
-
117
-
118
-
119
-
120
-
121
-
122
-
123
-
124
-
125
-
126
-
127
-
128
-
129
-
130
-
131
-
132
 |
 |