Gateway ZX6800 Gateway Desktop Quick Start Guide - Page 44
All Programs, System Tools - power supply
 |
View all Gateway ZX6800 manuals
Add to My Manuals
Save this manual to your list of manuals |
Page 44 highlights
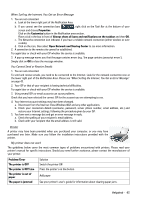
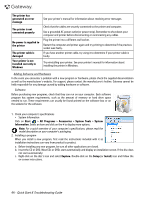
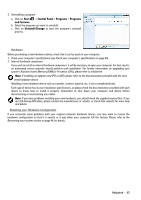
The printer has generated an error message The printer is not connected properly No power is supplied to the printer The printer cable is damaged Your printer is not installed correctly in Windows See your printer's manual for information about resolving error messages. Check that the cables are securely connected to the printer and computer. Use a grounded AC power outlet (or power strip). Remember to shut down your computer and printer before disconnecting or reconnecting any cables. Plug the printer into a different wall socket. Restart the computer and printer again and try printing to determine if the previous socket was faulty. If you have another printer cable, try using it to determine if your printer cable is faulty. Try reinstalling your printer. See your printer's manual for information about installing the printer in Windows. Adding Software and Hardware In the event you encounter a problem with a new program or hardware, please check the supplied documentation as well as the manufacturer's website. For support, please contact the manufacturer's hotline. Gateway cannot be held responsible for any damage caused by adding hardware or software. Software Before purchasing new programs, check that they can run on your computer. Each software program has system requirements, such as the amount of memory or hard drive space needed to run. These requirements can usually be found printed on the software box or on the website for the software. 1. Check your computer's specifications • System Information Click on Start > All Programs > Accessories > System Tools > System Information. Select an item and click on the + to display more options. Note: For a quick overview of your computer's specifications, please read the model description on your computer's packaging. 2. Installing a program When you install a new program, first read the instructions included with it as installation instructions can vary from product to product. a. Before installing any new program, be sure all other applications are closed. b. Insert the CD or DVD. Most CDs or DVDs start automatically and display an installation screen. If the disc does not start automatically: c. Right-click on the disc's icon and select Explore. Double-click on the Setup (or Install) icon and follow the on-screen instructions. 44 - Quick Start & Troubleshooting Guide
-
 1
1 -
2
-
3
-
4
-
5
-
6
-
7
-
8
-
9
-
10
-
11
-
12
-
13
-
14
-
15
-
16
-
17
-
18
-
19
-
20
-
21
-
22
-
23
-
24
-
25
-
26
-
27
-
28
-
29
-
30
-
31
-
32
-
33
-
34
-
35
-
36
-
37
-
38
-
 39
39 -
 40
40 -
 41
41 -
 42
42 -
 43
43 -
 44
44 -
 45
45 -
 46
46 -
 47
47 -
 48
48 -
 49
49 -
50
-
51
-
52
-
53
-
54
-
55
-
56
-
57
 |
 |
