GE 29897GE2 User Guide
GE 29897GE2 Manual
 |
UPC - 044319400557
View all GE 29897GE2 manuals
Add to My Manuals
Save this manual to your list of manuals |
GE 29897GE2 manual content summary:
- GE 29897GE2 | User Guide - Page 1
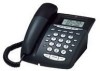
Model 29897 Digital Answerer with Call Waiting Caller ID and Speakerphone Telephone User's Guide - GE 29897GE2 | User Guide - Page 2
A compliant telephone cord and modular plug is provided with this product. It is designed to be connected to a compatible modular jack that is also compliant. See installation instructions for details. Notes • This equipment may not be used on coin service provided by the telephone company. • Party - GE 29897GE2 | User Guide - Page 3
telephone equipment, the telephone company must give you adequate notice, in writing, to allow you to maintain uninterrupted service accordance with the instructions, may cause harmful the equipment off and on, the user is encouraged to try to correct Radio/TV Interference Problems." This booklet is - GE 29897GE2 | User Guide - Page 4
6 Important Installation Information 6 Base Layout 7 Installing the Phone 7 Desktop Installation 7 Wall Mounting the Phone 8 Important Instructions for Moving the Answerer 9 Answering System Set Up 10 Recording the Greeting 10 Telephone Set Up 10 Setting the Display Contrast 11 Setting the - GE 29897GE2 | User Guide - Page 5
Number 26 Dialing a Quick Dial Number 27 Reviewing Stored Numbers 27 Chain Dialing from Memory 28 Message Indicators 28 Troubleshooting Guide 29 General Product Care 31 Service 31 Limited Warranty 32 Index 34 WARNING: TO PREVENT FIRE OR ELECTRICAL SHOCK HAZARD, DO NOT EXPOSE THIS PRODUCT - GE 29897GE2 | User Guide - Page 6
INSTRUCTIONS provided with this product and save them for future reference. Before You Begin Parts Checklist Make sure your package includes the following items: Mounting bracket Handset Base Coiled cord AC power adaptor Line cord Telephone Jack Requirements Wall plate To use this phone - GE 29897GE2 | User Guide - Page 7
Base Layout REVIEW (button) Hook switch NEW MESSAGE/ CID (indicator) DELETE (button) ANSWER/ON/OFF (button) PLAY/STOP (button listed in the user's guide. This power adaptor is intended to be correctly orientated in a vertical or floor mount position. 1. Plug the coiled cord into the handset. - GE 29897GE2 | User Guide - Page 8
telephone line cord into the LINE jack on the back of the phone. Plug the other end into a wall jack. 4. Connect the small end of the power adaptor into the POWER 7.5V AC jack on the back of the answerer you don't know which type of service you have, check with the phone company. NOTE: The unit is - GE 29897GE2 | User Guide - Page 9
the line cord into the jack on the back of the base. Wrap the extra line cord, if any phone is firmly in place. Important Instructions for Moving the Answerer: To move the answerer to a different location in the house, follow these instructions: 1. Disconnect the phone line. 2. Go to the electrical - GE 29897GE2 | User Guide - Page 10
. Sample Greeting: "Hi, this is (use your name here). I can't answer the phone right now, so please leave your name, number, and a brief message after • To review the greeting, press and release GREETING. The unit plays back your greeting automatically. • To return to the answerer's default greeting - GE 29897GE2 | User Guide - Page 11
answers. Remote Access Sets your 3-digit code used for remote access to the unit. TONE/PULSE Dialing Sets the phone NEXT or REVIEW. To save a setting, press ENTER." 2. Use NEXT or REVIEW to select Caller ID display feature from your telephone company, the telephone company sends the time and date - GE 29897GE2 | User Guide - Page 12
ready to enter the time of day, AM or PM. AM/PM 1. Use NEXT or REVIEW to set the time of day. 2. When finished, press ENTER to confirm. Now you're ready to confirm. Now you're ready to enter the day. Date 1. Use NEXT or REVIEW to set the date. 2. When finished, press ENTER to confirm. TIP: You can - GE 29897GE2 | User Guide - Page 13
before the unit answers a call. You can choose from 2-8 or Toll Saver (see "Toll Saver.") 1. If you just adjusted the Message Length menu, skip to step 2. If you haven't adjusted any other setting, press and release the MENU button until SET RINGS TO ANS is displayed. 2. Use NEXT or REVIEW or press - GE 29897GE2 | User Guide - Page 14
phone: • If you have new messages, the unit answers after the 2nd ring. • If you have no new messages, the unit answers after the 5th ring. You can hang up after the 3rd ring and save the pay telephone Use NEXT or REVIEW or press the keypad number for the desired setting (1 for pulse, 2 for tone). - GE 29897GE2 | User Guide - Page 15
need to set regional area codes. These are needed in order for the phone to determine the number format to be displayed when a valid Caller ID AC# is displayed. The first digit of code #1 flashes. 2. Use NEXT or REVIEW to set the first digit. 3. Press ENTER. The next digit flashes. 4. Repeat - GE 29897GE2 | User Guide - Page 16
v buttons to adjust the volume when playing back messages and while reviewing or changing the setting. Ringer Volume Use the VOLUME ^ pt and v buttons to adjust the loudness of the ringer when the handset is not in use. The phone gives a sample ring when adjusting. Handset Volume Use the VOLUME ^ pt - GE 29897GE2 | User Guide - Page 17
up handset. Temporary Tone Dialing If you have pulse service, you can temporarily change from pulse to tone service. After dialing the telephone number, press and release the TONE (*) button on the telephone. This allows access to phone services that require a tone, such as banking and long-distance - GE 29897GE2 | User Guide - Page 18
switch to activate customer calling services such as call waiting or call transfer, which are provided by your local phone company. Redial Redial the last of a power outage, your phone will still be able to make and receive calls, however, the speakerphone and answerer will not be operational. Mute - GE 29897GE2 | User Guide - Page 19
machine keeps playing the greeting. This is normal. If you want to pick up the phone during the greeting play, wait about two seconds after the system answers before picking up a phone press and hold REVIEW until the message restarts. • To replay the previous message, press and release REVIEW. • To - GE 29897GE2 | User Guide - Page 20
(the default security code is 1 2 3, but you can change it.) Be aware that remote functions do not work with rotary or push-button pulse-dialing phones. To access your answerer: 1. Call your telephone number. 2. After you hear the beep that follows the greeting, enter your 3-digit security code. 20 - GE 29897GE2 | User Guide - Page 21
message playback) 4 Turn answerer on/off 3 End call phone, you must subscribe to Call Waiting Caller ID Service. This unit receives and displays CID information transmitted by your local telephone company. This information can include the phone number, date and time; or the name, phone - GE 29897GE2 | User Guide - Page 22
number of new calls to be reviewed. It is displayed until any button Waiting Caller ID service from your phone company; if you receive an incoming call and you are already on the phone, a beep indicates button to put the current call on hold and answer the incoming call. Press FLASH/ EXIT again to - GE 29897GE2 | User Guide - Page 23
press DELETE, and the unit displays ERASE ALL CALLS? Press DELETE again to erase all Caller ID records. Dialing Back When reviewing Caller ID records, you may dial back the phone numbers shown on the display by pressing the DIAL button. If you programmed your local area code in the setup menu - GE 29897GE2 | User Guide - Page 24
resets itself. 3. To adjust the phone number, press the DIAL button. digit telephone number (i.e. 555-5555) 10-digits: 3-digit area code + 7-digit telephone number setup menu 1. Use the NEXT and REVIEW buttons to scroll to the number you to return to the ready-to-answer mode. Memory You can store up - GE 29897GE2 | User Guide - Page 25
ENTER TEL. NO. is displayed. 2. Use the keypad to enter the phone number. You can put spaces in the number and it will still dial or backward, use NEXT (when the cursor is not at the end of the number) or REVIEW. • To erase the current digit, press DELETE. 3. When finished, press STORE. ENTER NAME - GE 29897GE2 | User Guide - Page 26
quick dial button. 1. Use the NEXT or REVIEW buttons to scroll to the Caller ID record you insert a delay in the dialing sequence of a stored telephone number when a pause is needed to wait for a to store a number- you're just replacing the phone number with a different one. Dialing a Stored Number - GE 29897GE2 | User Guide - Page 27
and dials the number automatically. (To cancel, press SPEAKER). • To exit stored number review, press FLASH/EXIT. • To change the displayed number, press STORE. EDIT TEL. NO. is displayed. See "Storing a Number in Memory." NOTE: Direct access memory A, B and C are displayed as Memory 11, 12 and 13 - GE 29897GE2 | User Guide - Page 28
of a message or the unit: 00 CALLS The call record log is empty. UNKNOWN CALLER The incoming call does not have Caller ID service or their service area is not linked to yours. If UNKNOWN NAME appears along with a calling number, the name information for that number was not available. BLOCKED - GE 29897GE2 | User Guide - Page 29
Troubleshooting Guide Telephone Solutions No dial tone • Check the hook switch to make sure it pops up. Won't dial out • Make sure the tone/pulse setting is programmed correctly. Phone doesn't ring • Check the ringer volume. • Could have too many phones on one line. (See FCC registration information - GE 29897GE2 | User Guide - Page 30
Won't respond to remote commands • Must use a touch-tone phone. • Must enter the correct security code. • Did unit hang up? If you take no action for a period of time, it automatically hangs up. Answerer doesn't work • Unplug the power cord from the electrical outlet and plug it back in to reset the - GE 29897GE2 | User Guide - Page 31
the problem is resolved. Any unauthorized repairs, changes or modifications not expressly approved by Thomson Inc. could void the user's authority to operate this product. For instructions on how to obtain a replacement unit, refer to the warranty included in this guide or call customer service at - GE 29897GE2 | User Guide - Page 32
your warranty does not cover: • Customer instruction. (Your Owner's Manual provides information regarding operating instructions and user controls. Any additional information, should be obtained from your dealer.) • Installation and setup service adjustments. • Batteries. • Damage from misuse or - GE 29897GE2 | User Guide - Page 33
• Products purchased or serviced outside the USA. • Acts of nature, such as but not limited to lightning damage. Product Registration: • Please complete and mail the Product Registration Card packed - GE 29897GE2 | User Guide - Page 34
Layout 7 Before You Begin 6 C Call Answering 19 Caller ID Features 22 Caller ID with 20 Erasing Caller ID Info 23 F Flash 18 G General Product Care 31 H Handset Volume 16 Hearing Aid a Pause in the Dialing Sequence 26 Installing the Phone 7 Interference Information 3 Introduction 6 L Leaving a - GE 29897GE2 | User Guide - Page 35
Records 26 Summary Screen 22 Switching between Speaker and Handset 17 T Table of Contents 4 Telephone Jack Requirements 6 Telephone Operation 16 Telephone Set Up 10 Telephone Solutions 29 Temporary Tone Dialing 18 Toll Saver 14 Troubleshooting Guide 29 U Using the Speakerphone 16 W Wall Mounting the - GE 29897GE2 | User Guide - Page 36
Visit our website at: www.GE.com/phones Model 29897 55927740 (Rev. 5 Dom E/S) 07-47 Printed in China Thomson Inc. 101 West 103rd Street Indianapolis, IN 46290-1102 © 2007Thomson Inc. Trademark(s) ® Registered Marca(s) Registrada(s) - GE 29897GE2 | User Guide - Page 37
Modelo 29897 Contestador Digital con Identificador de Llamada en Espera y Teléfono con Altavoz Guía del Usuario - GE 29897GE2 | User Guide - Page 38
ón sobre la Aprobación de Equipo El equipo de su teléfono esta aprobado para la conexión con la red Telefónica Pública (Public Switched Telephone Network) y cumple con los requisitos establecidos en las secciones 15 y 68 de las Reglas y Regulaciones de la FCC y con los Requerimientos Técnicos para - GE 29897GE2 | User Guide - Page 39
én, la Comisión Federal de Comunicaciones (FCC) ha preparado un folleto muy útil, "How To Identify and Resolve Radio/TV Interference Problems" ("Como Identificar y Resolver Problemas de Interferencia de Radio/Televisión"). Este folleto se puede obtener del U.S. Goverment Printing Office, Washington - GE 29897GE2 | User Guide - Page 40
Tabla de Contenido Información sobre la Aprobación de Equipo 2 Información de Interferencias 3 Compatibilidad con Audífonos 3 Licensing 3 Tabla de Contenido 4 Introducción 6 Antes de Comenzar 6 Lista de Partes 6 Requisitos de Enchufe Modular 6 Información Importante para la Instalación. 6 - GE 29897GE2 | User Guide - Page 41
la Memoria 28 Indicadores de Mensajes 28 Solución de Problemas 29 Soluciones Para el Teléfono 29 Soluciones para el Contestador 29 Cuidado general del producto 31 Cómo obtener servicios de mantenimiento...31 Garantía limitada 32 Índice 34 ADVERTENCIA: PARA PREVENIR EL RIESGO DE UNFUEGO O DE - GE 29897GE2 | User Guide - Page 42
Introducción CUIDADO: Cuando utilice equipo telefónico, hay instrucciones básicas de seguridad que siempre deben seguirse. Refiérase a la guía de INSTRUCCIONES DE SEGURIDAD IMPORTANTES provista con este producto y guárdela para referencia futura. Antes de Comenzar Lista de Partes Asegúrese de que su - GE 29897GE2 | User Guide - Page 43
Formato de la Base REVIEW (botón para revisar) NEW MESSAGE/ CID (Indicador de mensajes nuevos/ Identificador) Gancho para colgar DELETE (Botón para borrar) ANSWER ON/OFF (botón del contestador) GREETING (botón de saludo ) VOLUME (botones para volumen) MUTE (botón enmudecedor) Microphone (Micró - GE 29897GE2 | User Guide - Page 44
3. Conecte el cable largo de línea telefónica en el enchufe marcado "LINE" en la parte posterior del teléfono. Conecte el otro extremo en un contacto de pared. 4. Conecte el extremo pequeño del cable de corriente en el enchufe marcado "POWER 7.5V AC" en la parte trasera del contestador. Conecte el - GE 29897GE2 | User Guide - Page 45
3. Coloque el auricular sobre la base. 4. Cuidadosamente dé la vuelta al aparato a que quede boca abajo. Quite la placa para montaje de los dos pares de ranuras en la parte superior, oprimiendo las lengüetas hacia adentro. Jale la placa del teléfono y gírela a que quede como indica el diagrama. - GE 29897GE2 | User Guide - Page 46
Programación del Sistema Contestador Para grabar el saludo Antes de usar su nuevo contestador, usted debe de grabar un saludo (el anuncio que la persona que llama escucha cuando su sistema de contestador contesta una llamada). Si usted no graba un saludo, las personas que llaman escucharán el - GE 29897GE2 | User Guide - Page 47
en la pantalla. El aparato anuncia "Setup Menu. To change setting, use NEXT (siguiente) o REVIEW (revisar). To save a setting, press ENTER." 2. Utilice el botón NEXT o REVIEW para seleccionar la programación deseada u oprima el número en el teclado correspondiente a esa programación (1-5). 3. Cuando - GE 29897GE2 | User Guide - Page 48
listo para programar los minutos. Minutos 1. Utilice los botones NEXT o REVIEW para programar los minutos. 2. Cuando haya terminado, oprima el botón la hora del día, AM o PM. AM/PM 1. Utilice los botones NEXT o REVIEW para programar la hora del día. 2. Cuando haya terminado, oprima el botón ENTER - GE 29897GE2 | User Guide - Page 49
oprima y suelte el botón MENU hasta que la indicación MESSAGE LENGTH (duración de mensaje) aparezca en la pantalla. 2. Utilice los botones NEXT o REVIEW para programar la hora, o utilice los números del teclado (1-4) para la programación deseada. 3. Cuando haya terminado, oprima el botón ENTER para - GE 29897GE2 | User Guide - Page 50
programación, oprima y suelte el botón MENU hasta que la indicación REMOTE ACCESS (acceso remoto) aparezca en la pantalla. 2. Utilice los botones NEXT o REVIEW para seleccionar el primer dígito. 3. Una vez que el primer dígito está programado, oprima el botón ENTER. El aparato emite un tono para - GE 29897GE2 | User Guide - Page 51
la indicación REGIONAL AC# (número de clave regional) aparezca en la pantalla. El primer dígito del código #1 parpadea. 2. Utilice los botones NEXT o REVIEW para inscribir el primer dígito. 3. Oprima el botón ENTER. El siguiente dígito parpadea. 4. Repita los pasos 2-3 hasta que todos los dígitos de - GE 29897GE2 | User Guide - Page 52
Volumen de los Mensajes Utilice los botones VOLUME ^ y v para ajustar el volumen mientras reproduce los mensajes o mientras revisa y cambia la programación. Volumen del Timbre Utilice los botones VOLUME ^ y v para ajustar el nivel de volumen del timbre cuando el auricular no está en uso. El teléfono - GE 29897GE2 | User Guide - Page 53
Cómo recibir una Llamada 1. Cuando suena el teléfono, el indicador del altavoz parpadea y la información de la persona que llama, si ésta es disponible, aparecerá en la pantalla. Levante el auricular u oprima el botón SPEAKER para conectar su llamada telefónica. 2. Usted puede ajustar el volumen de - GE 29897GE2 | User Guide - Page 54
Volver a Marcar ("REDIAL") Vuelva a marcar el último número al que usted llamó, oprimiendo el botón REDIAL una vez que obtiene tono de marcar. NOTA: La función de Volver a Marcar ("REDIAL") retiene en la memoria el último número que usted marcó (hasta 63 dígitos). Si usted oprimió cualquier tecla - GE 29897GE2 | User Guide - Page 55
Para volver a comenzar el mensaje que se está reproduciendo, oprima y sostenga el botón REVIEW hasta que el mensaje vuelva a comenzar. • Para reproducir el mensaje anterior, oprima y suelte el botón REVIEW. • Para reproducir el siguiente mensaje, oprima y suelte el botón "NEXT." Cómo Borrar Mensajes - GE 29897GE2 | User Guide - Page 56
Cómo dejar un Recado (Memo) Utilice el botón MEMO para dejar un recado específico a otras personas que tienen acceso al aparato. 1. Oprima y sostenga el botón MEMO. El aparato le pide que grabe su mensaje después del tono ("Record your memo after the tone."). 2. Grabe su recado después del bip. 3. - GE 29897GE2 | User Guide - Page 57
Comandos Para Acceso Remoto Reproducir los mensajes nuevos 1 Reproducir todos los mensajes 2 Repetir mensaje (durante la reproducción) 5 Reproducir mensaje anterior (durante la reproducción) 6 Saltar al siguiente mensaje (durante la reproducción) 7 Borrar el mensaje (durante la - GE 29897GE2 | User Guide - Page 58
o NEXT para revisar sus archivos del Identificador de Llamadas. El aparato se lo indica ("Press NEXT or REVIEW to review Caller ID. Press STOP to quit"). • Oprima el botón REVIEW para recorrer los archivos de llamadas desde la más nueva hasta la más antigua. • Oprima el botón NEXT para recorrer - GE 29897GE2 | User Guide - Page 59
se muestra en la pantalla, oprimiendo el botón DIAL. Si usted Programó su Clave de Area en el Menú de Programación 1. Oprima los botones NEXT o REVIEW para mostrar el número que usted quiera marcar. • Si usted ve un número de 7 dígitos (por ejemplo, 555-1234), entonces esa llamada fue recibida desde - GE 29897GE2 | User Guide - Page 60
ón NEXT. • Para ir hacia adelante o hacia atrás, utilice el botón NEXT (cuando el cursor no está al final del número) o el botón para revisar REVIEW. • Para borrar el dígito actual, oprima el botón DELETE. 3. Cuando haya terminado, oprima el botón STORE. La pantalla le indica que inscriba el nombre - GE 29897GE2 | User Guide - Page 61
manera tradicional, usted puede almacenar el archivo en una localización de memoria o en un botón para marcado rápido. 1. Utilice los botones NEXT o REVIEW para recorrer los archivos hasta llegar al archivo del Identificador de Llamadas que usted quiera almacenar. Oprima el botón DIAL para cambiar - GE 29897GE2 | User Guide - Page 62
. Cómo Revisar Números Almacenados 1. Oprima el botón DIAL/ENTER. La indicación MEMORY DIAL=? aparece en la pantalla. 2. Utilice los botones NEXT o REVIEW para recorrer las localizaciones de memoria. • Para marcar el número mostrado, oprima el botón DIAL. El altavoz se activa y marca el número autom - GE 29897GE2 | User Guide - Page 63
Cómo Marcar en Cadena desde la Memoria Utilice esta función para hacer llamadas que requieren una secuencia de números, por ejemplo si usted usa una tarjeta para llamar frecuentemente a un número de larga distancia. Básicamente, usted marca cada parte de la secuencia desde la memoria. El siguiente - GE 29897GE2 | User Guide - Page 64
Solución de Problemas Soluciones Para el Teléfono No hay tono de marcar. • Verifique que le gancho para colgar rebote hacia arriba. No da línea. • Asegúrese de que el selector de tono/ pulso esté programado correctamente. El teléfono no timbra. • Verifique los niveles de volumen. • Puede haber - GE 29897GE2 | User Guide - Page 65
No responde a los comandos de acceso remoto. • Tiene que usar un teléfono con modalidad para marcar de Touch-Tone. • Usted debe inscribir el código de seguridad correcto. • ¿El aparato colgó? Si usted no actúa por un periodo de tiempo, el aparato cuelga automáticamente. El contestador no funciona. • - GE 29897GE2 | User Guide - Page 66
Cuidado general del producto Para mantener su teléfono funcionando bien y con buena apariencia, observe las siguientes pautas: • Evite poner el teléfono cerca de calentadores (calefactores) - GE 29897GE2 | User Guide - Page 67
nuevo o uno remozado se le enviará con los cargos pagados. Lo que no cubre la garantía: • Instrucciones al cliente. (Su manual de propietario le proporciona la información con respecto a las instrucciones de operación y los controles del usuario. Cualquier información adicional debe obtenerse - GE 29897GE2 | User Guide - Page 68
Registro del Producto: • Por favor llene y envíe por correo la Tarjeta de Registro del Producto que se embarcó con su producto. Hará más fácil que hagamos contacto con usted si fuera necesario. No se requiere la devolución de la tarjeta para tener la cobertura de la garantía. Limitaciones sobre la - GE 29897GE2 | User Guide - Page 69
33 - GE 29897GE2 | User Guide - Page 70
Mensajes 19 Cómo Revisar Archivos de Llamadas 23 Cómo Revisar Números Almacenados 27 Cómo Usar el Altavoz 16 Compatibilidad con Audífonos 3 Cuidado general del producto 31 E Enmudecedor 18 F Formato de la Base 7 Funciones Básicas del Teléfono 16 Funciones del Identificador de Llamadas (Caller ID - GE 29897GE2 | User Guide - Page 71
Índice L Licensing 3 Lista de Partes 6 M Memoria 25 Memoria Llena 20 O Operación del Contestador 19 P Pantalla Sumario 22 Para grabar el saludo 10 Para Instalar el Teléfono 7 Para intercambiar entre Altavoz y Auricular 17 Para Volver a Marcar 24 Programación de la Clave de Area Local 12 Programaci - GE 29897GE2 | User Guide - Page 72
Visite el sitio de GE en: www.GE.com/phones Modelo 29897 55927740 (Rev. 5 Dom E/S) 07-47 Impreso en China Thomson Inc. 101 West 103rd Street Indianapolis, IN 46290-1102 © 2007 Thomson Inc. Trademark(s) ® Registered Marca(s) Registrada(s)
-
 1
1 -
 2
2 -
 3
3 -
 4
4 -
 5
5 -
 6
6 -
 7
7 -
8
-
9
-
10
-
11
-
12
-
13
-
14
-
15
-
16
-
17
-
18
-
19
-
20
-
21
-
22
-
23
-
24
-
25
-
26
-
27
-
28
-
29
-
30
-
31
-
32
-
33
-
34
-
35
-
36
-
37
-
38
-
39
-
40
-
41
-
42
-
43
-
44
-
45
-
46
-
47
-
48
-
49
-
50
-
51
-
52
-
53
-
54
-
55
-
56
-
57
-
58
-
59
-
60
-
61
-
62
-
63
-
64
-
65
-
66
-
67
-
68
-
69
-
70
-
71
-
72
 |
 |

Model 29897
Digital Answerer with
Call Waiting Caller ID and
Speakerphone Telephone
User’s Guide