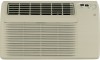
GE AJCQ10ACC Owners Manual
GE AJCQ10ACC Manual
 |
View all GE AJCQ10ACC manuals
Add to My Manuals
Save this manual to your list of manuals |
GE AJCQ10ACC manual content summary:
- GE AJCQ10ACC | Owners Manual - Page 1
ge.com Safety Instru_4ions ......... 2, 3 Operating Instructions Controls--Control I_obs .... 8, 9 Comrols_Fouch Pads ....... 4-6 Care and Cleanir N Air .... 22 Consumer Support Consmner Sul)por_ . . . Back Cover Warramy 23 *ENERGY STAR *> labeled product Cool (k@: Heal/Cool: Hoar Pump: - GE AJCQ10ACC | Owners Manual - Page 2
instructions belore it is used. ?_2Never unph,g your air conditioner I,7pulling on the power cot@ ,klways gsi[) plug firmly and pull straight out tiom th< rc(epmcle. _;2Replace immediately all electric service :tions, Electrical Requirements section [St- specific electrical connection requirements - GE AJCQ10ACC | Owners Manual - Page 3
ge.corn WARNING! USEOFEXTENSIOCNORDS--115-Volt modelsonly Because of potential safeS/hazards under break with repeat_ d use. If _1_(adapter ground t(rminal br(aks, DO NOTIJSE th_ air conditioner mull a proper ground has be(n (smblished. AttachflTgthe adapterground terminal to a waft outlet cover - GE AJCQ10ACC | Owners Manual - Page 4
COOL HI{ K/{', O SPrLeEssEIPO S(l Ih( air c,.)nditioll(:r II) ltlll f()l" 8 BOLII'S /)(_{)l'( it atltOnl_tticallv l-(lt/lllS to th( pr(vious setting. Fan Speeds (Remote control _elon th( air (onditionel: [] Make sure nothing is belween the air conditioner and the remote control that could - GE AJCQ10ACC | Owners Manual - Page 5
the LON MED ot Hlindicamr light is/it for tile desired tim speed. Vent Control The vent control is located behind the front grille on the fight side of the air discharge area. When set at CLOSEo,nly dm air in,qde the room _dll be circulated and conditioned. When set at OPEN, some inside - GE AJCQ10ACC | Owners Manual - Page 6
the tiont glille. Access them through the small rectangular opening al)ov_ the control panel. "I_qnpe_-,mne limiting can reduce enerRT costs b} limiting the lowest temperature that can he set tbr cooling. Tempemmr( limiting is corm-oiled by switches 1-3 of auxilial T colllrols. TL1(C)(TempL. imit1 - GE AJCQ10ACC | Owners Manual - Page 7
Notes. m ge.com m m 7 - GE AJCQ10ACC | Owners Manual - Page 8
Cooling--Select HIGH COOL with thu lh(ll]]osl_l[ _11 l]l_lxil_]lll_] (ool. Temp Control The turn l) (ontrol is us(d Io mainlain Ihe room mml)eramre. The (ompressor will cycle on and ofl to keep the room is provided by the ele(tric heater in the air conditioner instead ot b) th( heat pump. NOTE," - GE AJCQ10ACC | Owners Manual - Page 9
contrtd l)anel. Limits(_ heat temg Limits cool temp Each position equals approximately 3°E Veut Control The vent control is located behind tim front grille on file right skte ot the air discharge area. When set at CLOSEo, nly the air inside the room will be circulamd and conditioned. When set - GE AJCQ10ACC | Owners Manual - Page 10
cleaning of the air conditioner. Grille and Case "['111"1[11"1{}lil"I on(litioncr of} and r('movc the plug f'rom th_ wall outlet l)et;,)re cleaning. To (l_m, use w_lter and _1mild deterg('nt. Do 11o1 use bl_ ach or abrasiws. Outdoor Coils The coils on the outdoor side of"the air (onditioner sh - GE AJCQ10ACC | Owners Manual - Page 11
. ge.com Dirtyfilter Needscleaning Cloggedfilte_Greagy reduces coogng heating and airflo_z Turnthe air conditioner off before cleaning. "I"11(m' ost iml)ortm_t thing you can (lo to lnaintain the air condition( r is 1o clean the filmr at leasl evel T 3() day,,. A (:logged filter reduces cooling - GE AJCQ10ACC | Owners Manual - Page 12
Instructions Air Conditioner I [] Questions? Call 8OO.GE.CARES (800.432.2737) or Visit our Website at: ge.com BEFORE YOU BEGIN Read these instructions electric air conditioner. Aluminum house wiring may present special problems--consult a qualified electrician. IMPORTANT! GE " or specific vintage. - GE AJCQ10ACC | Owners Manual - Page 13
Instructions Read these instructions stay engaged, discontinue use of the air conditioner and contact a qualified service technician. TOOLS YOU MAY NEED ACTBChassis) RAK1082 Whirlpool Type 23W Wall Case RAK1102 RAK123A64 GE RAB30 ("F" models) FeddersWall Case "A" RAK126 Westinghouse Wall - GE AJCQ10ACC | Owners Manual - Page 14
these instructions completely and carefully. [] REMOVE LOCKING PLATE ON FRONT LEFT SIDE I[] REINSTALL LOCKING PLATE WITH TAB BEHIND WALL CASE FLANGE. TIGHTEN SCREW Ro_oIvI_IJ _ [] ATTACH POWER CORD TO BASE PAN WITH CLAMP pan cord [] REMOVE ALL SHIPPING PADS (IF PRESENT) INSIDE AIR CONDITIONER - GE AJCQ10ACC | Owners Manual - Page 15
WALL Read these instructions completely and carefully 65" to the right and 39" to the left. [] SUPPORT REQUIREMENTS FOR AIR CONDITIONER The air conditioner wall case may be installed with 1/4" min. extension out from if desired) Room side 1/4" rain. extension-inside the wall from the trim molding 15 - GE AJCQ10ACC | Owners Manual - Page 16
• These instructions are for a standard double-hung window. You will need to modify them for other types of windows, • The air conditioner can be installed without the accordion panels if needed to fit in a narrow window, See the window opening dimensions to the right. • All supporting parts must be - GE AJCQ10ACC | Owners Manual - Page 17
Installation Instructions [_]STORM WINDOW REQUIREMENTS A storm window frame will not allow the air conditioner to tilt towards the outside and 2 short screws. Clips screw [] Pull the bottom corners of the air conditioner and slide it out of the case. Insert the 2 long screws on the outside Insert - GE AJCQ10ACC | Owners Manual - Page 18
Instructions WINDOW INSTALLATIONmOPTIONAL (cont.) [] PREPAREWINDOW [] Mark the centerline of the stool. Measure from the centerline 13:W' on both sides for the panel cuts. Centerline Sill [] Measure 123A" from the centerline on both sides for the sill support may not be enough room to use the lock - GE AJCQ10ACC | Owners Manual - Page 19
Instructions [] MEASURE, CUT AND INSTALL FILLER PANELS [] Measure from the edge of the panel marks (see Prepare the Window) to the inside of the window track on each side. (A and B) Sill _ A /_'_ Left side l Window track--_ 13%" i 1 13% Width of the air conditioner sill support. Filler Panels - GE AJCQ10ACC | Owners Manual - Page 20
Installation Instructions WINDOW INSTALLATIONmOPTIONAL (cont.) [] INSTALL CASE IN WINDOW [] Peel off the backing from the bottom window gasket. ['B] Place the gasket on the stool and over the - GE AJCQ10ACC | Owners Manual - Page 21
the foam between the glass and the window to prevent air and insects from getting into the room, [] Attach the window locking bracket with 1 type E screw. I [] REPLACE AIR CONDITIONER IN CASE [] Carefully slide the air conditioner back into the case. /( > [] Reinstall the locking plate with the - GE AJCQ10ACC | Owners Manual - Page 22
Troubleshooting Tips:Save time and money] Review the chart below first and you may not need to call for service. PossibleCauses The air conditioner is tmplugged, The fuse is blown!circuit breaker is tripped, Power failm'e. The CtUTent interrupter device is tripped. What ToDo * Make sure tile air - GE AJCQ10ACC | Owners Manual - Page 23
, delivery or maintenance. If you have an installation problem, or if the air conditioner is of improper cooling, capacity for the intended use, contact your dealer or installer. You are responsible for providii_ adequate electrical connecting, facilities. i!i:F, ailure of the product resulth_ from - GE AJCQ10ACC | Owners Manual - Page 24
llOllllal business bours. Instructions contained in this manual cover procedures to be performed by any user, Otherservicing generally should be referred to qualified service personnel Caution must be exercised, since improper servicing may cause unsafe operation. ContactUs ge.com lt:7,'ou are - GE AJCQ10ACC | Owners Manual - Page 25
°F--q © °e-q www.electromenagersge.ca Instructions de sdcurit( ......... 2, 3 Instructions de foncfionmnlwnt R('glag( s--D_oulons (](_ l'eglag(_ .... 7, S Rdglages--Touches e[_i_l(:tII'(:lll (:111 4--(; Entreti_ et netloyage Fihrc fi air 10 Grille fixmtal 9 Grille e_ boifi(r 9 - GE AJCQ10ACC | Owners Manual - Page 26
(r(mis( cn tamall( ) nc rcst_ pas cntbm(', (essez d'utiliser votrc conditio)meur d'air et app(lez l*)l t - GE AJCQ10ACC | Owners Manual - Page 27
wwwz.electromenagersge.ca AVERTISSEMENT! UTILISATIODNERALLONGES--modgdes115volts uniquement A cause clu danger qu'elles font courir clans certaines conditions, neus veus recommanflons instamment de ne pas utiliser de raflonge. ((pendam, si vous d(_cz utilis( rune mllongc, il thut at)sohlment qu' - GE AJCQ10ACC | Owners Manual - Page 28
ttll d arfft. el/ position de mar(he oil Display(Affichage) O MODE Sur ]a td]d(_ mmande, uli]is_ z (eu( tbnctJon pour rdglc* lc ((mdhJonncur au mode COOL ou FAN. _L]F It'S (Olrll]l tH(k _N (]H (ollditiol]]ltq])_ utiliscz ceUc fbncdon b_x]r rdgler le mode COOLou FAN "l la vik ssc de v_ ndlau - GE AJCQ10ACC | Owners Manual - Page 29
temp&atu_e re(gee. Pearearefroidissememnat ximal--,q_lectionnelze mode COOL et la fitesse de emilateur HIGHavec un r{,gbtgede temp le c6t_droit de lazone d'&acuationd'ail:Lolsque cette commandeest i _g_t:e ;_CLOSsEeulI'air fil'Jnt&Jeurde la pi&ceest dimatis4et misen cir(ulation.Lorsqu'dleest r{,gt, - GE AJCQ10ACC | Owners Manual - Page 30
Commandesur le conditionneuIr modelesdotesde touchesa effleurement. Commandes auxiliaires--Limitation de temperature Pour aueindre les commandes mlxiliaire% enlevez 1_1grille fi-ontzde. Vous l}OUVeZ3 await accbs ell passant par l_lpetite ouvermre rectangulaire sim_e au - GE AJCQ10ACC | Owners Manual - Page 31
FF" wvwzelectromenagersge.ca OFF FAN LOW_OW FAN • OOL • COOL HIGH _ HI6H / COMMANDEDU MODE 0 Commandes COMMANDEDE LA TEMPI_RATURE &ieur dmienne plus froid. Toume>le sur la position WARMER(rouge) p(u_rque l'air devienne phls chaud. Modeles avee pompe a chaleur [.or_que la mmp&atnre ext_rieure - GE AJCQ10ACC | Owners Manual - Page 32
commande. L'intermpteur du hmlt est pour le tdglage de refi'oidissement [COOL)etcelui du bus pour le 16gl Ne de t&hautt_ment (HEAT). [ climatis_ et mis en circulation. Lol_qu'elle _t r_gl& fi OPENu,ne pa_tie de l'air inkXfieurest &v_ctl__ l'ext&iem; Potlr ouvrir ou [eR//e/l'event : I. Retiret la - GE AJCQ10ACC | Owners Manual - Page 33
salet_ ou de la suie, il est possible de les thiru nettover fi la vapeur pal- des profbssionnels en [)assant par u)tre Centre de se_vic(s GE. Grille frentale L_ grilh' frontah _ p(ut i,trc retirde pour un llell()yHgo ell profon(leur oil l>:mr ace&let aux IIIlI]I(_F()Sde modble et - GE AJCQ10ACC | Owners Manual - Page 34
le ris(ltle de d_|(*rtnosil& prdcoces. Pour nettoyer le filtre a air: • Enlevez les particules grossi_"r( savec l'aspir4t eul; • Faites drculer rendement de l'appareil et l'efficadlt _ de la dimatisation, du chmltl;ge el de la ventilalion. Vous pouvez "+_)usprocurer des filtres de remplacemellt - GE AJCQ10ACC | Owners Manual - Page 35
• Note au consommateur - Conservez ces instructions pour consultation ulterieure. • Niveau de en aluminium peut occasionner des problemes particuliers--consultez un eloctricion qualifie adapter ad_quatement le Iogement au conditionneur d'air GE. Repondez aux questions suivantes et consultez - GE AJCQ10ACC | Owners Manual - Page 36
toutes ces instructions attentivement. enfonc_, cessez d'utiliser votre conditionneur d'air et appelez un technicien de service qualifi& OUTILS DONT VOUS POUVEZ AVOIR de 2574 po L x 16_ Do H x 2374 DoP Adapte un Iogement mural GE 9 un chgssis de module . Convient au Iogement mural RAB30 de 26 L - GE AJCQ10ACC | Owners Manual - Page 37
de montage INSTALLATION D'UN MODI_LE ccJ ii DANS UN LOGEMENT MURAL EXISTANT Veuillez life toutes ces instructions attentivement. [] RETIREZ LA PLAQUE DE VERROUILLAGE SUR LE C6TI_ GAUCHE AVANT Plaque de _l[ verrouillage L_ /1 Enlevez J la vis I [] RI_INSTALLEZ LA PLAQUE DE VERROUILLAGE - GE AJCQ10ACC | Owners Manual - Page 38
INSTALLATION A TRAVERS LE MUR Veuillez lire toutes ces instructions attentivement. []PREPARATION DE L'OUVERTURE DANS LE MUR charpente du mur. Linteau - Pour les murs de ma9onnerie, utilisez un linteau pour supporter les briques ou les blocs au-dessus de I'ouverture. Le Iogement mural ne doit passe - GE AJCQ10ACC | Owners Manual - Page 39
la fen_tre _ verrouillage :onditionneur d'air Quincaillede pour la ferrure de support Type A (9) Type C (peintes) (6) Type D (2) Type B (2) Type E (4) Agrafe d'_cartement (2) Contre-ecrou (2) & Boulon de reglage (2) Grande rondelle (2) [] INSTRUCTIONS RELATIVES A LA FENETRE I I B====4B - GE AJCQ10ACC | Owners Manual - Page 40
de montage I-2]INSTRUCTIONS RELATIVES A LA CONTRE-FENI TRE Le cadre de la contre-fen_tre emp_che le conditionneur de pencher vers I'exterieur et donc de se drainer ad_quatement. Pour - GE AJCQ10ACC | Owners Manual - Page 41
Instructions de montage INSTALLATION DE FENI TRE (EN OPTION) (suite) [] PRI PAREZ [ement Boulon de r6glage-_),_ Grande rondelle-_- _;) (pour seuils en bois) i [] Avant de fixer les supports de seuil, placezles sur le rebord de la fen6tre. Placez I'agrafe d'6cartement le plus pros possible du - GE AJCQ10ACC | Owners Manual - Page 42
Instructions de montage [] MESUREZ, COUPEZ ET INSTALLEZ LES PANNEAUX DE FERMETURE [] De Ioger dans les rails de la fen6tre et ins6rez la languette dans le support de seuil. 3 po Inserez la languette dans le support de seuil [] Assemblez les composants des panneaux. Enlevez le doublage en papier - GE AJCQ10ACC | Owners Manual - Page 43
Instructions de montage INSTALLATION DE FENI TRE (EN OPTION) (suite) [] MONTEZ LE LOGEMENT DANS LA FENETRE [] Enlevez le doublage en papier du joint d'etanch6it6 inferieur de la fen6tre. rB'lPlacez le joint d'etanch6it_ sur le rebord de la fen6tre et par-dessus les supports, a 6galite avec le bord - GE AJCQ10ACC | Owners Manual - Page 44
Instructions de montage [] MONTEZ LE JOINT D'I_TANCHI_ITI_ EN MOUSSE DE LA FENETRE ET LA FERRURE DE VERROUILLAGE [] Coupez, a la largeur de la fen_tre, le joint d'etanchdit6 supdrieur en mousse. [] Ins6rez la mousse entre la vitre et la fen6tre pour emp6cher I'air et les insectes de p6n6trer dans - GE AJCQ10ACC | Owners Manual - Page 45
Avant ' ap--pem"-ur "le service.., En cas de panne : E. conom,/sezdu tempset de t¢argent.! E" tuc,helze @!x& Le filh'e h air est sale. • Netto_ez le filtt_ au moins tousles ._0 joule. Consult_ r la section Instructions de fonctionnement. ta chambre t3tait chautde. L'air froid s'6chappe de la - GE AJCQ10ACC | Owners Manual - Page 46
Notes. 22 - GE AJCQ10ACC | Owners Manual - Page 47
les frais de transport ou apporter exp#dier le produit _ un centre de service autoris# GE. Certaines provinces ne permettent pas I'exc/usion ou la limitation des dommages indirects bureau local ou provincial de protection des consommateurs. 23 Garant : General Electric Company. Louisville, KY 40225 - GE AJCQ10ACC | Owners Manual - Page 48
fidre rdl)m-er "_otre dleclrom&mger, GE, il st/Hlt cle no(is I_l_phon(m 1.800.361.3400 Studiodeconceptionrealiste Sur dcmande, GE petit fot/rllir a mobilitd rdduilt. n'importe quel ntilisnteur, tes antres reparations doivent generalement #tre effectuees par un technicien qualifie. Soyez prudent - GE AJCQ10ACC | Owners Manual - Page 49
ge.com © © Instrucciones de segmqdad ..... 2, 3 InsO'ucciones de operacidn Comrolcs--t)otones de control 8, 9 08, 10 AS( _ DCC _'_ © < ENERGYSTAR Como tm asociado dr" Eba_GY STAR c_, GE ha determinado que este producto ctlnlpl( COil las gufas de ENERGY STAR ('° para - GE AJCQ10ACC | Owners Manual - Page 50
s_ glln se (lest ribe en el Manual del propietm'io. _2 Este acondicionador de aire del)e insmlarse correcmnlente de acuerdo con las hlstrucciones algllllO de St/S eXtI'(:ll,OS. _;2Apague el control de modo y desenchutc su acondicionador it( air( alms d( hacer cual/luier reparacidn o linlpiat; - GE AJCQ10ACC | Owners Manual - Page 51
ge.com iAD VERTENCIA! USODECABLEDSEEXTENSE ION--Modedleo!s15voltiossolamente Debido a! vt`(es. Si se rompe el terminal de conexidn a tierm del adapmdol; NO USE el a(ondicionador de air( hasm qu( la conexidn a fierra s( hava testable( ido. Unirel terminal de conexibna tierradel adaptadora un - GE AJCQ10ACC | Owners Manual - Page 52
Controles Control remoto Cuandoel acondicionadodre aireesta encendidos,eencenderaautomaticamenteen el Oltimonivel establec[do. O ON/PARAR Apaga ) plende el acondicionador tie aire. O Pantalla o El/ O(Dl O(201111o1 lerllOlO, /Isa(lo pal/ilj/islat (_1 ao:mdi(ionador de air( a/modo COOL - GE AJCQ10ACC | Owners Manual - Page 53
ge.com MODO COOL (FRIO) Controrel mote interne se enfi-iarfiin_s.Si Io @lsm a un nfimero masol; l. Pxesione el bot6n COOL, Control del escape E1controldel escapese encuentra ubicadodetnlsde la i@lla delanwraen el lade derechodel fireade descaqgade air< Cuandose fiiael/CLOSEf,inicamenteel aire - GE AJCQ10ACC | Owners Manual - Page 54
Acerca de los controlesen el acondicionadorde aireI modeloscon teclas de toque. Controles auxiliares--Limitaci6n de temperatura Pal'd alcallZal- los COllll-oles auxiliares l-ellltlev_ la parfilla flontal. Logre acc_ so a (llos a tl-,ix'Os(k la pe(luefla abermm - GE AJCQ10ACC | Owners Manual - Page 55
Notas. m ge.com i m m t_ m m - GE AJCQ10ACC | Owners Manual - Page 56
I _F _gg_ CONTROLDE MODO O CONTROLDE LATEMPERATURA O Controles _) C,°]_l_.,O(ll_del.yHdy;oLLOWCO0L Paraenfriamiento silencioso y enfriamiento girt el botdn a COOLER(azul) el aire interior se volver,_ lmis tifo. Gire el botdn a WARMER(rojo) y el aire interior se volvcl-,im;is caliente. Modelos - GE AJCQ10ACC | Owners Manual - Page 57
ge COOL(enfiimniento))en CYCLpEare HEAT (('alenramienro). Losmodelossolamentedeenfriamiento fienen tm interlupror de balancfn en el fieme de la c:!ia de control establezca en OPENs,e liberarfi l_r e] tubo de escape ciemt cantidad de aire hacia el exteri(m Para abllr 0 ce/'l'gtF el €'scape: 1. Retire - GE AJCQ10ACC | Owners Manual - Page 58
Rejilla y caja Apagta (1 acondkiolmdor de air( y retire (1 ( ll(hll_( d(! la [i)[ll_ (OFl'iell[_! _lllt(:s (1(: lillll) sua'_c. Bobinas exteriores Los resortt, sen el lado exterior del acondicioYlador de aire deben revisarse con flecuencia. Si est_in obsllui(Ios con suciedad u hollfn se pueden - GE AJCQ10ACC | Owners Manual - Page 59
If;is. [ n filtro obstmido wduce (1 enfriamiento, la calethcci6n v el flt{jo del aire. Mantener el filtro del aim limpie: • Disminu) e el coslo de (q)eracidn. • disponibles a troy& de su COllcesionario (;E, centro de se_xicios y ])aries de GE o de los t_:cnicos (le selxi(io al cliente (( ustomer ( - GE AJCQ10ACC | Owners Manual - Page 60
de un desempeSo deficiente o la falla del producto, Io cual no esta cubierto por los terminos de la garantia de GE. PREGUNTAS SOBRE LA CALIFICACI( N DEL MODELO J Los acondicionadores de aire modelo J pueden caber en las cajas de pared existentes. Sin embargo, a menudo necesitan un kit para adaptar - GE AJCQ10ACC | Owners Manual - Page 61
pared Whirlpool de 2574" ancho x 16_4" alto x 23W' profundidad Adapta la caja de pared GE a un chasis modelo "J". Ajusta la caja de pared RAB 30 de 26" ancho x 18 para exteriores, use este kit para garantizar el flujo de aire correcto. Rejilla exterior est_ndar de aluminio (Incluida con las cajas - GE AJCQ10ACC | Owners Manual - Page 62
el cable electrico esta en la I I-g]UpaNrteA deLAabaRjoEJdeILlLaArejiDllaELdAelaNntTerEa.RA Retire los protectors de empaque (si aplicable) [] CUIDADOSAMENTE DESLICE EL ACONDICIONADOR DE AIRE HACIA ATRAS EN LA CAJA Verifique que el tubo en la unidad no toque la caja de pared y que la instalaci6n de - GE AJCQ10ACC | Owners Manual - Page 63
de 230/208 voltios la Iongitud del cable es 65" hacia la derecha y 39" hacia la izquierda. [_]REQUISITOS DE APOYO PARA EL ACONDICIONADOR DE AIRE El mortero o cemento entre la caja y el ladrillo alrededor de la caja puede cortarse mas baja a aproximadamente 45 ° para mejorar el calafateo. Interior - GE AJCQ10ACC | Owners Manual - Page 64
ventana de espuma para parle superior .de la ventana Empaque para parte superior de la caja / _Empaque para parte inferior de la ventana Soporte bloqueo pdaeraventana • i I _i I i • I I r. _,condicionador de aire Herramientas de soporte para apoyo Type A (9) Type C (pintados) (6) Type - GE AJCQ10ACC | Owners Manual - Page 65
la rejilla desde el interior de la caja, use dos tornillos cortos. Retire el _.__ I_ tornillo [] Hale las esquinas de la parte inferior del acondicionador de aire y deslice hacia fuera de la caja. 17 Inser[e los dos tornillos Largos en el exterior Inserte los dos tornillos cortos en el - GE AJCQ10ACC | Owners Manual - Page 66
Instrucciones para la instalacion INSTALACION EN UNA VENTANAmOPCIONAL (cont.) [] PREPARELA VENTANA [] Marque la linea central de la alfajia interior. Mida desde la linea central 13%" en ambos lados para los cortes de los paneles. AIfajia Linea central exterior [] Mida 12%" desde la linea central - GE AJCQ10ACC | Owners Manual - Page 67
Empaq inel Type C tornillos _intados) Pestafla-- A ,_r,.._ Lado izquierdo Ancho del acondicionador de aire .._.I,.-_ B Lado derecho [] Instale los paneles en la ventana. Coloque los ganchos de resorte a 3" de la parte superior y la [] Marque las medidas AyB en cada lado de la placa del panel - GE AJCQ10ACC | Owners Manual - Page 68
la ventana se encuentra con la caja. [] Pele el respaldo del empaque para la parte superior de la caja. [] Sostenga la caja, abra la ventana y coloque el Coloque el empaque de vinilo para la ventana encima del empaque para la parte superior de la caja. Inserte las pestaSas del panel a traves de los - GE AJCQ10ACC | Owners Manual - Page 69
EMPAQUE PARA LA VENTANA Y EL SOPORTE DE BLOQUEO [] Corte el empaque de espuma para la parte superior de la ventana al ancho de la ventana. [] Rellene la espuma entre el vidrio y la ventana para evitar que el aire y los insectos entren en la habitaci6n. [] Una el soporte de bloqueo de la ventana - GE AJCQ10ACC | Owners Manual - Page 70
se manti_ ne en su hlgm; no utilice m_s {l acondicionador de aire y conmnfquese con un t6cnico calificado. El fluid de aire esVa restringido. El control de temperature no est_ ajustado apropiadamente, El Ffltro de aire estfi sucio. * Cerci6rese de que no existe ningtma corona, persiana o mueble - GE AJCQ10ACC | Owners Manual - Page 71
de diseflo a?.uda a removel la humedad y mcjom la eficienda. • Quizf_s (_,c/_che q!m el mmno_,taU) hace clic cuando el c(mlprcsor hace dclo enm- encendido y apag_tdo. ge.com • E1 agua se acurmlla en la ban(h-ja durant( dias Ihlviosos o con mucha lmmedad. El agua podt fa detranlatse y gomar desde el - GE AJCQ10ACC | Owners Manual - Page 72
m m m m _" 24 - GE AJCQ10ACC | Owners Manual - Page 73
Notas. m i m _D m t_ m mqw_4F 25 - - GE AJCQ10ACC | Owners Manual - Page 74
m _ Notas. gm_ €_ m m €_ _l_qq m r.rl Jlmm_ €_ _ 26 - GE AJCQ10ACC | Owners Manual - Page 75
ii_ii_i!il;iiii_!i_i_i IInako Cualquierparte del acondicionador d( air( quc 1_11( d(bido a cI,A'ectos en no dispone de servicio por parte de un proveedor de servicio autorizado de GE,podria tener que hacerse cargo General en su Iocalidad. Garante: General Electric Company. Louisville, KY 40225 27 - GE AJCQ10ACC | Owners Manual - Page 76
pi( zas o inchlso hater una (ira ev, lfnea para que vengml a realizar una rel)aracidn. Soliciteunareparaci6n ge.com El s(rvicio de ( xpertos (;E (st_ a tan s61o un paso ,:l( su pu( rta. iEntr . Cnalquier otra reparacion deberia, por regla general, referitse a personal calificado autorizado. Debe
-
 1
1 -
 2
2 -
 3
3 -
 4
4 -
 5
5 -
 6
6 -
 7
7 -
8
-
9
-
10
-
11
-
12
-
13
-
14
-
15
-
16
-
17
-
18
-
19
-
20
-
21
-
22
-
23
-
24
-
25
-
26
-
27
-
28
-
29
-
30
-
31
-
32
-
33
-
34
-
35
-
36
-
37
-
38
-
39
-
40
-
41
-
42
-
43
-
44
-
45
-
46
-
47
-
48
-
49
-
50
-
51
-
52
-
53
-
54
-
55
-
56
-
57
-
58
-
59
-
60
-
61
-
62
-
63
-
64
-
65
-
66
-
67
-
68
-
69
-
70
-
71
-
72
-
73
-
74
-
75
-
76
 |
 |

ge.com
©
©
©
.<
Safety Instru_4ions
.........
2, 3
Operating
Instructions
Controls--Control
I_obs
....
8, 9
Comrols_Fouch
Pads
.......
4-6
Care
and
Cleanir
N
Air
Filter
. ..................
11
Front
Grille
.................
10
Grilk
and
(;_se
..............
10
Outdoor
Coils
...............
10
Installation
Insln_ctions
Before
x,i)u
Begin
..........
12, 13
Installing
a J-Model
in
an
Existing
Wall Case
.........
14
Through-the-Wall
Installation--Optional
........
15
Window
Installation--
Optional
on
models
so equipp(
d
..............
lC_21
Troubleslmolmg
71ps
........
22
NoHnal
Operating
Sounds
....
22
Consumer Support
Consmner
Sul)por_
..
.
Back
Cover
Warramy
...................
23
*ENERGY
STAR
*>
labeled
product
ENERGYSTAR
.\s
aIl
ENERGY
STAR
a_ partner;
(;E
has
determined
that
this
product
meets
th_
ENERGY
STAR
°o
guidelines
t;.w
(
llerg)"
,:fflciencx;
Write the modeland
serial
numbershere:
Model #
Serial
#
Find
thes_
lmmbers
Oll _1label
on
file fr*mt ot th(
1)_lsc
l);m/)ehind
the front grille.
Cool
(k@:
AJCH
08,
10
ACC
_
A]CH
10,
12
DCC
_
_4]CQ
06
LCC*
A](.'Q
08,
10,
12
ACC',"
A JCO. 10,
12
DC(?
_
,4[C5
06
LC(/_
A JCS
08,
10
ACC':'
4[(N
OR
10,
12
DC(?
"_
Heal/Cool:
,4]EH
12
l)(;(7
_4]ES
06
LSC
AlES
08
ASC
AJE,S'
OR
10,
12
DCC
.4/_:S
10
D,SC
Hoar
Pump:
AJHS
08
ASC
_
.41H5" 08,
10
DCC*
_pa_ol
For
a Sp_mish
wwsion
of this
manual,
visit
our
W,:bsite
_t ge,com,
Para
consuhar
lllla
veFsioIl
(11
espaflol
de
este
lll2t.llll_ll
de
illStrllcciolles,
visite
lltleStrO
sitio
de
intern(_
g(.com.
Fran_aise
For
a Fr(nch
version
ot
this
manual,
visit
our
W(bsi_e
a_ _'.ele(trom(
nag(
rsge.(a
Polll-1HI(
version
fiancaise
de
ce
lllallll(1
d'utilisadon,
veuill(z
visiter
notre
site
w(b
_'_
l'adr(sse
www.(l(ctroinenagersge.ca
TINSEA518JBRZ
49-7572
03-07 JR