GE GTR10HAXRWW Use and Care Manual
GE GTR10HAXRWW Manual
 |
UPC - 084691187882
View all GE GTR10HAXRWW manuals
Add to My Manuals
Save this manual to your list of manuals |
GE GTR10HAXRWW manual content summary:
- GE GTR10HAXRWW | Use and Care Manual - Page 1
4 Ice Service 5 Storage Drawers 4 Installation Instructions Preparing to Install the Refrigerator 8 Reversing the Door Swing 9-12 Troubleshooting Tips 13-15 Normal Operating Sounds 13 Consumer Support Consumer Support 18 Warranty (U.S 17 Owner's Manual and Installation Instructions GTL12HBX - GE GTR10HAXRWW | Use and Care Manual - Page 2
a live wire filament. (A burned-out light bulb may break when being replaced.) Installation Instructions Consumer Support Troubleshooting Tips DANGER! RISK OF CHILD ENTRAPMENT PROPER DISPOSAL OF THE REFRIGERATOR Child entrapment and suffocation are not problems of the past. Junked or abandoned - GE GTR10HAXRWW | Use and Care Manual - Page 3
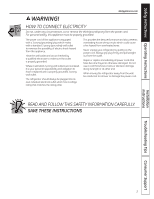
the possibility of electric shock hazard from this appliance. Have the refrigerator away from the wall, be careful not to roll over or damage the power cord. READ AND FOLLOW THIS SAFETY INFORMATION CAREFULLY. SAVE THESE INSTRUCTIONS Installation Instructions Troubleshooting Tips Consumer Support - GE GTR10HAXRWW | Use and Care Manual - Page 4
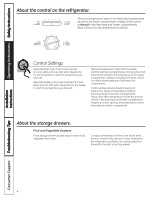
store fruits, vegetables and meats. To replace the drawers and the cover above them, the door must be fully opened. In some installations, the refrigerator may have to be moved away from the wall for the door to be fully opened. Installation Instructions Consumer Support Troubleshooting Tips 4 - GE GTR10HAXRWW | Use and Care Manual - Page 5
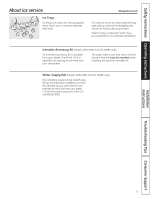
containing copper tubing, shutoff valve, fittings and instructions needed to connect the icemaker to your cold water line are available at extra cost from your dealer or from Parts and Accessories. In the U.S., call 800.626.2002. Installation Instructions Troubleshooting Tips Consumer Support 5 - GE GTR10HAXRWW | Use and Care Manual - Page 6
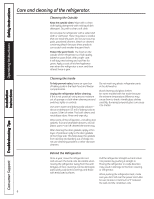
care, it will stay new-looking and rust free for years. Apply a coat of kitchen/appliance wax when the refrigerator is new, and then at least twice a year. Installation Instructions Consumer Support Troubleshooting Tips Cleaning the Inside To help prevent odors, leave an open box of baking soda - GE GTR10HAXRWW | Use and Care Manual - Page 7
open. Preparing to Move Secure all loose items such as shelves and drawers by taping them securely in place to prevent damage. Be sure the refrigerator stays in an upright position during moving. Installation Instructions Troubleshooting Tips Consumer Support 7 - GE GTR10HAXRWW | Use and Care Manual - Page 8
Installer - Be sure to leave these instructions with the Consumer. • Note to Consumer - Keep these instructions for future reference. • Skill level - Installation of this appliance requires basic mechanical skills. • Completion time - Refrigerator Installation 15 minutes Reversing the Door Swing - GE GTR10HAXRWW | Use and Care Manual - Page 9
instructions all the way through before starting. • Handle parts carefully to avoid scratching paint. • Set screws down by their related parts side, follow these same instructions and reverse all references to left and right. Unplug the refrigerator from its electrical outlet. Empty all door shelves - GE GTR10HAXRWW | Use and Care Manual - Page 10
Installation Instructions REVERSING THE DOOR SWING (CONT.) 2 REMOVE THE FRESH FOOD DOOR Tape the door shut with masking tape. Remove the center hinge and shim by removing - GE GTR10HAXRWW | Use and Care Manual - Page 11
Installation Instructions 4 TRANSFER BOTTOM HINGE TO THE LEFT To access the bottom hinge, move the refrigerator so it is 30″ from a wall. Then carefully tip the refrigerator back until it rests against the wall. CAUTION: Be sure that the coils on the back of the refrigerator do not rest against the - GE GTR10HAXRWW | Use and Care Manual - Page 12
Installation Instructions REVERSING THE DOOR SWING (CONT.) 8 TRANSFER FREEZER DOOR STOP TO THE LEFT Remove the door stop from the bottom of the right side of the - GE GTR10HAXRWW | Use and Care Manual - Page 13
HUMMM... WHOOSH... ■ The new high efficiency compressor may run faster and longer than your old refrigerator and you may hear a high-pitched hum or pulsating sound while it is operating. ■ You sound due to pressure equalization. Installation Instructions Troubleshooting Tips Consumer Support 13 - GE GTR10HAXRWW | Use and Care Manual - Page 14
Instructions Safety Instructions Before you call for service... Troubleshooting Tips Save time and money! Review the charts on the following pages first and you may not need to call for service. Problem Refrigerator does not operate Possible Causes Refrigerator in defrost cycle. Refrigerator - GE GTR10HAXRWW | Use and Care Manual - Page 15
cleaning. • Wipe surface dry. • Replace fuse or reset the breaker. • See Replacing the light bulb. • Move the food away from the air vent. • Move the refrigerator control to a warmer temperature setting one increment at a time. Installation Instructions Troubleshooting Tips Consumer Support 15 - GE GTR10HAXRWW | Use and Care Manual - Page 16
Notes. 16 Consumer Support Troubleshooting Tips Installation Instructions Operating Instructions Safety Instructions - GE GTR10HAXRWW | Use and Care Manual - Page 17
service under the warranty. For The Period Of: GE Will Replace: One Year From the date of the original purchase Any part of the refrigerator of the light bulbs, General. Warrantor: General Electric Company. Louisville, KY 40225 Installation Instructions Troubleshooting Tips Consumer Support 17 - GE GTR10HAXRWW | Use and Care Manual - Page 18
Support. GE Appliances Website GEAppliances.com Have a question or need assistance with your appliance? Try the GE Appliances Website, 24 hours a day, any day of the year! For greater convenience and faster service, you can now download Owner's Manuals, order parts or even schedule service - GE GTR10HAXRWW | Use and Care Manual - Page 19
ón y solución de problemas . . . 13-15 Sonidos normales de la operación . . . 13 Apoyo al cliente Apoyo al cliente 18 Garantía 16 Manual del propietario e instalación GTL12HBX GTR10HAX GTR12HBX Escriba los números de modelo y de serie aquí: Modelo Serie Usted puede encontrarlos en una etiqueta - GE GTR10HAXRWW | Use and Care Manual - Page 20
aparato sólo para los fines que se describen en este Manual del propietario. PRECAUCIONES DE SEGURIDAD Cuando use electrodomésticos, evite el contacto con las partes móviles del mecanismo de expulsión, o con el elemento calefactor localizado en la parte inferior del dispositivo para hacer hielo - GE GTR10HAXRWW | Use and Care Manual - Page 21
Seguridad Operación GEAppliances.com ¡ADVERTENCIA! COMO CONECTAR LA ELECTRICIDAD Bajo ninguna circunstancia debe cortar o quitar la tercera punta (tierra) de la clavija. Para su seguridad personal, este aparato deberá conectarse debidamente a tierra. El cable eléctrico de este aparato está - GE GTR10HAXRWW | Use and Care Manual - Page 22
SafetSye Ignusritrduacdtions Operación Sobre el control del refrigerador. Hay un control de temperatura en el compartimento de alimentos frescos y en el compartimento del congelador. Inicialmente configure el control en Normal de los compartimentos de alimentos frescos y del congelador. Deje pasar - GE GTR10HAXRWW | Use and Care Manual - Page 23
de hielo. El IM-4A, IM-6 o kit de accesorios equivalente funcionará con su refrigerador. La tapa de la válvula de agua provista junto con el manual del usuario se debe instalar al realizar la instalación del kit opciona de la máquina de hacer hielo. Kits de suministro de agua (Sólo modelos - GE GTR10HAXRWW | Use and Care Manual - Page 24
de la pintura. Proteja el acabado de la pintura. El acabado de la parte exterior del refrigerador es de una pintura cocida de alta calidad. Con los nuevo, y luego por lo menos dos veces por año. Limpieza de la parte interior Para ayudar a prevenir olores, deje una caja abierta de bicarbonato de - GE GTR10HAXRWW | Use and Care Manual - Page 25
de la luz introduciendo un destornillador plano dentro de la ranura en la parte superior de la protección y ejerciendo presión. Reemplácela con una tienda local, comuníquese con el servicio al cliente de GE. Introduzca la lengüeta en la parte inferior de la protección de la luz dentro de la - GE GTR10HAXRWW | Use and Care Manual - Page 26
ón Refrigerador Modelos GTL12HBX, GTR10HAX, GTR12HBX ¿Preguntas? Llame al 800.GE.CARES (800.432.2737) o bien Visite nuestra página Web: instalación incorrecta. DISTANCIAS Sólo instalación independiente. Despeje Mínimo: Parte trasera - 3″ desde las serpentinas del condensador PATAS DE NIVELACIÓN - GE GTR10HAXRWW | Use and Care Manual - Page 27
la puerta sobre una superficie que no raye con la parte exterior hacia arriba. NOTA: Cuando quite la puerta, preste atención a las arandelas entre la bisagra central y la parte inferior de la puerta de congelador porque pueden pegarse a la puerta. No - GE GTR10HAXRWW | Use and Care Manual - Page 28
Quite la cinta que sostiene la puerta cerrada. Levante la puerta de alimentos frescos y quítela de la bisagra inferior. Coloque la puerta con la parte exterior hacia arriba sobre una superficie que no raye. NOTA: Cuando quite la puerta, preste atención a las arandelas entre la bisagra central y la - GE GTR10HAXRWW | Use and Care Manual - Page 29
instálelos sobre el derecho. 5 TRANSFIERA LA TRABA DE LA PUERTA DE ALIMENTOS FRESCOS A LA IZQUIERDA Quite la traba de la puerta de la parte inferior del lado derecho de la puerta. Transfiera los botones obturadores del lado inferior izquierdo al lado derecho. Instale la traba de la puerta sobre - GE GTR10HAXRWW | Use and Care Manual - Page 30
EL VAIVÉN DE LA PUERTA (CONT.) 8 TRANSFIERA LA TRABA DE LA PUERTA DEL CONGELADOR A LA IZQUIERDA Quite la traba de la puerta de la parte inferior del lado derecho de la puerta. Transfiera los botones obturadores del lado inferior izquierdo al lado derecho. Instale la traba de la puerta sobre - GE GTR10HAXRWW | Use and Care Manual - Page 31
Seguridad Operación Sonidos normales de la operación. GEAppliances.com Los refrigeradores más nuevos producen sonidos diferentes a los modelos más antiguos. Los refrigeradores modernos tienen más funciones y usan tecnología más reciente. ¿Usted escucha lo que yo escucho? Estos sonidos son - GE GTR10HAXRWW | Use and Care Manual - Page 32
nivelación frontales • Ver Patas de nivelación. deben ajustarse. El motor funciona por períodos prolongados o se enciende y apaga frecuentemente alimentos transmiten olor/sabor a los cubitos de hielo Debe limpiarse la parte interior del refrigerador. • Envuelva bien los alimentos. •Ver Cuidado y - GE GTR10HAXRWW | Use and Care Manual - Page 33
fuertes deben envolverse bien. • Mantenga una caja abierta de bicarbonato de sodio en el refrigerador; cámbiela casa tres meses. Debe limpiarse la parte interna. • Ver Cuidado y limpieza. Resulta común durante períodos • Seque la superficie con un paño. de humedad elevada. Se acumula humedad en - GE GTR10HAXRWW | Use and Care Manual - Page 34
situado en un área que no dispone de servicio por parte de un proveedor de servicio autorizado de GE, podría tener que hacerse cargo de los costes de env consumidor local o la oficina del Attorney General en su localidad. Garante: General Electric Company. Louisville, KY 40225 Instalación Servicio - GE GTR10HAXRWW | Use and Care Manual - Page 35
Notas. GEAppliances.com Seguridad Operación Instalación Solucionar problemas Servicio al consumidor 17 - GE GTR10HAXRWW | Use and Care Manual - Page 36
GE Appliances, 24 horas al día, cualquier día del año! Para mayor conveniencia y servicio más rápido, ya puede descargar los Manuales horas normales de oficina. GE Consumer Home Services estará aún ahí cuando íbanos a: General Manager, Customer Relations GE Appliances, Appliance Park Louisville,
-
 1
1 -
 2
2 -
 3
3 -
 4
4 -
 5
5 -
 6
6 -
 7
7 -
8
-
9
-
10
-
11
-
12
-
13
-
14
-
15
-
16
-
17
-
18
-
19
-
20
-
21
-
22
-
23
-
24
-
25
-
26
-
27
-
28
-
29
-
30
-
31
-
32
-
33
-
34
-
35
-
36
 |
 |

Safety Instructions
. . . . . . . . . . . . . 2, 3
Operating Instructions
Care and Cleaning . . . . . . . . . . . . . . . . . .6, 7
Control Settings . . . . . . . . . . . . . . . . . . . . . . .4
Ice Service . . . . . . . . . . . . . . . . . . . . . . . . . . . . . .5
Storage Drawers . . . . . . . . . . . . . . . . . . . . . . .4
Installation Instructions
Preparing to Install
the Refrigerator
. . . . . . . . . . . . . . . . . . . . . . 8
Reversing the Door Swing . . . . . . . . . . 9–12
Troubleshooting Tips
. . . . . . . . 13–15
Normal Operating Sounds . . . . . . . . . . .13
Consumer Support
Consumer Support . . . . . . . . . . . . . . . . . .18
Warranty (U.S.) . . . . . . . . . . . . . . . . . . . . . .17
GEAppliances.com
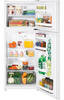
Refrigerators
Top Freezer
197D8071P002
49-60602
04-09 JR
Write the model and serial
numbers here:
Model #
____________________
Serial #
____________________
You can find them on a label inside
the refrigerator.
GTL12HBX
GTR10HAX
GTR12HBX
Owner’s Manual and
Installation Instructions