GE JES1656SJ Owners Manual
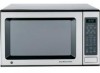
GE JES1656SJ - 1.6 cu. Ft. Full-Size Microwave Manual
 |
View all GE JES1656SJ manuals
Add to My Manuals
Save this manual to your list of manuals |
GE JES1656SJ manual content summary:
- GE JES1656SJ | Owners Manual - Page 1
- GE JES1656SJ | Owners Manual - Page 2
- GE JES1656SJ | Owners Manual - Page 3
- GE JES1656SJ | Owners Manual - Page 4
- GE JES1656SJ | Owners Manual - Page 5
- GE JES1656SJ | Owners Manual - Page 6
- GE JES1656SJ | Owners Manual - Page 7
- GE JES1656SJ | Owners Manual - Page 8
- GE JES1656SJ | Owners Manual - Page 9
- GE JES1656SJ | Owners Manual - Page 10
- GE JES1656SJ | Owners Manual - Page 11
- GE JES1656SJ | Owners Manual - Page 12
- GE JES1656SJ | Owners Manual - Page 13
Component Identification ∫ KV-S2025C / KV-S2025CU Document guides Paper feed roller Feed tray Feed extension tray Business card stopper Exit extension tray Exit stopper Exit tray DIP switch AC inlet Power cord ADF - GE JES1656SJ | Owners Manual - Page 14
Component Identification ∫ KV-S2045C / KV-S2045CU Document guides Paper feed roller Feed tray Feed extension tray Business card stopper Exit stopper Exit door ADF door release STOP/START button LED Radiation vent Power switch Business card guides SCSI connectors Imprinter door pull Imprinter door - GE JES1656SJ | Owners Manual - Page 15
∫ Power turn-on sequence 1 Turn on the power of the scanner. ≥ Press the power switch. (The LED will now light.) 2 Turn on the power of the host computer after scanner's LED lights green. Component Identification LED ∫ About LED LED indicates the status of the scanner as follows: LED light Green - GE JES1656SJ | Owners Manual - Page 16
Component Identification ∫ About the SCSI setting When connecting the scanner to a SCSI chain using a SCSI cable, perform the SCSI ID setting correctly. The scanner is provided with a DIP switch for the SCSI ID No. setting and the terminator setting. SCSI ID Setting ID No. 0 1 2 3 4 5 6 7 #2 OFF - GE JES1656SJ | Owners Manual - Page 17
the documents, hold firmly 1 and pull them apart as shown in the illustration. Repeat these steps as necessary. 2 3 2 Carefully align the documents. 3 Adjust the document guides slightly larger than the actual size of the documents. Document - GE JES1656SJ | Owners Manual - Page 18
the business card stopper for larger documents than their acceptable size. It will cause paper jams. A Exit extension tray Business card guides 5 Place the documents on the feed tray with the side to be scanned facing up. ≥ Be sure to place the documents on the feed tray - GE JES1656SJ | Owners Manual - Page 19
the size of the documents. Loading Documents Document guides 7 Set documents under the paper feed roller. 1 Lift rollers to swell up. ≥ The amount of documents should not exceed the limit mark on the document guide. This may cause a paper jam or skew. ≥ Be sure to remove the document from the exit - GE JES1656SJ | Owners Manual - Page 20
top edge may cause paper jams. If a paper jam occurs, remove the jammed sheet according to the following procedure. ∫ Removing paper jams from the feed part 1 Push the ADF door release to open the ADF door. 2 Remove the jammed document. ≥ If the jammed document remains at the feed tray side, pull - GE JES1656SJ | Owners Manual - Page 21
3 Make sure that the sensor rollers are installed properly, before closing the ADF door. ≥ If the sensor rollers are removed, reattach them. (Refer to page 32.) Clearing Paper Jams Sensor roller (front) 4 Close the ADF door. ≥ When you close the ADF door, close it securely until the door is locked - GE JES1656SJ | Owners Manual - Page 22
Cleaning the Unit ∫ Outside of the scanner Clean the unit at least once a month. 1 Turn the power off. 2 Clean the cover with a soft cloth. 3 Remove dirt and dust from the radiation vent with a brush. Radiation vent ∫ Inside the scanner ≥ Clean the unit at least once a week or when 20,000 sheets - GE JES1656SJ | Owners Manual - Page 23
of time before using it, the alcohol will evaporate. Please use the roller cleaning paper immediately after opening the bag. The roller cleaning paper (Model No. KV-SS03) is available from the dealer where you purchased your scanner. For supplies and accessories: Call 1-800-346-4768 (U.S.A. only) or - GE JES1656SJ | Owners Manual - Page 24
Cleaning the Unit 3 Use the roller cleaning paper (KV-SS03) to remove the dirt from the surfaces of the retard roller, paper feed roller, separation roller, 6 drive rollers, 6 free rollers. Also, remove dust on the paper sensors and reflector sheets with a cotton swab. ≥ When wiping off the dirt on - GE JES1656SJ | Owners Manual - Page 25
5 Make sure that the sensor rollers are installed properly, before closing the ADF door. 6 Close the ADF door. 7 Clear the roller cleaning counter with User Utility. ≥ After cleaning the above rollers, click [Clear Counter] button for [After Clean Roller] with User Utility. ∫ Cleaning the CIS - GE JES1656SJ | Owners Manual - Page 26
Cleaning the Unit 3 Clean the CIS glasses and sensor rollers using the roller cleaning paper. ≥ If the sensor rollers are removed while cleaning, re-attach them after cleaning. Sensor roller (front) CIS glass (front) Sensor roller (back) 4 Close the ADF door. ≥ When you close the ADF door, close - GE JES1656SJ | Owners Manual - Page 27
Replacing Consumables ∫ Replacing the paper feed roller module 1 Turn the power off. 2 Push the ADF door release to open the ADF door. 3 Push the two green levers down at both ends of the paper feed roller module to unlock the paper feed rollers. ≥ When moving the green levers, do not apply pressure - GE JES1656SJ | Owners Manual - Page 28
module, pass the claw along the groove of the feed cover. 3 Attach the bearings at both ends of the paper feed roller module into the guide grooves of the chassis in the scanner. . Chassis Bearings Green levers 28 - GE JES1656SJ | Owners Manual - Page 29
6 Push up the green levers at both ends in the direction of the arrows until they click into place. ≥ After installing the paper feed roller module, confirm that the feed rollers can be moved lightly in vertical direction. Replacing Consumables 7 Close the ADF door. ≥ When you close the ADF door, - GE JES1656SJ | Owners Manual - Page 30
Replacing Consumables ∫ Replacing the retard roller module 1 Turn the power off. 2 Push the ADF door release to open the ADF door. 3 Open the retard roller cover. 4 Remove the retard roller module in the direction of the arrow. 30 Retard roller cover Retard roller module - GE JES1656SJ | Owners Manual - Page 31
5 Install the new retard roller module by matching the groove of its shaft with the groove of the metal holder. Make sure that both ends of the shaft reach the springs of the holder. Replacing Consumables Wider groove 6 Close the retard roller cover. Metal holder 7 Close the ADF door. ≥ When you - GE JES1656SJ | Owners Manual - Page 32
the non-gear side to the ADF door release. ≥ Match the groove to the guide. ≥ Push the roller, and confirm the sensor is locked by the springs on the non-gear side to the ADF door release. ≥ Match the groove to the guide. ≥ Attach the side of the ADF door release first, and attach the other side - GE JES1656SJ | Owners Manual - Page 33
transport or ship your scanner, please follow these instructions. Please Note: ≥ Please use the original Improper repacking of the scanner may result in a service charge to repair the unit. ≥ The scanner off and disconnect your scanner from the electrical outlet and the SCSI interface cable. 2 - GE JES1656SJ | Owners Manual - Page 34
or ship your scanner, please follow these instructions. Please Note: ≥ Please use the repacking of the scanner may result in a service charge to repair the unit. ≥ The to use a power cord whose shape matches the shape of the electric Tray outlet. CD-ROM Note: How to remove the feed extension - GE JES1656SJ | Owners Manual - Page 35
Specifications Items Scanner Model No. KV-S2025C KV-S2025CU KV-S2045C KV-S2045CU Scanning face Scanning method Scanning speed *1 Letter size portrait Scanning speed *1 A4 size portrait Resolution Binary - GE JES1656SJ | Owners Manual - Page 36
Specifications Items Model No. KV-S2025C KV-S2025CU KV- manual, Operating instructions, RTIV Capture software, ISIS driver, TWAIN driver, PIE manual, RTIV manual, User utility), Printed documents (Maintenance, Safety and Installation manual) Option White roller kit (KV-SS023) Roller exchange kit - GE JES1656SJ | Owners Manual - Page 37
light when the power switch is turned ON. The power cord is not plugged in. Problem with power supply. Insert the power plug firmly. Disconnect the scanner from the electric outlet and call for service. The scanner is not connected to the computer correctly. Connect the cables correctly. The - GE JES1656SJ | Owners Manual - Page 38
Troubleshooting Symptom Possible Cause Remedy The rollers are dirty. Clean all of the rollers. (See page 23.) The rollers have reached their life expectancy. Replace the paper feed roller module and the retard roller module. (See page 27 and page 30.) Double feeding or skewing problems occur - GE JES1656SJ | Owners Manual - Page 39
CIS glasses 25 Cleaning the rollers 23 Cleaning the sensor rollers 25 Cleaning the sensors 23 Component identification 13 D DIP switch 13, 14, 16 Document guides 13, 14, 17 Documents to avoid 19 Drive rollers 24 E Exit extension tray 13, 14, 18 Exit stopper 13, 14 Exit tray 13 External - GE JES1656SJ | Owners Manual - Page 40
, 32 Separation roller 24 Specifications 35 Starting position sensor 24 STOP/START button 13, 14 Storage temperature and humidity 36 System requirements 2 T Tonal gradation 35 Troubleshooting 37 U User Utility 25, 31 W Waiting sensor 24 Weight 36 40 - GE JES1656SJ | Owners Manual - Page 41
41 - GE JES1656SJ | Owners Manual - Page 42
Panasonic Digital Imaging Solutions Company Business Unit of Matsushita Electric Corporation of America Two Panasonic Way, Secaucus, New Jersey 07094 Panasonic Canada Inc. 5770 Ambler Drive, Mississauga, Ontario, L4W 2T3 Matsushita Electric Industrial Co., Ltd. Web Site: http://www.panasonic.co.jp/
-
 1
1 -
 2
2 -
 3
3 -
 4
4 -
 5
5 -
 6
6 -
 7
7 -
8
-
9
-
10
-
11
-
12
-
13
-
14
-
15
-
16
-
17
-
18
-
19
-
20
-
21
-
22
-
23
-
24
-
25
-
26
-
27
-
28
-
29
-
30
-
31
-
32
-
33
-
34
-
35
-
36
-
37
-
38
-
39
-
40
-
41
-
42
 |
 |
