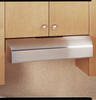
GE JV566HSS Use and Care Manual
GE JV566HSS Manual
 |
UPC - 084691085638
View all GE JV566HSS manuals
Add to My Manuals
Save this manual to your list of manuals |
GE JV566HSS manual content summary:
- GE JV566HSS | Use and Care Manual - Page 1
Cleaning Instructions Charcoal Filters 5 Grease Filters 4 Hood Lights 5 Hood Surfaces 5 Stainless Steel Surfaces 5 Vent Controls 4 Installation Instructions . . .6-15 Troubleshooting Tips 16 Consumer Support Consumer Support 20 Warranty 19 Owner's Manual and Installation Instructions JV535 - GE JV566HSS | Use and Care Manual - Page 2
electrical wiring and other hidden utilities. D. Ducted fans must always be vented to the outdoors. WARNING - TO REDUCE THE RISK OF FIRE, USE ONLY METAL DUCTWORK. I Do not attempt to repair or replace any part of your hood unless it is specifically recommended in this guide. All other servicing - GE JV566HSS | Use and Care Manual - Page 3
Instructions Operating Instructions Installation Instructions Troubleshooting Tips Consumer Support INSTRUCTIONS DE SÉCURITÉ IMPORTANTES. LISEZ TOUTES LES INSTRUCTIONS AVANT D'UTILISER. ge les fils électriques et les autres installations cachées de service public. D. Vous devez toujours alimenter - GE JV566HSS | Use and Care Manual - Page 4
Consumer Support Troubleshooting Tips Installation Instructions Operating Instructions Safety Instructions Using the hood controls. Throughout this manual, features and appearance may vary from your model. Control Knobs (on some models) Rocker Switch Controls (on some models) OFF LO MED HI - GE JV566HSS | Use and Care Manual - Page 5
Safety Instructions Operating Instructions Installation Instructions Troubleshooting Tips Consumer Support Care and cleaning of the vent hood. The charcoal filters are clipped inside of each reusable metal grease filter. Charcoal Filters (on some models) The charcoal filters cannot be cleaned. - GE JV566HSS | Use and Care Manual - Page 6
Installation Instructions Range Hood Questions? Call 800.GE.CARES (800.432.2737) or Visit our Website at: ge.com BEFORE YOU BEGIN Read these instructions completely and carefully. • IMPORTANT - Save these instructions for local inspector's use. • IMPORTANT - Observe all governing codes and - GE JV566HSS | Use and Care Manual - Page 7
Installation Instructions Follow the guidelines for proper duct sizing in the ducting charts. DUCTING CHART-JV5 Series Models 300 Air Volume (CFM) 250 200 • • • • • • • • 7″ Round 31⁄4″ x 10″ • • Rectangular • • 150 0 25 50 75 100 125 150 175 Equivalent Length (feet) DUCTING CHART- - GE JV566HSS | Use and Care Manual - Page 8
Installation Instructions WORKSHEET-CALCULATE TOTAL EQUIVALENT DUCTWORK LENGTH DUCT PIECES 31⁄4″ x 10″ Rect., straight EQUIVALENT NUMBER LENGTH x USED = TOTAL 1 Ft. x( ) = Ft. 7″ Round, 1 Ft. straight 6″ Round, 1 Ft. straight x( ) = - GE JV566HSS | Use and Care Manual - Page 9
duct preparation. PARTS YOU MAY NEED Damper for 7″ Round Exhaust Adaptor (Obtain Locally) OPTIONAL ACCESSORIES These kits can be ordered from your GE supplier. Cord Kit-For both 30″ and 36″ models, order Kit no. JXHC1. Charcoal Filters-JV5 Series only, if recirculating For 30″ hood models, order - GE JV566HSS | Use and Care Manual - Page 10
will use. NOTE: Only JV5 Series models may be recirculated. The JV6 Series models cannot be recirculated. IMPORTANT: If the hood is to be installed in a recirculating, non-vented ductless manner, do not knock out any vent openings in the hood. Only an electrical access hole will be knocked out of - GE JV566HSS | Use and Care Manual - Page 11
Installation Instructions 2 REMOVE EXHAUST ADAPTOR Remove the 7″ round exhaust adaptor from the top of the hood. Set it aside along with its mounting screws. NOTE: Save the screws for 3-1/4″ x 10″ rectangular ducted installation, if that is your chosen venting option. 7″ round exhaust adaptor 4 - GE JV566HSS | Use and Care Manual - Page 12
duct knockout only. NOTE: If the hood is to be installed in a recirculating, non-vented ductless manner, order charcoal filters, kit number WB02X11000 for 30″ hood models, or kit number WB02X11001 for 36″ hood models. These kits can be ordered from your GE supplier. Skip to Step 9 D and proceed - GE JV566HSS | Use and Care Manual - Page 13
Installation Instructions 9 MARK HOLES Select the vent option that your installation will require and proceed to that section: A.Outside top exhaust (Vertical duct-31⁄4″ x 10″ Rectangular) • Use the diagram or the hood as a template and mark the locations on the cabinet for ductwork, electrical - GE JV566HSS | Use and Care Manual - Page 14
Installation Instructions 11 FOR RECESSED-BOTTOM CABINETS ONLY Wood shims • If the freely when installing the hood. It may also ease installation by cutting the hole 101⁄2″ instead of 10″. 13 RUN WIRES Run the electrical wires through the wall or cabinet according to National Electrical Code and - GE JV566HSS | Use and Care Manual - Page 15
the wiring cover. 22 REPLACE FILTERS The installation is complete. Turn on power at service panel, and test for proper operation. 19 FOLLOW ELECTRICAL CODE Complete the electrical wiring according to National Electrical Code and local codes. NOTE: This hood must be permanently grounded. Connect - GE JV566HSS | Use and Care Manual - Page 16
Consumer Support Troubleshooting Tips Installation Instructions Operating Instructions Safety Instructions Before you call for service... Troubleshooting Tips Save time and money! Review the following chart first and you may not need to call for service. Problem Fan does not operate when the - GE JV566HSS | Use and Care Manual - Page 17
Safety Instructions Operating Instructions Installation Instructions Troubleshooting Tips Consumer Support Notes. 17 - GE JV566HSS | Use and Care Manual - Page 18
Consumer Support Troubleshooting Tips Installation Instructions Operating Instructions Safety Instructions Notes. 18 - GE JV566HSS | Use and Care Manual - Page 19
Safety Instructions Operating Instructions Installation Instructions Troubleshooting Tips Consumer Support GE Range Hood Warranty. All warranty service provided by our Factory Service Centers, or an authorized Customer Care® technician. To schedule service, on-line, 24 hours a day, visit us at ge. - GE JV566HSS | Use and Care Manual - Page 20
Consumer Support. GE Appliances Website ge.com Have a question or need assistance with your appliance? Try the GE Appliances Website 24 hours a day, any day of the year! For greater convenience and faster service, you can now download Owner's Manuals, order parts or even schedule service on-line. - GE JV566HSS | Use and Care Manual - Page 21
Campanas de estufas con ventilación ge.com Información de seguridad . . . . 2 Instrucciones de operación / 5-14 Solucionar problemas 15 Soporte al consumidor Soporte al consumidor 20 Garantía 19 Manual del propietario e instrucciones de instalación JV535 JV536 JV565 JV566 JV635 JV636 JV665 - GE JV566HSS | Use and Care Manual - Page 22
estar conectada a tierra. PRECAUCIÓN - Para uso de ventilación general solamente. No use para expulsar materiales peligrosos o explosivos y vapores reemplazar ninguna parte de su estufa de ventilación de aire descendente (downdraft) a no ser que lo recomiende específicamente este manual. Cualquier - GE JV566HSS | Use and Care Manual - Page 23
Uso de los controles de la campana. ge.com A lo largo de este manual, las funciones y el aspecto pueden ser reemplazarlos, inserte las pestañas posteriores del filtro en las ranuras del marco en la parte posterior de la abertura. Presione los filtros hacia arriba y ajústelos en su lugar. - GE JV566HSS | Use and Care Manual - Page 24
. Para los modelos de campana de 36,″ ordene el kit No. WB02X11001. Estos kits se pueden ordenar a través de su proveedor GE. NOTA: Los filtros de carbón de 50 vatios. Tome la bombilla por los bordes y Compre e instale bombillas halógenas desenrosque. PAR20 de 50 vatios como máximo. Reemplace - GE JV566HSS | Use and Care Manual - Page 25
Instrucciones de instalación Campana para estufa Preguntas? Llame al 800.GE.CARES (800.432.2737) o Visite nuestro sitio Web: ge.com ANTES DE EMPEZAR Lea estas instrucciones completa y cuidadosamente. • IMPORTANTE - Guarde estas instrucciones para uso del inspector local • IMPORTANTE - Observe - GE JV566HSS | Use and Care Manual - Page 26
en las tablas. TABLA PARA LOS DUCTOS-Modelos de la serie JV5 300 Volumen de aire en CFM 250 200 • • • • • • • • Circular de 7″ Rectangular • • de en pies TABLA PARA LOS DUCTOS-Modelos de la serie JV6 450 Volumen de aire en CFM 400 350 • • • • Circular de 7″ • • Rectangular • • 300 - GE JV566HSS | Use and Care Manual - Page 27
Instrucciones de instalación HOJA DE TRABAJO-CALCULE LA LONGITUD TOTAL EQUIVALENTE DEL DUCTO PIEZAS DEL DUCTO LONGITUD NÚMERO EQUIV. x USADO = TOTAL Rectangular, 1 pie recta de 31⁄4″ x 10″ x( ) = pies Circular, 1 pie recta de 7″ x( ) = pies Circular, 1 pie recta de 6″ x( ) = pies Codo - GE JV566HSS | Use and Care Manual - Page 28
instalación de los ductos" para la preparación del ducto del escape. PARTES QUE PODRÍA NECESITAR Regulador de tiro para el adaptador de escape circ. kits se pueden ordenar a través de su proveedor GE. Kit de cable-para ambos modelos, el de 30″ y el de 36,″ ordene el kit no. JXHC1. FIltros de carbón- - GE JV566HSS | Use and Care Manual - Page 29
Instrucciones de instalación 1 SELECCIONE LA OPCIÓN DE VENTILACIÓN Determine entre las siguientes opciones la opción de ventilación que su instalación requiere: La opción de escape de ventilación exterior que su instalación requiera determinará los agujeros ciegos de la campana necesarios. A Escape - GE JV566HSS | Use and Care Manual - Page 30
EL ADAPTADOR DEL ESCAPE Retire el adaptador del escape circular de 7″ de la parte superior de la campana. Colóquelo a un lado junto con los tornillos o posterior del cableado según sea necesario e instale una abrazadera aprobada para liberación de presión. Abrazadera para liberación de presión - GE JV566HSS | Use and Care Manual - Page 31
el(los) orificio(s) ciego(s) del ducto correspondiente(s) de la parte superior o posterior de la campana. Salida vertical rectangular de o el kit No. WB02X11001 para modelos de campana de 36″. Estos kits se pueden ordenar a través de su proveedor GE. Siga con el paso 9 D. 7 PARA INSTALACIONES DE - GE JV566HSS | Use and Care Manual - Page 32
del tornillo de bocallave. Tornillos para instalar la campana (4) 1315⁄16″ (campana de 30″) 1615⁄16″ (campana de 36″) Frente del gabinete 1315⁄16″ (campana de 30″) 1615⁄16″ (campana de 36″) 12 9⁄16″ Fondo de gabinete 5″ 11⁄4″ 51⁄4″ 51⁄4″ Orificio de acceso para el ducto vertical 2″ 101⁄2″ 11 - GE JV566HSS | Use and Care Manual - Page 33
Instrucciones de instalación 11 PARA GABINETES CON MUESCA EN EL FONDO ÚNICAMENTE Cuñas de madera • Si los gabinetes tienen un corte delantero, lateral o posterior, haga 2 cuñas de madera del ancho del corte y únalos al espacio en la muesca del fondo del gabinete en ambos lados. Consulte el paso 9 - GE JV566HSS | Use and Care Manual - Page 34
al cable verde/amarillo de la campana. Firmemente apriete la abrazadera de liberación de presión en el cableado de la casa. 18 INSTALE LAS BOMBILLAS Compre e instale dos bombillas halógenas PAR20 de 50 vatios como máximo. Las bombillas no vienen incluidas con la campana. ADVERTENCIA: Para reducir - GE JV566HSS | Use and Care Manual - Page 35
Seguridad Operación Antes de llamar a solicitar servicio... Consejos para la solución de problemas ¡Ahorre tiempo y dinero! Revise la siguiente tabla primero y quizás no necesite llamar a solicitar servicio. Problema El ventilador no opera cuando el interruptor se enciende El ventilador no - GE JV566HSS | Use and Care Manual - Page 36
Notas. 16 Soporte al consumidor Solucionar problemas Instrucciones de instalación Operación Seguridad - GE JV566HSS | Use and Care Manual - Page 37
Notas. 17 Seguridad Operación Instrucciones de instalación Solucionar problemas Soporte al consumidor - GE JV566HSS | Use and Care Manual - Page 38
Notas. 18 Soporte al consumidor Solucionar problemas Instrucciones de instalación Operación Seguridad - GE JV566HSS | Use and Care Manual - Page 39
de: Un año A partir de la fecha de la compra original GE reemplazará: Cualquier parte de la campana para ventilación de estufa que falle debido a defectos local o la oficina del Prucurador (Attorney General) en su localidad. Garante: General Electric Company. Louisville, KY 40225 Instrucciones de - GE JV566HSS | Use and Care Manual - Page 40
durante horas normales de oficina. GE Consumer Home Services estará aún ahí cuando su garantía termine. Piezas y accesorios ge.com Aquellos individuos con la en este manual cubren los procedimientos a seguir por cualquier usuario. Cualquier otra reparación debería, por regla general, referirse a
-
 1
1 -
 2
2 -
 3
3 -
 4
4 -
 5
5 -
 6
6 -
 7
7 -
8
-
9
-
10
-
11
-
12
-
13
-
14
-
15
-
16
-
17
-
18
-
19
-
20
-
21
-
22
-
23
-
24
-
25
-
26
-
27
-
28
-
29
-
30
-
31
-
32
-
33
-
34
-
35
-
36
-
37
-
38
-
39
-
40
 |
 |

Range Hoods
Vented
ge.com
49-80438
08-06 JR
Safety Information
. . . . . . . . 2, 3
Operating/Care and
Cleaning Instructions
Charcoal Filters . . . . . . . . . . . . . .5
Grease Filters . . . . . . . . . . . . . . . .4
Hood Lights
. . . . . . . . . . . . . . . .5
Hood Surfaces . . . . . . . . . . . . . . .5
Stainless Steel Surfaces . . . . . . . .5
Vent Controls
. . . . . . . . . . . . . . .4
Installation Instructions
. . .6–15
Troubleshooting Tips
. . . . . . .16
Consumer Support
Consumer Support
. . . . . . . . . .20
Warranty . . . . . . . . . . . . . . . . . . 19
JV535
JV536
JV565
JV566
JV635
JV636
JV665
JV666
Owner’s Manual
and Installation
Instructions
Write the model and serial
numbers here:
Model #
________________
Serial # __________________
Find these numbers on a label
on the back wall of the hood.