GE JVM1740SPSS Use and Care Manual
GE JVM1740SPSS Manual
 |
UPC - 084691188605
View all GE JVM1740SPSS manuals
Add to My Manuals
Save this manual to your list of manuals |
GE JVM1740SPSS manual content summary:
- GE JVM1740SPSS | Use and Care Manual - Page 1
Model: JVM1730 JNM1731 JVM1740 Spacemaker Microwave Oven Owner's Manual Important Safety Instructions 2 Precautions to Avoid Possible Exposure to Excessive Microwave Energy 2 Special Notes About Microwaving 5 Operating Instructions 10 Features of Your Microwave 10 The Controls on Your - GE JVM1740SPSS | Use and Care Manual - Page 2
important that the oven door close properly and that there is no damage to the: 1 door (bent), 2 hinges and latches (broken or loosened), 3 door seals and sealing surfaces. The Oven Should Not be adjusted or repaired by anyone except properly qualified service personnel. SAVE THESE INSTRUCTIONS 2 - GE JVM1740SPSS | Use and Care Manual - Page 3
by General Electric Service or an authorized service agent using a power cord available from General Electric. • Use this appliance only for its intended use as described in this manual. Do not use corrosive chemicals or vapors in this appliance. This microwave oven is specifically designed to heat - GE JVM1740SPSS | Use and Care Manual - Page 4
heated surfaces. • Do not immerse power cord or plug in water. • To reduce the risk of fire in the oven door surface cleaning instructions in the Care and Cleaning section(s) of this manual. • This appliance must only be serviced by qualified service personnel. Contact nearest authorized service - GE JVM1740SPSS | Use and Care Manual - Page 5
the problem. Only use microwave shelf when reheating on more than one level. DO NOT store the oven shelf in the microwave. See operating instructions for oven shelf. Arcing is the microwave term for sparks in the oven. Arcing is caused by: • The metal shelf (if included) not installed correctly - GE JVM1740SPSS | Use and Care Manual - Page 6
. - Stir the liquid both before and halfway through heating it. - Do not use straightsided containers with narrow necks. - After heating, allow the container to stand in the microwave oven for a short time before removing the container. • Avoid heating baby food in glass jars, even with the lid - GE JVM1740SPSS | Use and Care Manual - Page 7
IMPORTANT SAFETY INSTRUCTIONS MICROWAVESAFE COOKWARE Make sure all cookware used in your microwave oven is suitable for microwaving. Most glass in the cup heats, then the dish is microwave-safe. • If you use a meat thermometer while cooking, make sure it is safe for use in microwave ovens. • Do - GE JVM1740SPSS | Use and Care Manual - Page 8
IMPORTANT SAFETY INSTRUCTIONS SPECIAL NOTES ABOUT MICROWAVING • Use foil only as directed in this manual. When using foil in the microwave oven, keep the foil at least 1″ away from the sides of the oven. • Plastic cookware-Plastic cookware designed for microwave cooking is very useful, but should - GE JVM1740SPSS | Use and Care Manual - Page 9
-cabinet installation. Each kit contains two 3″-wide filler panels. JX81J- Recirculating Charcoal Filter Kit Filter kits are used when the microwave oven cannot be vented to the outside. Available at extra cost from your GE supplier, or see GE Service Numbers. JX81J JX48 SAVE THESE INSTRUCTIONS 9 - GE JVM1740SPSS | Use and Care Manual - Page 10
Operating Instructions Features of Your Microwave (Throughout this manual, features and appearance may vary from your model.) Features 3 4 2 1 7 896 5 7 1 Door Handle. Pull to open the door. The door must be securely latched for the microwave to operate. 2 Door Latches. 3 Window with Metal - GE JVM1740SPSS | Use and Care Manual - Page 11
Quick Start The Controls on Your Microwave Oven (Throughout this manual, features and appearance may vary from your model.) You can microwave by time or with the convenience features. 1 Time Features Time Cooking Press TIME COOK I & II (Press once or twice) DEFROST AUTO/TIME (Press twice) EXPRESS - GE JVM1740SPSS | Use and Care Manual - Page 12
Quick Start HELP (on some models) Press this pad and any feature pad for usage instructions and tips. GUIDE ON MICROWAVE Before you begin, check the guide located on the inside front of the oven when you open the door. GUIDES IN BOOK • Cooking • Time Defrost • Reheat • Snacks 2 Convenience - GE JVM1740SPSS | Use and Care Manual - Page 13
3 Press POWER LEVEL. 4 Select desired power level 1-10. 5 Press START. Variable power levels add flexibility to microwave cooking. The power levels on the microwave oven can be compared to the surface units on a range. High (power level 10) or full power is the fastest way to cook and gives you 100 - GE JVM1740SPSS | Use and Care Manual - Page 14
. Select a desired power level 1-10.) 4 Press START. Time Cook I Allows you to microwave for any time up to 99 minutes and 99 seconds. Power level 10 (High) is automatically set, but you may change it for more flexibility. You may open the door during Time Cook to check the food. Close the - GE JVM1740SPSS | Use and Care Manual - Page 15
Cooking Guide for Time Cook I & II NOTE: Use power level High (10) unless otherwise noted. Vegetable Amount Time Comments Asparagus (fresh spears) 1 lb. 6 to 9 min., In 11⁄2- - GE JVM1740SPSS | Use and Care Manual - Page 16
Operating Instructions Cooking Guide for Time Cook I & II Vegetable Amount Time Comments Corn (frozen with 1/2 cup water. Stir after half of time. Pierce with cooking fork. Place in center of the oven. Let stand 5 minutes. In 2-qt. casserole, place washed spinach. In 1-qt. casserole, place 3 - GE JVM1740SPSS | Use and Care Manual - Page 17
of time you select. See the Defrosting Guide for suggested times. Power level 3 is automatically . At one half of selected defrosting time, the oven signals TURN. At this time, turn food over defrosted and microwaved. If the food is in a foil container, transfer it to a microwave-safe dish. - GE JVM1740SPSS | Use and Care Manual - Page 18
Operating Instructions Defrosting Guide Food Time Comments Breads, Cakes Bread, buns or rolls (1 piece) break up after half the time. Place unopened package in oven. Let stand 5 minutes after defrosting. Place unopened package in oven. Microwave just until franks can be separated. Let stand 5 - GE JVM1740SPSS | Use and Care Manual - Page 19
Time Features Express Cook This is a quick way to set cooking time for 1-6 minutes. Press one of the Express Cook pads (from 1 to 6) for 1 to 6 minutes of cooking at power level 10. For example, press the 2 pad for 2 minutes of cooking time. The power level can be changed as time is counting down. - GE JVM1740SPSS | Use and Care Manual - Page 20
instructions, using Time Cook if the package is less than 3.0 ounces or larger than 3.5 ounces. Place the package of popcorn in the center of the microwave. 2 Press POPCORN. The oven 20 The Beverage feature heats 1-3 servings of any beverage. Press BEVERAGE. The oven starts immediately. The serving - GE JVM1740SPSS | Use and Care Manual - Page 21
REHEAT. 2 Select food type 1-6 for one serving (see Reheat Guide below). 3 Press 2 or 3 to reheat 2 or 3 servings wrap. Cover with lid or vented plastic wrap. Works best with wide mouth mug-do not cover. Cover with . The oven will start immediately after POTATO is pressed. (on some models) The - GE JVM1740SPSS | Use and Care Manual - Page 22
casserole or bowl. Follow package instructions for adding water. Cover with lid or vented plastic wrap. Use microwave-safe casserole or bowl. Add 2 tablespoons water for each serving. Cover with lid or vented plastic wrap. Pierce skin with fork. Place potatoes on oven floor or turntable. Use oblong - GE JVM1740SPSS | Use and Care Manual - Page 23
up to 6 pounds. There is a handy guide located on the inside front of the oven. Guide Conversion Guide If the weight of food is stated in 14-15 .9 • Remove meat from package and place on microwave-safe dish. • Twice during defrost, the oven signals TURN. At each TURN signal, turn the food over. - GE JVM1740SPSS | Use and Care Manual - Page 24
Operating Instructions Other Features Your Model May Have Cooking Complete Reminder To remind you that you have food in the oven, the oven will display "FOOD IS READY" and beep once a minute until you either open the oven door or press CLEAR/OFF. Clock Press to enter the time of day or to check - GE JVM1740SPSS | Use and Care Manual - Page 25
3 seconds. To redisplay the clock, repeat. Delay Start (on some models) Delay Start allows you to set the microwave to delay cooking up to 24 hours. 1 Press DELAY START. 2 Enter the time you want the oven to start. (Be sure the microwave clock shows the correct time of day.) 3 Select AM or PM - GE JVM1740SPSS | Use and Care Manual - Page 26
functions, START/PAUSE allows you to stop cooking without opening the door or clearing the display. Reminder 26 (on some models) The Reminder feature can be used like an alarm clock and can be used at any time, even when the oven is operating. The Reminder time can be set up to 24 - GE JVM1740SPSS | Use and Care Manual - Page 27
the control panel to prevent the microwave from being accidentally started or used by children. (on some models) For best cooking results, leave the turntable will stay lit to remind you that the feature is set. You can review the Auto Nite Light settings by pressing AUTO NITE LIGHT. To erase your - GE JVM1740SPSS | Use and Care Manual - Page 28
Operating Instructions Other Features Your Model May Have Beeper Volume (on some models) The beeper sound level can be fan speed, twice for low fan speed or a third time to turn the fan off. Automatic Fan An automatic fan feature protects the microwave from too much heat rising from the cooktop - GE JVM1740SPSS | Use and Care Manual - Page 29
with Sensor Cooking or Reheat. (on some models) Food microwaves best when placed on the turntable. For best results Notice: • Only use microwave shelf when reheating on more than one level. • DO NOT store the oven shelf in the microwave oven. 2-level reheating Switch places after 1/2 time. • To - GE JVM1740SPSS | Use and Care Manual - Page 30
allow for more even heating and reduce cooking time. Venting plastic wrap or covering with wax paper allows excess steam to escape. In a regular oven, you shield chicken breasts or baked foods to prevent over-browning. When microwaving, you use small strips of foil to shield thin parts, such as the - GE JVM1740SPSS | Use and Care Manual - Page 31
off before cleaning any part of this oven. How to Clean the Inside Walls, Floor, Inside Window, Metal and Plastic Parts on the Door Some spatters can be utensils on oven walls. Never use a commercial oven cleaner on any part of your microwave. Removable Turntable and Turntable Support To prevent - GE JVM1740SPSS | Use and Care Manual - Page 32
, as they can damage the appearance of the microwave oven. If you choose to use a common household cleaner door panel, make sure you know what type of panel you have. Refer to the eleventh digit of the model cleaner carefully to avoid the surrounding plastic parts. Do not use appliance wax, polish - GE JVM1740SPSS | Use and Care Manual - Page 33
the adhesive seal, remove the bulb by gently turning. Replace with the same size and type bulb. Filter housing Light cover 5 Replace the light cover. 6 Replace the grille and screws. Connect electrical power to the oven. 3 Lift the metal tab on the light cover located above the handle. 33 - GE JVM1740SPSS | Use and Care Manual - Page 34
also use a charcoal filter. Reusable Grease Filter (on all models) Reusable Grease Filter The reusable grease filter traps grease released by foods on the cooktop. It also prevents flames from foods on the cooktop from damaging the inside of the microwave. For this reason, the filter must ALWAYS - GE JVM1740SPSS | Use and Care Manual - Page 35
Charcoal Filter (on some models) The charcoal filter cannot be cleaned. It must be replaced. Order Part No. WB06X10823 from your GE supplier. To Remove Charcoal Filter Remove 3 grille screws to remove the grille. To Install Charcoal Filter If the model is not vented to the outside, the air will be - GE JVM1740SPSS | Use and Care Manual - Page 36
Service Problem Possible Cause What to Do Oven will not start A fuse in your home • Replace fuse or reset circuit breaker. may be blown or the circuit breaker tripped. Power surge. • Unplug the microwave oven internal parts while the microwave is on. When using a Sensor feature, the door was - GE JVM1740SPSS | Use and Care Manual - Page 37
on the oven door and walls while cooking. Wipe the moisture off with a paper towel or soft cloth. • Moisture between the oven door panels indicate a problem with the microwave. Plug the microwave into a different electrical circuit, move the radio or TV as far away from the microwave as possible - GE JVM1740SPSS | Use and Care Manual - Page 38
assistance with your appliance? Try the GE Appliances Website 24 hours a day, any day of the year! For greater convenience and faster service, you can now download Owner's Manuals, order parts or even schedule service on-line. Schedule Service GEAppliances.com 800.GE.CARES (800.432.2737) Real Life - GE JVM1740SPSS | Use and Care Manual - Page 39
800.626.2002 during normal business hours. Instructions contained in this manual cover procedures to be performed by any user. Other servicing generally should be referred to qualified service personnel. Caution must be exercised, since improper servicing may cause unsafe operation. Register Your - GE JVM1740SPSS | Use and Care Manual - Page 40
under warranty. What Is Covered LIMITED ONE-YEAR WARRANTY For one year from date of original purchase, All warranty service will be provided by our Factory GE will replace any part in the microwave Service Centers or by our authorized Customer oven that fails due to a defect in materials
-
 1
1 -
 2
2 -
 3
3 -
 4
4 -
 5
5 -
 6
6 -
 7
7 -
8
-
9
-
10
-
11
-
12
-
13
-
14
-
15
-
16
-
17
-
18
-
19
-
20
-
21
-
22
-
23
-
24
-
25
-
26
-
27
-
28
-
29
-
30
-
31
-
32
-
33
-
34
-
35
-
36
-
37
-
38
-
39
-
40
 |
 |

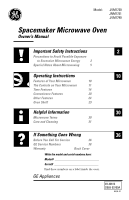
Spacemaker Microwave Oven
Owner’s Manual
Model:
JVM1730
JNM1731
JVM1740
2
30
Helpful Information
Microwave Terms
30
Care and Cleaning
31
36
If Something Goes Wrong
Before You Call For Service
36
GE Service Numbers
38
Warranty
Back Cover
GE Appliances
10
Important Safety Instructions
Precautions to Avoid Possible Exposure
to Excessive Microwave Energy
2
Special Notes About Microwaving
5
Operating Instructions
Features of Your Microwave
10
The Controls on Your Microwave
11
Time Features
14
Convenience Features
20
Other Features
24
Oven Shelf
29
49-40613
DE68-03700A
06-09 JR
Write the model and serial numbers here:
Model#
______________________________
Serial#
______________________________
Find these numbers on a label inside the oven.