GE JVM1790WK Owners Manual
GE JVM1790WK - Profile 1.7 cu. Ft. Convection Microwave Manual
 |
UPC - 084691123439
View all GE JVM1790WK manuals
Add to My Manuals
Save this manual to your list of manuals |
GE JVM1790WK manual content summary:
- GE JVM1790WK | Owners Manual - Page 1
26 Replacing the Light Bulbs 27 Stainless Steel 27 Vent Filters 28, 29 Troubleshooting Tips 30, 31 Things That Are Normal With Your Microwave Oven 32 Consumer Support Consumer Support Back Cover Optional Kits 7 Warranty 35 Español For a Spanish version of this manual, visit our Website at ge - GE JVM1790WK | Owners Manual - Page 2
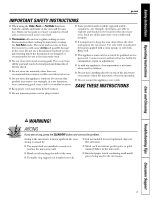
on page 6. ■ Install or locate this appliance only in accordance with the provided installation instructions. ■ This microwave oven is UL listed for installation over electric and gas ranges. ■ This microwave oven is not approved or tested for marine use. ■ This over-the-range oven is designed for - GE JVM1790WK | Owners Manual - Page 3
button and correct the problem. Arcing is the microwave term for sparks in the oven. Arcing is caused by: ■ The metal shelf not installed correctly so it touches the microwave wall. ■ Metal or foil touching the side of the oven. ■ Turntable ring support not installed correctly. ■ Foil not molded - GE JVM1790WK | Owners Manual - Page 4
than foods containing less moisture. Should this occur, refer to the Care and cleaning of the microwave oven section for instructions on how to clean the inside of the oven. ■ Avoid heating baby food in glass jars, even with the lid off. Make sure all infant food is thoroughly cooked. Stir food - GE JVM1790WK | Owners Manual - Page 5
them in strict compliance with the cookware manufacturer's recommendations. 2 Do not microwave empty containers. 3 Do not permit children to use plastic cookware without complete supervision. ■ Do not use your microwave/convection oven to dry newspapers. 5 Troubleshooting Tips Consumer Support - GE JVM1790WK | Owners Manual - Page 6
or service technician install an outlet near the appliance. For best operation, plug this appliance into its own electrical outlet to prevent flickering of lights, blowing of fuse or tripping of circuit breaker. Consult a qualified electrician or service technician if the grounding instructions are - GE JVM1790WK | Owners Manual - Page 7
panels. Filter Kits ■ JX81D-Recirculating Charcoal Filter Kit Filter kits are used when the oven cannot be vented to the outside. Available at extra cost from your GE supplier. See the back cover for ordering by phone or at ge.com. JX40, JX41 JX81D Troubleshooting Tips Consumer Support 7 - GE JVM1790WK | Owners Manual - Page 8
Care and Cleaning Operating Instructions Safety Instructions About the features of your oven. Throughout this manual, features and appearance may vary from your model. Consumer Support Troubleshooting Tips Features of the Oven Door Latch Release Handle. Door Latches. Window with Metal Shield. - GE JVM1790WK | Owners Manual - Page 9
Safety Instructions Operating Instructions Care and Cleaning About the cooking and warming features of your microwave/convection oven. ge.com You can cook by Microwave, Convection Bake, Convection Roast or Combination Fast Bake. Keep hot, cooked foods at serving temperature with the Warm feature - GE JVM1790WK | Owners Manual - Page 10
Care and Cleaning Operating Instructions Safety Instructions Available cooking options. Do not use the shelves when microwave cooking. Microwave Cooking Your oven uses microwave energy to cook by a set time or weight, or automatically by sensor. Sensor microwave works by detecting the increasing - GE JVM1790WK | Owners Manual - Page 11
Safety Instructions Operating Instructions Care and Cleaning About the time and auto microwave features. ge.com Using the Dial You can make selections on the oven by turning the dial and pressing it to enter the selection. Pressing the dial can also be used in place of the START/PAUSE button - GE JVM1790WK | Owners Manual - Page 12
Guide at right. For example, dial .5 for .5 pounds (8 oz.) Press the dial to enter. 3 Press the START/PAUSE button to start defrosting. 4 Turn the food over if the oven .6 .7 .8 .9 Consumer Support Troubleshooting Tips Auto Defrost (Do not use the shelves when microwave cooking.) Use Auto Defrost - GE JVM1790WK | Owners Manual - Page 13
when microwave cooking.) The BEVERAGE feature heats beverages from 6 to 12 ounces. Press once for 6-7 oz. Press twice for 8-9 oz. Press three times for 10-12 oz. Drinks heated with the Beverage feature may be very hot. Remove the container with care. Troubleshooting Tips Consumer Support 13 - GE JVM1790WK | Owners Manual - Page 14
food warm; softening butter. Consumer Support Troubleshooting Tips Microwave terms. Term Definition Arcing Arcing is the microwave term for sparks in the oven. Arcing is caused by: ■ the metal shelf being installed incorrectly and touching the microwave walls. ■ metal or foil touching - GE JVM1790WK | Owners Manual - Page 15
Instructions Operating Instructions Care and Cleaning About the sensor microwave features. ge.com Humidity Sensor What happens when using the Sensor Features: The Sensor Features detect the increasing humidity released during cooking. The oven feature. Troubleshooting Tips Consumer Support Foods - GE JVM1790WK | Owners Manual - Page 16
plastic wrap. Use microwave-safe casserole or bowl. Add 2 tablespoons water for each serving. Cover with lid or vented plastic wrap. Use microwave-safe casserole or bowl. Follow package instructions for adding water. Cover with lid or vented plastic wrap. Consumer Support Troubleshooting Tips 16 - GE JVM1790WK | Owners Manual - Page 17
or burnt food. ge.com Popcorn (Do not use the shelves when microwave cooking.) To use the Popcorn feature: 1 Follow package instructions, using Time after the oven starts, turn the dial clockwise, until a plus ("+") sign appears, and press to enter. Troubleshooting Tips Consumer Support 17 - GE JVM1790WK | Owners Manual - Page 18
and press the dial to enter. To view the cook time and oven temperature during cooking, press the BAKE button. Consumer Support Troubleshooting Tips Auto Recipe™ Conversion When using CONVECTION BAKE, the Auto Recipe™ Conversion feature will automatically convert entered regular baking - GE JVM1790WK | Owners Manual - Page 19
Instructions Care and Cleaning About the Fast Bake feature. ge.com Correct shelf position Incorrect shelf position Fast Bake offers the best features of microwave energy and convection cooking. Microwaves cook food fast and convection circulation of heated air browns foods beautifully. Any oven - GE JVM1790WK | Owners Manual - Page 20
heat and help produce a light tender crust. Glass or Glass-Ceramic casserole or baking microwave cookware that is safe to 450°F. Microwave Yes No No Yes Yes Yes Yes Convection Bake or Roast Yes Yes No No No No No Combination Fast Bake Yes No No Yes* No No No Consumer Support Troubleshooting - GE JVM1790WK | Owners Manual - Page 21
Instructions Operating Instructions Care and Cleaning Select the best method of cooking. ge.com Use the following guide Pies and Pastry Candy Blanching Vegetables Frozen Convenience Foods Microwave Bake ✓ Roast Fast Bake ✓ ✓ ✓ ✓ minutes. Troubleshooting Tips Consumer Support 21 - GE JVM1790WK | Owners Manual - Page 22
Care and Cleaning Operating Instructions Safety Instructions About the warming feature. Correct shelf information on suggested cookware. Consumer Support Troubleshooting Tips Incorrect shelf position 1 Press the WARM button. 2 Turn the dial to select the oven temperature. See the chart and - GE JVM1790WK | Owners Manual - Page 23
feature and press the dial to enter. ge.com START / PAUSE CLEAR / OFF CLEAR / OFF Cooking Complete Reminder To remind you that you have food in the oven, the oven will display YOUR FOOD IS READY and beep briefly anytime a button or dial is pressed. 23 Troubleshooting Tips Consumer Support - GE JVM1790WK | Owners Manual - Page 24
will be lit whenever the beeper volume is set to mute. Consumer Support Troubleshooting Tips Auto Recipe™ Conversion Selection When ON the oven will automatically convert entered regular baking temperatures to convection baking temperatures. See Auto Recipe™ Conversion in the About the baking and - GE JVM1790WK | Owners Manual - Page 25
touch. Be careful touching the turntable during and after cooking. Troubleshooting Tips Consumer Support Vent Fan The vent fan removes steam and other vapors from surface the internal parts are cool. It may stay on for 30 minutes or more after the cooktop and microwave controls are turned off. 25 - GE JVM1790WK | Owners Manual - Page 26
or sharp utensils on oven walls. Never use a commercial oven cleaner on any part of your microwave. Removable Turntable and Turntable Support To prevent breakage, what type of panel you have. Refer to the eighth digit of the model number. "S" is stainless steel, "L" is CleanSteel and "B", "W" or "C" - GE JVM1790WK | Owners Manual - Page 27
cover and lower the cover until it stops. 3 Be sure the bulb is cool before removing. Break the adhesive seal by gently unscrewing the bulb. 4 Screw in the new bulb, then raise the light cover and replace the screw. Connect electrical power to the oven. Troubleshooting Tips Consumer Support 27 - GE JVM1790WK | Owners Manual - Page 28
because they will darken the metal. Light brushing can be used to remove embedded dirt. Rinse, shake and let dry before replacing. To replace, slide the filters into the frame slots on the back of each opening. Press up and to the front to lock into place. Consumer Support Troubleshooting Tips 28 - GE JVM1790WK | Owners Manual - Page 29
Instructions Operating Instructions Care and Cleaning ge.com Charcoal Filter The charcoal filter cannot be cleaned. It must be replaced. Order Part No. WB02X10943 from your GE supplier. If the model is not vented to the outside, the air will be recirculated through a disposable charcoal filter - GE JVM1790WK | Owners Manual - Page 30
Care and Cleaning Operating Instructions Safety Instructions Before you call for service... Troubleshooting Tips Save time and money! Review the charts on the following pages first and you may not need to call for service. Problem Oven will not start Control panel lighted, yet oven will not start - GE JVM1790WK | Owners Manual - Page 31
Instructions Operating Instructions Care and Cleaning ge.com Problem Food browns on top much faster than on the bottom Possible Causes Rack has been placed in the "high" position. What To Do • Always use the rack in its "low" position. Oven more time. Troubleshooting Tips Consumer Support 31 - GE JVM1790WK | Owners Manual - Page 32
a problem with the microwave. Plug the microwave into a different electrical circuit, move the radio or TV as far away from the microwave as possible or check the position and signal of the TV/radio antenna. ■ Dull thumping sound while oven is operating. Consumer Support Troubleshooting Tips - GE JVM1790WK | Owners Manual - Page 33
• Backed by GE • All brands covered • Unlimited service calls • All parts and labor costs GE and call us in the U.S. toll-free at 800.626.2224 for more information. *All brands covered, up to 20 years old, in the continental U.S. ✁ Cut here Please place in envelope and mail to: General Electric - GE JVM1790WK | Owners Manual - Page 34
a safe place. It contains information you will need should you require service. Our service number is 800.GE.CARES (800.432.2737). 3 Read your Owner's Manual carefully. It will help you operate your new appliance properly. Model Number Serial Number Important: If you did not get a registration - GE JVM1790WK | Owners Manual - Page 35
serial and model numbers available when calling for service. For The Period Of: GE Will Replace: Staple your receipt here. Proof of the original purchase date is needed to obtain service under the warranty. One Year From the date of the original purchase Any part of the microwave oven which fails - GE JVM1790WK | Owners Manual - Page 36
Support. GE Appliances Website ge.com Have a question or need assistance with your appliance? Try the GE Appliances Website 24 hours a day, any day of the year! For greater convenience and faster service, you can now download Owner's Manuals, order parts, catalogs, or even schedule service
-
 1
1 -
 2
2 -
 3
3 -
 4
4 -
 5
5 -
 6
6 -
 7
7 -
8
-
9
-
10
-
11
-
12
-
13
-
14
-
15
-
16
-
17
-
18
-
19
-
20
-
21
-
22
-
23
-
24
-
25
-
26
-
27
-
28
-
29
-
30
-
31
-
32
-
33
-
34
-
35
-
36
 |
 |

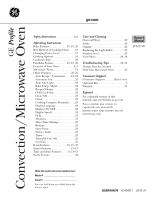
Convection/Microwave Oven
GE
Profile
3828W5A4678
49-40480-1
08-08 JR
JVM1790
Owner’s
Manual
ge.com
Write the model and serial numbers here:
Model #
__________________________
Serial #
__________________________
You can find them on a label when the
door is open.
Safety Instructions
. . . . . . . . . . . . . .2–6
Operating Instructions
Bake Features . . . . . . . . . . . . . 10, 18, 20
Best Method of Cooking Chart
. . . .21
Changing Power Level . . . . . . . . . . . 14
Cooking Options
. . . . . . . . . . . . . . . .10
Cookware Tips . . . . . . . . . . . . . . . . . . .20
Fast Bake Feature . . . . . . . . . .10, 19, 20
Features of Your Oven
. . . . . . . . . . 8, 9
Microwave Terms . . . . . . . . . . . . . . . . 14
Other Features
. . . . . . . . . . . . . . .23–25
Auto Recipe
™
Conversion . . . .18, 24
Automatic Fan . . . . . . . . . . . . . . . . .25
Auto Nite Light . . . . . . . . . . . . . . . .24
Bake Temp. Adjust
. . . . . . . . . . . . .24
Beeper Volume
. . . . . . . . . . . . . . . .24
Child Lock-Out
. . . . . . . . . . . . . . . .23
Clear/Off
. . . . . . . . . . . . . . . . . . . . .23
Clock . . . . . . . . . . . . . . . . . . . . . . . . .23
Cooking Complete Reminder . . . .23
Display Language . . . . . . . . . . . . . . .24
Display ON/OFF . . . . . . . . . . . . . . .24
Display Speed . . . . . . . . . . . . . . . . . .24
Help . . . . . . . . . . . . . . . . . . . . . . . . . .23
Measures . . . . . . . . . . . . . . . . . . . . . .25
More Time Message . . . . . . . . . . . .25
Resume . . . . . . . . . . . . . . . . . . . . . . .23
Start/Pause . . . . . . . . . . . . . . . . . . . .23
Surface Light . . . . . . . . . . . . . . . . . .25
Timer . . . . . . . . . . . . . . . . . . . . . . . . .25
Turntable On/Off . . . . . . . . . . . . . .25
Vent Fan . . . . . . . . . . . . . . . . . . . . . .25
Roast Features
. . . . . . . . . . . . 10, 18, 20
Sensor Features
. . . . . . . . . . . . . . . 15–17
Time and Auto Features
. . . . 9, 11–13
Warm Feature . . . . . . . . . . . . . . . . . . . 22
Care and Cleaning
Charcoal Filters . . . . . . . . . . . . . . . . . . .29
Inside
. . . . . . . . . . . . . . . . . . . . . . . . . . .26
Outside . . . . . . . . . . . . . . . . . . . . . . . . .26
Replacing the Light Bulbs . . . . . . . . .27
Stainless Steel . . . . . . . . . . . . . . . . . . . .27
Vent Filters . . . . . . . . . . . . . . . . . . .28, 29
Troubleshooting Tips
. . . . . . . . 30, 31
Things That Are Normal
With Your Microwave Oven . . . . . . . 32
Consumer Support
Consumer Support
. . . . . . Back Cover
Optional Kits . . . . . . . . . . . . . . . . . . . . .7
Warranty
. . . . . . . . . . . . . . . . . . . . . . . .
35
Español
For a Spanish version of this
manual, visit our Website at ge.com.
Para consultar una version en
español de este manual de
instrucciones, visite nuestro sitio de
internet ge.com.