GE PSCS5RGXSS Use and Care Manual
GE PSCS5RGXSS - 25CF - Refrigerator SS Manual
 |
UPC - 084691168317
View all GE PSCS5RGXSS manuals
Add to My Manuals
Save this manual to your list of manuals |
GE PSCS5RGXSS manual content summary:
- GE PSCS5RGXSS | Use and Care Manual - Page 1
6 Water Filter 9 Installation Instructions Installing the Refrigerator 28-31 Moving the Refrigerator 24-27 Preparing to Install the Refrigerator 23 Trim Kits and Panels 19-22 Water Line Installation 32-34 Troubleshooting Tips . . . . . .36-38 Normal Operating Sounds 35 Consumer Support - GE PSCS5RGXSS | Use and Care Manual - Page 2
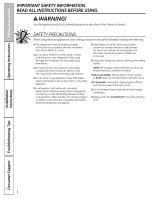
as described in this Owner's Manual. SAFETY PRECAUTIONS When using electrical appliances, basic safety precautions should be followed, including the following: s This refrigerator must be properly installed and located in accordance with the Installation Instructions before it is used. s Do - GE PSCS5RGXSS | Use and Care Manual - Page 3
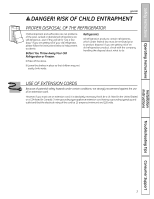
UL-listed (in the United States) or a CSA-listed (in Canada), 3-wire grounding type appliance extension cord having a grounding type plug and outlet and that the electrical rating of the cord be 15 amperes (minimum) and 120 volts. Installation Instructions Troubleshooting Tips Consumer Support 3 - GE PSCS5RGXSS | Use and Care Manual - Page 4
the possibility of electric shock hazard from this appliance. Have the wall refrigerator away from the wall, be careful not to roll over or damage the power cord. READ AND FOLLOW THIS SAFETY INFORMATION CAREFULLY. SAVE THESE INSTRUCTIONS Installation Instructions Consumer Support Troubleshooting - GE PSCS5RGXSS | Use and Care Manual - Page 5
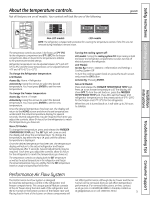
About the temperature controls. Not all features are on all models. Your controls will look like one of the following: ge.com Installation Instructions Non-LCD models LCD models NOTE: The refrigerator is shipped with protective film covering the temperature controls. If this film was - GE PSCS5RGXSS | Use and Care Manual - Page 6
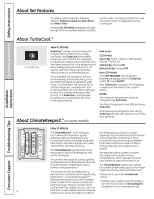
, Door Alarm and Water Filter. Pressing SET FEATURES repeatedly will cycle through all of the available features and then exit the mode. If no key is pressed, the mode will exit and return to displaying features currently set. Installation Instructions About TurboCool.™ LCD Models Only How it - GE PSCS5RGXSS | Use and Care Manual - Page 7
Safety Instructions Operating Instructions About CustomCool.™(on some models) ge.com Installation Instructions LCD Models Only ExpressThaw™ ExpressChill ™ REFRIGERATOR OPTIONS CUSTOM COOL PAN BEVERAGE CENTER TURBOCOOL BACK Non-LCD Models Only How it Works The CustomCool™ feature is used to - GE PSCS5RGXSS | Use and Care Manual - Page 8
hand. Access by: Home > Options > Refrigerator Options > Beverage Center Activate by: Pressing ON. Deactivate by: Pressing OFF. Installation Instructions Consumer Support Troubleshooting Tips Dairy Bin 8 How to Remove and Replace the Beverage Center (LCD models only) To remove: Remove dairy bin - GE PSCS5RGXSS | Use and Care Manual - Page 9
Installation Instructions Troubleshooting Tips Consumer Support About the water filter. refrigerator compartment. When to Replace the Filter LCD Models: A pop-up screen will appear on the LCD screen to remind you to replace the water filter. You can check the status of the water filter manually - GE PSCS5RGXSS | Use and Care Manual - Page 10
Instructions Safety Instructions About the shelves and bins. Not all features are on all models. Snugger Refrigerator bin Freezer tilt-out bin Refrigerator Door Bins and Freezer Door Tilt-Out Bins Bins Top Freezer Bins The larger refrigerator Instructions Consumer Support Troubleshooting - GE PSCS5RGXSS | Use and Care Manual - Page 11
Instructions Operating Instructions Installation Instructions ge.com Not all features are on all models NOTE FOR DISPENSER MODELS: In order to supports. Rotate the right side of the shelf up and out of the shelf supports. Door Wine/Beverage Rack (on some models in the molded supports on the door. - GE PSCS5RGXSS | Use and Care Manual - Page 12
pin, prevents the pin from turning unless a wrench is used.) 7/16″ Wrench Raise After one or two turns of the wrench, open and close the refrigerator door and check the alignment at the top of the doors. Installation Instructions Consumer Support Troubleshooting Tips 12 - GE PSCS5RGXSS | Use and Care Manual - Page 13
water that may accumulate in the bottom of the drawers should be wiped dry. On some models, the bottom drawer has full extension slides that allow full access to the drawer. ge.com Installation Instructions Troubleshooting Tips Consumer Support pan to normal refrigerator temperature and The - GE PSCS5RGXSS | Use and Care Manual - Page 14
other use conditions. If the refrigerator is operated before the water connection is made to the Switch Icemaker Green Power Light Feeler Arm NOTE: In homes with lower-than-average water pressure, you may Models only Installation Instructions Consumer Support Troubleshooting Tips Lift and pull forward - GE PSCS5RGXSS | Use and Care Manual - Page 15
pad twice and QUICK ICE will blink. Press ON/OFF to turn the feature on, then again to turn it off. Troubleshooting Tips Consumer Support Precise Fill (on some models) This water dispenser is equipped with a feature called "precise fill." This feature allows you to choose a precise amount of - GE PSCS5RGXSS | Use and Care Manual - Page 16
Operating Instructions Safety Instructions About the ice and water dispenser. (on some models) Important Facts About Your a clean cloth lightly dampened with kitchen appliance wax or mild liquid dish detergent. Dry and polish with a clean, soft cloth. Do not wipe the refrigerator with a soiled - GE PSCS5RGXSS | Use and Care Manual - Page 17
, do not rest the front or back of the refrigerator against the hand truck. This could damage the refrigerator. Handle only from the sides of the refrigerator. Be sure the refrigerator stays in an upright position during moving. Installation Instructions Troubleshooting Tips Consumer Support 17 - GE PSCS5RGXSS | Use and Care Manual - Page 18
pull it out. Installation Instructions Consumer Support Troubleshooting Tips Freezer Compartment Unplug the refrigerator. Remove the shelf just above the light shield. (The shelf will be easier to remove if it is emptied first.) On some models, a screw at the top of the light shield will need to - GE PSCS5RGXSS | Use and Care Manual - Page 19
lbs. (13 kg) max. Panels thicker than 1/4″ (6 mm) 5/16″ (8 mm) 1/4″ (6 mm) max 3/4″ (19 mm) 2″ (5.1 cm) Clearance Handle Side Appearance Panel 1/4″ (6 mm) Thick Backing 3/4″ (19 mm) Refrigerator Door Installation Instructions Troubleshooting Tips Consumer Support 19 - GE PSCS5RGXSS | Use and Care Manual - Page 20
Instructions 679⁄ 32″ (170.9 cm) FRONT 1415⁄ 32″ (36.8 cm) FRONT 1415⁄ 32″ (36.8 cm) 335⁄ 8″ (85.4 cm) 25' CustomStyle™ Dimensions 32″ (49.5 cm) Fresh Food Panel 1/8″ (3 mm) Cutout 5/16″ (8 mm) Consumer Support Troubleshooting Tips 69″ (175.3 cm) FRONT 1415⁄ 32″ (36.8 cm) 20 FRONT 1415⁄ 32″ - GE PSCS5RGXSS | Use and Care Manual - Page 21
Instructions Operating Instructions Installation Instructions Inserting the door panels. Read these instructions food panel. If your model has a dispenser, this step Top Trim can be found inside the refrigerator compartment. door. Hand tighten only. Troubleshooting Tips Consumer Support 21 - GE PSCS5RGXSS | Use and Care Manual - Page 22
Operating Instructions Safety Instructions Inserting the door panels. Install the Side Trim. These pieces are tucked inside the refrigerator door handle. Do appearance of all the parts. Top Trim Side Trim Side Trim Bottom Trim Installation Instructions Consumer Support Troubleshooting Tips 22 - GE PSCS5RGXSS | Use and Care Manual - Page 23
If the refrigerator has an icemaker, it will have to be connected to a cold water line. A GE water supply kit (containing tubing, shutoff valve, fittings and instructions) is available at extra cost from your dealer, by visiting our Website at ge.com (in Canada at geappliances.ca) or from Parts and - GE PSCS5RGXSS | Use and Care Manual - Page 24
NOT remove the handles. If all entrances are more than 38″ wide, skip to Installing the Refrigerator. 3 DISCONNECT THE WATER COUPLING (on some models) If the refrigerator has a water dispenser, there is a water line from the cabinet into the bottom hinge on the freezer door that must be disconnected - GE PSCS5RGXSS | Use and Care Manual - Page 25
Installation Instructions 4 DISCONNECT THE POWER COUPLING (on some models) If the refrigerator has a water dispenser, there is a power REFRIGERATOR DOORS Bottom freezer hinge 5 DISCONNECT THE ELECTRICAL CONNECTORS (on some models) If the refrigerator has a refreshment center, there are electrical - GE PSCS5RGXSS | Use and Care Manual - Page 26
Instructions MOVING THE REFRIGERATOR (CONT.) 7 REMOVE THE FREEZER DOOR (cont.) D As one person slowly lifts the freezer door up and off the bottom hinge, the second person should carefully guide the water line and power line (harness) through the bottom hinge. 8 REMOVE THE REFRIGERATOR - GE PSCS5RGXSS | Use and Care Manual - Page 27
Installation Instructions 8 REMOVE THE REFRIGERATOR DOOR (cont .) D Lift the refrigerator door up and off the bottom hinge. If the refrigerator has a refreshment center, one person should slowly lift the door up and off the bottom hinge and the second person should carefully guide the electrical - GE PSCS5RGXSS | Use and Care Manual - Page 28
Top Back 23'/25' CustomStyle™ 1/8″ (4 mm) 1″ (25 mm) 1/2″ (13 mm) 23' (33" wide), 25', 26', 27', 29' 1/8″ (4 mm) 1″ (25 mm) 1″ (25 mm) DIMENSIONS AND SPECIFICATIONS Water Electrical 701⁄4″ (178.4 cm) 36″ (91.4 cm) 24″ (61 cm) DIMENSIONS AND SPECIFICATIONS (for 25' CustomStyle™ models) 24″ (61 - GE PSCS5RGXSS | Use and Care Manual - Page 29
outlet. • If your refrigerator does not have a water filter, we recommend installing one if your water supply has sand or particles that could clog the screen of the refrigerator's water valve. Install it in the water line near the refrigerator. If using GE SmartConnect™ Refrigerator Tubing Kit, you - GE PSCS5RGXSS | Use and Care Manual - Page 30
3/8″ hex socket or wrench, or an adjustable wrench. 5 LEVEL THE REFRIGERATOR (cont.) To adjust the rollers on 23'/25' CustomStyle™ models: Turn the front roller adjusting screws clockwise to raise the refrigerator, counterclockwise Roller adjusting screws to lower it. Use a 3/8″ hex wrench - GE PSCS5RGXSS | Use and Care Manual - Page 31
Installation Instructions 7 REPLACE THE BASE GRILLE Replace the grille by installing the two Phillips head screws. 9 8 SET THE CONTROLS Set the controls to the recommended setting. Power switch NOTE: In lower water pressure conditions, the water valve may turn on up to 3 times to deliver enough - GE PSCS5RGXSS | Use and Care Manual - Page 32
Installation Instructions INSTALLING THE WATER LINE (ICEMAKER & DISPENSER MODELS) BEFORE YOU BEGIN Recommended copper water supply kits are WX8X2, WX8X3 or WX8X4, depending on the amount of tubing you need. Approved plastic water supply lines are GE SmartConnect™ Refrigerator Tubing (WX08X10006, - GE PSCS5RGXSS | Use and Care Manual - Page 33
Installation Instructions WHAT YOU WILL NEED (CONT.) NOTE: The only GE approved plastic tubing is that supplied in GE SmartConnect™ Refrigerator Tubing kits. Do not use any other plastic water supply line because the line is under pressure at all times. Certain types of plastic will crack or - GE PSCS5RGXSS | Use and Care Manual - Page 34
Instructions INSTALLING THE WATER LINE (CONT.) 4 FASTEN THE SHUTOFF VALVE Fasten the shutoff valve to the cold water pipe with the pipe clamp. Pipe Clamp Saddle-Type Shutoff Valve Vertical Cold Water securely. For plastic tubing from a GE SmartConnect™ Refrigerator Tubing kit, insert the molded - GE PSCS5RGXSS | Use and Care Manual - Page 35
hear the fans come on in order to cool the light bulbs. s The fans change speeds in order to provide optimal cooling and energy savings. s You may hear the fans running after selecting About the ice and water dispenser sections. Installation Instructions Troubleshooting Tips Consumer Support 35 - GE PSCS5RGXSS | Use and Care Manual - Page 36
you call for service... Troubleshooting Tips Save time and money! Review the charts on the following pages first and you may not need to call for service. Installation Instructions Problem Refrigerator does not operate Vibration or rattling (slight vibration is normal) Motor operates for long - GE PSCS5RGXSS | Use and Care Manual - Page 37
ge.com Installation Instructions Problem Possible Causes What To Do Frequent "buzzing" sound Icemaker power switch is in the • Set the power switch to the O (off) position. Keeping it in I (on) position, but the water supply the I (on) position will damage the water valve. to the refrigerator - GE PSCS5RGXSS | Use and Care Manual - Page 38
call for service... Installation Instructions Problem Orange glow in the freezer Refrigerator has odor Door not closing properly Moisture forms on outside of refrigerator Moisture collects inside (in humid weather, air carries moisture into refrigerator when doors are opened) Interior light does - GE PSCS5RGXSS | Use and Care Manual - Page 39
Other Parts One (1) Year One (1) Year One (1) Year TERMS AND CONDITIONS: This warranty applies only for single family domestic use in Canada when the Refrigerator has been properly installed according to the instructions supplied by Mabe and is connected to an adequate and proper utility service - GE PSCS5RGXSS | Use and Care Manual - Page 40
. During this limited one-year warranty, GE will also provide, free of charge, all labor and related service to replace the defective part. Thirty Days (Water filter, if included) From the original purchase date of the refrigerator Any part of the water filter cartridge which fails due to a defect - GE PSCS5RGXSS | Use and Care Manual - Page 41
instructions, parts and service availability, and standard warranty are included with the product when shipped. This drinking water system must be maintained according to manufacturer's instructions, including replacement of filter NSF® Manufactured for: General Electric Company, Louisville, KY 40225 - GE PSCS5RGXSS | Use and Care Manual - Page 42
For Purchases Made In Iowa: This form must be signed and dated by the buyer and seller prior to the consummation of this sale. This form should be retained on file by the seller for a minimum of two years. BUYER: SELLER: Name Name Address Address City State Zip City State Zip Signature - GE PSCS5RGXSS | Use and Care Manual - Page 43
you with excellent service in a professional and timely manner. Place your confidence in GE and call us in the U.S. toll-free at 1.800.626.2224 for more information. *Most brands covered up to 15 years old in the continental U.S. SPP is a trademark of General Electric Company. ✁ Cut here Please - GE PSCS5RGXSS | Use and Care Manual - Page 44
! Model Number Serial Number First Name Mr. s Ms. s Mrs. s Miss s Street Address Last Name Apt. # E-mail Address* Zip City State Code Date Placed In Use Month Day Year Phone _ _ Number GE Consumer & Industrial Appliances General Electric Company Louisville, KY 40225 ge.com - GE PSCS5RGXSS | Use and Care Manual - Page 45
Notes. 45 Safety Instructions Operating Instructions Installation Instructions Troubleshooting Tips Consumer Support - GE PSCS5RGXSS | Use and Care Manual - Page 46
Fonctionnement Mesures de sécurité Installation Mesures de sécurit 47, 48 Fonctionnement Clayettes et bacs 54, 55 ClimateKeeper2 50 CustomCool 51, 52 Enlèvement des contenants 57 Entretien et nettoyage du réfrigérateur 60, 61 Le distributeur d'eau et de glaçons . . . . .59-60 Le filtre à eau - GE PSCS5RGXSS | Use and Care Manual - Page 47
toujours étroits. DANGER! RISQUES POUR LES ENFANTS COMMENT VOUS DÉBARRASSER CONVENABLEMENT DE VOTRE ANCIEN RÉFRIGÉRATEUR Les enfants pris au piège ou morts d'asphyxie sont toujours d'actualité. Les réfrigérateurs abandonnés sont toujours aussi dangereux, même si on n'attend que «quelques jours - GE PSCS5RGXSS | Use and Care Manual - Page 48
Fonctionnement Mesures de sécurité MESURES DE SÉCURITÉ IMPORTANTES. LISEZ D'ABORD TOUTES LES DIRECTIVES. AVERTISSEMENT! RACCORDEMENT ÉLECTRIQUE Ne coupez ni retirez en aucun cas la troisième broche (mise à la terre) de la fiche du cordon d'alimentation. Pour votre sécurité, cet appareil doit ê - GE PSCS5RGXSS | Use and Care Manual - Page 49
du réfrigérateur : Modèles avec écran ACL : Accès : Home > Refrigerator Activation : Les flèches permettent de sélectionner la température désirée. Vous température. (Pour recevoir les instructions de démontage de ces éléments en ligne, veuillez contacter GE sur le site Web electromenagersge.ca - GE PSCS5RGXSS | Use and Care Manual - Page 50
TurboCool, Quick Ice, Door Alarm et Water Filter. Une pression à répétition sur SET FEATURES cran ACL : Accès : Home > Options > Refrigerator Options > TurboCool Activation : Appuyez sur la touche fonction des variations une efficacité de niveau E star. de la charge d'aliments et des conditions - GE PSCS5RGXSS | Use and Care Manual - Page 51
contenant. Placez les aliments sur le plateau et fermez le contenant complètement. Modèles avec écran ACL : Accès : Home > Options > Refrigerator Options > CustomCool Pan Modèles sans écran ACL : Appuyez sur l'une des touches ExpressThaw™, ExpressChill™ ou SelectTemp™. L'affichage et le voyant SET - GE PSCS5RGXSS | Use and Care Manual - Page 52
température plus basse. Utilisez cette fonction si vous souhaitez avoir des breuvages très glacés à votre disposition. Accès : Home > Options > Refrigerator Options > Beverage Center Activation : Appuyez sur la touche ON. Désactivation : Appuyez sur la touche OFF. Conseils de dépannage Soutien au - GE PSCS5RGXSS | Use and Care Manual - Page 53
Accès : Home > Options > Dispenser Options > Reset Water Filter Modèles sans écran ACL : Une lumière support de cartouche. Placez le haut de la nouvelle cartouche à l'intérieur du support notre site Web à l'adresse ge.com, ou appelez le Service des pièces et accessoires GE au 800.626.2002. MSWF - GE PSCS5RGXSS | Use and Care Manual - Page 54
extérieur. Remise en place ou relocalisation : Alignez la clayette avec les supports et faites glisser en place. L'étagère peut être repositionnée lorsque la glisser vers le bas dans la position désirée, alignez-la avec les supports et glissez-la en place. Prenez soin de pousser la clayette jusqu'au - GE PSCS5RGXSS | Use and Care Manual - Page 55
clayette : Soulevez le côté gauche de la clayette et faites-le glisser vers la gauche au centre des supports de la clayette. Soulevez le côté droit de la clayette puis sortez-le des supports de la clayette. NOTE CONCERNANT LES MODÈLES AVEC DISTRIBUTEUR : Afin de tirer pleinement avantage du tiroir - GE PSCS5RGXSS | Use and Care Manual - Page 56
Fonctionnement Mesures de sécurité Les portes du réfrigérateur. Portes du réfrigérateur Les portes de votre réfrigérateur ne sont pas tout à fait comme celles dont vous avez l'habitude. Un système spécial d'ouverture/fermeture assure que les portes ferment complètement et hermétiquement. Lorsque - GE PSCS5RGXSS | Use and Care Manual - Page 57
au contenant. Réglez la temperature à la position froid pour ramener le contenant à une temperature Le réglage de temperature variable normale de refrigeration et l'utiliser comme contrôle la circulation d'air en provenance espace supplémentaire pour les legumes. de la canalisation d'air du - GE PSCS5RGXSS | Use and Care Manual - Page 58
Fonctionnement Mesures de sécurité Installation Machine à glaçons automatique. Il faut prévoir entre 12 et 24 heures avant qu'un réfrigérateur nouvellement installé commence à produire des glaçons. Dans le cas des modèles avec distributeur, pour atteindre la glace ou l'interrupteur : Soulevez le - GE PSCS5RGXSS | Use and Care Manual - Page 59
le distributeur Sélectionnez CUBED (glaçons), CRUSHED (glace concassée) ou WATER (eau). Appuyez doucement le verre contre le haut du bras de distribution tenez-la enfoncée pendant encore 3 secondes. Lumière du distributeur La touche LIGHT (lumière) allume et éteint la lumière du distributeur. Vous - GE PSCS5RGXSS | Use and Care Manual - Page 60
Fonctionnement Mesures de sécurité Le distributeur d'eau et de glaçons. (sur certains modèles) Renseignements importants concernant votre distributeur s N'ajoutez pas dans le bac à glaçons des glaçons non fabriqués par votre machine à glaçons. Ils risquent d'être difficiles à concasser ou à - GE PSCS5RGXSS | Use and Care Manual - Page 61
place en le poussant, veillez à ne pas le faire rouler sur le cordon d'alimentation ou sur la conduite d'eau de la machine à glaçons. Départ en vacances Lorsque vous vous absentez pendant une période prolongée, videz et débranchez le réfrigérateur. Nettoyez l'intérieur avec une solution d'eau et de - GE PSCS5RGXSS | Use and Care Manual - Page 62
DEL apparaît dans le haut du compartiment réfrigérateur sur les modèles Affichage DEL ACL. Si cet ensemble doit être remplacé, communiquez avec le Service GE au 1.800.432.2737 aux États-Unis ou 62 1.800.561.3344 au Canada. Conseils de dépannage Soutien au consommateur - GE PSCS5RGXSS | Use and Care Manual - Page 63
monter des panneaux de porte. Vous pouvez commander des panneaux de décoration pré-découpés des couleurs suivantes : noir, blanc, bisque ou acier inoxydable au service de Pièces et accessoires 1.888.261.3055, ou vous pouvez ajouter des panneaux de bois qui vont avec votre cuisine. Panneaux de moins - GE PSCS5RGXSS | Use and Care Manual - Page 64
,8 cm (1415⁄ 32 po) DEVANT 36,8 cm (1415⁄ 32 po) 85,4 cm (335⁄ 8 po) 170,9 cm (679⁄ 32 po) DEVANT 49,5 cm (1915⁄ 32 po) 25' Dimensions « CustomStyle™ » pour les panneaux de bois sur mesure Les parties supérieures des panneaux doivent être découpées dans les panneaux. Panneau du congélateur - GE PSCS5RGXSS | Use and Care Manual - Page 65
Mesures de sécurité Fonctionnement Installation Installation des panneaux de porte. Veuillez lire toutes les directives attentivement. Insérez les panneaux du congélateur et du réfrigérateur. Poussez délicatement sur le panneau supérieur du congélateur jusqu'à ce qu'il soit inséré dans la - GE PSCS5RGXSS | Use and Care Manual - Page 66
Fonctionnement Mesures de sécurité Installation des panneaux de porte. Installez la moulure latérale. Ces pièces se trouvent à l'intérieur de la poignée de porte du compartiment réfrigérateur. N'enlevez pas la pellicule protectrice qui se trouve à l'extérieur de la moulure latérale avant d'avoir - GE PSCS5RGXSS | Use and Care Manual - Page 67
d'eau froide. Vous pouvez acheter une trousse d'alimentation d'eau GE (contenant la tuyauterie, le robinet d'arrêt, les joints et les instructions) chez votre revendeur ou en vous adressant à notre site Web à l'adresse electromenagersge.ca ou à notre service de Pièces et accessoires au numéro de - GE PSCS5RGXSS | Use and Care Manual - Page 68
Instructions d'installation DÉMÉNAGEMENT DU RÉFRIGÉRATEUR 1 CHARGEMENT DU RÉFRIGÉRATEUR réfrigération est doté d'un rafraîchisseur d'eau, alors il faut débrancher la conduite d'eau qui part de la carosserie et s'insère dans la charnière inférieure de la porte du compartiment congélation. - GE PSCS5RGXSS | Use and Care Manual - Page 69
Instructions d'installation 4 DÉBRANCHEZ LE RACCORD D'ALIMENTATION ÉLECTRIQUE (sur certains modèles) Si le compartiment réfrigération est doté d'un rafraîchisseur d'eau, alors il faut débrancher la conduite électrique (faisceau) qui part de la carosserie et s'insère dans la charnière inférieure de - GE PSCS5RGXSS | Use and Care Manual - Page 70
Instructions d'installation DÉMÉNAGEMENT DU RÉFRIGÉRATEUR (SUITE) 7 ENLEVEZ LA PORTE DU COMPARTIMENT CONGÉLATION (suite) D Pendant qu'une personne soulève lentement la porte du compartiment - GE PSCS5RGXSS | Use and Care Manual - Page 71
Instructions d'installation 8 ENLEVEZ LA PORTE DU COMPARTIMENT RÉFRIGÉRATION (suite) D Soulevez la porte la porte pour la dégager de la charnière inférieure, pendant qu'une deuxième personne guide minutieusement les conduites électriques (faisceaux) à travers la charnière inférieure. 9 REMISE EN - GE PSCS5RGXSS | Use and Care Manual - Page 72
Instructions d'installation INSTALLATION DU RÉFRIGÉRATEUR EMPLACEMENT DU RÉFRIGÉRATEUR • ,4 cm (701⁄4 po) 91,4 cm (36 po) 61 cm (24 po) DIMENSIONS ET SPÉCIFICATIONS (pour les modèles « CustomStyle™ » de 25′) DIMENSIONS ET SPÉCIFICATIONS Eau Électricité Armoire de 61 cm (24 po) Dégagement de 19 - GE PSCS5RGXSS | Use and Care Manual - Page 73
Instructions d'installation 1 BRANCHEMENT DU RÉFRIGÉRATEUR À LA CONDUITE D'EAU DE LA Installez-le sur la conduite d'eau près du réfrigérateur. Si vous utilisez une trousse GE SmartConnect™ Refrigerator Tubing, vous aurez besoin d'un tuyau additionnel (WX08X10002) pour brancher le filtre. Ne coupez - GE PSCS5RGXSS | Use and Care Manual - Page 74
Instructions d'installation INSTALLATION DU RÉFRIGÉRATEUR (SUITE) 4 PLACEZ LE RÉFRIG METTEZ LE RÉFRIGÉRATEUR DE NIVEAU (suite) Pour ajuster les roulettes sur les modèles CustomStyle™ de 23′ / 25′ : Tournez les vis de réglage des roulettes dans le sens des Vis de réglage aiguilles d'une montre pour - GE PSCS5RGXSS | Use and Care Manual - Page 75
Instructions d'installation 7 REPLACEZ LA GRILLE DE BASE Replacez la grille de base en installant les deux vis à tête cruciforme (Phillips). 9 METTEZ EN MARCHE LA MACHINE À GLAÇ - GE PSCS5RGXSS | Use and Care Manual - Page 76
de réfrigérateur ou de machine à glaçons. Suivez soigneusement ces instructions pour minimiser le risque de dommages onéreux d'inondation. Les coups GE SmartConnect™ Refrigerator Tubing sont disponibles dans les dimensions suivantes : 1,8 m (6 pi) - WX08X10006 4,6 m (15 pi) - WX08X10015 7,6 m (25 - GE PSCS5RGXSS | Use and Care Manual - Page 77
Instructions d'installation CE DONT VOUS AUREZ BESOIN (SUITE) • Une alimentation d'eau froide compression. Ne coupez jamais l'extrémité finie d'un tuyau de la trousse GE SmartConnect™ Refrigerator Tubing. 2 CHOISISSEZ L'EMPLACEMENT DU ROBINET Choisissez pour le robinet un emplacement facilement - GE PSCS5RGXSS | Use and Care Manual - Page 78
Instructions d'installation INSTALLATION DE LA CONDUITE D'EAU (SUITE) 4 FIXEZ LE ROBINET D' le robinet. Serrez fort l'écrou de compression. Pour le tuyau en matière plastique d'une trousse GE SmartConnect™ Refrigerator Tubing, insérez l'extrémité moulée du tuyau dans le robinet d'arrêt et serrez - GE PSCS5RGXSS | Use and Care Manual - Page 79
Mesures de sécurité Fonctionnement Bruits normaux de fonctionnement. electromenagersge.ca Les réfrigérateurs plus récents font des bruits différents de ceux des anciens. Les réfrigérateurs modernes présentent plus de fonctions et sont plus avancés sur le plan technologique. Entendez-vous ce que - GE PSCS5RGXSS | Use and Care Manual - Page 80
Fonctionnement Mesures de sécurité Avant d'appeler un réparateur... Conseils de dépannage-Économisez du temps et de l'argent! Consultez d'abord les tableaux qui suivent et vous pourrez peut-être éviter de faire appel à un réparateur. Installation Problème Le réfrigérateur ne fonctionne pas - GE PSCS5RGXSS | Use and Care Manual - Page 81
Mesures de sécurité Fonctionnement electromenagersge.ca Installation Problème Causes possibles Correctifs La machine à glaçons ne fonctionne pas L'interrupteur d'alimentation de la machine à glaçons est à la position d'arrêt. • Réglez l'interrupteur d'alimentation à la position de marche. - GE PSCS5RGXSS | Use and Care Manual - Page 82
Fonctionnement Mesures de sécurité Avant d'appeler un réparateur... Installation Problème Causes possibles Correctifs Le distributeur d'eau ne fonctionne pas L'alimentation en eau est • Consultez Installation de la conduite d'eau. coupée ou n'est pas raccordée. Le filtre à eau est bouché. - GE PSCS5RGXSS | Use and Care Manual - Page 83
Mesures de sécurité Fonctionnement electromenagersge.ca Problème Causes possibles Correctifs Le réfrigérateur ne s'arrête jamais mais les températures sont normales La fonction de dégivrage maintient le compresseur en marche au cours de l'ouverture des portes. • Ceci est normal. Le réfrigé - GE PSCS5RGXSS | Use and Care Manual - Page 84
GE et toutes autre marques : Un (1) an Un (1) an Un (1) an Un (1) an TERMES ET CONDITIONS : La présente garantie ne s'applique qu'à l'utilisation domestique par une seule famille au Canada, lorsque le réfrigérateur a été installé conformément aux instructions pour obtenir un service dans le cadre - GE PSCS5RGXSS | Use and Care Manual - Page 85
trop lent. Avis spéciaux Les directives d'installation, la disponibilité de pièces et de service ainsi que la garantie standard sont expédiées avec le produit. Ce système d' de spores, Réduction de asbestos NSF® Fabriquée pour : General Electric Company, Louisville, KY 40225 1.800.626.2002 85 - GE PSCS5RGXSS | Use and Care Manual - Page 86
Notes. 86 Soutien au consommateur Conseils de dépannage Installation Fonctionnement Mesures de sécurité - GE PSCS5RGXSS | Use and Care Manual - Page 87
énager? Contactez-nous par Internet au site electromenagersge.ca, tous les jours de l'année. Service de réparations Service de réparations GE est tout près de vous. Pour faire réparer votre électroménager GE, il suffit de nous téléphoner. 1.800.561.3344 Studio de conception réaliste Sur demande - GE PSCS5RGXSS | Use and Care Manual - Page 88
de modelo y de serie: No. de modelo No. de serie Usted los verá en una etiqueta en el interior del compartimiento de refrigerador en la parte superior en el lado derecho. 88 Servicio al consumidor Solucionar problemas - GE PSCS5RGXSS | Use and Care Manual - Page 89
LAS INSTRUCCIONES. ge.com ¡ADVERTENCIA! Use este aparato sólo para los fines que se describen en este Manual del propietario. refrigerador. Podría dañarse el refrigerador y causarles serias lesiones. localizado en la parte inferior del dispositivo para hacer hielo. No ponga los dedos ni las manos - GE PSCS5RGXSS | Use and Care Manual - Page 90
Seguridad Operación INFORMACIONES IMPORTANTES DE SEGURIDAD. LEA PRIMERO TODA LAS INSTRUCCIONES. ¡ADVERTENCIA! COMO CONECTAR LA ELECTRICIDAD Bajo ninguna circunstancia debe cortar o quitar la tercera punta (tierra) de la clavija. Para su seguridad personal, este aparato deberá conectarse - GE PSCS5RGXSS | Use and Care Manual - Page 91
del refrigerador: Modelos con pantalla de LCD: Vaya a Home y luego a Refrigerator Seleccione la temperatura deseada con las flechas. Debe presionar ENTER para que la en contacto con nosotros visitándonos a ge.com o llamándonos al 800.GE.CARES.) 91 Solucionar problemas Servicio al consumidor - GE PSCS5RGXSS | Use and Care Manual - Page 92
Door Alarm (Alarma de la Puerta) y Water Filter (Filtro de Agua). Acerca de TurboCool.™ Al pantalla de LCD: Vaya a Home, luego Options, luego Refrigerator Options, y TurboCool Active presionando ON. Desactive presionando OFF. conforme se depositen nivel E star. en su interior diferentes tipos - GE PSCS5RGXSS | Use and Care Manual - Page 93
Acerca de CustomCool.™(en algunos modelos) ge.com Seguridad Operación Instalación REFRIGERATOR OPTIONS CUSTOM COOL PAN BEVERAGE CENTER TURBOCOOL BACK Modelos con pantalla de LCD solamente ExpressThaw™ (Descongelación expresa) ExpressChill ™ (Refrigeración expresa) Modelos que no tienen - GE PSCS5RGXSS | Use and Care Manual - Page 94
fríos. Vaya a Home, luego a Options, luego a Refrigerator Options y por último a Beverage Center Active presionando ON. Desactive Para retirar: Retire el compartimiento de productos lácteos primero. Sosteniendo la parte inferior del compartimiento de productos lácteos, levante el frente de forma - GE PSCS5RGXSS | Use and Care Manual - Page 95
trasera del compartimento del refrigerador. Cuándo reemplazar el filtro Modelos con manera manual. Vaya a Home, luego a Options, luego a Dispenser Options y por último a Reset Water Filter Modelos Unidos, visite nuestro sitio Web, ge.com, o llame a GE para partes y accesorios al 800.626.2002. MSWF - GE PSCS5RGXSS | Use and Care Manual - Page 96
cuando reemplace artículos en el recipiente superior. Cerciórese de que ningún artículo bloquee o caiga en el vertedor de hielo. PRECAUCIÓN: La parte debe estar en su lugar como se exhibe para un dispensado correcto del hielo. Los alimentos no se pueden almacenar en este lugar. Recipiente superior - GE PSCS5RGXSS | Use and Care Manual - Page 97
Seguridad ge.com No todos los modelos tienen todas las características. Cestas de congelador Para remover, empuje la canasta totalmente hacia la parte posterior del congelador. Levante hasta que los pasadores posteriores sean desenganchados. Levante la canasta completa hacia arriba y hacia afuera - GE PSCS5RGXSS | Use and Care Manual - Page 98
Seguridad Operación Puertas del refrigerador. Puertas del refrigerador Es posible que Ud. note una diferencia entre el manejo de las puertas de su antiguo y nuevo refrigerador. La característica especial de abertura y cierre de las puertas asegura que estas cierren por completo y permanezcan - GE PSCS5RGXSS | Use and Care Manual - Page 99
deben ser secadas. En algunos modelos, la gaveta inferior tiene deslizadores de extensión total que permiten acceso total a la gaveta. ge.com Operación Instalación Solucionar problemas Servicio al consumidor COLD Gavetas con humedad ajustable HI LO Deslice el control hasta llegar a la - GE PSCS5RGXSS | Use and Care Manual - Page 100
Seguridad Operación Instalación El dispositivo automático para hacer hielo. Un refrigerador recién instalado puede tardar hasta 12 a 24 horas antes de empezar a hacer hielo. En los modelos con dispensador, para lograr acceso al hielo o para alcanzar el interruptor: Levante el cubo, entonces tí - GE PSCS5RGXSS | Use and Care Manual - Page 101
(en algunos modelos) ge.com Recogedor Para usar el dispensador Seleccione CUBED (cubos de hielo), CRUSHED (hielo triturado) o WATER (agua). Presione el la misma tecla durante 3 segundos nuevamente. Dispenser Light (Luz del dispensador) La tecla LIGHT (Luz) enciende y apaga la luz nocturna del - GE PSCS5RGXSS | Use and Care Manual - Page 102
salida del hielo situada en la puerta. Esto es normal y, por regla general, sucede cuando ha dispensado hielo picado repetidamente. La nieve se evaporará pedazos. (15 ml) de bicarbonato de sodio por cada cuarto No lave partes plásticas del refrigerador (1 litro) de agua. Esta solución limpia y - GE PSCS5RGXSS | Use and Care Manual - Page 103
Seguridad Operación ge.com Atrás del refrigerador Se deberá tener cuidado al retirar su lugar para evitar daños. Al usar una carretilla para mover el refrigerador, no haga descansar la parte frontal o trasera del refrigerador contra la carretilla. Esto podría dañar el refrigerador. Manéjelo sólo - GE PSCS5RGXSS | Use and Care Manual - Page 104
en la parte superior del parte frontal de la cubierta de la luz. En otros modelos, retirar un tornillo en la bolsa en la parte parte trasera de la cubierta quepan en las ranuras de la parte tendrá que retirarse un tornillo de la parte superior de la cubierta de la luz. parte superior del compartimiento - GE PSCS5RGXSS | Use and Care Manual - Page 105
instalar paneles en las puertas. Puede usted ordenar los paneles decorativos precortados en negro, blanco, bisqué o de acero inoxidable en GE Parts and Accessories (partes y accesorios), 800.626.2002 o puede añadir paneles de madera para que hagan juego con los gabinetes de su cocina. Paneles - GE PSCS5RGXSS | Use and Care Manual - Page 106
) FRENTE 1415⁄ 32″ (36,8 cm) FRENTE 1415⁄ 32″ (36,8 cm) 335⁄ 8″ (85,4 cm) 679⁄ 32″ (170,9 cm) FRENTE 1915⁄ 32″ (49,5 cm) 25' Dimensiones CustomStyle™ de los paneles precortados Las áreas superiores de los paneles necesitan recortarse. Panel del congelador sin dispensador Paneles del congelador - GE PSCS5RGXSS | Use and Care Manual - Page 107
. Con un Torxdriver T-20, sujete la moldura superior, usando dos tornillos en cada parte de la moldura superior, en la parte superior de cada puerta. Apriete solamente con las manos. Cerciórese de que la parte superior de cada panel ajusta cómodamente detrás de la tapa de la moldura superior - GE PSCS5RGXSS | Use and Care Manual - Page 108
protectora al exterior de la moldura lateral sino hasta que haya quedado instalada la moldura lateral. Acomode la parte inferior de la moldura lateral debajo de la moldura de la parte inferior como se ilustra. Sujete la moldura lateral contra la cara delantera de los paneles decorativos y sujete la - GE PSCS5RGXSS | Use and Care Manual - Page 109
23, 25, 26, 27 y 29 ¿Preguntas? Llame al 800.GE.CARES (800.432.2737) o bien Visite nuestra página Web: ge.com ANTES costo adicional a través de su proveedor, visitando nuestra página Web ge.com o bien a través de Partes y Accesorios, 800.626.2002. HERRAMIENTAS QUE USTED NECESITARÁ Cubo de - GE PSCS5RGXSS | Use and Care Manual - Page 110
Instrucciones para la instalación CÓMO MOVER EL REFRIGERADOR 1 CÓMO CARGAR EL REFRIGERADOR EN UNA CARRETILLA DE MANO Deje toda la cinta adhesiva y las almohadillas hasta que el refrigerador llegue a su destino final. Para mover el refrigerador, use una carretilla de mano con almohadillas. Coloque - GE PSCS5RGXSS | Use and Care Manual - Page 111
Instrucciones para la instalación 4 DESCONECTE EL ACOPLAMIENTO ENERGÉTICO (en algunos modelos) Si el refrigerador tiene un dispensador de agua, hay una línea de suministro eléctrico (alambrado) desde el gabinete hacia la bisagra del fondo de la puerta del congelador que debe ser desconectado. Para - GE PSCS5RGXSS | Use and Care Manual - Page 112
liberarla del pasador de la bisagra. Cabeza hexagonal de 5/16″ ó 1/8″ 90° E Coloque la puerta en una superficie donde no se ralle con la parte interna hacia arriba. 8 REMUEVA LA PUERTA DEL REFRIGERADOR A Remueva la cubierta de la bisagra superior de la puerta del refrigerador (si viene equipado - GE PSCS5RGXSS | Use and Care Manual - Page 113
ximo indicado por la marca. 90° Modelos con centro para refrescar solamente E Coloque la puerta en una superficie donde no se ralle con la parte interna hacia arriba. Marca • No pellizque la tubería o el alambrado mientras se encuentre remplazando las puertas en las bisagras del fondo. • Cuando se - GE PSCS5RGXSS | Use and Care Manual - Page 114
CustomStyle™ de 23′/25′ 1/8″ (4 mm) 1″ (25 mm) 1/2″ (13 mm) 23' (33" de ancho), 25′, 26′, 27′ y 29′ 1/8″ (4 mm) 1″ (25 mm) 1″ (25 mm) DIMENSIONES Y instalados por encima del refrigerador tienen puertas niveladas con la parte superior de la abertura para el refrigerador, entonces se requieren - GE PSCS5RGXSS | Use and Care Manual - Page 115
agua, recomendamos que instale uno si su suministro de agua tiene arena o partículas que pudieran obstruir la pantalla de la válvula de agua del refrigerador tuberías de GE SmartConnect,™ inserte el extremo moldeado de la tubería en la conexión del refrigerador en la parte posterior del refrigerador - GE PSCS5RGXSS | Use and Care Manual - Page 116
limpieza. Para ajustar los rodillos en los modelos de 23′ (33″ de ancho), 25′, 26′, 27′ y 29′: • Gire los tornillos de ajuste del rodillo en Ajuste la puerta del refrigerador para que las puertas estén niveladas en la parte superior. Para alinear: A Usando una llave de 7/16,″ gire el tornillo - GE PSCS5RGXSS | Use and Care Manual - Page 117
Instrucciones para la instalación 7 REEMPLACE LA PARRILLA DE LA BASE Reemplace la parrilla de la base instalando los dos tornillos de cabeza Phillips. 9 INICIE LA MÁQUINA DE HIELOS Fije el interruptor de la máquina de hielos en la posición de I (encendido). La máquina de hielos no empezará a - GE PSCS5RGXSS | Use and Care Manual - Page 118
daños en su casa debido al agua. • Un kit de suministro de agua de GE (contiene tubería, válvula de apagado y accesorios enumerados abajo) está disponible a un costo adicional en su tienda o por medio de Partes y Accesorios, 800.626.2002. • Un suministro de agua fría. La presión del agua debe estar - GE PSCS5RGXSS | Use and Care Manual - Page 119
horizontal de agua, haga la conexión en la parte superior o al lado, en vez de hacerlo en la parte de abajo, para evitar retirar cualquier sedimento de No corte el extremo formado de la tubería para el refrigerador SmartConnect ™ de GE. • Válvula de cierre para conectar a la línea del agua fría. La - GE PSCS5RGXSS | Use and Care Manual - Page 120
en la válvula. Apriete la tuerca de compresión firmemente. Para tubería de plástico de un kit de tubería para el refrigerador SmartConnect ™ de GE, inserte el extremo moldeado de la tubería en la válvula de apagado y apriete la tuerca de compresión hasta que esté firmemente apretada a mano, luego - GE PSCS5RGXSS | Use and Care Manual - Page 121
Seguridad Sonidos normales de operación. ge.com Los refrigeradores más nuevos producen sonidos diferentes a los modelos más volver a arrancar (esto puede tomar hasta 5 minutos). s El tablero de control electrónico puede causar un sonido de chasquido cuando se activa el relé para controlar los - GE PSCS5RGXSS | Use and Care Manual - Page 122
el refrigerador y enchúfelo otra vez. Vibraciones o sacudidas Los rodillos requieren (una vibración ligera un ajuste. es normal) • Vea Rodillos. El motor opera durante Es normal cuando períodos prolongados o el refrigerador es recién se arranca y se para con instalado en su casa. frecuencia - GE PSCS5RGXSS | Use and Care Manual - Page 123
ge.com Seguridad Operación Instalación Problema Los cubos tienen mal olor/sabor Causas Posibles El recipiente para los cubos necesita limpieza. Alimentos transmitiendo olor/sabor a los - GE PSCS5RGXSS | Use and Care Manual - Page 124
, es posible que la temperatura real del congelador se reduzca hasta a -3°F (-19°C) 124 El interior requiere limpieza. El aire fluye para enfriar el motor. En el proceso de refrigeración es normal que salga calor de la base del refrigerador. Algunos recubrimientos de piso estan sensitivos y se - GE PSCS5RGXSS | Use and Care Manual - Page 125
ge.com Seguridad Operación Instalación Problema Humedad en el exterior del refrigerador Causas Posibles Normal en períodos con alto grado de humedad. Qué hacer • Seque - GE PSCS5RGXSS | Use and Care Manual - Page 126
área que no dispone de servicio por parte de un proveedor de servicio autorizado de GE, podría tener que hacerse cargo de cuáles son sus derechos legales, consulte a la oficina de asuntos del consumidor local o la oficina del Attorney General en su localidad. 126 Garante: General Electric Company - GE PSCS5RGXSS | Use and Care Manual - Page 127
0,5; temp. de 68° ± 5°F (20° ± 2,5°C) ** Medición en partículas/ml. Las partículas usadas eran de 0,5-1 micrón. *** Unidades de turbidez Nefelométrica-NTU Especificaciones de ón de quistes, Reducción de asbestos Hecho por General Electric Company, Louisville, KY 40225 1.800.626.2002 NSF® 127 - GE PSCS5RGXSS | Use and Care Manual - Page 128
Para Compras Hechas en Iowa: Este formulario debe ser firmado y fechado por el comprador y el vendedor antes de la conclusión de esta venta. Este formulario debe ser conservado en archivo por el comprador por un mínimo de dos años. COMPRADOR: VENDEDOR: Nombre Nombre Dirección Dirección Ciudad - GE PSCS5RGXSS | Use and Care Manual - Page 129
Notas. ge.com Seguridad Operación Instalación Solucionar problemas Servicio al consumidor 129 - GE PSCS5RGXSS | Use and Care Manual - Page 130
Notas. 130 Servicio al consumidor Solucionar problemas Instalación Operación Seguridad - GE PSCS5RGXSS | Use and Care Manual - Page 131
normales de oficina. GE Consumer Home Services estará aún ahí cuando su garantía termine. Piezas y accesorios ge.com Aquellos individuos escríbanos a: General Manager, Customer Relations GE Appliances, Appliance Park Louisville, KY 40225 ge.com Registre su electrodoméstico ge.com ¡Registre - GE PSCS5RGXSS | Use and Care Manual - Page 132
Consumer Support. GE Appliances Website In the U.S.: ge.com Have a question or need assistance with your appliance? Try the GE Appliances Website, any day of the year! For greater convenience and faster service, you can now download Owner's Manuals, order parts or even schedule service on-line.
-
 1
1 -
 2
2 -
 3
3 -
 4
4 -
 5
5 -
 6
6 -
 7
7 -
8
-
9
-
10
-
11
-
12
-
13
-
14
-
15
-
16
-
17
-
18
-
19
-
20
-
21
-
22
-
23
-
24
-
25
-
26
-
27
-
28
-
29
-
30
-
31
-
32
-
33
-
34
-
35
-
36
-
37
-
38
-
39
-
40
-
41
-
42
-
43
-
44
-
45
-
46
-
47
-
48
-
49
-
50
-
51
-
52
-
53
-
54
-
55
-
56
-
57
-
58
-
59
-
60
-
61
-
62
-
63
-
64
-
65
-
66
-
67
-
68
-
69
-
70
-
71
-
72
-
73
-
74
-
75
-
76
-
77
-
78
-
79
-
80
-
81
-
82
-
83
-
84
-
85
-
86
-
87
-
88
-
89
-
90
-
91
-
92
-
93
-
94
-
95
-
96
-
97
-
98
-
99
-
100
-
101
-
102
-
103
-
104
-
105
-
106
-
107
-
108
-
109
-
110
-
111
-
112
-
113
-
114
-
115
-
116
-
117
-
118
-
119
-
120
-
121
-
122
-
123
-
124
-
125
-
126
-
127
-
128
-
129
-
130
-
131
-
132
 |
 |
ge.com
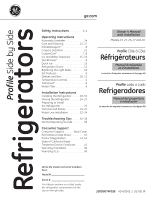
Refrigerators
Profile
Side by Side
200D8074P018
49-60541-1
02-08 JR
La section française commence à la page 46
La sección en español empieza en la página 88
Safety Instructions
. . . . . . . . . . .2–4
Operating Instructions
Automatic Icemaker . . . . . . . . . . . . . . .14
Care and Cleaning
. . . . . . . . . . . . .16, 17
ClimateKeeper2
™
. . . . . . . . . . . . . . . . . . . .6
Crispers and Pans
. . . . . . . . . . . . . . . . .13
CustomCool
™
. . . . . . . . . . . . . . . . . . . . .7, 8
Ice and Water Dispenser
. . . . . . .15–16
QuickFreeze
™
. . . . . . . . . . . . . . . . . . . . . . .9
Quick Ice . . . . . . . . . . . . . . . . . . . . . . . . . .15
Refrigerator Doors . . . . . . . . . . . . . . . . .12
Replacing the Light Bulbs
. . . . . . . . . .18
Set Features . . . . . . . . . . . . . . . . . . . . . . . .6
Shelves and Bins . . . . . . . . . . . . . . .10, 11
Temperature Controls . . . . . . . . . . . . . . .5
TurboCool
™
. . . . . . . . . . . . . . . . . . . . . . . . .6
Water Filter . . . . . . . . . . . . . . . . . . . . . . . . .9
Installation Instructions
Installing the Refrigerator . . . . . . .28–31
Moving the Refrigerator . . . . . . . .24–27
Preparing to Install
the Refrigerator . . . . . . . . . . . . . . . . . . . .23
Trim Kits and Panels . . . . . . . . . . . .19–22
Water Line Installation
. . . . . . . . .32–34
Troubleshooting Tips
. . . . . .36–38
Normal Operating Sounds . . . . . . . . . .35
Consumer Support
Consumer Support . . . . . . . .Back Cover
Performance Data Sheet . . . . . . . . . . .41
Product Registration . . . . . . . . . . . .43, 44
State of California Water
Treatment Device Certificate . . . . . . .42
Warranty (Canadian) . . . . . . . . . . . . . . .39
Warranty (U.S.)
. . . . . . . . . . . . . . . . . . . .40
Réfrigérateurs
Profile
Côte à Côte
Refrigeradores
Profile
Lado a Lado
Models 23, 25, 26, 27 and 29
Write the model and serial numbers
here:
Model # __________________________
Serial #
__________________________
Find these numbers on a label inside
the refrigerator compartment at the
top on the right side.
Owner’s Manual
and Installation
Manuel d’utilisation
et d’installation
Manual del propietario
e instalación