GE RVM1535DMBB Owners Manual
GE RVM1535DMBB - HotpointR 1.5 cu. Ft. Microwave OVEN7 Manual
 |
UPC - 084691156581
View all GE RVM1535DMBB manuals
Add to My Manuals
Save this manual to your list of manuals |
GE RVM1535DMBB manual content summary:
- GE RVM1535DMBB | Owners Manual - Page 1
Microwave Terms 29 Care and Cleaning 30 If Something Goes Wrong 35 Before You Call For Service 35 Hotpoint Service Numbers 37 Warranty Back Cover Write the model and serial numbers here: Model Serial Find these numbers on a label inside the oven. For a Spanish version of this manual - GE RVM1535DMBB | Owners Manual - Page 2
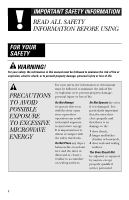
followed to minimize the risk of fire or explosion, electric shock, or to prevent property damage, personal injury or loss of life. PRECAUTIONS TO AVOID POSSIBLE EXPOSURE TO EXCESSIVE MICROWAVE ENERGY For your safety, the information in this manual must be followed to minimize the risk of fire or - GE RVM1535DMBB | Owners Manual - Page 3
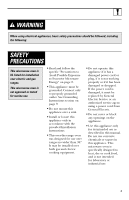
Electric Service or an authorized service agent using a power cord from General Electric. • Do not cover or block any openings on the appliance. • Use this appliance only for its intended use as described in this manual. Do not use corrosive chemicals or vapors in this appliance. This microwave oven - GE RVM1535DMBB | Owners Manual - Page 4
Contact nearest authorized service facility for examination, repair or adjustment. • As with any appliance, close supervision is necessary when used by children. • Do not store anything directly on top of the microwave oven surface when the microwave oven is in operation. SAVE THESE INSTRUCTIONS 4 - GE RVM1535DMBB | Owners Manual - Page 5
problem. FOODS Arcing is the microwave term for sparks in the oven. Arcing is caused by: • The metal shelf (if included) not installed correctly so it touches the microwave wall. • The temperature probe (if included) in the microwave oven. • Foods with unbroken outer "skin" such as potatoes, hot - GE RVM1535DMBB | Owners Manual - Page 6
or tea, are able to be overheated beyond the boiling point without appearing to be boiling. Visible bubbling or boiling when the container is removed from the microwave oven is not always present. THIS COULD RESULT IN VERY HOT LIQUIDS SUDDENLY BOILING OVER WHEN THE CONTAINER IS DISTURBED OR A SPOON - GE RVM1535DMBB | Owners Manual - Page 7
suitable for use in microwave ovens. Check the package for proper use. • Paper towels, waxed paper and plastic wrap can be used to cover dishes in order to retain moisture and prevent spattering. Be sure to vent plastic wrap so steam can escape. • Cookware may become hot because of heat transferred - GE RVM1535DMBB | Owners Manual - Page 8
while the vent fan is in use. • Clean the underside of the microwave often. Do not allow grease to build up on the microwave or the fan filters. • In the event of a grease fire on the surface units below the microwave oven, smother a flaming pan on the surface unit by covering the pan completely - GE RVM1535DMBB | Owners Manual - Page 9
not for end-of-cabinet installation. Each kit contains two 3″-wide filler panels. JX81J-Recirculating Charcoal Filter Kit Filter kits are used when the microwave oven cannot be vented to the outside. Available at extra cost from your GE supplier, or see the Hotpoint Service numbers. JX81J JX40 - GE RVM1535DMBB | Owners Manual - Page 10
cooking to be viewed while keeping microwaves confined in the oven. 4 Touch Control Panel. 5 Cooktop Light. 6 Grease Filter. 7 Removable Turntable. Turntable and support must be in place when using the oven. The turntable may be removed for cleaning. 8 Convenience Guide. NOTE: The rating plate and - GE RVM1535DMBB | Owners Manual - Page 11
Quick Start The Controls on Your Microwave Oven (Throughout this manual, features and appearance may vary from your model.) You can microwave by time, temperature or with the convenience features. 1 Time Features Time Cooking Press TIME COOK I & II (Press once or twice) TIME DEFROST MINUTE COOK ( - GE RVM1535DMBB | Owners Manual - Page 12
GUIDE ON MICROWAVE Before you begin, check the guide located on the inside front of the oven when you open the door. GUIDES IN BOOK • Cooking • Time Defrost • Reheat 2 Convenience Features Press POPCORN BEVERAGE REHEAT AUTO DEFROST Enter Starts immediately! Starts immediately! (See Reheat Guide - GE RVM1535DMBB | Owners Manual - Page 13
Instructions power levels add flexibility to microwave cooking. The power levels on the microwave oven can be compared to the surface units on a range. High (power level are some examples of uses for various power levels: Power Level Best Uses High 10 Fish, bacon, vegetables, boiling liquids. Med - GE RVM1535DMBB | Owners Manual - Page 14
Operating Instructions Time Features Time Cook 1 Press TIME COOK. 2 Enter cooking time. 3 Change power level if you don't want full power. (Press POWER LEVEL. Select a desired power level 1-10.) 4 Press START. Time Cook I Allows you to microwave for any time up to 99 minutes and 99 seconds. Power - GE RVM1535DMBB | Owners Manual - Page 15
Cooking Guide for Time Cook I & II NOTE: Use power level High (10) unless otherwise noted. Vegetable Amount Time Comments Asparagus (fresh spears) 1 lb. 6 to 9 min., In 11⁄2- - GE RVM1535DMBB | Owners Manual - Page 16
Operating Instructions Cooking Guide for Time Cook I & II Vegetable Amount Time Comments Corn (frozen 1 (6 to 8 oz.) 3 to 4 min. Pierce with cooking fork. Place in sweet or white) center of the oven. Let stand 5 minutes. Spinach (fresh) 10 to 16 oz. 5 to 7 min. In 2-qt. casserole, place - GE RVM1535DMBB | Owners Manual - Page 17
of time you select. See the Defrosting Guide for suggested times. Power level 3 is automatically during defrosting. This sound is normal when the oven is not operating at High power. Defrosting Tips defrosted and microwaved. If the food is in a foil container, transfer it to a microwave-safe dish. - GE RVM1535DMBB | Owners Manual - Page 18
Operating Instructions Defrosting Guide Food Time Comments Breads, Cakes Bread, buns or rolls (1 piece) break up after half the time. Place unopened package in oven. Let stand 5 minutes after defrosting. Place unopened package in oven. Microwave just until franks can be separated. Let stand 5 - GE RVM1535DMBB | Owners Manual - Page 19
Time Features Minute Cook This is a quick way to set cooking time for 1-6 minutes. Press one of the Minute Cook pads (from 1 to 6) for 1 to 6 minutes of cooking at power level 10. For example, press the 2 pad for 2 minutes of cooking time. The power level can be changed as time is counting down. - GE RVM1535DMBB | Owners Manual - Page 20
ounces. How to Use the Popcorn Feature 1 Follow package instructions, using Time Cook if the package is less than 3.0 ounces or larger than 3.5 ounces. Place the package of popcorn in the center of the microwave. 2 Press POPCORN. The oven starts immediately. Tap POPCORN to select the bag size you - GE RVM1535DMBB | Owners Manual - Page 21
be changed or added after the oven starts. Press number pad 2 or 3. The serving size for food type 7 cannot be changed. Reheat Guide Food Type 1 Pasta 2 Meats vented plastic wrap. Cover with lid or vented plastic wrap. Works best with wide mouth mug-do not cover. Cover with lid or vented plastic wrap. - GE RVM1535DMBB | Owners Manual - Page 22
Operating Instructions Convenience Features Beverage The Beverage feature heats 4 ounce, 8 ounce or 12 ounce servings of any beverage. Press BEVERAGE. The oven starts immediately. The serving size is automatically set at 4 ounces, but can be changed by tapping BEVERAGE to select 8 or 12 ounces. - GE RVM1535DMBB | Owners Manual - Page 23
to six pounds. There is a handy guide located on the inside front of the oven. Guide Conversion Guide If the weight of food is stated 14-15 .9 • Remove meat from package and place on microwave-safe dish. • Twice during defrost, the oven signals TURN. At each TURN signal, turn the food over. - GE RVM1535DMBB | Owners Manual - Page 24
Operating Instructions Other Features Your Model May Have Cooking Complete Reminder To remind you that you have food in the oven, the oven will display "END" and beep once a minute until you either open the oven door or press CLEAR/OFF. Clock Press to enter the time of day or to check the time - GE RVM1535DMBB | Owners Manual - Page 25
. To redisplay the clock, repeat. Delay Start Delay Start allows you to set the microwave to delay cooking up to 24 hours. 1 Press DELAY START. 2 Enter the time you want the oven to start. (Be sure the microwave clock shows the correct time of day.) 3 Select any combination of Auto or Time - GE RVM1535DMBB | Owners Manual - Page 26
Operating Instructions Other Features Your Model May Have Timer On/Off Timer On/Off operates as a minute timer and can be used at any time, even when the oven is operating. To use the timer as a minute timer when the oven is not operating: 1 Press TIMER ON/OFF. 2 Enter the time you want to count - GE RVM1535DMBB | Owners Manual - Page 27
Child Lock-Out You may lock the control panel to prevent the microwave from being accidentally started or used by children. To lock or unlock the controls, press and hold CLEAR/OFF for about three seconds. When the control panel is locked, "LOC" will be displayed. 27 - GE RVM1535DMBB | Owners Manual - Page 28
Operating Instructions Other Features Your Model May Have Surface Light Press to turn the surface light on or off. Vent Fan The vent fan removes steam and other vapors from surface cooking and cools internal parts in the microwave oven. 28 When the microwave oven is off, you may operate the - GE RVM1535DMBB | Owners Manual - Page 29
plastic wrap or covering with wax paper allows excess steam to escape. In a regular oven, you shield chicken breasts or baked foods to prevent over-browning. When microwaving, you use small strips of foil to shield thin parts, such as the tips of wings and legs on poultry, which would cook before - GE RVM1535DMBB | Owners Manual - Page 30
abrasive cleaners or sharp utensils on oven walls. Nev er use a commercial oven cleaner on any part of your microwave. Shelf (if included) Clean with mild soap and water or in the dishwasher. Do not clean in a selfcleaning oven. Removable Turntable and Turntable Support To prevent breakage, do not - GE RVM1535DMBB | Owners Manual - Page 31
alcohol, as they can damage the appearance of the microwave oven. If you choose to use a common household cleaner panel you have. Refer to the eighth digit of the model number. "S" is metallic, "G" is graphite, "L" is carefully to avoid the surrounding plastic parts. Do not use appliance wax, polish - GE RVM1535DMBB | Owners Manual - Page 32
bulb (WB36X10003), available from your GE supplier. 1 To replace the bulb Install the replacement bulb. Reinstall the compartment cover and charcoal filter, if present, Reinstall the front grille panel with the 3 original screws. Interior Light Housing 5 Connect electrical power to the oven - GE RVM1535DMBB | Owners Manual - Page 33
grease filter. Models that recirculate air back into the room also use a charcoal filter. Reusable Grease Filter Reusable Grease Filter The metal filter traps grease released by foods on the cooktop. It also prevents flames from foods on the cooktop from damaging the inside of the microwave - GE RVM1535DMBB | Owners Manual - Page 34
Helpful Information The Exhaust Feature Charcoal Filter (on some models) The charcoal filter cannot be cleaned. It must be replaced. Order Part No. WB02X11124 from your GE supplier. To Remove Charcoal Filter Remove 3 grille screws at the top of the oven. If the model is not vented to the outside, - GE RVM1535DMBB | Owners Manual - Page 35
If Something Goes Wrong Before You Call For Service Problem Possible Cause What to Do Oven will not start A fuse in your home • Replace fuse or reset circuit breaker. may be blown or the circuit breaker tripped. Power surge. • Unplug the microwave oven, then plug it back in. Plug not fully - GE RVM1535DMBB | Owners Manual - Page 36
. Similar to the interference caused by other small appliances, it does not indicate a problem with the microwave. Plug the microwave into a different electrical circuit, move the radio or TV as far away from the microwave as possible or check the position and signal of the TV/radio antenna. 36 - GE RVM1535DMBB | Owners Manual - Page 37
products and take advantage of all of our on-line support services designed for your convenience. Schedule Service Hotpoint.com 800.GE.CARES (800.432.2737) Real Life Design Studio ge.com 800.TDD.GEAC (800.833.4322) Expert Hotpoint repair service is only one step away from your door. Get on - GE RVM1535DMBB | Owners Manual - Page 38
hours. Instructions contained in this manual cover procedures to be performed by any user. Other servicing generally should be referred to qualified service personnel. Caution must be exercised, since improper servicing may cause unsafe operation. Register Your Appliance Hotpoint.com Register - GE RVM1535DMBB | Owners Manual - Page 39
39 - GE RVM1535DMBB | Owners Manual - Page 40
and model numbers available when calling for service. • Service trips to your home to teach you how to use the product. • Improper installation, delivery or maintenance. If you have an installation problem, contact your dealer or installer. You are responsible for providing adequate electrical - GE RVM1535DMBB | Owners Manual - Page 41
RVM1535 Horno de microondas encima de la estufa Manual del propietario Información de seguridad importante 2 algo sale mal 35 Antes de llamar para solicitar servicio 35 Números de servicio de Hotpoint 38 Garantía Cubierta posterior Escriba los números de modelo y de serie aquí: Nú - GE RVM1535DMBB | Owners Manual - Page 42
ADVERTENCIA! Por su seguridad, debe seguirse la información que contiene este manual para minimizar el riesgo de fuego o explosión, descarga eléctrica o para usar mal los cierres de seguridad. No coloque ningún objeto entre la parte frontal del horno y la puerta, ni permita que tierra o residuo de - GE RVM1535DMBB | Owners Manual - Page 43
un fregadero. • Instale o localice este electrodom de GE o un agente autorizado usando un cable eléctrico de General Electric. • No cubra o bloquee ninguna apertura de este electrodoméstico. • Use este electrodoméstico solamente para los usos que se especifican en este manual - GE RVM1535DMBB | Owners Manual - Page 44
durante más tiempo. • Ver las instrucciones de limpieza de la superficie de la puerta en la sección de Limpieza y cuidado en este manual. • A este electrodoméstico solamente le debe proporcionar servicio el personal técnico calificado. Póngase en contacto con una instalación de servicio autorizada - GE RVM1535DMBB | Owners Manual - Page 45
aumenta el calor alrededor del magnetrón y reduce la vida del horno de microondas. • Los alimentos con "piel" externa no rota, como las patatas, los hot dogs, las salchichas, los tomates, las manzanas, los hígados de pollo y otras menudencias, además de las yemas de huevos, deberían perforarse para - GE RVM1535DMBB | Owners Manual - Page 46
INFORMACIÓN DE SEGURIDAD IMPORTANTE NOTAS ESPECIALES SOBRE EL USO DEL MICROONDAS HECHOS SOBRE LA SEGURIDAD AGUA SUPERCALENTADA Los líquidos, tales como el agua, el café o el té, se podrían calentar excesivamente más allá del punto de ebullición sin dar las apariencias de estar hirviendo. Usted no - GE RVM1535DMBB | Owners Manual - Page 47
en un horno de microondas. • No use productos de papel reciclado. Las toallas de papel reciclado, las servilletas y el papel encerado pueden contener partículas diminutas de metal que podrían causar chispas o hasta un incendio. Trate de evitar usar productos de papel que contienen filamentos de nil - GE RVM1535DMBB | Owners Manual - Page 48
INFORMACIÓN DE SEGURIDAD IMPORTANTE NOTAS ESPECIALES SOBRE EL USO DEL MICROONDAS • Use papel de aluminio conforme se instruye en este manual. Cuando se encuentre usando papel de aluminio en el horno de microondas, mantenga el papel de aluminio a por lo menos 1″ de los lados del horno. • - GE RVM1535DMBB | Owners Manual - Page 49
es demasiado corto, haga los arreglos para que un electricista o un técnico calificado le instale un tomacorriente cerca del electrodoméstico. Para una mejor operación, conecte este electrodoméstico en su filtros están disponibles a un costo adicional en su abastecedor GE. JX81J JX40, JX41 9 - GE RVM1535DMBB | Owners Manual - Page 50
Instrucciones de operación Funciones de su horno de microondas (A través de este manual, las funciones y la apariencia de su modelo podrían variar.) Funciones 23 1 4 5687 1 las paredes interiores del horno de microondas. La luz interior está localizada en la parte superior de la cavidad. 10 - GE RVM1535DMBB | Owners Manual - Page 51
Inicio rápido Los controles en su horno de microondas (A través de este manual, las funciones y la apariencia de su modelo podrían variar.) Usted puede cocer en el horno de microondas por tiempo, temperatura, o con las funciones de - GE RVM1535DMBB | Owners Manual - Page 52
Inicio rápido GUÍA PARA EL USO DEL MICROONDAS Antes de comenzar, inspeccione la guía localizada en el interior frontal del horno cuando usted abre la puerta. GUÍAS EN EL LIBRO • Cocción • Descongelado de tiempo • Recalentamiento 2 Funciones de conveniencia Presione POPCORN (PALOMITAS DE MAÍZ) - GE RVM1535DMBB | Owners Manual - Page 53
el nivel de potencia 3-el ciclo de descongelado. Si la energía del microondas no hizo ciclo de apagado, la parte externa de los alimentos se podría cocinar antes que la parte se descongelara. A continuación algunos ejemplos para varios niveles de potencia: Nivel de potencia Mejores usos High 10 - GE RVM1535DMBB | Owners Manual - Page 54
Instrucciones de operación Funciones de tiempo Cocción de tiempo 1 Presione TIME COOK (COCCIÓN DE TIEMPO). 2 Entre el tiempo de cocción. 3 Cambie el nivel de potencia si usted no desea la potencia máxima. (Presione POWER LEVEL [NIVEL DE POTENCIA]). Seleccione el nivel de potencia deseado entre 1- - GE RVM1535DMBB | Owners Manual - Page 55
Guía de cocción para cocción de tiempo I y II NOTA: Use el nivel de potencia alto (10) a no ser que se especifique lo contrario. Vegetal Cantidad Tiempo Comentarios Espárragos (briznas frescas) 1 libra (briznas congeladas) Frijoles (frescas verdes) (congelados verdes) Paquete de 10 onzas 1 - GE RVM1535DMBB | Owners Manual - Page 56
Instrucciones de operación Guía de cocción para cocción de tiempo I y II Vegetable Amount Time Comments Maíz (granos congelados) paquete de 10 onzas Maíz en su mazorca (fresco) de 1 a 5 mazorcas (congelado) 1 espiga de 2 a 6 mazorcas Vegetales mezclados (congelados) paquete de 10 onzas - GE RVM1535DMBB | Owners Manual - Page 57
Funciones de tiempo Time Defrost (Descongelado de tiempo) 1 Presione TIME DEFROST (DESCONGELADO DE TIEMPO). 2 Entre el tiempo de descongelado. 3 Presione START. (La función de Auto Defrost [Descongelado automático] se explica en la sección de Funciones de conveniencia.) Esta función le permite - GE RVM1535DMBB | Owners Manual - Page 58
Instrucciones de operación Guía para descongelar Alimento Panes, Pasteles Pan, panecillos o bollo (1 pedazo) Panecillos dulces (aprox. 12 onzas) Pescado y Mariscos Filetes, congelados (1 libra) Mariscos, pedazos pequeños (1 libra) Frutas Bolsa plástica-1 a 2 (paquete de 10 onzas) Carne Tocino (1 - GE RVM1535DMBB | Owners Manual - Page 59
Funciones del tiempo Minute Cook (Cocción de minutos) Esta es una forma rápida de ajustar el tiempo de cocción entre 1 y 6 minutos. Presione uno de los botones de Minute Cook (Cocción de minutos) para tiempo de cocción entre 1 y 6 minutos en el nivel de potencia 10. Por ejemplo, presione el botón - GE RVM1535DMBB | Owners Manual - Page 60
Instrucciones de operación Funciones de conveniencia Popcorn (Palomitas de maíz) (menos tiempo) (más tiempo) Solamente use con palomitas de maíz pre-empaquetada para cocerse en hornos de microondas que pesen entre 3,0 y 3,5 onzas. Cómo usar la función de las palomitas de maíz 1 Obedezca las - GE RVM1535DMBB | Owners Manual - Page 61
Reheat (Recalentar) La función de Reheat (Recalentar) recalienta las porciones a servir de muchos alimentos precocinados. 1 Presione REHEAT (RECALENTAR). 2 Seleccione el tipo de alimento entre 1 y 7 para una porción (Ver la Guía de recalentamiento más adelante). El horno comenzará inmediatamente. - GE RVM1535DMBB | Owners Manual - Page 62
Instrucciones de operación Funciones de conveniencia Beverage (Bebidas) La función de bebidas calienta porciones de 4, 8 y 12 onzas de cualquier bebida. Presione BEVERAGE (BEBIDAS). El horno comienza automáticamente. El tamaño de la porción viene automáticamente ajustado para 4 onzas, pero se - GE RVM1535DMBB | Owners Manual - Page 63
Auto Defrost (Descongelado automático) 1 Presione AUTO DEFROST (DESCONGELADO AUTOMÁTICO). 2 Usando la Guía de conversión en la derecha, entre el peso del alimento. Por ejemplo, presione 1 y 2 para 1,2 libras (1 libra y 2 onzas). 3 Presione START (INICIAR). (Time Defrost [Descongelado de tiempo] se - GE RVM1535DMBB | Owners Manual - Page 64
Instrucciones de operación Otras funciones que su modelo podría tener Cooking Complete Reminder (Recordatorio de cocción completo) Para recordarle que usted tiene alimentos en el horno de microondas, el horno mostrará "END" (FIN) y pitará una vez por minuto hasta que usted abra la puerta del - GE RVM1535DMBB | Owners Manual - Page 65
Display On/Off (Visualización Encendida/Apagada) Para apagar la visualización del reloj en la pantalla, presione y sostenga 0 por aproximadamente tres segundos. Para mostrar el reloj otra vez, repita el proceso. Delay Start (Inicio retrasado) Delay Start (Inicio retrasado) le permite ajustar el - GE RVM1535DMBB | Owners Manual - Page 66
Instrucciones de operación Otras funciones que su modelo podría tener Timer On/Off (Sincronizador Encendido/Apagado) Start/Pause (Iniciar/Pausar) La función de Timer On/Off (Sincronizador Encendido/Apagado) opera como un sincronizador de minutos y se puede usar en cualquier momento, aún cuando - GE RVM1535DMBB | Owners Manual - Page 67
Child Lock-out (Cierre de seguridad para niños) Usted podría cerrar el panel de control para evitar que el horno de microondas se encienda accidentalmente o que los niños lo usen. Para cerrar o para suspender el cierre de los controles, presione y mantenga presionado CLEAR/OFF (Borrar/Apagar) por - GE RVM1535DMBB | Owners Manual - Page 68
para encender o apagar la luz de superficie. Vent Fan (Ventilador) El ventilador remueve los vapores de la superficie de cocción y enfría las partes internas del horno de microondas. 28 Cuando el horno de microondas está apagado, usted puede operar el ventilador: 1 Presione el botón de Vent - GE RVM1535DMBB | Owners Manual - Page 69
estrechas o finas, tales como las puntas de alas o las patas en las carnes de aves, para que no se cocinen primero que las partes mayores. Cuando cocine en hornos regulares, alimentos tales como asados o tortas se les permiten permanecer al aire libre para terminar de cocerse o para que el - GE RVM1535DMBB | Owners Manual - Page 70
limpiadores abrasivos o utensilios filosos en las paredes del horno de microondas. Nunca use un limpiador comercial de hornos convencionales en ninguna de las partes de su horno de microondas. Bandeja (si está incluida) Limpiar con jabón suave y agua o en el lavavajillas. No limpiar en un horno con - GE RVM1535DMBB | Owners Manual - Page 71
ún limpiador casero común, primero aplique el limpiador directamente a un paño limpio, y luego pase el paño a las áreas sucias. La caja Limpie la parte externa del horno de microondas con un paño humedecido con agua jabonosa. Enjuáguela y luego séquela. Pásele un paño humedecido limpio a la ventana - GE RVM1535DMBB | Owners Manual - Page 72
40 vatios (WB36X10003), disponible en su abastecedor de GE. 2 Remueva el tornillo de la cubierta de parrilla frontal retirando los tres tornillos en la parte superior. Deslice la parrilla hacia la izquierda bombilla dándole vueltas con cuidado. 4 Instale la bombilla de reemplazo. Reinstale la - GE RVM1535DMBB | Owners Manual - Page 73
La función de escape El ventilador Filtro de carbón (en algunos modelos) El ventilador tiene un filtro de grasa metálico reusable. Los modelos que recirculan aire de regreso a la habitación también usan un filtro de carbón. Filtro de grasa reusable Filtro de grasa reusable Cómo remover y limpiar - GE RVM1535DMBB | Owners Manual - Page 74
carbón (en algunos modelos) El filtro de carbón no se puede limpiar. Se debe cambiar por uno nuevo. El número de parte para ordenar es WB02X11124 disponible en su abastecedor de GE. Si el modelo no está ventilado hacia el exterior, el aire recirculará a través de un filtro de carbón desechable que - GE RVM1535DMBB | Owners Manual - Page 75
. • Presione CLEAR/OFF (Borrar/Apagar) por 3 segundos para invalidar el cierre del control. El ventilador se enciende automáticamente para enfriar las partes internas mientras el horno de microondas está encendido. • El ventilador no se puede apagar mientras el horno de microondas está en operaci - GE RVM1535DMBB | Owners Manual - Page 76
Si algo sale mal Antes de llamar para solicitar servicio Problema "BAD PROBE" aparece en la pantalla "PLEASE INSERT PROBE" aparece en la pantalla SENSOR ERROR (Error de sensor) aparece en la pantalla Posible causa Qué hacer La sonda no ha sido insertada por completo en la salida en la pared del - GE RVM1535DMBB | Owners Manual - Page 77
Cosas que son normales • Humedad en la puerta y paredes del horno al cocinar. Frote la humedad con una toallita de papel o un paño suave. • Humedad entre los paneles de las puertas del horno al cocinar determinados alimentos. La humedad se disipará poco después de terminar de cocinar. • El vapor se - GE RVM1535DMBB | Owners Manual - Page 78
al día, cualquier día del año! Usted también puede comprar más magníficos productos Hotpoint en nuestra página Web. Planifique servicio Hotpoint.com 800.GE.CARES (800.432.2737) El servicio de reparación experto de Hotpoint está a solamente una llamada o una visita a nuestra página Web. Visite - GE RVM1535DMBB | Owners Manual - Page 79
.626.2224 durante las horas laborables. El Departamento de Servicio a domicilio para los consumidores de Hotpoint estará ahí aún después que su garantía expire. Partes y accesorios Hotpoint.com 800.626.2002 Individuos calificados para proporcionar servicio a sus electrodomésticos le pueden enviar - GE RVM1535DMBB | Owners Manual - Page 80
DE UN AÑO Por un año a partir de la compra original, GE sustituirá cualquier parte del horno de microondas que presente fallos provocados por defectos en los materiales en su estado o localidad o a su Procurador General. Garante: General Electric Company. Louisville, KY 40225 Impreso en Malasia
-
 1
1 -
 2
2 -
 3
3 -
 4
4 -
 5
5 -
 6
6 -
 7
7 -
8
-
9
-
10
-
11
-
12
-
13
-
14
-
15
-
16
-
17
-
18
-
19
-
20
-
21
-
22
-
23
-
24
-
25
-
26
-
27
-
28
-
29
-
30
-
31
-
32
-
33
-
34
-
35
-
36
-
37
-
38
-
39
-
40
-
41
-
42
-
43
-
44
-
45
-
46
-
47
-
48
-
49
-
50
-
51
-
52
-
53
-
54
-
55
-
56
-
57
-
58
-
59
-
60
-
61
-
62
-
63
-
64
-
65
-
66
-
67
-
68
-
69
-
70
-
71
-
72
-
73
-
74
-
75
-
76
-
77
-
78
-
79
-
80
 |
 |
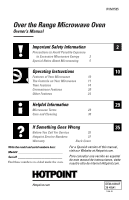
Over the Range Microwave Oven
Owner’s Manual
2
29
Helpful Information
Microwave Terms
29
Care and Cleaning
30
35
If Something Goes Wrong
Before You Call For Service
35
Hotpoint Service Numbers
37
Warranty
Back Cover
10
Important Safety Information
Precautions to Avoid Possible Exposure
to Excessive Microwave Energy
2
Special Notes About Microwaving
5
Operating Instructions
Features of Your Microwave
10
The Controls on Your Microwave
11
Time Features
14
Convenience Features
20
Other Features
24
Hotpoint.com
RVM1535
DE68-62382F
39-40541
11-06 JR
For a Spanish version of this manual,
visit our Website at Hotpoint.com.
Para consultar una versión en español
de este manual de instrucciones, visite
nuestro sitio de internet Hotpoint.com.
Write the model and serial numbers here:
Model#
______________________________
Serial#
______________________________
Find these numbers on a label inside the oven.