GE PTS25SHS Use and Care Manual - Page 20
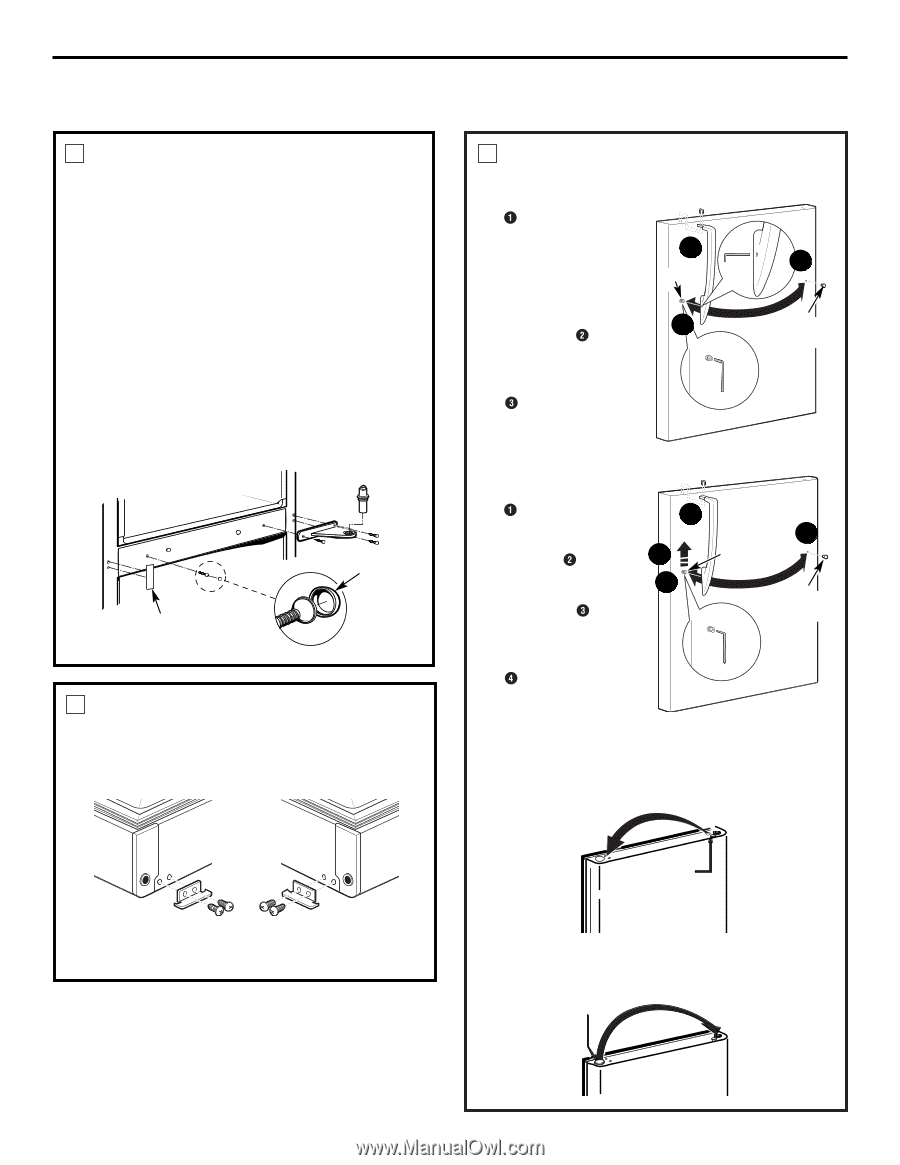
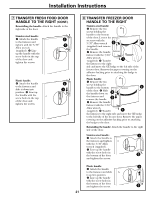
REVERSING THE DOOR SWING, Installation Instructions, TRANSFER FRESH FOOD, DOOR HANDLE TO THE RIGHT
 |
View all GE PTS25SHS manuals
Add to My Manuals
Save this manual to your list of manuals |
Page 20 highlights
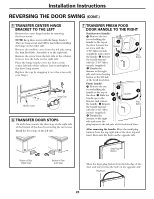
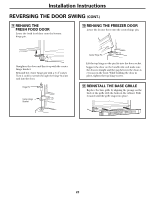
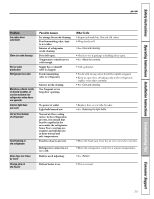
Installation Instructions REVERSING THE DOOR SWING (CONT.) 5 TRANSFER CENTER HINGE BRACKET TO THE LEFT Remove the center hinge bracket by removing the three screws. NOTE: Keep these screws with the hinge bracket. They are long screws and will be used when installing the hinge on the other side. Remove the mullion cover from the left side using the thin flat blade. Assemble it to the right side. Remove the screw from the left side of the cabinet. Screw it into the hole on the right side. Place the hinge bracket over the holes at the center left side of the cabinet. Insert and tighten the three long screws. Replace the cap by snapping it over the screw with your finger. Mullion Cover Screw Cap 6 TRANSFER DOOR STOPS On each door, remove the door stop on the right side of the bottom of the door by removing the two screws. Install the door stop on the left side. 7 TRANSFER FRESH FOOD DOOR HANDLE TO THE RIGHT Stainless steel handle: Remove the two screws holding the handle to the top of the door. Loosen the set screw with the 3/32″ Allen wrench (supplied) and remove the handle. Remove the handle fastener with the 3/16″ Allen wrench (supplied). Transfer the fastener to the right side and move the plug button to the left side of the fresh food door. 1 Fastener 2 3 Plug Button Plastic handle: Remove the two 1 screws holding the 4 handle to the top of the door. Slide the 2 Fastener handle up on the 3 fastener and remove the handle. Remove Plug Button the handle fastener with the 3/16″ Allen wrench (supplied). Transfer the fastener to the right side and move the plug button to the left side of the fresh food door. After removing the handle: Move the small plug buttons from the top right side of the door top and insert them into the holes on the opposite side. Bottom of Door (Right Side) Bottom of Door (Left Side) Small Plug Buttons Move the large plug button from the left edge of the door and insert it into the hole on the opposite side. Plug Button 20
-
 1
1 -
2
-
3
-
4
-
5
-
6
-
7
-
8
-
9
-
10
-
11
-
12
-
13
-
14
-
 15
15 -
 16
16 -
 17
17 -
 18
18 -
 19
19 -
 20
20 -
 21
21 -
 22
22 -
 23
23 -
 24
24 -
 25
25 -
26
-
27
-
28
-
29
-
30
-
31
-
32
-
33
-
34
-
35
-
36
-
37
-
38
-
39
-
40
-
41
-
42
-
43
-
44
-
45
-
46
-
47
-
48
-
49
-
50
-
51
-
52
-
53
-
54
-
55
-
56
-
57
-
58
-
59
-
60
-
61
-
62
-
63
-
64
-
65
-
66
-
67
-
68
-
69
-
70
-
71
-
72
-
73
-
74
-
75
-
76
-
77
-
78
-
79
-
80
-
81
-
82
-
83
-
84
-
85
-
86
-
87
-
88
-
89
-
90
-
91
-
92
 |
 |