GE PTS25SHS Use and Care Manual - Page 4
About the controls on the refrigerator., Troubleshooting Tips, Operating Instructions
 |
View all GE PTS25SHS manuals
Add to My Manuals
Save this manual to your list of manuals |
Page 4 highlights
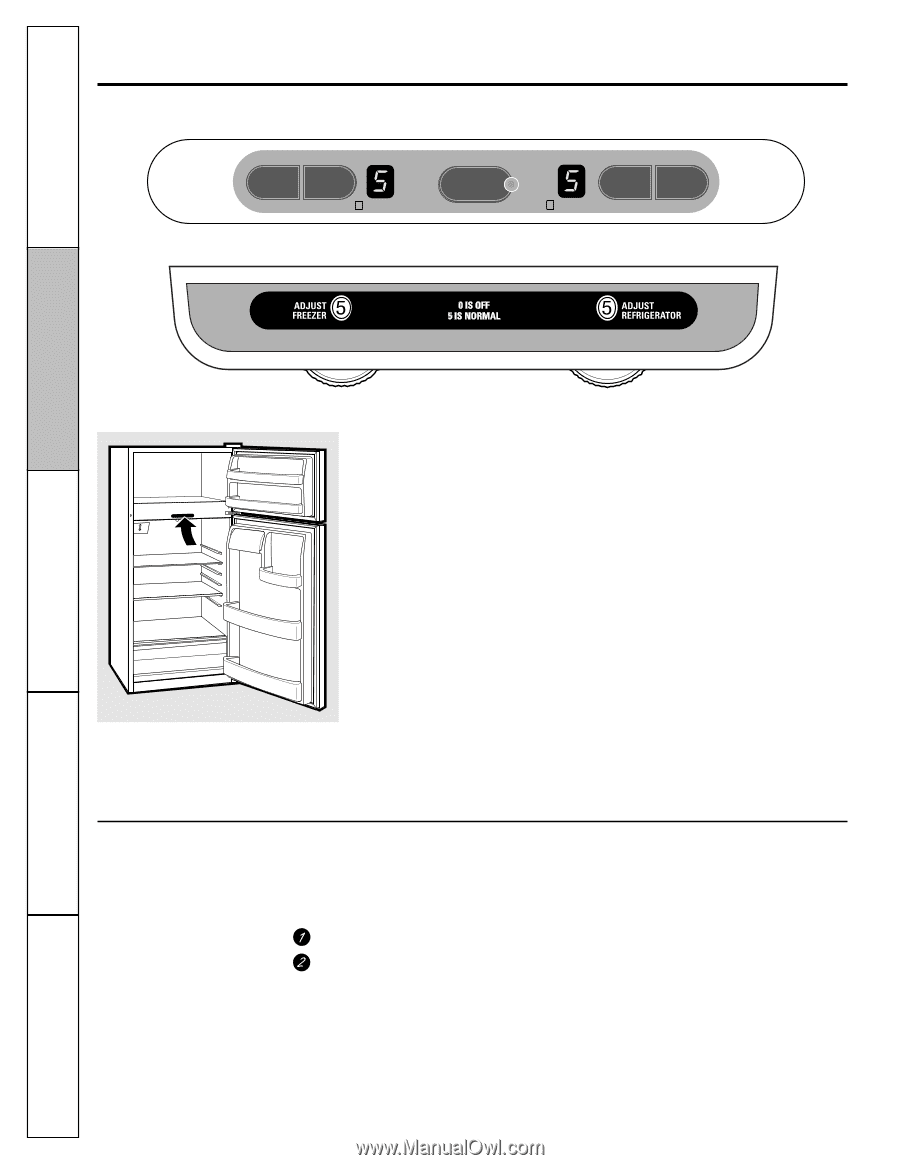
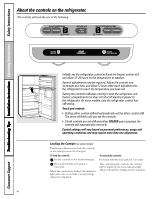
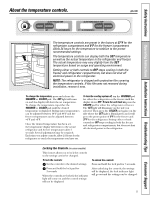
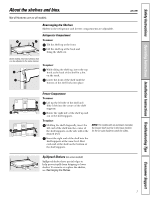
Troubleshooting Tips Installation Instructions Operating Instructions Safety Instructions About the controls on the refrigerator. The controls will look like one of the following: ADJUST FREEZER TEMP COLDER WARMER 9 IS COLDEST ACTIVATE LOCK HOLD 3 SECS ADJUST REFRIGERATOR TEMP COLDER WARMER 9 IS COLDEST Initially, set the refrigerator control at 5 and the freezer control at 5 and allow 12-24 hours for the temperature to stabilize. Several adjustments may be required. Adjust the controls one increment at a time, and allow 12 hours after each adjustment for the refrigerator to reach the temperature you have set. Setting the controls to 0 stops cooling in both the refrigerator and freezer compartments but does not shut off electrical power to the refrigerator. On some models, only the refrigerator control has a 0 setting. Touch pad controls • Setting either control at 0 will automatically set the other control at 0. The zeros will blink until you set the controls. • If both controls are set at 0 and either COLDER pad is pressed, the controls will automatically reset to 5. Control settings will vary based on personal preferences, usage and operating conditions and may require more than one adjustment. Locking the Controls (on some models) This feature allows you to lock the controls so the settings cannot be changed. To lock the controls: Set the controls to the desired settings. Press and hold the lock pad for 3 seconds. When the controls are locked, the indicator light will come on and the control settings will not be displayed. To unlock the controls: Press and hold the lock pad for 3 seconds. After unlocking the controls, the settings will be displayed, the lock indicator light will go out and the settings can be changed. 4 Consumer Support
-
 1
1 -
 2
2 -
 3
3 -
 4
4 -
 5
5 -
 6
6 -
 7
7 -
 8
8 -
 9
9 -
 10
10 -
11
-
12
-
13
-
14
-
15
-
16
-
17
-
18
-
19
-
20
-
21
-
22
-
23
-
24
-
25
-
26
-
27
-
28
-
29
-
30
-
31
-
32
-
33
-
34
-
35
-
36
-
37
-
38
-
39
-
40
-
41
-
42
-
43
-
44
-
45
-
46
-
47
-
48
-
49
-
50
-
51
-
52
-
53
-
54
-
55
-
56
-
57
-
58
-
59
-
60
-
61
-
62
-
63
-
64
-
65
-
66
-
67
-
68
-
69
-
70
-
71
-
72
-
73
-
74
-
75
-
76
-
77
-
78
-
79
-
80
-
81
-
82
-
83
-
84
-
85
-
86
-
87
-
88
-
89
-
90
-
91
-
92
 |
 |