Gigabyte GA-G33M-S2L Manual - Page 64
Load Optimized, Defaults, Update New BIOS, Files of type, Update the BIOS without Using the Internet
 |
UPC - 818313004918
View all Gigabyte GA-G33M-S2L manuals
Add to My Manuals
Save this manual to your list of manuals |
Page 64 highlights
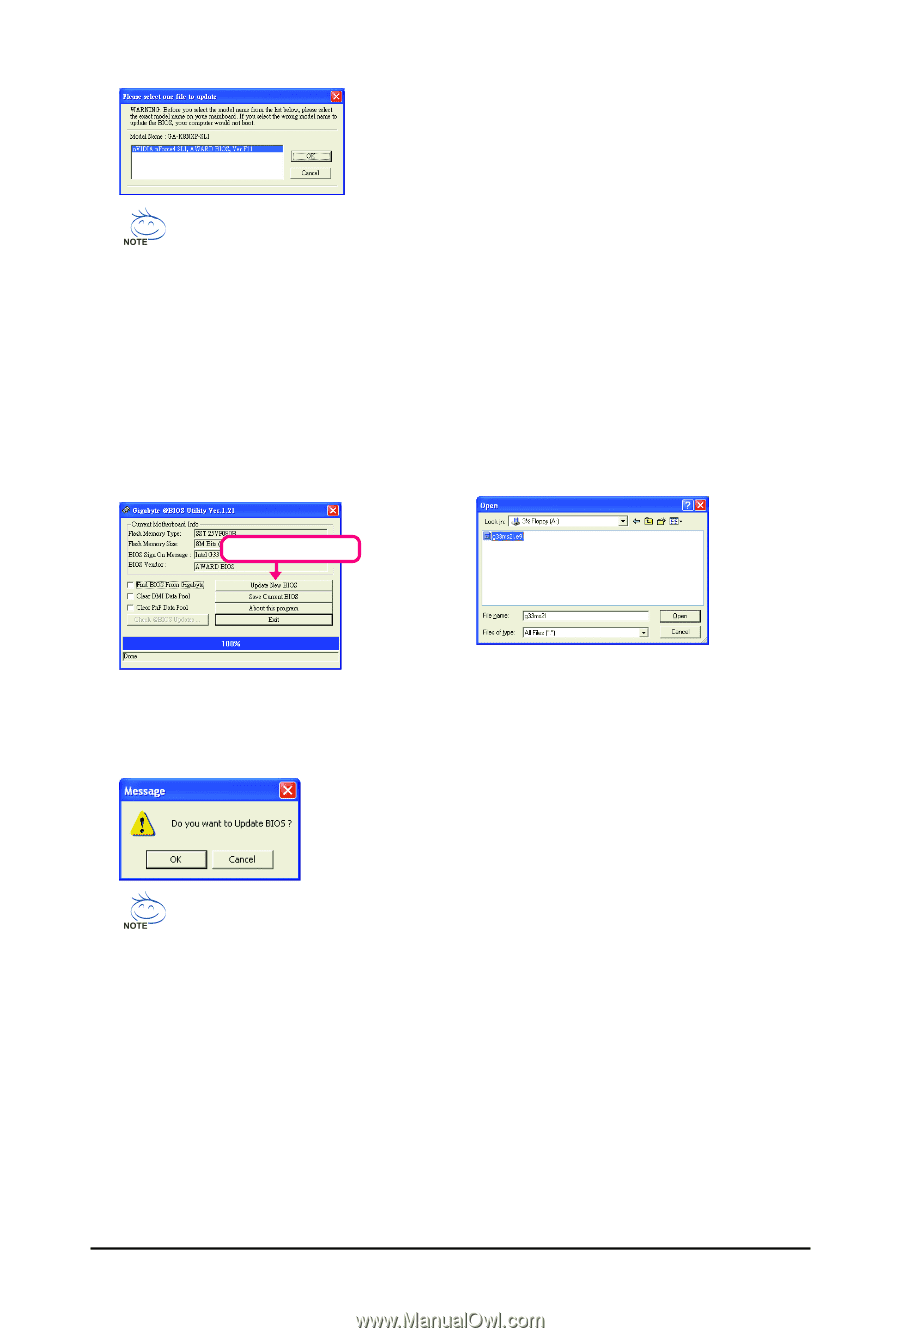
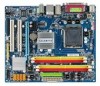
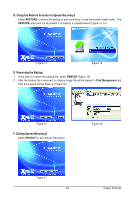
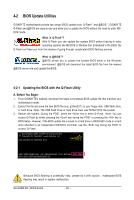
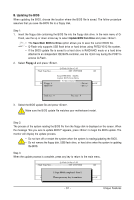
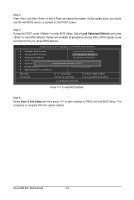
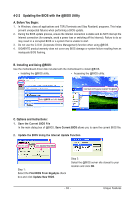
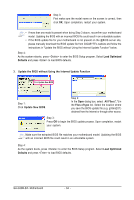
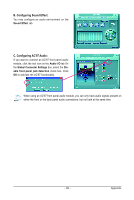
Step 3: First make sure the model name on the screen is correct, then click OK. Upon completion, restart your system. • If more than one model is present when doing Step 3 above, recomfirm your motherboard model. Updating the BIOS with an incorrect BIOS file could result in an unbootable system. • If the BIOS update file for your motherboard is not present on the @BIOS server site, please manually download the BIOS update file from GIGABYTE's website and follow the instructions in "Update the BIOS without Using the Internet Update Function" below. Step 4: As the system reboots, press to enter the BIOS Setup program. Select Load Optimized Defaults and press to load BIOS defaults. 3. Update the BIOS without Using the Internet Update Function Click Update New BIOS Step 1: Click Update New BIOS. Step 2: In the Open dialog box, select All Files (*.*) in the Files of type list. Select the location where you save the BIOS update file (e.g. g33ms2l.f1) obtained from the Internet or through other source. Step 3: Press OK to begin the BIOS update process. Upon completion, restart your system. Make sure the extracted BIOS file matches your motherboard model. Updating the BIOS with an incorrect BIOS file could result in an unbootable system. Step 4: As the system boots, press to enter the BIOS Setup program. Select Load Optimized Defaults and press to load BIOS defaults. GA-G33M-S2L Motherboard - 64 -
-
 1
1 -
2
-
3
-
4
-
5
-
6
-
7
-
8
-
9
-
10
-
11
-
12
-
13
-
14
-
15
-
16
-
17
-
18
-
19
-
20
-
21
-
22
-
23
-
24
-
25
-
26
-
27
-
28
-
29
-
30
-
31
-
32
-
33
-
34
-
35
-
36
-
37
-
38
-
39
-
40
-
41
-
42
-
43
-
44
-
45
-
46
-
47
-
48
-
49
-
50
-
51
-
52
-
53
-
54
-
55
-
56
-
57
-
58
-
 59
59 -
 60
60 -
 61
61 -
 62
62 -
 63
63 -
 64
64 -
 65
65 -
 66
66 -
 67
67 -
 68
68 -
 69
69 -
70
-
71
-
72
-
73
-
74
-
75
-
76
-
77
-
78
-
79
-
80
-
81
-
82
-
83
-
84
 |
 |