Gigabyte GA-G41MT-S2 Manual
Gigabyte GA-G41MT-S2 Manual
 |
View all Gigabyte GA-G41MT-S2 manuals
Add to My Manuals
Save this manual to your list of manuals |
Gigabyte GA-G41MT-S2 manual content summary:
- Gigabyte GA-G41MT-S2 | Manual - Page 1
GA-G41MT-S2 LGA775 socket motherboard for Intel® Core™ processor family/ Intel® Pentium® processor family/Intel® Celeron® processor family User's Manual Rev. 1301 12ME-G41MTS2-1301R - Gigabyte GA-G41MT-S2 | Manual - Page 2
Motherboard GA-G41MT-S2 Oct. 1, 2010 Motherboard GA-G41MT-S2 Oct. 1, 2010 - Gigabyte GA-G41MT-S2 | Manual - Page 3
at: http://www.gigabyte.com Identifying Your Motherboard Revision The revision number on your motherboard looks like this: "REV: X.X." For example, "REV: 1.0" means the revision of the motherboard is 1.0. Check your motherboard revision before updating motherboard BIOS, drivers, or when looking - Gigabyte GA-G41MT-S2 | Manual - Page 4
Table of Contents GA-G41MT-S2 Motherboard Layout 5 Chapter 1 Hardware Installation 6 1-1 Installation Precautions 6 1-2 Product Specifications 7 1-3 Installing the CPU and CPU Cooler 9 1-3-1 Installing the CPU...9 1-4 Installing the Memory 10 1-4-1 Dual Channel Memory Configuration 10 1-5 - Gigabyte GA-G41MT-S2 | Manual - Page 5
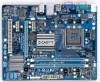
B_BIOS M_BIOS CODEC PCI LPT SYS_FAN F_USB2 F_USB1 Intel® ICH7 SATA2_0 CLR_CMOS GA-G41MT-S2 DDR3_1 DDR3_2 F_PANEL ATX SATA2_3 SATA2_2 SATA2_1 Box Contents GA-G41MT-S2 motherboard Two SATA cables I/O Shield Motherboard driver disk User's Manual The box contents above are for reference - Gigabyte GA-G41MT-S2 | Manual - Page 6
manual and follow these procedures: • Prior to installation, do not remove or break motherboard S/N wrist strap when handling electronic com- ponents such as a motherboard, CPU or memory. If you do not have an ESD wrist strap, steps or have a problem related to the use of the product, please consult - Gigabyte GA-G41MT-S2 | Manual - Page 7
Onboard Graphics Audio LAN North Bridge: Intel® G41 Express Chipset South Bridge: Intel® ICH7 2 x 1.5V DDR3 DIMM sockets supporting up to 4 GB of system memory Dual channel memory architecture Support for DDR3 1066/800 MHz memory modules (Go to GIGABYTE - Gigabyte GA-G41MT-S2 | Manual - Page 8
0a, DMI 2.0, SM BIOS 2.4, ACPI 1.0b Support for @BIOS Support for Q-Flash Support for Xpress BIOS Rescue Support for Download Center Support for Xpress Install Support for Xpress Recovery2 Support for EasyTune * Available functions in EasyTune may differ by motherboard model. Support for Easy Energy - Gigabyte GA-G41MT-S2 | Manual - Page 9
that the motherboard supports the CPU. (Go to GIGABYTE's website for the latest CPU support list.) • specifications, please do so according to your hardware specifications including the CPU, graphics card, memory, hard drive, etc. 1-3-1 Installing the CPU Locate the alignment keys on the motherboard - Gigabyte GA-G41MT-S2 | Manual - Page 10
This motherboard provides two DDR3 memory sockets and supports Dual Channel Technology. After the memory is installed, the BIOS will automatically detect the specifications and capacity of the memory. Enabling Dual Channel memory mode will double the original memory bandwidth. The two DDR3 memory - Gigabyte GA-G41MT-S2 | Manual - Page 11
. Connect a monitor that supports D-Sub connection to this port. USB 2.0/1.1 Port The USB port supports the USB 2.0/1.1 specification. Use this port for USB devices such as a USB keyboard/mouse, USB printer, USB flash drive and etc. RJ-45 LAN Port The Gigabit Ethernet LAN port provides Internet - Gigabyte GA-G41MT-S2 | Manual - Page 12
devices. • After installing the device and before turning on the computer, make sure the device cable has been securely attached to the connector on the motherboard. Hardware Installation - 12 - - Gigabyte GA-G41MT-S2 | Manual - Page 13
2x12 Main Power Connector) With the use of the power connector, the power supply can supply enough stable power to all the components on the motherboard. Before connecting the power connector, first make sure the power supply is turned off and all devices are properly installed. The power connector - Gigabyte GA-G41MT-S2 | Manual - Page 14
design. When connecting a fan cable, be sure to connect it in the correct orientation (the black connector wire is the ground wire). The motherboard supports CPU fan speed control, which requires the use of a CPU fan with fan speed control design. For optimum heat dissipation, it is recommended - Gigabyte GA-G41MT-S2 | Manual - Page 15
turn off your system using the power switch (refer to Chapter 2, "BIOS Setup," "Power Management Setup," for more information). • SPEAK (Speaker): heard if no problem is detected at system startup. If a problem is detected, the BIOS may issue beeps in different patterns to indicate the problem. • HD - Gigabyte GA-G41MT-S2 | Manual - Page 16
Header) The front panel audio header supports Intel High Definition audio (HD) and AC'97 audio. You may connect your chassis front panel audio module to this header. Make sure the wire assignments of the module connector match the pin assignments of the motherboard header. Incorrect connection - Gigabyte GA-G41MT-S2 | Manual - Page 17
the jumper. Failure to do so may cause damage to the motherboard. • After system restart, go to BIOS Setup to load factory defaults (select Load Optimized Defaults) or manually configure the BIOS settings (refer to Chapter 2, "BIOS Setup," for BIOS configurations). - 17 - Hardware Installation - Gigabyte GA-G41MT-S2 | Manual - Page 18
11) BATTERY The battery provides power to keep the values (such as BIOS configurations, date, and time information) in the CMOS when the computer is turned off. Replace the battery when the battery voltage drops to a low level, - Gigabyte GA-G41MT-S2 | Manual - Page 19
Startup Screen The following screens may appear when the computer boots. Motherboard Model BIOS Version Award Modular BIOS v6.00PG, An Energy Star Ally Copyright (C) 1984-2010, Award Software, Inc. G41MT-S2 E10c . . . . : BIOS Setup : XpressRecovery2 : Boot Menu : Qflash 09/20 - Gigabyte GA-G41MT-S2 | Manual - Page 20
BIOS settings. First select the profile you wish to load, then press to complete. 2-3 MB Intelligent Tweaker(M.I.T.) CMOS Setup Utility-Copyright (C) 1984-2010 Award Software MB Intelligent Tweaker(M.I.T.) Robust Graphics ] System Memory Multiplier (SPD) [Auto] Memory Frequency (Mhz - Gigabyte GA-G41MT-S2 | Manual - Page 21
overclock/overvoltage may result in damage to CPU, chipset, or memory Graphics Booster Robust Graphics Booster (R.G.B.) helps to enhance the performance of the graphics chip and memory. Auto allows the BIOS If your system fails to boot after overclocking, please wait for 20 seconds to allow for - Gigabyte GA-G41MT-S2 | Manual - Page 22
set in accordance with the CPU specifications. PCI Express Frequency (Mhz) Allows you to manually set the PCIe clock frequency. The frequency at system bootup. Options for adjusting memory multiplier below may differ according to the fixed frequency. a CPU that supports this feature. BIOS Setup - 22 - - Gigabyte GA-G41MT-S2 | Manual - Page 23
Rank) x Twr2rd(Different Rank) x Trd2wr(Same/Diff Rank) Auto Auto Auto Auto x DIMM1 Clock Skew Control x DIMM2 Clock Skew Control x DDR Write Leveling x DDR Write Training Auto Auto Auto Auto Move Enter: Select F5: Previous Values +/-/PU/PD: Value F10: Save F6: Fail-Safe - Gigabyte GA-G41MT-S2 | Manual - Page 24
~-700ps. DIMM2 Clock Skew Control Options are: Auto (default), +800ps~-700ps. DDR Write Leveling Allows you to determine whether to fine-tune memory parameters to enhance memory compatibility. Auto Lets the BIOS decide whether to enable this function. (Default) Enabled Enables this function to - Gigabyte GA-G41MT-S2 | Manual - Page 25
), +8~-7. ******** Mother Board Voltage Control CPU CPU Vcore The default is Auto. CPU Termination The default is Auto. >>> DRAM DRAM Voltage The default is Auto. - 25 - BIOS Setup - Gigabyte GA-G41MT-S2 | Manual - Page 26
BIOS automatically detect IDE/SATA devices during the POST. (Default) • None If no IDE/SATA devices are used, set this item to None so the system will skip the detection of the device during the POST for faster system startup. • Manual Allows you to manually enter the specifications - Gigabyte GA-G41MT-S2 | Manual - Page 27
whether to enable all CPU cores and multi-threading function when using an Intel CPU that supports multi-core technology. This feature only works for operating systems that support multi-processor mode. Enabled Enables all CPU cores and multi-threading capability. (Default) Disabled Enables - Gigabyte GA-G41MT-S2 | Manual - Page 28
Memory Protect (Note) Enables or disables Intel BIOS image file to the hard drive. If the system BIOS is corrupted, it will be recovered from this image file. (Default: Disabled) (Note) This item is present only if you install a CPU that supports this feature. For more information about Intel - Gigabyte GA-G41MT-S2 | Manual - Page 29
graphics card as the first display. PAVP Mode Enables or disables PAVP mode. Enable this function if you wish to playback HDCP contents. PAVP mode can support buffer memory size for the encryption of compressed video. (Default) Paranoid PAVP Reserves 96 MB of system memory during boot. This memory - Gigabyte GA-G41MT-S2 | Manual - Page 30
to install a 3rd party add-in audio card instead of using the onboard audio, set this item to Disabled. Onboard H/W LAN Enables or disables the onboard LAN function. (Default: Enabled) If you wish to install a 3rd party add-in network card instead of using the onboard LAN, set this item to Disabled - Gigabyte GA-G41MT-S2 | Manual - Page 31
USB functionalities below. USB 2.0 Controller Enables or disables the integrated USB 2.0 controller. (Default: Enabled) USB Keyboard Function Allows USB keyboard to be used in MS-DOS. (Default: Disabled) USB Mouse Function Allows USB : 0 HPET Support (Note) [Enabled Support to RAM) sleep - Gigabyte GA-G41MT-S2 | Manual - Page 32
or on a specific day in a month. Time (hh: mm: ss) Alarm: Set the time at which the system will be powered on automatically. Note: When using this function, avoid inadequate shutdown from the operating system or removal of the AC power, or the settings may not be effective. HPET Support (Note - Gigabyte GA-G41MT-S2 | Manual - Page 33
Memory The system returns to its last known awake state upon the return of the AC power. ErP Support IRQ Assignment Auto 3,4,5,7,9,10,11,12,14,15 BIOS auto-assigns IRQ to the first PCI slot. chassis intrusion detection device attached to the motherboard CI header. If the system chassis - Gigabyte GA-G41MT-S2 | Manual - Page 34
CMOS to BIOS F12: Load CMOS from BIOS Press on this item and then press the key to load the safest BIOS default settings. In case system instability occurs, you may try to load Fail-Safe defaults, which are the safest and most stable BIOS settings for the motherboard. BIOS Setup - 34 - Gigabyte GA-G41MT-S2 | Manual - Page 35
> on this item and then press the key to load the optimal BIOS default settings. The BIOS defaults settings help the system to operate in optimum state. Always load the Optimized defaults after updating the BIOS or after clearing the CMOS values. 2-13 Set Supervisor/User Password CMOS Setup - Gigabyte GA-G41MT-S2 | Manual - Page 36
Setup PnP/PCI Configurations Exit Without Saving ESC: Quit F8: Q-Flash Select Item F10: Save & Exit Setup Save Data to CMOS F11: Save CMOS to BIOS F12: Load CMOS from BIOS Press on this item and press the key. This saves the changes to the CMOS and exits the - Gigabyte GA-G41MT-S2 | Manual - Page 37
will automatically scan your system and then list all the drivers that are recommended to install. You can click the Install All button and "Xpress Install" will install all the recommended drivers. Or click Install Single Items to manually select the drivers you wish to install. - 37 - BIOS Setup - Gigabyte GA-G41MT-S2 | Manual - Page 38
GIGABYTE. Our Commitment to Preserving the Environment In addition to high-efficiency performance, all GIGABYTE motherboards local government office, your household waste disposal service or where you purchased the product for user's manual and we will be glad to help you with your effort. Appendix - Gigabyte GA-G41MT-S2 | Manual - Page 39
Finally, we suggest that you practice other environmentally friendly actions by understanding and using the energy-saving features of this product (where applicable), recycling the inner and outer packaging (including shipping containers) this product was delivered in, and by disposing of or - Gigabyte GA-G41MT-S2 | Manual - Page 40
: +886-2-8912-4000, FAX: +886-2-8912-4003 Tech. and Non-Tech. Support (Sales/Marketing) : http://ggts.gigabyte.com.tw WEB address (English): http://www.gigabyte.com WEB address (Chinese): http://www.gigabyte.tw You may go to the GIGABYTE website, select your language in the language list on the top
-
 1
1 -
 2
2 -
 3
3 -
 4
4 -
 5
5 -
 6
6 -
 7
7 -
8
-
9
-
10
-
11
-
12
-
13
-
14
-
15
-
16
-
17
-
18
-
19
-
20
-
21
-
22
-
23
-
24
-
25
-
26
-
27
-
28
-
29
-
30
-
31
-
32
-
33
-
34
-
35
-
36
-
37
-
38
-
39
-
40
 |
 |

GA-G41MT-S2
LGA775 socket motherboard for Intel
®
Core
™
processor family/
Intel
®
Pentium
®
processor family/Intel
®
Celeron
®
processor family
User's Manual
Rev. 1301
12ME-G41MTS2-1301R