Gigabyte GA-X58-USB3 Manual - Page 65
D. Using the Restore Function in Xpress Recovery2, E. Removing the Backup, F. Exiting Xpress
 |
UPC - 818313011282
View all Gigabyte GA-X58-USB3 manuals
Add to My Manuals
Save this manual to your list of manuals |
Page 65 highlights
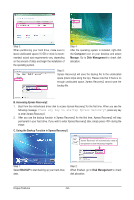
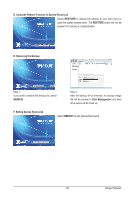
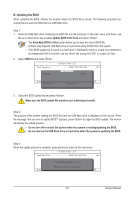
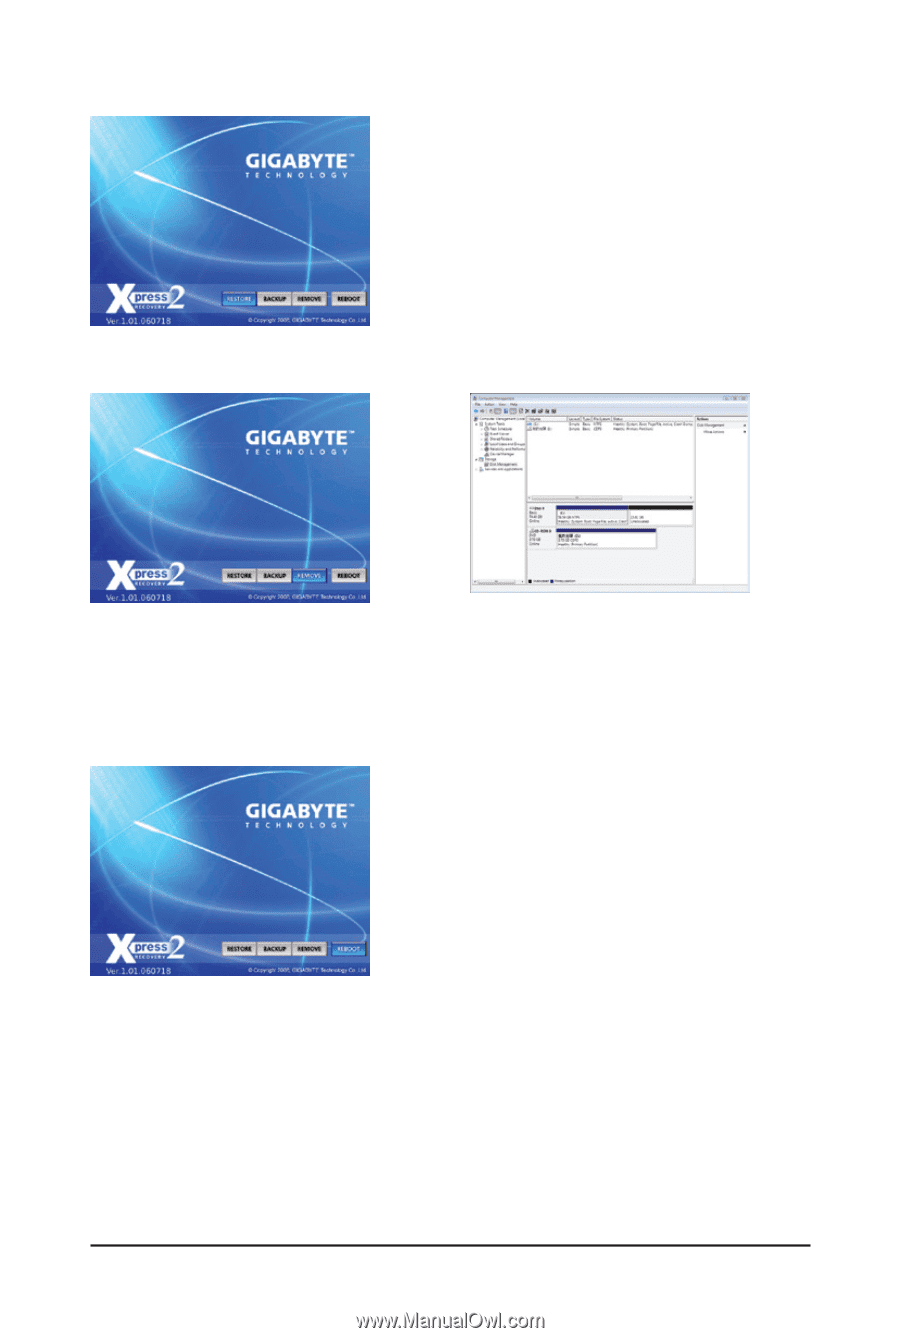
D. Using the Restore Function in Xpress Recovery2 Select RESTORE to restore the backup to your hard drive in case the system breaks down. The RESTORE option will not be present if no backup is created before. E. Removing the Backup Step 1: If you wish to remove the backup file, select REMOVE. Step 2: After the backup file is removed, no backup image file will be present in Disk Management and hard drive space will be freed up. F. Exiting Xpress Recovery2 Select REBOOT to exit Xpress Recovery2. - 65 - Unique Features
-
 1
1 -
2
-
3
-
4
-
5
-
6
-
7
-
8
-
9
-
10
-
11
-
12
-
13
-
14
-
15
-
16
-
17
-
18
-
19
-
20
-
21
-
22
-
23
-
24
-
25
-
26
-
27
-
28
-
29
-
30
-
31
-
32
-
33
-
34
-
35
-
36
-
37
-
38
-
39
-
40
-
41
-
42
-
43
-
44
-
45
-
46
-
47
-
48
-
49
-
50
-
51
-
52
-
53
-
54
-
55
-
56
-
57
-
58
-
59
-
 60
60 -
 61
61 -
 62
62 -
 63
63 -
 64
64 -
 65
65 -
 66
66 -
 67
67 -
 68
68 -
 69
69 -
 70
70 -
71
-
72
-
73
-
74
-
75
-
76
-
77
-
78
-
79
-
80
-
81
-
82
-
83
-
84
-
85
-
86
-
87
-
88
-
89
-
90
-
91
-
92
-
93
-
94
-
95
-
96
-
97
-
98
-
99
-
100
-
101
-
102
-
103
-
104
-
105
-
106
-
107
-
108
-
109
-
110
-
111
-
112
 |
 |
- 65 -
Unique Features
D. Using the Restore Function in Xpress Recovery2
E. Removing the Backup
F. Exiting Xpress Recovery2
Select
RESTORE
to restore the backup to your hard drive in
case the system breaks down. The
RESTORE
option will not be
present if no backup is created before.
Select
REBOOT
to exit Xpress Recovery2.
Step 2:
After the backup file is removed, no backup image
file will be present in
Disk Management
and hard
drive space will be freed up.
Step 1:
If you wish to remove the backup file, select
REMOVE
.