Gigabyte GA-X58-USB3 Manual - Page 87
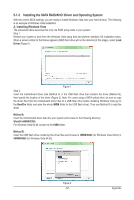
Installing the SATA RAID/AHCI Driver and Operating System, A. Installing Windows Vista
 |
UPC - 818313011282
View all Gigabyte GA-X58-USB3 manuals
Add to My Manuals
Save this manual to your list of manuals |
Page 87 highlights
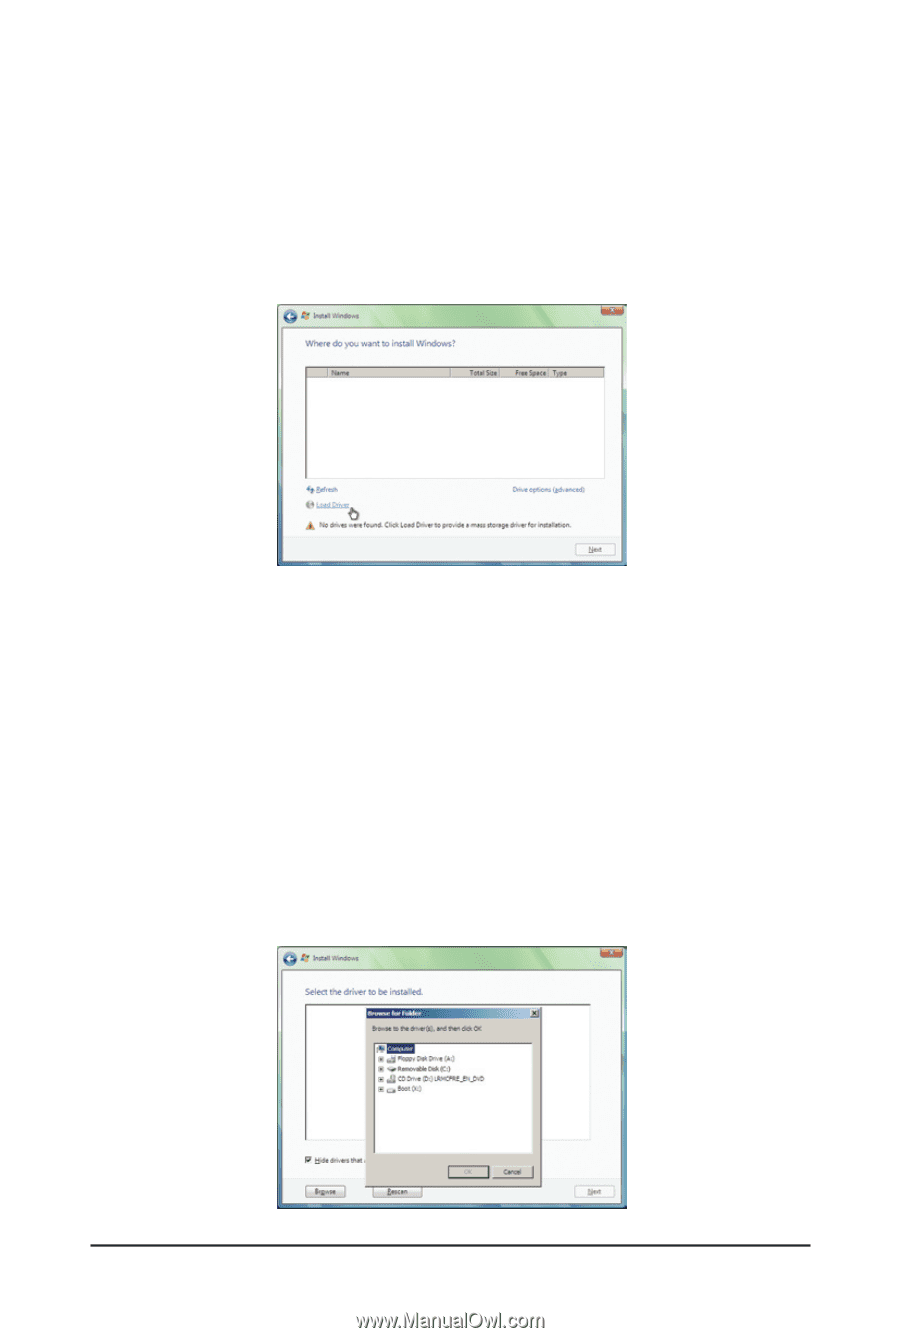
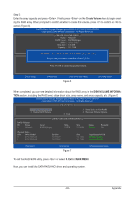
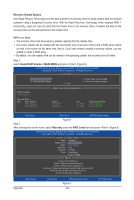
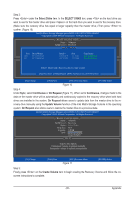
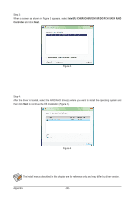
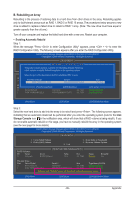
5-1-2 Installing the SATA RAID/AHCI Driver and Operating System With the correct BIOS settings, you are ready to install Windows Vista onto your hard drive(s). The following is an example of Windows Vista installation. A. Installing Windows Vista The procedure below assumes that only one RAID array exists in your system. Step 1: Restart your system to boot from the Windows Vista setup disk and perform standard OS installation steps. When a screen similar to that below appears (RAID hard drive will not be detected at this stage), select Load Driver (Figure 1). Figure 1 Step 2: Insert the motherboard driver disk (Method A) or the USB flash drive that contains the driver (Method B), then specify the location of the driver (Figure 2). Note: For users using a SATA optical drive, be sure to copy the driver files from the motherboard driver disk to a USB flash drive before installing Windows Vista (go to the BootDrv folder and save the whole iMSM folder to the USB flash drive). Then use Method B to load the driver. Method A: Insert the motherboard driver disk into your system and browse to the following directory: \BootDrv\iMSM\32Bit For Windows Vista 64-bit, browse to the 64Bit folder. Method B: Insert the USB flash drive containing the driver files and browse to \iMSM\32Bit (for Windows Vista 32-bit) or \iMSM\64Bit (for Windows Vista 64-bit). Figure 2 - 87 - Appendix
-
 1
1 -
2
-
3
-
4
-
5
-
6
-
7
-
8
-
9
-
10
-
11
-
12
-
13
-
14
-
15
-
16
-
17
-
18
-
19
-
20
-
21
-
22
-
23
-
24
-
25
-
26
-
27
-
28
-
29
-
30
-
31
-
32
-
33
-
34
-
35
-
36
-
37
-
38
-
39
-
40
-
41
-
42
-
43
-
44
-
45
-
46
-
47
-
48
-
49
-
50
-
51
-
52
-
53
-
54
-
55
-
56
-
57
-
58
-
59
-
60
-
61
-
62
-
63
-
64
-
65
-
66
-
67
-
68
-
69
-
70
-
71
-
72
-
73
-
74
-
75
-
76
-
77
-
78
-
79
-
80
-
81
-
 82
82 -
 83
83 -
 84
84 -
 85
85 -
 86
86 -
 87
87 -
 88
88 -
 89
89 -
 90
90 -
 91
91 -
 92
92 -
93
-
94
-
95
-
96
-
97
-
98
-
99
-
100
-
101
-
102
-
103
-
104
-
105
-
106
-
107
-
108
-
109
-
110
-
111
-
112
 |
 |