Gigabyte GA-Z68MA-D2H-B3 Manual - Page 85
Installing the SATA RAID/AHCI Driver and Operating System, A. Installing Windows 7/Vista - compatibility
 |
UPC - 818313012708
View all Gigabyte GA-Z68MA-D2H-B3 manuals
Add to My Manuals
Save this manual to your list of manuals |
Page 85 highlights
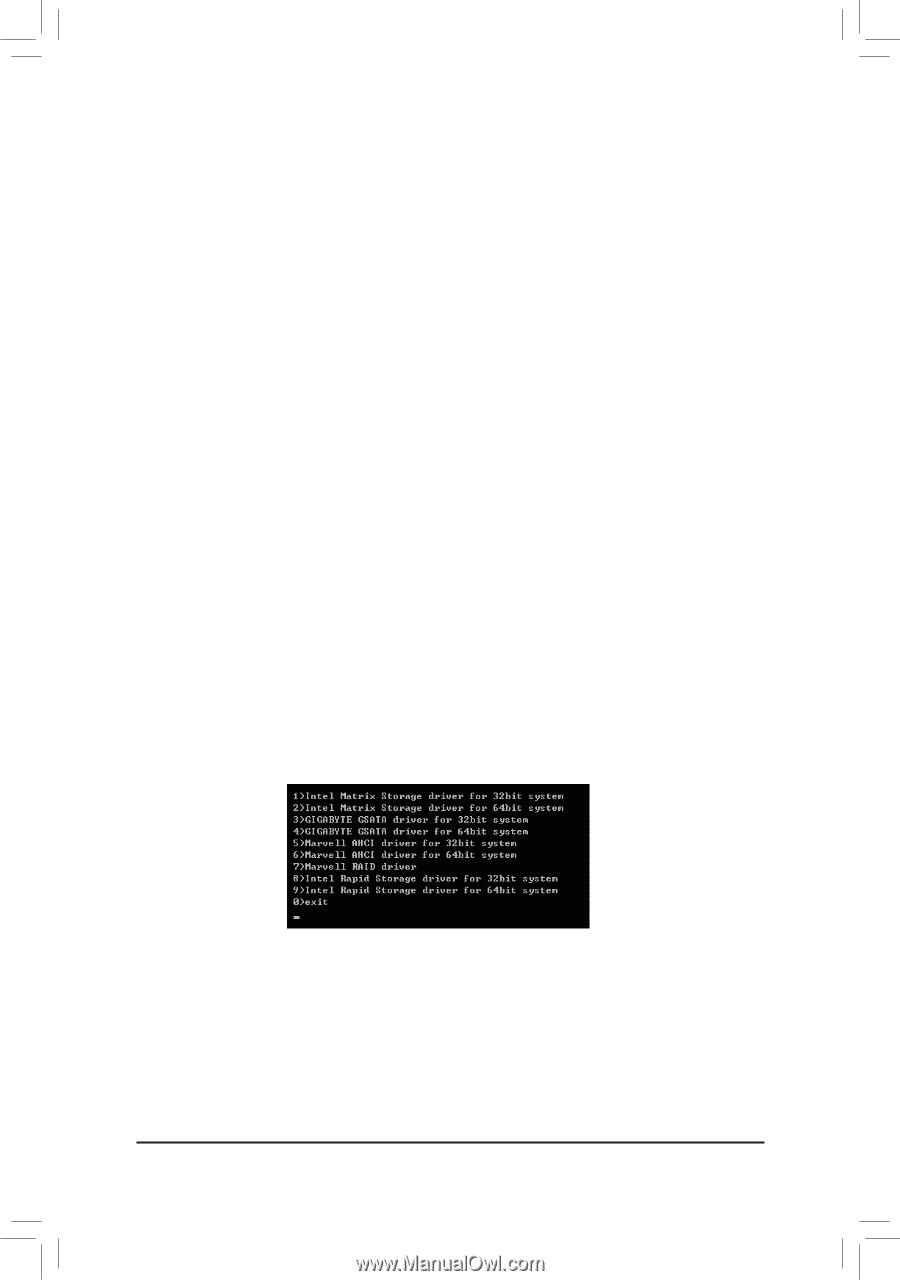
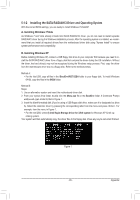
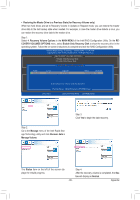
5-1-2 Installing the SATA RAID/AHCI Driver and Operating System With the correct BIOS settings, you are ready to install Windows 7/Vista/XP. A. Installing Windows 7/Vista As Windows 7 and Vista already include Intel SATA RAID/AHCI driver, you do not need to install separate RAID/AHCI driver during the Windows installation process. After the operating system is installed, we recommend that you install all required drivers from the motherboard driver disk using "Xpress Install" to ensure system performance and compatibility. B. Installing Windows XP Before installing Windows XP, connect a USB floppy disk drive to your computer first because you need to install the SATA RAID/AHCI driver from a floppy disk that contains the driver during the OS installation. Without the driver, the hard drive(s) may not be recognized during the Windows setup process. First, copy the driver from the motherboard driver disk to a floppy disk. Refer to the methods below. Method A: • For the Intel Z68, copy all files in the \BootDrv\iRST\32Bit folder to your floppy disk. To install Windows 64-Bit, copy the files in the 64Bit folder. Method B: Steps: 1: Use an alternative system and insert the motherboard driver disk. 2: From your optical drive folder, double click the Menu.exe file in the BootDrv folder. A Command Prompt window will open similar to that in Figure 1. 3: Insert the blank formatted disk (if you're using a USB floppy disk drive, make sure it is designated as drive A). Select the controller driver by pressing the corresponding letter from the menu and press . For example, from the menu in Figure 1, • For the Intel Z68, select 8) Intel Rapid Storage driver for 32bit system for Windows XP 32-bit op- erating system. Your system will then automatically copy the driver files to the floppy disk. Press any key to exit when finished. Figure 1 - 85 - Appendix
-
 1
1 -
2
-
3
-
4
-
5
-
6
-
7
-
8
-
9
-
10
-
11
-
12
-
13
-
14
-
15
-
16
-
17
-
18
-
19
-
20
-
21
-
22
-
23
-
24
-
25
-
26
-
27
-
28
-
29
-
30
-
31
-
32
-
33
-
34
-
35
-
36
-
37
-
38
-
39
-
40
-
41
-
42
-
43
-
44
-
45
-
46
-
47
-
48
-
49
-
50
-
51
-
52
-
53
-
54
-
55
-
56
-
57
-
58
-
59
-
60
-
61
-
62
-
63
-
64
-
65
-
66
-
67
-
68
-
69
-
70
-
71
-
72
-
73
-
74
-
75
-
76
-
77
-
78
-
79
-
 80
80 -
 81
81 -
 82
82 -
 83
83 -
 84
84 -
 85
85 -
 86
86 -
 87
87 -
 88
88 -
 89
89 -
 90
90 -
91
-
92
-
93
-
94
-
95
-
96
-
97
-
98
-
99
-
100
-
101
-
102
-
103
-
104
 |
 |