Gigabyte GA-Z68P-DS3 Manual - Page 30
Startup Screen - - ds3
 |
View all Gigabyte GA-Z68P-DS3 manuals
Add to My Manuals
Save this manual to your list of manuals |
Page 30 highlights
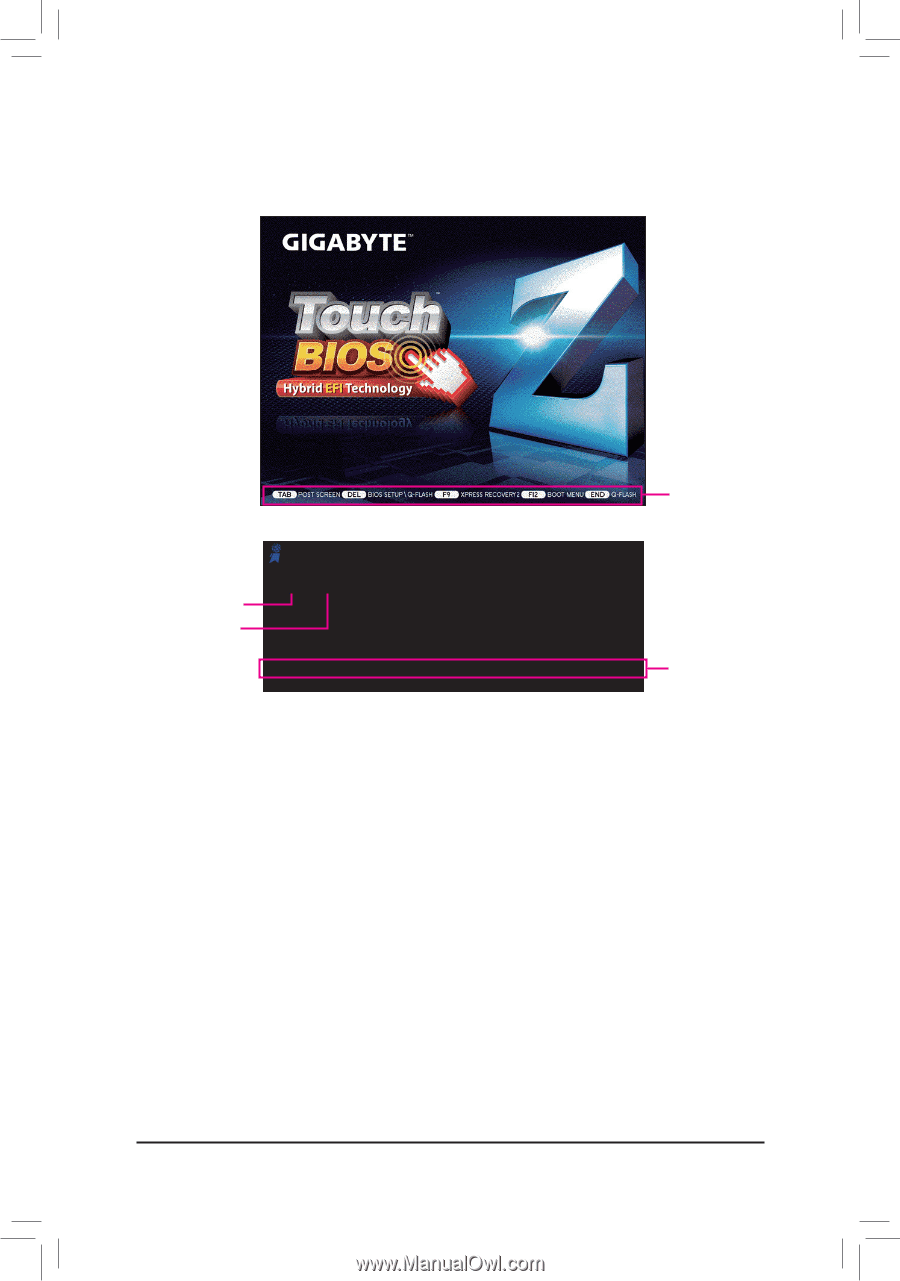
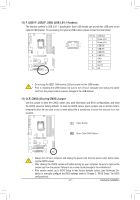
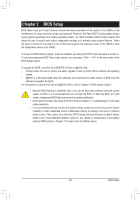
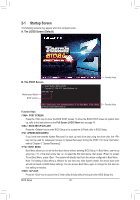
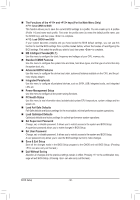
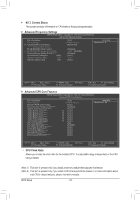
2-1 Startup Screen The following screens may appear when the computer boots. A. The LOGO Screen (Default) B. The POST Screen Award Modular BIOS v6.00PG Copyright (C) 1984-2011, Award Software, Inc. Motherboard Model BIOS Version Z68P-DS3 F1b . . . . : BIOS Setup : XpressRecovery2 : Boot Menu : Qflash 05/16/2011-Z68-7A89WG0EC-00 Function Keys Function Keys Function Keys: : POST SCREEN Press the key to show the BIOS POST screen. To show the BIOS POST screen at system startup, refer to the instructions on the Full Screen LOGO Show item on page 44. : BIOS SETUP\Q-FLASH Press the key to enter BIOS Setup or to access the Q-Flash utility in BIOS Setup. : XPRESS RECOVERY2 If you have ever entered Xpress Recovery2 to back up hard drive data using the driver disk, the key can be used for subsequent access to Xpress Recovery2 during the POST. For more information, refer to Chapter 4, "Xpress Recovery2." : BOOT MENU Boot Menu allows you to set the first boot device without entering BIOS Setup. In Boot Menu, use the up arrow key or the down arrow key to select the first boot device, then press to accept. To exit Boot Menu, press . The system will directly boot from the device configured in Boot Menu. Note: The setting in Boot Menu is effective for one time only. After system restart, the device boot order will still be based on BIOS Setup settings. You can access Boot Menu again to change the first boot device setting as needed. : Q-FLASH Press the key to access the Q-Flash utility directly without having to enter BIOS Setup first. BIOS Setup - 30 -
-
 1
1 -
2
-
3
-
4
-
5
-
6
-
7
-
8
-
9
-
10
-
11
-
12
-
13
-
14
-
15
-
16
-
17
-
18
-
19
-
20
-
21
-
22
-
23
-
24
-
 25
25 -
 26
26 -
 27
27 -
 28
28 -
 29
29 -
 30
30 -
 31
31 -
 32
32 -
 33
33 -
 34
34 -
 35
35 -
36
-
37
-
38
-
39
-
40
-
41
-
42
-
43
-
44
-
45
-
46
-
47
-
48
-
49
-
50
-
51
-
52
-
53
-
54
-
55
-
56
-
57
-
58
-
59
-
60
-
61
-
62
-
63
-
64
-
65
-
66
-
67
-
68
-
69
-
70
-
71
-
72
-
73
-
74
-
75
-
76
-
77
-
78
-
79
-
80
-
81
-
82
-
83
-
84
-
85
-
86
-
87
-
88
-
89
-
90
-
91
-
92
-
93
-
94
-
95
-
96
-
97
-
98
-
99
-
100
-
101
-
102
-
103
-
104
 |
 |