Gigabyte GA-Z77P-D3 User Guide
Gigabyte GA-Z77P-D3 Manual
 |
View all Gigabyte GA-Z77P-D3 manuals
Add to My Manuals
Save this manual to your list of manuals |
Gigabyte GA-Z77P-D3 manual content summary:
- Gigabyte GA-Z77P-D3 | User Guide - Page 1
been assigned as a member of a RAID array, it cannot be used to set up Intel Rapid Start store partition); IDE mode not supported 5. All motherboard drivers correctly installed B. Creating a Primary Store Partition Below it is assumed Windows 7 is already installed on the SATA hard drive. Open Disk - Gigabyte GA-Z77P-D3 | User Guide - Page 2
Application 1. While in the operating system, insert the motherboard driver disk, go to Application Software\Install Application Software, and select \All Programs\Intel or click the icon in the notification area. Instructions: The Intel Rapid Start application allows you to enable or disable the - Gigabyte GA-Z77P-D3 | User Guide - Page 3
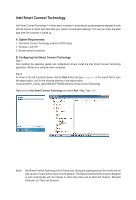
Windows 7 with SP1 3. Normal network connection B. Configuring Intel Smart Connect Technology Step 1: After installing the operating system and motherboard drivers, install the Intel Smart Connect Technology application. Restart your computer when completed. Step 2: As shown in the left screenshot - Gigabyte GA-Z77P-D3 | User Guide - Page 4
Step 3: As shown in the left screenshot below, right-click on OEM, select New > Multi-String Value, and type WhiteList. Double-click WhiteList and type the application name to be added in Edit Multi-String. For example, to add Microsoft Outlook, type outlook.exe; to add Microsoft Windows Live, type - Gigabyte GA-Z77P-D3 | User Guide - Page 5
for the Intel SATA controllers in BIOS Setup 4. A conventional SATA disk and an SSD (Note 1) 5. Windows 7 with SP1 (Note 2) 6. All motherboard drivers correctly installed If you have installed the operating system before configuring the Smart Response Technology, all original data on the hard disk - Gigabyte GA-Z77P-D3 | User Guide - Page 6
Step 4: After selecting the SSD you want to use, the size of the SSD allocated for the cache memory, the hard disk/ volume to accelerate, and the acceleration mode, click OK to complete the configuration of the Intel Smart Response Technology. The "Enable Acceleration" Dialog Box: Select the SSD to
-
 1
1 -
 2
2 -
 3
3 -
 4
4 -
 5
5 -
 6
6
 |
 |
Intel Rapid Start Technology
A. System Requirements
Windows 7 with SP1
1.
An SSD with size larger than the total system memory
2.
Intel Rapid Start Technology enabled in BIOS Setup
3.
AHCI/RAID mode supported (please note if the SSD has been assigned as a member of a RAID array, it
4.
cannot be used to set up Intel Rapid Start store partition); IDE mode not supported
All motherboard drivers correctly installed
5.
B. Creating a Primary Store Partition
Below it is assumed Windows 7 is already installed on the SATA hard drive.
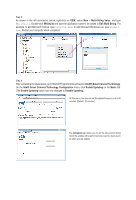
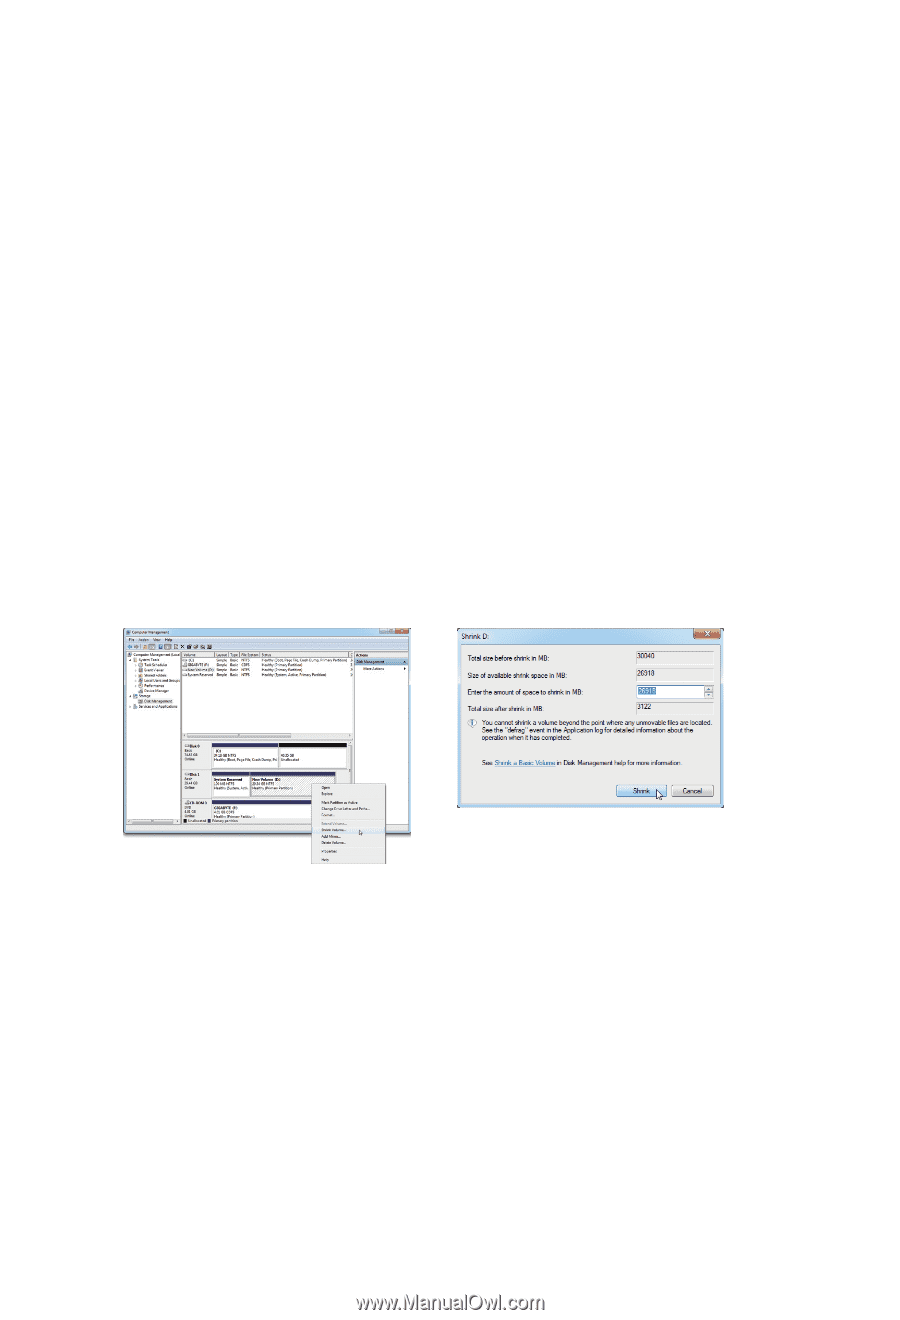
Open Disk Management Tool
Step 1:
Go to Control Panel > System and Security > Administrative Tools > Computer Management >Storage
> Disk Management.
Step 2:
Select the SSD on which you want to create the store partition (if the SSD is unallocated, create a
new partition first), and right-click on the partition you select and select
Shrink Volume
. (Figure 1)
Step 3:
Enter the size of the required partition (it should be at least equal to the size of the memory
currently installed on the system. (1 GB=1024 MB. For example, to set 8 GB, enter 8192 MB). The
recommendation is to create a partition equal to the maximum memory capacity supported on the
system, in order to take care of future memory upgrade scenarios.)
Step 4:
When completed, click
Shrink
. (Figure 2)
C. Launching DiskPart Disk Partitioning Tool to Set up Intel Rapid Start Store Partition
Open the command prompt window and run diskpart.exe (enter "
diskpart
" at the C:\> command prompt
and press <Enter>). At the diskpart prompt, type the following commands in sequence. Note: The commands for
MBR format and GPT format are different. Refer to the commands below. After entering all of the commands,
be sure to restart your computer.
MBR format:
DISKPART>list disk
(Lists the disks and information about them)
DISKPART>select disk X
(Selects a disk. "
X
" is the disk number where you
want to create the store partition. Refer to results from
"
list disk
" for the exact disk number)
DISKPART>create partition primary
(Create the primary store partition)
Figure 2
Figure 1