Gigabyte GV-R96X128D Manual
Gigabyte GV-R96X128D Manual
 |
View all Gigabyte GV-R96X128D manuals
Add to My Manuals
Save this manual to your list of manuals |
Gigabyte GV-R96X128D manual content summary:
- Gigabyte GV-R96X128D | Manual - Page 1
Weg 41, 1F, 20537 Hamburg, Germany declare that the product ( description of the apparatus, system, installation to which it refers) VGA Card GV-R96X128D is in conformity with (reference to the specification under which conformity is declared) in accordance with 89/336 EEC-EMC Directive Limits and - Gigabyte GV-R96X128D | Manual - Page 2
, CA 91748 Phone/Fax No: (818) 854-9338/ (818) 854-9339 hereby declares that the product Product Name: VGA Card Model Number: GV-R96X128D Conforms to the following specifications: FCC Part 15, Subpart B, Section 15.107(a) and Section 15.109 (a),Class B Digital Device Supplementary Information: This - Gigabyte GV-R96X128D | Manual - Page 3
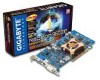
GV-R96X128D Radeon 9600 XT Graphics Accelerator USER'S MANUAL Rev. 101 12MD-R96X128D-101 - Gigabyte GV-R96X128D | Manual - Page 4
manual may be reproduced or transmitted in any from without the expressed, written permission of GBT. Trademarks Third-party brands and names are the property of their respective owners. Notice Due to rapid change in technology, some of the specifications GV-R96X128D Graphics Accelerator - 2 - - Gigabyte GV-R96X128D | Manual - Page 5
Icon ...18 3.1.6. Display Properties pages 22 3.2. Win® 98/98SE / Win® 2000 / Win® ME driver installation 31 3.3. BIOS FLASH UTILITY 31 4. Troubleshooting Tips 32 5. Appendix 33 5.1. How to reflash the BIOS 33 5.2. Resolutions and Color Depth Table (In Windows® XP 34 - 3 - Table of Content - Gigabyte GV-R96X128D | Manual - Page 6
(VPU) „ Supports DirectX® 9.0 „ Supports the new AGP 8X standard „ 4-pixel pipeline architecture „ 128-bit memory interface „ 128MB DDR memory accelerates the latest 3D games „ Supports pixel shaders to accelerate video „ Supports DVI-I and TV-Out connector GV-R96X128D Graphics Accelerator - 4 - - Gigabyte GV-R96X128D | Manual - Page 7
INSTALLATION 2.1. UNPACKING The GV-R96X128D package contains the following: z The GV-R96X128D graphics accelerator z This user's manual z The GV-R96X128D driver CD x 1 z PowerDVD CD z Game CD z One cable supports S-video and AV-Output z DVI-I to D-Sub connector WARNING! Expansion cards contain - Gigabyte GV-R96X128D | Manual - Page 8
LCD Monitor Analog Monitor NTSC / PAL TV Projector Digital LCD Monitor Analog LCD Monitor AV Output S-VideoOutput DVI Output DVI-I to D-Sub Connector VGA Output GV-R96X128D Graphics Accelerator - 6 - VGA Monitor Connector (15pin) TV-out DVI-I Connector - Gigabyte GV-R96X128D | Manual - Page 9
are ready to install your graphics accelerator card. To install your graphics accelerator card: 1. Power off the computer and monitor, then disconnect the display cable from the back of your computer. 2. Remove the computer cover. If necessary, consult your computer's manual for help in removing - Gigabyte GV-R96X128D | Manual - Page 10
the appropriate connector, as shown below... To Flat Panel Display To TV or VCR To VGA Monitor You are now ready to proceed with the installation of the graphics card driver. For detailed instructions, select your operating system from the list below. GV-R96X128D Graphics Accelerator - 8 - - Gigabyte GV-R96X128D | Manual - Page 11
ROM drive, you can see the AUTORUN window (if it does not show up, run "D:\setup.exe"). Then you can follow the guides to setup your graphics card driver. (Please follow the subsection 3.1.3 "Driver installation" to install the driver for your graphics accelerator.) 3.1. WIN® XP DRIVER AND UTILITIES - Gigabyte GV-R96X128D | Manual - Page 12
. Note: For software MPEG support in Windows® 98/ 98SE/ Windows® 2000/ Windows® ME or Windows® XP, you must install DirectX 9(or later version) first. 1. Install DirectX Driver: Click "Install DirectX 9" Item. 2.Click "Next" icon. 3.Click "Next" icon. GV-R96X128D Graphics Accelerator - 10 - Gigabyte GV-R96X128D | Manual - Page 13
English 4.Click "Finish" item. Then the DirectX 9 installation is completed. - 11 - Software Installation - Gigabyte GV-R96X128D | Manual - Page 14
Update Device Driver Wizard: Finish At this time, system will ask for your Windows CD in order to complete the VGA driver installation. If you don't have the CD, you can press C:\Windows\System directory. Step 4: System Setting Change 2.Click "Finish" button. GV-R96X128D Graphics Accelerator - 12 - Gigabyte GV-R96X128D | Manual - Page 15
the driver CD disk into your CD-ROM, and then you can see the AUTORUN window. If it does not show up, please run "D:\setup. exe". Step 5: Driver Setup (Pictures below are shown in Windows XP) 1. Click "Install Display Drivers (Radeon 9600 Series)" item. 2.Click "Next". - 13 - Software Installation - Gigabyte GV-R96X128D | Manual - Page 16
English 3.Click "Yes". 4. Click "Express" or "Custom" icon. GV-R96X128D Graphics Accelerator 5. Click "Finish" to restart computer. - 14 - - Gigabyte GV-R96X128D | Manual - Page 17
English 3.1.4. Utilities on driver CD The utilities include Display Driver and V-Tuner utilities. Please follow the steps. z Install V-Tuner : 1. Click "V-Tuner" item. 2.Click "Next". 3. Enter your name and company. 4. Click "Finish" to restart computer. - 15 - Software Installation - Gigabyte GV-R96X128D | Manual - Page 18
English z Install Hydravision : 1. Click "Hydravision Install" item. 2.Click "Next". 3.Click "Yes". 4.Click "Next". GV-R96X128D Graphics Accelerator - 16 - - Gigabyte GV-R96X128D | Manual - Page 19
English 5.Click "Next". 6. Click "Finish" to restart computer. - 17 - Software Installation - Gigabyte GV-R96X128D | Manual - Page 20
installation of the display drivers, you will find an GBT icon on the taskbar's status area. Right-clicking this icon opens the GBT control panel, showing a menu composed of shortcute of the graphics card graphics card, latest drivers, and other information. GV-R96X128D Graphics Accelerator - 18 - - Gigabyte GV-R96X128D | Manual - Page 21
engine and video memory (Core Clock and Memory Clock) Display & Adjust Min. V-Tuner Core Clock Display Core Clock Close V-Tuner Display Memory Clock Link to the Website of Gigabyte Display & Adjust Memory Clock Help Description Close V-Tuner to System Tray - 19 - Software Installation - Gigabyte GV-R96X128D | Manual - Page 22
English VGA Information VGA Info lists the relevant information about your card. Color Adjust Color Adjust allows you to make color adjustments, such as brightness, contrast and gamma values for each or all of RGB colors. GV-R96X128D Graphics Accelerator - 20 - - Gigabyte GV-R96X128D | Manual - Page 23
. GVR96X128D graphic cards that have more than one display output can benefit fully from this software. A GV-R96X128D with only one display output can still take advantage of the many features of HYDRAVISION™. HYDRAVISION™ installation enables the Desktop Manager and creates a Windows® program - Gigabyte GV-R96X128D | Manual - Page 24
the refresh rate. Settings (Resolutions and Color depth for windows) The Setting properties page allows you to adjust the Direct card's hardware details and driver information. „ Re-activate all warning messages allows you to reactivate any disabled graphics GV-R96X128D Graphics Accelerator - 22 - - Gigabyte GV-R96X128D | Manual - Page 25
to ATI Technologies. SMARTGART™ Properties: The SMARTGART™ Properties ensures system stability by automatically performing a variety of bus tests that determine your optimal graphics accelerator settings. Changing these settings might result in system instability. - 23 - Software Installation - Gigabyte GV-R96X128D | Manual - Page 26
the slider to the right delivers the highest quality experience. Moving the slider to the left emphasizes a high performance solution while still providing good visuals. GV-R96X128D Graphics Accelerator - 24 - - Gigabyte GV-R96X128D | Manual - Page 27
limited number of texture formats. By selecting Disabled, the driver will not support DTX texture formats, thus reducing the number of texture formats supported. z Alternate pixel center This may eliminate problems with some Direct3D games which display vertical and horizontal lines around textures - Gigabyte GV-R96X128D | Manual - Page 28
the slider to the right delivers the highest quality experience. Moving the slider to the left emphasizes a high performance solution while still providing good visuals. GV-R96X128D Graphics Accelerator - 26 - - Gigabyte GV-R96X128D | Manual - Page 29
This button allows you to access advanced settings that can solve compatibility issues for a few specific OpenGL applications. z Force Z-buffer depth allows you to explicitly set the ZBuffer depth. This button allows you to reset the OpenGL Settings to default values. - 27 - Software Installation - Gigabyte GV-R96X128D | Manual - Page 30
can change red, green, and blue display colors. Set Desktop and Video Overlay brightness (gamma) levels can also be changed. „ Desktop increases is NOT supported in Windows NT4.0) „ Default resets the desktop brightness and color settings to the default values. GV-R96X128D Graphics Accelerator - - Gigabyte GV-R96X128D | Manual - Page 31
(or VCR). 2. Ensure your graphics card was installed correctly. (For information about placing the card in your computer and installing the enhanced graphics driver, see the user's manual.) 3. Determine if your television (or VCR) has an S-Video or Composite video connection. 4. Looking at the back - Gigabyte GV-R96X128D | Manual - Page 32
of the video image. „ Defaults button allows you to reset the Overlay settings to default values. „ Clone mode options button allows overlay settings are only available in dual-controller Clone mode, and not single-display or extended desktop configurations. GV-R96X128D Graphics Accelerator - 30 - Gigabyte GV-R96X128D | Manual - Page 33
/98SE / WIN® 2000 / WIN® ME DRIVER INSTALLATION Please make sure the Windows have installed Windows Service Pack version 2 (or later) before installing the graphics accelerator driver. With Windows running on your computer, you need to install the graphics card driver to take advantage of the higher - Gigabyte GV-R96X128D | Manual - Page 34
use the Troubleshooting Guide located in the Windows® Help or contact your computer manufacturer. If necessary, adjust your monitor's setting by monitor's adjust panel to make the screen looks focused, crisp, and sharp. (Please refer to the monitor's manual.) GV-R96X128D Graphics Accelerator - 32 - Gigabyte GV-R96X128D | Manual - Page 35
We use GV-AR64SH VGA card and Atiflash BIOS flash utility as example. How to reflash the BIOS for your graphics card? 1. Extract the Zip file to the drive C: or A: 2. Restart your PC in MS-DOS mode (This function only for Windows 98/98SE, If your OS is Windows 2000 / Windows Me / Windows XP. please - Gigabyte GV-R96X128D | Manual - Page 36
(In Windows® XP) Display Screen Resolution 640 x 480 800 x 600 1024 x 768 GV-R96X128D 2D ) 3 3 3 3 3 3 3 3 3 3 3 32bpp(16.7M) True mode 3 3 3 3 3 3 3 3 3 3 (interlaced) 3 3 3 3 3 3 3 3 3 3 3 3 (interlaced) 3 3 3 3 3 3 3 3 3 3 3 To be continued... GV-R96X128D Graphics Accelerator - 34 - - Gigabyte GV-R96X128D | Manual - Page 37
English Display Screen Resolution 1152 x 864 1280 x 768 1280 x 960 1280 x 1024 1600 x 1200 Refresh Rate (Hz) 43 47 60 70 75 85 100 56 60 75 85 60 70 72 75 85 100 120 160 43 47 60 70 75 85 90 100 120 60 70 75 85 100 Color Depth (bpp) 8bpp(256 color) Standard mode 3 (interlaced) 3 (interlaced) 3 3 - Gigabyte GV-R96X128D | Manual - Page 38
mode 3 3 3 3 3 3 3 3 3 3 3 3 3 3 3 3 3 16bpp(65K color) High mode 3 3 3 3 3 3 3 3 3 3 3 3 3 3 3 3 3 32bpp(16.7M) True mode 3 3 3 3 3 3 3 3 3 3 3 3 3 3 3 3 3 * Lower maximum refresh rates at some resolutions when using lower bandwidth memory configuration. GV-R96X128D Graphics Accelerator - 36 - - Gigabyte GV-R96X128D | Manual - Page 39
- 37 - Appendix English - Gigabyte GV-R96X128D | Manual - Page 40
English GV-R96X128D Graphics Accelerator - 38 -
-
 1
1 -
 2
2 -
 3
3 -
 4
4 -
 5
5 -
 6
6 -
 7
7 -
8
-
9
-
10
-
11
-
12
-
13
-
14
-
15
-
16
-
17
-
18
-
19
-
20
-
21
-
22
-
23
-
24
-
25
-
26
-
27
-
28
-
29
-
30
-
31
-
32
-
33
-
34
-
35
-
36
-
37
-
38
-
39
-
40
 |
 |

Declaration of Conformity
We, Manufacturer/Importer
(full address)
G.B.T. Technology Träding GMbH
Ausschlager Weg 41, 1F, 20537 Hamburg, Germany
declare that the product
( description of the apparatus, system, installation to which it refers)
VGA Card
GV-R96X128D
is in conformity with
(reference to the specification under which conformity is declared)
in accordance with 89/336 EEC-EMC Directive
EN 55011
Limits and methods of measurement
of radio disturbance characteristics of
industrial,scientific and medical (ISM
high frequency equipment
EN 61000-3-2*
EN 60555-2
Disturbances in supply systems cause
by household appliances and similar
electrical equipment "Harmonics"
EN 55013
Limits and methods of measurement
of radio disturbance characteristics of
broadcast receivers and associated
equipment
EN 61000-3-3*
Disturbances in supply systems cause
by household appliances and similar
electrical equipment "Voltage fluctuations"
EN 55014
Limits and methods of measurement
of radio disturbance characteristics of
household electrical appliances,
portable tools and similar electrical
apparatus
EN 50081-1
Generic emission standard Part 1:
Residual commercial and light industry
EN 50082-1
Generic immunity standard Part 1:
Residual commercial and light industry
EN 55015
Limits and methods of measurement
of radio disturbance characteristics of
fluorescent lamps and luminaries
Generic emission standard Part 2:
Industrial environment
EN 55081-2
Immunity from radio interference of
broadcast receivers and associated
equipment
Generic emission standard Part 2:
Industrial environment
EN 55082-2
EN 55022
Limits and methods of measurement
of radio disturbance characteristics of
information technology equipment
lmmunity requirements for household
appliances tools and similar apparatus
ENV 55104
Cabled distribution systems; Equipment
for receiving and/or
distribution
from
sound and television signals
EMC requirements for uninterruptible
power systems (UPS)
EN50091-2
EN 55020
DIN VDE 0855
part 10
part 12
(EC conformity marking)
CE marking
The manufacturer also declares the conformity of above mentioned product
with the actual required safety standards in accordance with LVD 73/23 EEC
Safety requirements for mains operated
electronic and related apparatus for
household and similar general use
EN 60950
EN 60065
Safety of household and similar
electrical appliances
EN 60335
Manufacturer/Importer
Signature:
Name:
(Stamp)
Date : Nov. 20, 2003
EN 60555-3
Timmy Huang
Timmy Huang
EN 50091-1
Safety for information technology equipment
including electrical bussiness equipment
General and Safety requirements for
uninterruptible power systems (UPS)