Gigabyte MD30-RS0 Manual
Gigabyte MD30-RS0 Manual
 |
View all Gigabyte MD30-RS0 manuals
Add to My Manuals
Save this manual to your list of manuals |
Gigabyte MD30-RS0 manual content summary:
- Gigabyte MD30-RS0 | Manual - Page 1
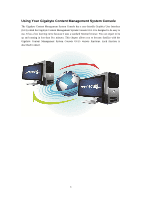
Gigabyte Content Management System Console User's Guide Version: 1.3 - Gigabyte MD30-RS0 | Manual - Page 2
Management Network Configuration 6 Using the Web UI...8 Gigabyte Content Management System Console Overview 9 Enter Gigabyte Content Management System Console 10 Properties ...10 Configuration ...11 Network...11 Network Security ...12 Users ...13 Services ...14 IPMI ...15 Time Setting ...17 - Gigabyte MD30-RS0 | Manual - Page 3
Marcos ...37 Tools ...37 Power ...39 Help ...39 2 - Gigabyte MD30-RS0 | Manual - Page 4
Content Management System Console has a user-friendly Graphics User Interface (GUI) called the Gigabyte Content Management System Console GUI. It is designed to be easy to use. It has a low learning curve because it uses a standard Internet browser. You - Gigabyte MD30-RS0 | Manual - Page 5
Gigabyte Content Management System Key Features and Functions Support IPMI v2.0 Out-of-band monitoring and control for sever management over includes power control and status report, front panel buttons and LEDs control. Support multi-session user, and alert destination for LAN channel. 4 - Gigabyte MD30-RS0 | Manual - Page 6
your system for the following required configuration requirements: Supported Browsers: Internet Explorer 8~12 Google chrome Version or later version (file size: ~ 623KB) Install Java Tool Please follow the instruction to install Java in Windows operating system. 1. Go to http://www.java.com - Gigabyte MD30-RS0 | Manual - Page 7
Gigabyte Content Management Network Configuration Please follow the instruction to enable the console redirection function. 1. Go to BIOS setup menu. 2. Select Server Management. 3. Define BMC LAN Configuration to Dynamic or Static. 4. Save and Exit. 5. - Gigabyte MD30-RS0 | Manual - Page 8
6. Save the configuration and exit BIOS setup menu. 7 - Gigabyte MD30-RS0 | Manual - Page 9
users to connect to the BMC using an Internet browser (Microsoft® Internet Explorer™). The web server shall support 4 concurrent connections Web-based GUI is supported on the following browsers: Microsoft Windows: • Internet Explorer 8 ~ 12 • Mozilla® Firefox® 2.0 or later Linux: Mozilla Firefox - Gigabyte MD30-RS0 | Manual - Page 10
Gigabyte Content Management System Console Overview 1. Open a web browser and type in Password. 3. Enter the following values: Username: admin Password: password If your motherboard is Intel C20x series chipset, please enter the following values: Username: root Password: superuser The default user - Gigabyte MD30-RS0 | Manual - Page 11
Enter Gigabyte Content Management System Console After you successfully log into your Gigabyte Content Management System Console, the Remote Management Console GUI appears. Properties Properties displays the firmware version of current remote client system. 10 - Gigabyte MD30-RS0 | Manual - Page 12
Configuration Network You can view and modify the network settings on this screen. Select the Network Mode from the drop-down list. Dedicate Mode When set to Dedicate Mode, you can configure the BMC related settings through the BMC port. Shared Mode When set to Shared Mode, you can configure the BMC - Gigabyte MD30-RS0 | Manual - Page 13
Network Security You can configure the network security settings on this screen. Check the IP Blocking Enabled box and input the desire value of IP Blocking Fail Count, IP Blocking Fail Window, and IP Blocking Penalty Time. After you finish the configuration, click Apply Change to save the settings. - Gigabyte MD30-RS0 | Manual - Page 14
Users To configure a specific user, click the Users ID. To display new user information, click Refresh. NOTE: BMC convention for enabling an 'anonymous' login is to configure the entry for User ID 1 with a null username (all zero's) and a null password (all zero's). Applications may then present - Gigabyte MD30-RS0 | Manual - Page 15
Services You can configure the web server parameters (such as, HTTP Port Number, HTTPS Port Number, and Timeout) on a remote computer. By default, the timeout is 1800 seconds. When you finish the configuration, click Apply Changes. 14 - Gigabyte MD30-RS0 | Manual - Page 16
IPMI This screen contains two sections: IPMI Serial and IPMI Settings. IPMI Serial There are four serial configuration in IPMI Serial: Connection Mode Settings, Baud Rate, Flow Control, and Channel Privilege Level Limit. The Connection Mode Settings allows user to select the Console redirection type - Gigabyte MD30-RS0 | Manual - Page 17
IPMI Settings IPMI Settings provides remote configuration over LAN. To activate IPMI remote configuration by LAN, check Enable IPMI Over LAN option, define the Channel Privilege Level Limit, and enter the Encryption Key. When you finish the configuration, click "Apply Changes". 16 - Gigabyte MD30-RS0 | Manual - Page 18
Time Setting This page provides the mechanism to configure the Network Time acquisition method. With Administrator or Operator privilege level, you can modify configuration settings and click the Apply Changes button to execute the settings, as well as click the Sync Time Now button (when in - Gigabyte MD30-RS0 | Manual - Page 19
Sessions This screen displays information on Active Sessions. Additionally, the trash can icon provides the delete function for privileged users. Click Refresh to refresh the Sessions status. 18 - Gigabyte MD30-RS0 | Manual - Page 20
LDAP LDAP screen allows download user list of LDAP server then create Gigabyte Content Management System Console user account from this list directly. Check the box below to enable LDAP authentication and enter the required information to access - Gigabyte MD30-RS0 | Manual - Page 21
Updates The firmware can be updated remotely. To update firmware, follow the instruction below: 1. Select Update Type. 2. Select the file on your local system using Browse. Click Upload to update to the new version of firmware. 20 - Gigabyte MD30-RS0 | Manual - Page 22
Utilities Utilities provides BMC reboot and Factory default restore functions. 1. To reboot system, click Reboot. 2. To restore factory default, click Factory Default. 21 - Gigabyte MD30-RS0 | Manual - Page 23
Server Information Power Control The Power Control allows you to power on/off/cycle the remote host system. Additionally you can see the remote power status. To perform the power control operation, select the operation and click Apply Changes. 22 - Gigabyte MD30-RS0 | Manual - Page 24
Voltages This screen displays the status of system power consumption. Each sensor displays different color to indicate the health status of a specified device. The green color indicates the device is healthy and there's no sensor that has any alert. The yellow color indicates the device has at least - Gigabyte MD30-RS0 | Manual - Page 25
Thermal This screen displays the Fans and Temperatures sensors of a remote host system. Click Refresh to update current health status for both Fans and Temperatures. The green color indicates the device is healthy and there's no sensor that has any alert. The yellow color indicates the device has at - Gigabyte MD30-RS0 | Manual - Page 26
Temperature 25 - Gigabyte MD30-RS0 | Manual - Page 27
System Event Log It records the event when sensor has an abnormal state. When the log matches the pre-defined alert, the system sends out the notification automatically, if it is pre-configured. 26 - Gigabyte MD30-RS0 | Manual - Page 28
Event Management Platform Event A platform event filter (PEF) can trigger an action and generate an alert when a critical hardware-related event occurs. For each PEF, you can choose the action to be taken when a platform event occurs. You can also choose to generate and send an alert when a platform - Gigabyte MD30-RS0 | Manual - Page 29
Trap Settings In the Trap Settings, user can set the IPv4 and Ipv6 Destination List. IPv6 and IPv4 are two completely separate protocols. IPv6 is not backwards compatible with IPv4, and IPv4 hosts and routers will not be able to deal directly with IPv6 traffic. IPv6 has a significantly larger - Gigabyte MD30-RS0 | Manual - Page 30
Email Settings If you want the alert to be sent by email, you can configure to specify the e-mail address, subject and message in the Email Settings. After you finish the configuration, click Apply Change to save the settings. SMTP Set E-mail (SMTP) server IP address for sending alert notification - Gigabyte MD30-RS0 | Manual - Page 31
Serial Over LAN You can configure the Serial Over LAN settings on this screen. Check the Enable Serial Over LAN box and select the Baud Rate and Channel Privilege Limit from the drop-down list. After you finish the configuration, click Apply Change to save the settings. 30 - Gigabyte MD30-RS0 | Manual - Page 32
Remote Console Console Redirection This screen allows you to start a Remote Console session with the host system. 31 - Gigabyte MD30-RS0 | Manual - Page 33
Launch Java KVM Client Click Launch Java KVM Client to launch the redirection console and manage the server remotely. After clicking the button, a console appears as below: For KVM and remote redirection detail function description, please go to chapter: KVM Function Description 32 - Gigabyte MD30-RS0 | Manual - Page 34
Launch Java VM Client Click Launch Java VM Client to launch the redirection console and manage the local computer. After clicking the button, a console appears as below: Function Item Mapped Create Image... Add Image... Remove Image Exit Details USB Reset Resulting Action Check the mapped box next - Gigabyte MD30-RS0 | Manual - Page 35
Console Redirection Configuration This screen allows you to configure the Remote Console settings. Check the Virtual KVM Configuration Enabled box or Virtual Media Configuration Enabled box, and select the Max Sessions, Remote Port, Video Encryption Enabled, and Preference Client from the drop-down - Gigabyte MD30-RS0 | Manual - Page 36
KVM Function Description After selecting KVM Remote Console Redirection button, system will lead you to the main menu of KVM window which is shown as below: Main Menu The items in the main menu will be described in the following sections.. File Menu Item File→Capture to File File→Exit Resulting - Gigabyte MD30-RS0 | Manual - Page 37
View Menu Item View → Hide/Show Status Bar View →Refresh View →Full Screen View →Fit Resulting Action Hide / Show the status bar which includes "Session IP address", "Session Username", "Frame Rate", and "Bandwidth". Sends a request to the KVM server asking for a reference screen. Will switch to - Gigabyte MD30-RS0 | Manual - Page 38
this is to provide an alternate mechanism for generate these keystrokes. We refer to these keystroke sequences as macros. The list of supported macros is as follows: Tools Menu Item Tools → Instant Messaging Tools → Session Options Tools → Session User List Tools → Single Cursor Resulting Action - Gigabyte MD30-RS0 | Manual - Page 39
Tools → Stats Will display the performance statistics dialog. 38 - Gigabyte MD30-RS0 | Manual - Page 40
Power Menu Item Power → Power On System Power → Power Off System Power → Graceful Shutdown Power → Reset System (warm boot) Power → Power Cycle System (cold boot) Resulting Action Turns the power on. Turns the power off. Issue a graceful shutdown command to the target. Issues a reboot command to
-
 1
1 -
 2
2 -
 3
3 -
 4
4 -
 5
5 -
 6
6 -
 7
7 -
8
-
9
-
10
-
11
-
12
-
13
-
14
-
15
-
16
-
17
-
18
-
19
-
20
-
21
-
22
-
23
-
24
-
25
-
26
-
27
-
28
-
29
-
30
-
31
-
32
-
33
-
34
-
35
-
36
-
37
-
38
-
39
-
40
 |
 |

Gigabyte Content Management
System Console
User’s Guide
Version: 1.3