Gigabyte MX31-BS0 Manual
Gigabyte MX31-BS0 Manual
 |
View all Gigabyte MX31-BS0 manuals
Add to My Manuals
Save this manual to your list of manuals |
Gigabyte MX31-BS0 manual content summary:
- Gigabyte MX31-BS0 | Manual - Page 1
. [2] Make sure target system BMC is live. [3] Get BMC IP address of target system. 1.2. Update BIOS [1] Get BIOS file Download BIOS from GIGABYTE Support & Downloads website. Save BIOS package in C:\BIOS of client PC. Decompress BIOS package in C:\BIOS [2] Make sure there is "image.RBU" in RBU - Gigabyte MX31-BS0 | Manual - Page 2
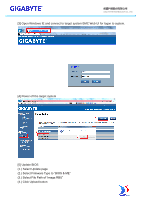
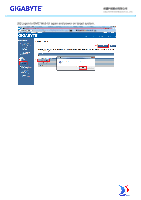
GIGA -BYTE TECHNOLOGY CO., LTD. [3] Open Windows IE and connect to target system BMC Web UI for logon to system. [4] Power off the target system [5] Update BIOS (1.) Select Update page (2.) Select Firmware Type to "BIOS & ME" (3.) Select File Path of "image.RBU" (4.) Click Upload button - Gigabyte MX31-BS0 | Manual - Page 3
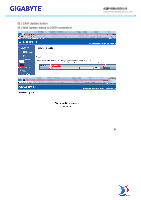
(5.) Click Update button (6.) Wait update status to 100% completed GIGA -BYTE TECHNOLOGY CO., LTD. - Gigabyte MX31-BS0 | Manual - Page 4
GIGA -BYTE TECHNOLOGY CO., LTD. - Gigabyte MX31-BS0 | Manual - Page 5
GIGA -BYTE TECHNOLOGY CO., LTD. [6] Logon to BMC Web UI again and power on target system. - Gigabyte MX31-BS0 | Manual - Page 6
image file "image.RBU" of target system. [2] Make sure target system BMC is live. [3] Get BMC IP address of target system. [4] Download TFTP service application for Windows client PC (e.g. Tftpd64.exe/Tftpd32.exe through free download). [5] Setup TFTP server for Linux client PC (Please users set up - Gigabyte MX31-BS0 | Manual - Page 7
GIGA -BYTE TECHNOLOGY CO., LTD. - Gigabyte MX31-BS0 | Manual - Page 8
2.3. Update BIOS (Sample on Windows client PC) [1] Set up TFTP service application Execute Tftpd64.exe Set Current Directory to file path of "image.RBU" GIGA -BYTE TECHNOLOGY CO., LTD. [2] Execute cmd.exe and connect to target - Gigabyte MX31-BS0 | Manual - Page 9
GIGA -BYTE TECHNOLOGY CO., LTD. [3] Set target system to power off. e.g. ipmitool -H 10.1.27.150 -U admin -P password raw 0x00 0x02 0x00 - Gigabyte MX31-BS0 | Manual - Page 10
Upload "image.RBU" through TFTP service application. e.g. ipmitool -H 10.1.27.150 -U admin -P password raw 0x2e 0x20 0x0a 0x3c 0x00 0x0e 0x00 0x00 0x0a 0x01 0x1b 0x34 0x69 0x6d 0x61 0x67 0x65 0x2e 0x52 0x42 0x55 Command format: raw - Gigabyte MX31-BS0 | Manual - Page 11
GIGA -BYTE TECHNOLOGY CO., LTD. [6] Check BIOS update status e.g. ipmitool -H 10.1.27.150 -U admin -P password raw 0x2e 0x21 0x0a 0x3c 0x00 0x0e Response: 0a 3c 00 06 40 Byte 1 = 00h : Command Completed Normally Byte 2 = 06h : Copying from Scratch - Gigabyte MX31-BS0 | Manual - Page 12
GIGA -BYTE TECHNOLOGY CO., LTD. Byte 3 = 40h : Update Progress 64% (If byte 2 is 06, this data is available.) Response: 0a 3c 00 07 00 Byte 1 = 00h : Command Completed Normally Byte 2 = 07h : Update Complete Byte 3 = 00h : Update Progress(If byte 2 is 06, this data is available.) [7] Set target - Gigabyte MX31-BS0 | Manual - Page 13
GIGA -BYTE TECHNOLOGY CO., LTD.
-
 1
1 -
 2
2 -
 3
3 -
 4
4 -
 5
5 -
 6
6 -
 7
7 -
8
-
9
-
10
-
11
-
12
-
13
 |
 |
技嘉科技股份有限公司
GIGA -BYTE TECHNOLOGY CO., LTD.
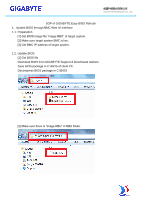
SOP of GIGABYTE Easy BIOS Refresh
1. Update BIOS through BMC Web UI interface
1.1. Preparation
[1] Get BIOS image file “image.RBU” of target system.
[2] Make sure target system BMC is live.
[3] Get BMC IP address of target system.
1.2. Update BIOS
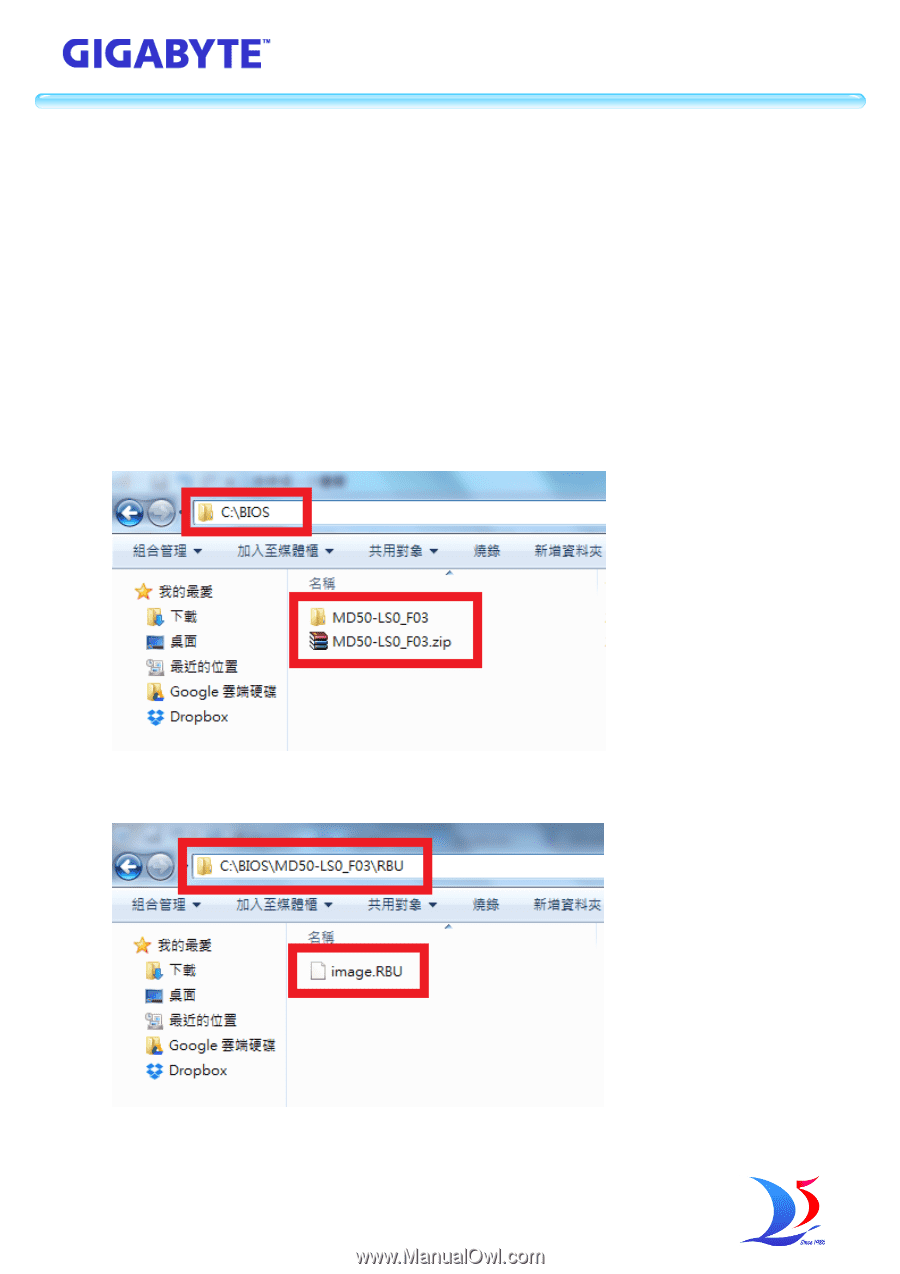
[1] Get BIOS file
Download BIOS from GIGABYTE Support & Downloads website.
Save BIOS package in C:\BIOS of client PC.
Decompress BIOS package in C:\BIOS
[2] Make sure there is “image.RBU” in RBU folder.