Graco 1756482 Owners Manual
Graco 1756482 - Passage Travel System Manual
 |
UPC - 047406105595
View all Graco 1756482 manuals
Add to My Manuals
Save this manual to your list of manuals |
Graco 1756482 manual content summary:
- Graco 1756482 | Owners Manual - Page 1
OWNER'S MANUAL MANUEL D'UTILISATEUR MANUAL DEL PROPIETARIO www.gracobaby.com ©2008 Graco ISPA337AA 8/08 - Graco 1756482 | Owners Manual - Page 2
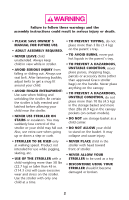
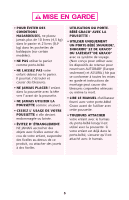
instructions could result in serious injury or death. • PLEASE SAVE OWNER' S MANUAL FOR FUTURE USE. • ADULT ASSEMBLY REQUIRED. • NEVER LEAVE child unattended. Always keep child in view while in stroller parcels or accessory items (other than approved Graco stroller bags) on the handle. Never place - Graco 1756482 | Owners Manual - Page 3
A GRACO® SNUGRIDE®, GRACO® SNUGRIDE® 32 OR INFANT SAFESEAT™ CAR SEAT with this travel system. (Not intended for use with AUTOBABY (Europe only) and ASSURA infant car seats.) Improper use of this stroller with other manufacturers' car seats may result in serious injury or death. • READ THE MANUAL - Graco 1756482 | Owners Manual - Page 4
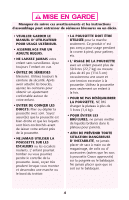
Manquer de suivre ces avertissements et les instructions d'assemblage peut entraî ner de sérieuses blessures ou un décès. • magasinage, de colis ou d' accessoires (autres que les sacs à poussette Graco approuvés) sur la poignée ou le baldaquin. Ne jamais placer quoi que ce soit sur le baldaquin - Graco 1756482 | Owners Manual - Page 5
UN PORTE-BÉBÉ SNUGRIDE®, SNUGRIDE® 32 DE GRACO® OU SAFESEAT™ DE GRACO® avec ce système de voyage. (Non conçu pour utiliser avec les dispositifs de retenue pour nourrisson AUTOBABY (Europe seulement) et ASSURA.) Ne pas se conformer à toutes les mises en garde et instructions de montage peut - Graco 1756482 | Owners Manual - Page 6
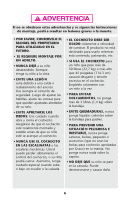
padres. • PARA PREVENIR UNA SITUACIÓ N PELIGROSA E INESTABLE, nunca ponga carteras, bolsas, paquetes o accesorios (que no sean las bolsas para cochecito aprobadas por Graco) en la manija. No ponga nunca nada sobre la capota. • NO DEJE QUE su niño se pare en la canasta. Puede desmoronarse y causar da - Graco 1756482 | Owners Manual - Page 7
TRANSPORTADOR PARA BEBÉ GRACO® CON EL COCHECITO: • USE SOLAMENTE UN TRANSPORTADOR SNUGRIDE®, SNUGRIDE® 32 DE GRACO® O SAFESEAT™ DE GRACO® en este sistema resultar en lesiones serias o la muerte. • LEA EL MANUAL incluido con su transportador Graco antes de usarlo con su cochecito. • ASEGURE SIEMPRE a - Graco 1756482 | Owners Manual - Page 8
are des pièces, llame al Departamento missing, call communiquez avec notre de Servicio al Cliente. Customer Service. service à la clientèle. Tools Required: Hammer Outils nécessaires: Marteau Herramienta necesaria: Martillo ALL MODELS • TOUS MODÈLES • TODOS MODELOS 2X 2X 2X 2X 2X 8 - Graco 1756482 | Owners Manual - Page 9
Footrest • Le repose-pied • Reposapiés WARNING Remove and IMMEDIATELY discard the zip tie. MISE EN GARDE Retirez l'attache et jetezla IMMÉDIATEMENT. ADVERTENCIA Quite y deseche INMEDIATAMENTE el cordón. Ziptie L' attache Cordón 1 Two ribs Deux côtes Dos costillas SNAP! ENCLENCHEZ! ¡ CHASQUIDO! - Graco 1756482 | Owners Manual - Page 10
• Ouvrir la poussette • Abrir el cochecito 3 – — Carton • Boî te • Caja 4 SNAP! ENCLENCHEZ! ¡ CHASQUIDO! CHECK that stroller is completely open (by trying to fold it) before continuing. VÉRIFIEZ que la poussette est completement dépliée (en essayant de la plier) avant de continuer. - Graco 1756482 | Owners Manual - Page 11
Basket • Le panier • La canasta 5 SNAP! ENCLENCHEZ! ¡ CHASQUIDO! 6 SNAP! ENCLENCHEZ! ¡ CHASQUIDO! 7 SNAP! ENCLENCHEZ! ¡ CHASQUIDO! 11 - Graco 1756482 | Owners Manual - Page 12
Front Wheels • Les roues avant • Las ruedas delanteras 2X 8 SNAP! ENCLENCHEZ! ¡ CHASQUIDO! Turn stroller over. Pull sleeve back to reveal metal button. Retournez la poussette. Retirez l'enveloppe pour révéler le bouton métallique. Vuelque el cochecito. Retire el manguito para - Graco 1756482 | Owners Manual - Page 13
the sur l'essieu arrière. extremos de las clavijas rear axle. del eje trasero. 9 SNAP! ENCLENCHEZ! ¡ CHASQUIDO! Brake levers point toward rear of stroller. Check that rear axle is securely attached by pulling on brake assembly. Leviers des freins vers l' arrière de la poussette. Assurez-vous - Graco 1756482 | Owners Manual - Page 14
Rear Wheels • Les roues arrières • Las ruedas traseras BEFORE attaching wheel: Be sure to place stroller on top of a piece of card board or some other protective cover to prevent any damage to floor. AVANT de fixer la roue: Assurez-vous - Graco 1756482 | Owners Manual - Page 15
11 Cap Capuchon Tapacubos 2X On certain models Sur certains modèles En ciertos modelos 12 Lay stroller on its side. Place wheel on rear axle, and set the cap in place. Tap cap onto axle with hammer. CHECK that wheel is secure - Graco 1756482 | Owners Manual - Page 16
Parent Tray • Le plateau pour adulte • Bandeja para padres 13 Open canopy. Ouvrez le baldaquin. Abra la capota. 14 SNAP! ENCLENCHEZ! ¡ CHASQUIDO! 16 - Graco 1756482 | Owners Manual - Page 17
de seguridad. La a restraint device. n'est pas un système de bandeja no es un DO NOT lift the retenue. NE PAS lever dispositivo de stroller by the la poussette par le seguridad. NO child' s tray. Use plateau pour enfant. levante el cochecito care when snapping Prenez garde lorsque por la - Graco 1756482 | Owners Manual - Page 18
16 SNAP! ENCLENCHEZ! ¡ CHASQUIDO! 17 To open tray, pull tab as shown. Pour ouvrir le plateau, tirer la languette tel qu'illustré. Para abrir la bandeja, tire de la lengüeta como se indica. 18 - Graco 1756482 | Owners Manual - Page 19
! ENCLENCHEZ! ¡ CHASQUIDO! Brakes • Les freins • Los frenos WARNING Always apply both brakes. Check that brakes are on by trying to push stroller. MISE EN GARDE Toujours utiliser les deux freins. Vérifiez que les freins fonctionnent en essayant de pousser la poussette. ADVERTENCIA Siempre use - Graco 1756482 | Owners Manual - Page 20
traban para el uso en superficies desparejas tales como césped, piedras o grava. To Secure Child • Attacher l' enfant • Para asegurar al niño Your stroller will Votre poussette have one of the aura une des following seat ceintures de belts: retenue suivantes: Su cochecito incluirá uno de - Graco 1756482 | Owners Manual - Page 21
5 Point Harness • Harnais à 5 point • Arnés de 5 puntos 26 27 28 To adjust harness. To change shoulder harness slots see page 23. Pour ajuster le harnais. Pour changer des fentes de harnais d'épaule voir la page 23. Para ajustar el arnés. Para cambiar ranuras del arnés del hombro vea la página - Graco 1756482 | Owners Manual - Page 22
3 Point Buckle • Boucle à 3 point • Hebilla de 3 puntos 29 To convert to 3-pt buckle. Pour convertir en boucle à 3-points. Para convertirlo en un hebilla de 3 puntos. 30 31 32 22 - Graco 1756482 | Owners Manual - Page 23
To Change Shoulder Harness Slots • Pour changer des dentes de harnais d'épaule • Para cambiar ranuras del arnés del hombro Shoulder harness anchor-larger child Harnais d 'ancrage à l 'épaule pour grand enfant Anclaje del arnés del hombro - niño grande Shoulder harness anchor-smaller child Harnais d - Graco 1756482 | Owners Manual - Page 24
Seat • Pour incliner le siège • Para reclinar el asiento WARNING When making adjustments to the stroller seat, make sure child' s head, arms, and legs are clear of moving seat parts and stroller frame. MISE EN GARDE Lorsque vous faites des ajustements au siège de la poussette, s'assurer que - Graco 1756482 | Owners Manual - Page 25
To Fold Stroller • Plier la poussette • Para plegar el cochecito 37 ˜ – — 38 25 - Graco 1756482 | Owners Manual - Page 26
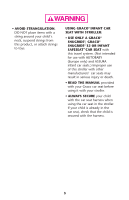
® , Graco® SnugRide® 32 or Infant SafeSeat™car seat with this travel system. (Not intended for use with AUTOBABY (Europe only) and ASSURA infant car seats.) If unsure of the model or for more information please call Graco' s customer service number: 1-800-345-4109. Improper use of this stroller with - Graco 1756482 | Owners Manual - Page 27
infantiles para automóviles SnugRide®, SnugRide® 32 de Graco® o SafeSeat™de Graco® en este sistema la muerte. Lea el manual incluido con su transportador Graco antes de usarlo con su reté de l' attachement Traba de seguridad • Recline the stroller seat back to its lowest position. Fold the canopy. - Graco 1756482 | Owners Manual - Page 28
40 • Push car seat down so it is below latches on stroller handle as shown. Turn and lock latches. ALWAYS LOCK LATCHES OVER CAR SEAT. • Check that car seat is securely attached by pulling up on the - Graco 1756482 | Owners Manual - Page 29
41 • To remove car seat: unlock latches above car seat, squeeze release handle at back of car seat, and lift car seat out of the stroller. When car seat is not in use, latches should be in unlocked position, away from baby. • Pour enlever le dispositif de retenue pour enfant, déverrouillez - Graco 1756482 | Owners Manual - Page 30
household soap and warm water. NO BLEACH or detergent. • FROM TIME TO TIME CHECK YOUR STROLLER for loose screws, worn parts, torn material or stitching. Replace or repair the parts as needed. Use only Graco replacement parts. • EXCESSIVE EXPOSURE TO SUN OR HEAT could cause fading or warping of parts - Graco 1756482 | Owners Manual - Page 31
para determinar si hay tornillos flojos, piezas gastadas, material o costuras rotas. Cambie o repare las piezas según sea necesario. Use solamente repuestos marca Graco. • EL CONTACTO EXCESIVO CON EL SOL o el calor podrí a causar que se destiña o se tuerzan algunas piezas. • SI EL COCHECITO SE MOJA - Graco 1756482 | Owners Manual - Page 32
). or/ou www.elfe.net Product Registration (USA) Inscription de votre produit (au Canada) Registro del producto (EE.UU.) To register your Graco product from within the U.S.A. visit us online at www.gracobaby.com/productregistration. We currently do not accept product registrations from those living - Graco 1756482 | Owners Manual - Page 33
's Manual READ THIS MANUAL KEEP INSTRUCTIONS FOR FUTURE USE. Do not install or use this infant restraint until you read and understand the instructions in this manual. FAILURE TO PROPERLY USE THIS INFANT RESTRAINT INCREASES THE RISK OF SERIOUS INJURY OR DEATH IN A SUDDEN STOP OR CRASH. © 2007 Graco - Graco 1756482 | Owners Manual - Page 34
Your Infant Restraint 6 2.2 Recall Information 6 2.3 If You Need Help 7 3.0 Features and Components 8-14 3.1 Removing and Attaching Base 10 3.2 Adjusting Handle 10 3.3 Attaching Canopy 11 3.4 Head Support (on certain models 12 3.5 Seat Pad Assembly (certains models 13 3.6 Cold Weather Boot - Graco 1756482 | Owners Manual - Page 35
Harness Straps 26 6.2 Securing Child in Infant Restraint 28 6.3 Installing the Infant Restraint/Base Using Vehicle Belt . . .30 6.4 Using LATCH to Install Base 33 6.5 Reclining Infant Restraint/Base 34 7.0 Additional Information 37-38 7.1 Airplane Use 37 7.2 Storing LATCH 37 7.3 Cleaning and - Graco 1756482 | Owners Manual - Page 36
it is very important to READ THE OWNER'S MANUAL. The manual is located in the back pocket of the infant restraint. You must also read your vehicle owner's manual. Your child's safety depends on: 1. Choosing a suitable location in your vehicle - Graco 1756482 | Owners Manual - Page 37
4. Placing infant restraint/base in a rear-facing position. 5. Properly routing the vehicle seat belt or LATCH. 6. Properly reclining the infant restraint. 7. Properly securing the infant restraint in the vehicle - Graco 1756482 | Owners Manual - Page 38
attached to the seat cover and mail it today. Child restraints could be recalled for safety reasons. You must register this restraint to be reached in a recall. Send your name, address and model/serial numbers to: Graco Children's Products Inc. 150 Oaklands Blvd. Exton, PA 19341 or call 1-800-345 - Graco 1756482 | Owners Manual - Page 39
2.3 If You Need Help In the U.S.A. or Canada, please contact our Customer Service Department with any questions you may have concerning parts, use, or maintenance. When you contact us, please have your product's model and serial numbers ready so that we may help you efficiently. These numbers can be - Graco 1756482 | Owners Manual - Page 40
3.0 Features and Components FRONT VIEW Handle Harness slots Harness clip Harness buckle Handle adjustment button Vehicle belt hook Harness buckle tongues Adjustment Belt Adjustable Foot Vehicle belt/LATCH path LATCH Storage Bars LATCH Connector Base 8 - Graco 1756482 | Owners Manual - Page 41
Harness tightener Level indicator* Owner's manual pocket REAR VIEW Canopy Release handle Harness slot Attachment latch *Level Indicator **Locking Clip Locking clip** The level indicator is attached to the side of - Graco 1756482 | Owners Manual - Page 42
at back of seat and lift infant restraint from base – as shown –. To put infant restraint in base, push infant restraint down until it clicks into base. Pull up on infant restraint to be sure it is latched firmly into base. 3.2 Adjusting Handle — 1. Press handle adjustment buttons on both - Graco 1756482 | Owners Manual - Page 43
the straight end of the first support š. 3. On models with four canopy supports, repeat steps one and two for the other canopy tunnel. The canopy should appear as shown ›. ™ š › OR œ 4. Attach canopy in the areas between the infant restraint and the handle base œ. To remove the canopy, reverse the - Graco 1756482 | Owners Manual - Page 44
and resnap them with the harness straps threaded through the slots in the cushion –. If your model does not include a head support, you may want — to use a rolled towel or a blanket for support —. MAKE SURE THAT NOTHING INTERFERES WITH THE HARNESS OR THE BLANKET. It must still be flat - Graco 1756482 | Owners Manual - Page 45
3.5 Seat Pad Assembly (on certain models) Step 1. – Wrap bottom edge of seat pad around the foot On side of seat, wrap elastic strap around the handle as shown. Skip Steps 3 and 4 if your model does not include straps. ™ Step 4. Fasten strap to hook that is attached to the seat pad. Repeat - Graco 1756482 | Owners Manual - Page 46
use, wrap elastic around bottom of seat and place both elastic loops around vehicle belt hooks as shown . 3.7 Harness Covers (on certain models) To prevent ejection in sudden stop or crash: • Always make sure shoulder straps are threaded through slots and properly positioned on shoulders. • Make - Graco 1756482 | Owners Manual - Page 47
Information 4.1 Warnings for Use as Infant Restraint • DO NOT INSTALL OR USE THIS INFANT RESTRAINT AND BASE UNTIL YOU READ AND UNDERSTAND THE INSTRUCTIONS IN THIS MANUAL AND IN YOUR VEHICLE OWNER'S MANUAL. DO NOT let others install or use the infant restraint unless they understand how to use it - Graco 1756482 | Owners Manual - Page 48
air bag, refer to your vehicle owner's manual as well as these instructions for infant restraint installation. • NEVER LEAVE YOUR CHILD UNATTENDED. • NEVER LEAVE AN INFANT RESTRAINT AND BASE UNSECURED IN YOUR VEHICLE. An unsecured infant restraint or base can be thrown around and may injure - Graco 1756482 | Owners Manual - Page 49
also giving them this manual. • NEVER USE A SECOND-HAND INFANT RESTRAINT AND BASE or an infant restraint whose history you do not know. 4.2 Warning for Use With a Stroller • USE ONLY WITH STROLLERS THAT ARE PART OF THE GRACO TRAVEL SYSTEM. Refer to stroller instruction sheet for details about - Graco 1756482 | Owners Manual - Page 50
4.3 Additional Warnings for Use as Carrier • FALL HAZARD: Child's movements can slide carrier. NEVER place carrier near edges of countertops, tables or other high surfaces. Always stay within arms reach whenever carrier is not on floor/ground. BE SURE handle locks into position before lifting - Graco 1756482 | Owners Manual - Page 51
4.4 Height and Weight Limits FAILURE TO USE INFANT RESTRAINT IN A MANNER APPROPRIATE FOR YOUR CHILD'S SIZE MAY INCREASE THE RISK OF SERIOUS INJURY OR DEATH. Your child MUST meet all requirements: • WEIGHT: 5-22 lbs. (2.3-10 kg) • HEIGHT: 29 inches (73 cm) or less 19 - Graco 1756482 | Owners Manual - Page 52
manual or call Graco at 1-800-345-4109. • Whenever possible, secure the infant restraint in the center position of the – seat directly behind the front seats –. An adult should ride in the rear seat to watch the child. If the driver is the only adult present, a child may need to ride - Graco 1756482 | Owners Manual - Page 53
that are not safe to use look very much like seat belts that are safe to use. If you are unsure, consult your vehicle owner's manual or call Graco at 1-800-345-4109. 21 - Graco 1756482 | Owners Manual - Page 54
of the following systems to secure the infant restraint. LATCH can be used IN PLACE OF the vehicle belt system. Please refer to vehicle owners manual for LATCH locations. • Lap Belts with Emergency Locking Retractor (ELR) This lap belt stays loose and can move until it locks in a crash or sudden - Graco 1756482 | Owners Manual - Page 55
5.2.2 SAFE Vehicle Belt Systems THE FOLLOWING BELT SYSTEMS CAN BE USED WITH YOUR INFANT RESTRAINT, IF the seat location meets all other requirements of these instructions and those in your vehicle owner's manual. LATCH can be used in place of the vehicle belt system. Please refer to vehicle owners - Graco 1756482 | Owners Manual - Page 56
the locking clip provided with the infant restraint, unless your vehicle's seat belt can be converted in another way as described in your vehicle owner's manual. Locking clip To Install Locking Clip: 1. Tighten the buckled belt by pushing down hard on the infant restraint and pulling hard on the - Graco 1756482 | Owners Manual - Page 57
points may be visible at the vehicle seat crease. If not visible, they may be marked with the symbol . See your vehicle owner's manual for exact locations, anchor identification, and requirements for use with an infant restraint. Typical seat in a passenger vehicle. Other vehicle types may have - Graco 1756482 | Owners Manual - Page 58
straps must be properly adjusted to fit your child according to the following instructions. 1. Remove infant restraint from base and rotate handle down to sitting position. See "3.1 Removing and Attaching Base" and "3.2 Adjusting Handle", p. 10. 2. Place child in infant restraint as shown - Graco 1756482 | Owners Manual - Page 59
5. From back, remove harness straps from harness tighteners. From front pull strap ˜ from slot ˜. Harness tighteners 6. Reinsert strap in the appropriate slot ™. ™ 7. Thread straps through tighteners exactly š as shown š. 8. SAFETY CHECK: a) CHECK that straps are not twisted; b) CHECK that - Graco 1756482 | Owners Manual - Page 60
sure that you hear each tongue click into the buckle. DO NOT use the infant restraint if the harness does not latch in place. Call Graco at 1-800-345-4109. 28 - Graco 1756482 | Owners Manual - Page 61
› level with armpits and away from the neck œ. 7. SAFETY CHECK: a) CHECK that harness straps are not twisted. b) CHECK that the harness is snug. œ A snug strap should not allow any slack. It lies in a relatively straight line without sagging. It does not press on the child's flesh or push - Graco 1756482 | Owners Manual - Page 62
6.3 Installing the Infant Restraint/Base Using Vehicle Belt You must carefully follow the instructions provided by your vehicle manufacturer, in addition to the information in this manual. Before proceeding, be sure you have read and understood section 5, "Infant Restraint Location" on p. 20-25. - Graco 1756482 | Owners Manual - Page 63
3. Thread the seat belt: Base with seat belt Belt MUST go under tongue Infant restraint with seat belt 4. Buckle the seat belt. Make sure the buckle tongue goes into the correct buckle ™. The seat belt should not be twisted or turned. ™ 31 - Graco 1756482 | Owners Manual - Page 64
belt. Refer to your vehicle owners manual and the instructions in "5.2.2 SAFE Vehicle Belt Systems", p.23-24, on tightening your vehicle belt. To create a very tight installation, push down hard with your knee or free hand in the middle of infant restraint – or base and pull and tighten the vehicle - Graco 1756482 | Owners Manual - Page 65
firmly on Connectors to be sure they are attached ™. 5. Tighten LATCH by pushing down hard on base and pulling the adjustment belt š. 6. NEVER put two LATCH connectors on one vehicle LATCH anchor unless If it does not stay tight, try another seating position or contact Customer Service. 33 - Graco 1756482 | Owners Manual - Page 66
to help properly recline the infant restraint/base on the vehicle seat. Failure to a child's head may drop forward and cause breathing problems. If the infant restraint is too reclined, a crash must be properly reclined according to the following instructions. Check the level indicator. You must look - Graco 1756482 | Owners Manual - Page 67
bottom of the foot to the desired setting to adjust the recline –. To raise the foot; set the base on a flat surface, push in on the fingers on the base and push down on the base to adjust the recline —. — If there is still orange in the level indicator when the foot is - Graco 1756482 | Owners Manual - Page 68
make sure the vehicle belt does not lengthen at all and that the vehicle belt or LATCH is fastened very tightly around the infant restraint/base –. — Holding the infant restraint near the vehicle belt path, TWIST AND PULL the seat forward and to both sides to make sure the vehicle belt - Graco 1756482 | Owners Manual - Page 69
only in forward-facing aircraft seat. Follow the flight attendant's instructions about infant restraint placement. Do not use this infant restraint if maximum length. 2. Locate the storage bars on bottom of infant restraint base ˜. Storage bars ˜ 3. Fasten end of LATCH (without adjustment belt) - Graco 1756482 | Owners Manual - Page 70
7.3 Cleaning and Maintenance ! TO REMOVE AND WASH INFANT RESTRAINT PAD, follow instructions in "6.1 Positioning Harness Straps", p. 26-27. Carefully remove the seat pad. Machine wash on delicate cycle and drip-dry. DO NOT USE BLEACH. Reverse steps - Graco 1756482 | Owners Manual - Page 71
Notes 39 - Graco 1756482 | Owners Manual - Page 72
Replacement Parts To purchase parts or accessories in the United States for your Graco product, please contact us at the following: www.gracobaby.com or 1-800-345-4109 40 - Graco 1756482 | Owners Manual - Page 73
INSTRUCCIONES PARA USO FUTURO. No instale ni use este sistema de seguridad para niños hasta que haya leído y entendido las instrucciones en este manual. NO USAR DEBIDAMENTE ESTE SISTEMA DE SEGURIDAD PARA NIÑOS AUMENTA EL RIESGO DE SUFRIR LESIONES SERIAS O FATALES EN UN ACCIDENTE O AL DETENERSE DE - Graco 1756482 | Owners Manual - Page 74
niños 6 2.2 Información sobre el retiro de productos del mercado . . . .7 2.3 Si necesita ayuda 7 3.0 Funciones y componentes 8-14 3.1 Sacar y conectar la base 10 3.2 Ajuste de la manija 10 3.3 Colocación de la capota 11 3.4 Apoyacabezas (en ciertos modelos 12 3.5 Armado de la almohadilla del - Graco 1756482 | Owners Manual - Page 75
niños . . . . . .28 6.3 Instalación del sistema de seguridad para niños/base con el cinturon del vehículo 30 6.4 Uso del LATCH para instalar la base 33 6.5 Inclinación del sistema de seguridad para niños/base . . .34 7.0 Información adicional 37-38 7.1 Uso en aviones 37 7.2 Almacenamiento del - Graco 1756482 | Owners Manual - Page 76
este sistema de seguridad infantil le parece muy fácil, es muy importante que LEA EL MANUAL DEL PROPIETARIO. El manual se encuentra en el bolsillo trasero del sistema de seguridad infantil. También debe leer el manual del propietario de su vehículo. La seguridad de su niño depende de: 1. Elegir una - Graco 1756482 | Owners Manual - Page 77
3. Sujetar a su niño de manera adecuada en el sistema de seguridad infantil. 4. Colocar el sistema de seguridad infantil/base en una posición orientada hacia atrás. 5. Colocar el cinturón de seguridad del vehículo o LATCH de manera correcta. 6. Reclinar de manera correcta el sistema de - Graco 1756482 | Owners Manual - Page 78
problemas de seguridad. Debe registrar este sistema para que lo podamos contactar en dicho caso. Envíe su nombre y apellido, dirección y números de serie y de modelo a: Graco Children's Products Inc. 150 Oaklands Blvd. Exton, PA 19341 o llame al 1-800-345-4109 o www.gracobaby.com 6 - Graco 1756482 | Owners Manual - Page 79
línea telefónica sobre seguridad en automóviles del gobierno de EE.UU. al 1-888-327-4236 (TTY:1-800-424-9153) o http://www.NHTSA.gov • Graco: 1-800-345-4109 o www.gracobaby.com 2.3 Si necesita ayuda En los EE.UU. o Canadá, por favor, comuníquese con el Departamento de Servicio al Cliente - Graco 1756482 | Owners Manual - Page 80
de la hebilla del arnés Cinturón de ajuste Cinturón del vehículo/recorrido del LATCH Barras de almacenamiento del LATCH Gancho del LATCH Apoyapiés ajustable Base 8 - Graco 1756482 | Owners Manual - Page 81
Tensionador del arnés Indicador del nivel* Bolsillo del manual del propietario VISTA TRASERA Capota Manija de liberación Ranura para el arnés Traba de conexión *Indicador del nivel **Traba de seguridad Traba de seguridad** El - Graco 1756482 | Owners Manual - Page 82
sistema de seguridad para niños de la base como se indica –. Para poner el sistema de seguridad para niños en la base, empuje el sistema de seguridad para niñ seguridad para niños para asegurarse que esté trabado firmemente en la base. 3.2 Ajuste de la manija — 1. Oprima los botones de ajuste - Graco 1756482 | Owners Manual - Page 83
túnel de la capota. La capota deberá tener este aspecto ›. ™ š › O 4. Sujete la capota en los lugares entre el sistema de seguridad para niños y la œ base de la manija œ. Para quitar la capota, siga los pasos al revés. 11 - Graco 1756482 | Owners Manual - Page 84
3.4 Apoyacabezas (en ciertos modelos) Algunos bebés necesitan apoyo adicional para mantener la cabeza – y el cuerpo en una posición cómoda. Destrabe los costados y vuelva a trabarlos con las correas del arnés pasadas a través de las ranuras en el cojín –. Si su modelo no incluye un - Graco 1756482 | Owners Manual - Page 85
3.5 Armado de la almohadilla del asiento (ciertos modelos) Paso 1. – Envuelva el borde inferior de la almohadilla del asiento alrededor del extremo del asiento donde van los pies como se indica. Paso 2. — Envuelva el borde superior de la almohadilla del asiento alrededor del extremo del - Graco 1756482 | Owners Manual - Page 86
3.6 Bota para tiempo frío (en ciertos modelos) Algunos modelos vienen con una bota para tiempo frío. Para usarla, ponga elástico alrededor del fondo del asiento y coloque elástico alrededor de los ganchos del cinturón del vehículo como se indica . 3.7 Cubiertas de arnes (ciertos modelos) - Graco 1756482 | Owners Manual - Page 87
para uso como sistema de seguridad para niños • NO INSTALE O USE ESTE SISTEMA DE SEGURIDAD PARA NIÑOS Y BASE HASTA QUE HAYA LEÍDO Y ENTIENDA LAS INSTRUCCIONES EN ESTE MANUAL Y EN EL MANUAL DEL PROPIETARIO DE SU VEHÍCULO. NO deje que otros instalen o usen el sistema de seguridad para niños - Graco 1756482 | Owners Manual - Page 88
ículo con una bolsa de aire para el pasajero delantero, consulte el manual del propietario de su vehículo así como estas instrucciones para la estén enganchados estén debidamente almacenados en la base. • CAMBIE EL SISTEMA DE SEGURIDAD PARA NIÑOS Y LA BASE DESPUÉS DE UN ACCIDENTE DE CUALQUIER TIPO - Graco 1756482 | Owners Manual - Page 89
persona sin entregarles este manual. • NUNCA USE UN SISTEMA DE SEGURIDAD PARA NIÑOS Y BASE USADOS o un sistema de seguridad para niños si no conoce su historia. 4.2 Advertencias para el uso con un cochecito • USAR SOLAMENTE CON COCHECITOS QUE SON PARTE DEL SISTEMA DE VIAJES GRACO. Consulte la hoja - Graco 1756482 | Owners Manual - Page 90
4.3 Advertencias adicionales para el uso como transportador • PELIGRO DE CAÍDA: Los movimientos del niño pueden mover el transportador. NUNCA ponga el transportador cerca de los bordes de mesadas, mesas u otras superficies altas. Manténgase siempre cerca cuando el transportador no esté en el piso/ - Graco 1756482 | Owners Manual - Page 91
4.4 Limitaciones de peso y estatura NO USAR EL SISTEMA DE SEGURIDAD PARA NIÑOS DE MANERA APROPIADA DE ACUERDO AL TAMAÑO DE SU NIÑO PODRÍA AUMENTAR EL RIESGO DE QUE SUFRA LESIONES SERIAS O FATALES. Su niño DEBE cumplir con todos los requisitos: • PESO: 5-22 libras (2.3-10 Kg) • ESTATURA: 29 pulgadas - Graco 1756482 | Owners Manual - Page 92
niños. Si no está seguro sobre dónde colocar el sistema de seguridad para niños en su vehículo, consulte el manual del propietario del vehículo o llame a Graco al 1-800-345-4109. • Cuando sea posible, sujete el sistema de seguridad para niños en la posición – de asiento central directamente - Graco 1756482 | Owners Manual - Page 93
de los sistemas de cinturones de seguridad que no son seguros se parecen mucho a los que no presentan peligro. Si no está seguro, consulte el manual del propietario del vehículo o llame a Graco al 1-800-345-4109. 21 - Graco 1756482 | Owners Manual - Page 94
sistema de seguridad para niños. El LATCH se puede usar EN LUGAR DE el sistema de cinturone para vehículo. Por favor, consulte el manual del propietario del vehículo para obtener las ubicaciones donde debe instalarse el LATCH. • Cinturón de seguridad abdominal con retractor de traba de emergencia - Graco 1756482 | Owners Manual - Page 95
los otros requisitos de estas instrucciones y los que se incluyen en el manual del propietario de su vehículo. Se puede usar el LATCH en lugar de el sistema de seguridad del vehículo. Por favor, consulte el manual del propietario se el LATCH. • Cinturón de seguridad abdominal ajustado manualmente - Graco 1756482 | Owners Manual - Page 96
que el Traba de seguridad cinturón de seguridad del asiento de su vehículo pueda convertirse de otra manera como se describe en el manual del propietario del vehículo. Para instalar la traba de seguridad: 1/2 pulgada 1. Ajuste el cinturón empujando con fuerza el sistema de seguridad para ni - Graco 1756482 | Owners Manual - Page 97
de anclaje inferiores en el pliegue del asiento del vehículo. Si no están visibles, pueden estar marcados con el símbolo que sigue . Vea el manual del propietario de su vehículo para informarse sobre las ubicaciones exactas, la identificación de los anclajes y los requisitos de uso con el sistema de - Graco 1756482 | Owners Manual - Page 98
su niño de a cuerdo a las siguientes instrucciones. 1. Saque el sistema de seguridad para niños de la base y gire la manija hacia abajo en la posición de asiento. Vea la sección "3.1 Sacar y conectar la base" y 3.2 "Ajuste de la manija" en la página 10. 2. Coloca el niño en el asiento de seguridad - Graco 1756482 | Owners Manual - Page 99
5. Por detrás, saque las correas del arnés de los tensionadores del arnés. Por adelante, ˜ saque la correa de la ranura ˜. 6. Vuelva a insertar la correa en la ranura apropiada ™. Tensionadores del arnés ™ 7. Pase las correas por los tensionadores exactamente como se indica š. š 8. VERIFICACI - Graco 1756482 | Owners Manual - Page 100
la lengüeta en la hebilla. NO use el sistema de seguridad para niños si el arnés no se traba en su lugar. Llame a Graco al 1-800-345-4109. 28 - Graco 1756482 | Owners Manual - Page 101
5. Por detrás, pase la correa a través del tensionador del arnés para tensionar ™ las correas como se indica. Las correas restantes deberían tener la misma longitud ™. ASEGÚRESE que ambas correas estén planas y ajustadas sobre los hombros del niño. Para aflojar las correas, levante el š - Graco 1756482 | Owners Manual - Page 102
6.3 Instalación del sistema de seguridad para niños/base con el cinturón del vehículo Debe seguir detenidamente las instrucciones provistas por el fabricante de su vehículo, además de la información de este manual. Antes de seguir, asegúrese que ha leído y entendido la sección 5, "Ubicación del - Graco 1756482 | Owners Manual - Page 103
3. Pase el cinturón de seguridad: Base con cinturón de seguridad El cinturón DEBE pasar debajo de la lengüeta. Sistema de seguridad para niños con cinturón de seguridad 4. Trabe el - Graco 1756482 | Owners Manual - Page 104
. Ajuste el cinturón de seguridad del vehículo. Consulte el manual del propietario del vehículo y las instrucciones en la sección o mano en el medio del sistema de seguridad para niños – o base y tire y apriete el cinturón de seguridad del vehículo. – 6. Empuje el sistema de seguridad hacia abajo - Graco 1756482 | Owners Manual - Page 105
Asegúrese que el LATCH esté DEBAJO de ™ la lengüeta de la base ˜. El cinturón debe mantenerse en posición plana sin torcerse. 4. Enganche los ™. š 5. Ajuste el LATCH empujando con fuerza hacia abajo sobre la base y tirando el cinturón de ajuste š. 6. NUNCA ponga dos conectores LATCH - Graco 1756482 | Owners Manual - Page 106
costado de su sistema de seguridad para niños hay un indicador del nivel para ayudar a reclinar debidamente el sistema de seguridad para niños/base en el asiento del vehículo. No reclinar debidamente el sistema de seguridad para niños en el asiento del vehículo aumenta el riesgo - Graco 1756482 | Owners Manual - Page 107
pie hasta alcanzar el valor deseado para ajustar la inclinación –. Para levantar el pie; ponga la base en una superficie plana, empuje hacia adentro los dedos de la base y empuje hacia abajo la base — para ajustar la inclinación —. Si todavía aparece la zona de color naranja en el indicador - Graco 1756482 | Owners Manual - Page 108
de arriba del sistema de seguridad para niños para asegurarse que el cinturón del vehículo o LATCH esté asegurado apretadamente alrededor de la base/sistema de seguridad para niños –. — GIRE Y TIRE el asiento hacia adelante agarrando el sistema de seguridad cerca del recorrido del cinturón del - Graco 1756482 | Owners Manual - Page 109
, extienda el LATCH hasta el máximo. 2. Ubique las barras de almacenamiento en el fondo de la base del sistema de seguridad ˜. 3. Ajuste el extremo del LATCH (sin el cinturón de ajuste) sobre almacenamiento del LATCH debería tener este aspecto cuando esté terminado ™. Parte inferior de la base 37 - Graco 1756482 | Owners Manual - Page 110
7.3 Limpieza y mantenimiento ! PARA SACAR Y LAVAR LA ALMOHADILLA DE SEGURIDAD DEL NIÑO, siga las instrucciones en la sección "6.1 Colocación de las correas del arnés", páginas 26 y 27. Saque cuidadosamente la almohadilla del asiento. Se lavan a máquina por separado en el ciclo delicado y se seca al - Graco 1756482 | Owners Manual - Page 111
Notas 39 - Graco 1756482 | Owners Manual - Page 112
Piezas de repuesto Para comprar repuestos o accesorios en los Estados Unidos para su producto Graco, por favor comuníquese con nosotros en: www.gracobaby.com o 1-800-345-4109 40
-
 1
1 -
 2
2 -
 3
3 -
 4
4 -
 5
5 -
 6
6 -
 7
7 -
8
-
9
-
10
-
11
-
12
-
13
-
14
-
15
-
16
-
17
-
18
-
19
-
20
-
21
-
22
-
23
-
24
-
25
-
26
-
27
-
28
-
29
-
30
-
31
-
32
-
33
-
34
-
35
-
36
-
37
-
38
-
39
-
40
-
41
-
42
-
43
-
44
-
45
-
46
-
47
-
48
-
49
-
50
-
51
-
52
-
53
-
54
-
55
-
56
-
57
-
58
-
59
-
60
-
61
-
62
-
63
-
64
-
65
-
66
-
67
-
68
-
69
-
70
-
71
-
72
-
73
-
74
-
75
-
76
-
77
-
78
-
79
-
80
-
81
-
82
-
83
-
84
-
85
-
86
-
87
-
88
-
89
-
90
-
91
-
92
-
93
-
94
-
95
-
96
-
97
-
98
-
99
-
100
-
101
-
102
-
103
-
104
-
105
-
106
-
107
-
108
-
109
-
110
-
111
-
112
 |
 |
OWNER'S MANUAL
MANUEL D'UTILISATEUR
MANUAL DEL PROPIETARIO
www.gracobaby.com
©2008 Graco
ISPA337AA
8/08