Graco 1757978 Owners Manual
Graco 1757978 - Glider Travel System Little Hoot Manual
 |
UPC - 047406106479
View all Graco 1757978 manuals
Add to My Manuals
Save this manual to your list of manuals |
Graco 1757978 manual content summary:
- Graco 1757978 | Owners Manual - Page 1
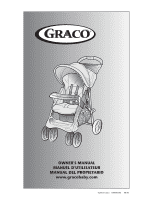
OWNER'S MANUAL MANUEL D'UTILISATEUR MANUAL DEL PROPIETARIO www.gracobaby.com ©2005 Graco ISPA085AB 08/05 - Graco 1757978 | Owners Manual - Page 2
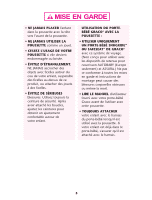
and the assembly instructions could result in serious injury or death. • PLEASE SAVE OWNER'S MANUAL FOR FUTURE USE. • ADULT ASSEMBLY REQUIRED. • NEVER LEAVE child unattended. Always keep child in view while in stroller. • AVOID SERIOUS INJURY from falling or sliding out. Always use seat belt. After - Graco 1757978 | Owners Manual - Page 3
SNUGRIDE™ OR INFANT SAFESEAT™ CAR SEAT with this travel system. (Not intended for use with AUTOBABY (Europe only) and ASSURA infant car seats.) Improper use of this stroller with other manufacturers' car seats may result in serious injury or death. • READ THE MANUAL provided with your Graco car seat - Graco 1757978 | Owners Manual - Page 4
Manquer de suivre ces avertissements et les instructions d'assemblage peut entraîner de sérieuses blessures ou un décès. • VEUILLER GARDER LE MANUEL D'UTILISATEUR POUR USAGE ULTÉRIEUR. • ASSEMBLAGE PAR UN ADULTE REQUIS. • NE LAISSEZ - Graco 1757978 | Owners Manual - Page 5
• UTILISER UNIQUEMENT UN PORTE-BÉBÉ SNUGRIDE™ OU SAFESEAT™ DE GRACO® avec ce système de voyage. (Non conçu pour utiliser avec les dispositifs de retenue pour nourrisson AUTOBABY (Europe seulement) et ASSURA.) Ne pas se conformer à toutes les mises en garde et instructions de montage peut causer des - Graco 1757978 | Owners Manual - Page 6
Si no se obedecen estas advertencias y se siguen las instrucciones de montaje, podría resultar en lesiones graves o la muerte. • POR FAVOR, CONSERVELO EL MANUEL DEL PROPIETARIO PARA UTILIZARLO EN EL FUTURO. • SE REQUIERE MONTAJE POR UN ADULTO. • NUNCA DEJE a su niño desatendido. Siempre tenga su ni - Graco 1757978 | Owners Manual - Page 7
SNUGRIDE™ O SAFESEAT™ DE GRACO® en este sistema de viaje. (No debe usarse con AUTOBABY (Europa solamente) y asientos de automóvil para bebé ASSURA.) El uso inadecuado de este cochecito con asientos para automóvil de otros fabricantes podría resultar en lesiones serias o la muerte. • LEA EL MANUAL - Graco 1757978 | Owners Manual - Page 8
indican a you have all the vous avez toutes les continuación. parts for this model pièces pour ce modéle Verifique que tiene BEFORE assembling AVANT d'assembler call Customer communiquez avec notre Si falta alguna pieza, Service. service à la clientèle. llame al Departamento de Servicio - Graco 1757978 | Owners Manual - Page 9
Ouvrir la poussette • Abrir el cochecito 1 Storage latch Loquet de rangement Traba de almacenamiento Carton • Boîte • Caja 2 SNAP! CHECK that stroller is completely open (by trying to fold it) ENCLENCHEZ! ¡CHASQUIDO! before continuing. VÉRIFIEZ que la poussette est completement dépliée (en - Graco 1757978 | Owners Manual - Page 10
Front Wheels • Les roues avant • Las ruedas delanteras WARNING MISE EN GARDE Choking Hazard: Danger d'étranglement: Remove and Enlevez et jetez immediately immédiatement les discard plastic embouts de plastique end caps on the sur les tiges des pieds front leg pins. de base avant. - Graco 1757978 | Owners Manual - Page 11
de los end caps on the sur l'essieu arrière. extremos de las clavijas rear axle. del eje trasero. 4 Brake levers point toward rear of stroller. Check that rear axle is securely attached by pulling on brake assembly. SNAP! ENCLENCHEZ! ¡CHASQUIDO! Leviers des freins vers l'arrière de la - Graco 1757978 | Owners Manual - Page 12
Rear Wheels • Les roues arrières • Las ruedas traseras 2X 2X BEFORE attaching wheel: Be sure to place stroller on top of a piece of card board or some other protective cover to prevent any damage to floor. Place wheel on rear axle, and set - Graco 1757978 | Owners Manual - Page 13
2X On certain models Sur certains modèles En ciertos modelos 6 SNAP! ENCLENCHEZ! ¡CHASQUIDO! 13 - Graco 1757978 | Owners Manual - Page 14
Footrest • Le repose-pied • Reposapiés 7 SNAP! ENCLENCHEZ! ¡CHASQUIDO! 8 Two ribs Deux côtes Dos costillas One rib Une côte Una costilla 14 - Graco 1757978 | Owners Manual - Page 15
Always secure your Toujours attaché votre Proteja siempre a su child with the seat enfant avec la ceinture niño con el cinturón belt. The tray is niños no DO NOT lift the un dispositif de es un dispositivo de stroller by the retenue. NE PAS seguridad. NO levante child's tray. Use care - Graco 1757978 | Owners Manual - Page 16
Brakes • Les freins • Los frenos WARNING Always apply both brakes. Check that brakes are on by trying to push stroller. MISE EN GARDE ADVERTENCIA Toujours utiliser les deux Siempre use ambos freins. Vérifiez que les frenos. Inspeccione freins fonctionnent en los frenos tratando de essayant - Graco 1757978 | Owners Manual - Page 17
). or/ou www.elfe.net Product Registration (USA) Inscription de votre produit (au Canada) Registro del producto (EE.UU.) To register your Graco product from within the U.S.A. visit us online at www.gracobaby.com/productregistration. We currently do not accept product registrations from those living - Graco 1757978 | Owners Manual - Page 18
Notes • Notas 31 - Graco 1757978 | Owners Manual - Page 19
Notes • Notas 30 - Graco 1757978 | Owners Manual - Page 20
para determinar si hay tornillos flojos, piezas gastadas, material o costuras rotas. Cambie o repare las piezas según sea necesario. Use solamente repuestos marca Graco. • EL CONTACTO EXCESIVO CON EL SOL o el calor podría causar que se destiña o se tuerzan algunas piezas. • SI EL COCHECITO SE MOJA - Graco 1757978 | Owners Manual - Page 21
ées, pièces usagées, tissu ou couture déchiré. Remplacez ou réparez ces pièces si nécessaire. Utilisez seulement les pièces de remplacement Graco. • UNE EXPOSITION PROLONGÉE AU SOLEIL peut provoquer une décoloration prématurée du tissu et du plastique. • SI LA POUSSETTE EST MOUILLÉE, ouvrez le - Graco 1757978 | Owners Manual - Page 22
household soap and warm water. NO BLEACH or detergent. • FROM TIME TO TIME CHECK YOUR STROLLER for loose screws, worn parts, torn material or stitching. Replace or repair the parts as needed. Use only Graco replacement parts. • EXCESSIVE EXPOSURE TO SUN OR HEAT could cause fading or warping of parts - Graco 1757978 | Owners Manual - Page 23
To Remove Canopy • Enlever le baldaquin • Para sacar la capota 30 31 32 Remove support wires from canopy (note orientation) before washing. Enlever les supports du baldaquin (noter bien l'orientation) avant de laver le baldaquin. Saque los alambres de apoyo de la capota (note la orientación) antes - Graco 1757978 | Owners Manual - Page 24
é conectado con firmeza tirando hacia arriba. 29 • To remove infant car seat: remove elastic strap from vehicle belt hook, squeeze release handle at back of infant car seat, and lift infant car seat out of the stroller. • Pour enlever le dispositif de retenue pour enfant: enlevez la courroie - Graco 1757978 | Owners Manual - Page 25
solamente los asientos infantiles para automóviles SnugRide™ o SafeSeat™ de Graco® en este sistema de viaje. o la muerte. Lea el manual incluido con su transportador Graco antes de usarlo con su stroller seat back to its lowest position. • Position mounting notches over tray. Push down on car seat - Graco 1757978 | Owners Manual - Page 26
the infant car seat with the stroller. WARNING Use only a Graco® SnugRide™ or infant SafeSeat™ car seat with this travel system. (Not intended for use with AUTOBABY (Europe only) and ASSURA infant car seats.) If unsure of the model or for more information please call Graco's customer service number - Graco 1757978 | Owners Manual - Page 27
• Plier la poussette • Para plegar el cochecito Before folding stroller: 1) adjust seat back to reclined position, 2) apply brakes, and 3) fold canopy. Avant de replier la poussette : 1) ajuster le dossier à la position inclinée, 2) appliquez les freins, et 3) repliez - Graco 1757978 | Owners Manual - Page 28
Swivel Wheels • Les roues pivotantes • Las ruedas giratorias 22 Front swivel wheels lock for use on uneven surfaces such as grass, stones or gravel. Les roues pivotantes avant se barrent pour un usage sur les surfaces irrégulières tel que le gazon, les cailloux ou le gravier. Las ruedas - Graco 1757978 | Owners Manual - Page 29
deje que la tela se When making Lorsque vous faites des agarre en la traba. adjustments to the ajustements au siège de Cuando realiza stroller seat, make la poussette, s'assurer ajustes al asiento del sure child's head, que la tête de l'enfant, cochecito, asegúrese arms, and legs are les bras - Graco 1757978 | Owners Manual - Page 30
To Change Shoulder Harness Slots • Pour changer des dentes de harnais d'épaule • Para cambiar ranuras del arnés del hombro Shoulder harness anchor-larger child Harnais d 'ancrage à l 'épaule pour grand enfant Anclaje del arnés del hombro - niño grande Shoulder harness anchor-smaller child Harnais d - Graco 1757978 | Owners Manual - Page 31
3 Point Buckle • Boucle à 3 point • Hebilla de 3 puntos To convert to 3-pt buckle. 15 Pour convertir en boucle à 3-points. Para convertirlo en un hebilla de 3 puntos. 16 17 18 18 - Graco 1757978 | Owners Manual - Page 32
To Secure Child • Attacher l'enfant • Para asegurar al niño 5 Point Harness • Harnais à 5 point • Arnés de 5 puntos 12 13 14 To adjust harness. To change shoulder harness slots see page 19. Pour ajuster le harnais. Pour changer des fentes de harnais d'épaule voir la page 19. Para ajustar el arn - Graco 1757978 | Owners Manual - Page 33
's Manual READ THIS MANUAL KEEP INSTRUCTIONS FOR FUTURE USE. Do not install or use this infant restraint until you read and understand the instructions in this manual. FAILURE TO PROPERLY USE THIS INFANT RESTRAINT INCREASES THE RISK OF SERIOUS INJURY OR DEATH IN A SUDDEN STOP OR CRASH. © 2007 Graco - Graco 1757978 | Owners Manual - Page 34
11 3.4 Head Support (on certain models 12 3.5 Seat Pad Assembly (certains models 13 3.6 Cold Weather Boot (certain models 14 3.7 Harness Covers (certain models 14 4.0 Important Information 15-19 4.1 Warnings for Use as Infant Restraint 15 4.2 Warning for Use With a Stroller 17 4.3 Additional - Graco 1757978 | Owners Manual - Page 35
5.0 Infant Restraint Location 20-25 5.1 Vehicle Seat Requirements 20 5.2 Vehicle Seat Belt Requirements 21 5.2.1 UNSAFE Vehicle Belt Systems 22 5.2.2 SAFE Vehicle Belt Systems 23 5.3 LATCH Locations 25 6.0 Using Infant Restraint 26-36 6.1 Positioning Harness Straps 26 6.2 Securing Child in - Graco 1757978 | Owners Manual - Page 36
is located in the back pocket of the infant restraint. You must also read your vehicle owner's manual. Your child's safety depends on: 1. Choosing a suitable location in your vehicle. Some seating positions, such as those equipped with air bags, may not be safe locations for this infant restraint - Graco 1757978 | Owners Manual - Page 37
or LATCH. 6. Properly reclining the infant restraint. 7. Properly securing the infant restraint in the vehicle using a seat belt designed to restrain an infant restraint or by using LATCH. Many seat belts are NOT safe to use with infant restraints, even though they can easily be threaded through the - Graco 1757978 | Owners Manual - Page 38
out the prepaid registration postcard attached to the seat cover and mail it today. Child restraints could be recalled for safety reasons. You must register this restraint to be reached in a recall. Send your name, address and model/serial numbers to: Graco Children's Products Inc. 150 Oaklands Blvd - Graco 1757978 | Owners Manual - Page 39
U.S.A. or Canada, please contact our Customer Service Department with any questions you may have concerning parts, use, or maintenance. When you contact us, please have your product's model and serial numbers ready so that we may help you efficiently. These numbers can be found on a sticker on the - Graco 1757978 | Owners Manual - Page 40
3.0 Features and Components FRONT VIEW Handle Harness slots Harness clip Harness buckle Handle adjustment button Vehicle belt hook Harness buckle tongues Adjustment Belt Adjustable Foot Vehicle belt/LATCH path LATCH Storage Bars LATCH Connector Base 8 - Graco 1757978 | Owners Manual - Page 41
Harness tightener Level indicator* Owner's manual pocket REAR VIEW Canopy Release handle Harness slot Attachment latch *Level Indicator **Locking Clip Locking clip** The level stored on the bottom of the infant restraint. You will need to use it with certain types of vehicle seat belts. 9 - Graco 1757978 | Owners Manual - Page 42
3.1 Removing and Attaching Base To remove infant restraint, squeeze handle at back of seat and lift infant restraint from base – as shown –. To put infant restraint in base, push infant restraint down until it clicks into base. Pull up - Graco 1757978 | Owners Manual - Page 43
comes with four (two on certain models) identical canopy support parts. Thread one canopy support completely through one sewn tunnel ™. 2. Slide straight end of a second support into the straight end of the first support š. 3. On models with four canopy supports, repeat steps one and two for - Graco 1757978 | Owners Manual - Page 44
and resnap them with the harness straps threaded through the slots in the cushion –. If your model does not include a head support, you may want — to use a rolled towel or a blanket for support —. MAKE SURE THAT NOTHING INTERFERES WITH THE HARNESS OR THE BLANKET. It must still be flat - Graco 1757978 | Owners Manual - Page 45
– Wrap bottom edge of seat pad around the foot end of seat as shown. Step 2. — Wrap the top edge of the seat pad around the head end of the seat as shown. Step 3. ˜ On side of seat, wrap elastic strap around the handle as shown. Skip Steps 3 and 4 if your model does not include straps - Graco 1757978 | Owners Manual - Page 46
with a cold weather boot. To use, wrap elastic around bottom of seat and place both elastic loops around vehicle belt hooks as shown . 3.7 Harness Covers (on certain models) To prevent ejection in sudden stop or crash: • Always make sure shoulder straps are threaded through slots and properly - Graco 1757978 | Owners Manual - Page 47
RESTRAINT AND BASE UNTIL YOU READ AND UNDERSTAND THE INSTRUCTIONS IN THIS MANUAL AND IN YOUR VEHICLE OWNER'S MANUAL. DO NOT let others install or use the infant it in the vehicle. • DO NOT PLACE THIS INFANT RESTRAINT IN A VEHICLE SEATING LOCATION THAT HAS A FRONT AIR BAG. If the air bag inflates, it - Graco 1757978 | Owners Manual - Page 48
car bed before using this product. • According to accident statistics, CHILDREN ARE SAFER WHEN PROPERLY RESTRAINED IN REAR VEHICLE SEATING POSITIONS, RATHER THAN FRONT SEATING POSITIONS. For a vehicle with a front passenger air bag, refer to your vehicle owner's manual as well as these instructions - Graco 1757978 | Owners Manual - Page 49
TRAVEL SYSTEM. Refer to stroller instruction sheet for details about how to attach the infant restraint to your stroller. If you do not have an instruction sheet, please call toll-free, 1-800-345-4109 to obtain one, or visit our website, www.gracobaby.com. • Improper use of Graco's infant car seat - Graco 1757978 | Owners Manual - Page 50
4.3 Additional Warnings for Use as Carrier • FALL HAZARD: Child's movements can slide carrier. NEVER place carrier near edges of countertops, tables or other high surfaces. Always stay within arms reach whenever carrier is not on floor/ground. BE SURE handle locks into position before lifting - Graco 1757978 | Owners Manual - Page 51
4.4 Height and Weight Limits FAILURE TO USE INFANT RESTRAINT IN A MANNER APPROPRIATE FOR YOUR CHILD'S SIZE MAY INCREASE THE RISK OF SERIOUS INJURY OR DEATH. Your child MUST meet all requirements: • WEIGHT: 5-22 lbs. (2.3-10 kg) • HEIGHT: 29 inches (73 cm) or less 19 - Graco 1757978 | Owners Manual - Page 52
restraint in your vehicle, consult your vehicle owner's manual or call Graco at 1-800-345-4109. • Whenever possible, secure the infant restraint in the center position of the – seat directly behind the front seats –. An adult should ride in the rear seat to watch the child. If the driver is - Graco 1757978 | Owners Manual - Page 53
DESIGNED TO HOLD THE INFANT RESTRAINT TIGHTLY AT ALL TIMES. Pay careful attention to these systems; some of the seat belts that are not safe to use look very much like seat belts that are safe to use. If you are unsure, consult your vehicle owner's manual or call Graco at 1-800-345-4109. 21 - Graco 1757978 | Owners Manual - Page 54
to secure the infant restraint. LATCH can be used IN PLACE OF the vehicle belt system. Please refer to vehicle owners manual for LATCH locations. • Lap Belts with Emergency Locking Retractor (ELR) This lap belt surround the passenger when the door is closed. • Lap Belts Forward of Seat Crease 22 - Graco 1757978 | Owners Manual - Page 55
YOUR INFANT RESTRAINT, IF the seat location meets all other requirements of these instructions and those in your vehicle owner's manual. LATCH can be used in place of the vehicle belt system. Please refer to vehicle owners manual for LATCH locations. • Lap Belts - Manually Adjusted When buckled, the - Graco 1757978 | Owners Manual - Page 56
portion of the belt. You must use the locking clip provided with the infant restraint, unless your vehicle's seat belt can be converted in another way as described in your vehicle owner's manual. Locking clip To Install Locking Clip: 1. Tighten the buckled belt by pushing down hard on the infant - Graco 1757978 | Owners Manual - Page 57
vehicles may have one or more seating positions with LATCH anchorage systems. If vehicle is equipped with LATCH, the vehicle lower anchor points may be visible at the vehicle seat crease. If not visible, they may be marked with the symbol . See your vehicle owner's manual for exact locations, anchor - Graco 1757978 | Owners Manual - Page 58
OF A SHARP TURN, SUDDEN STOP OR CRASH. The harness straps must be properly adjusted to fit your child according to the following instructions. 1. Remove infant restraint from base and rotate handle down to sitting position. See "3.1 Removing and Attaching Base" and "3.2 Adjusting Handle", p. 10 - Graco 1757978 | Owners Manual - Page 59
5. From back, remove harness straps from harness tighteners. From front pull strap ˜ from slot ˜. Harness tighteners 6. Reinsert strap in the appropriate slot ™. ™ 7. Thread straps through tighteners exactly š as shown š. 8. SAFETY CHECK: a) CHECK that straps are not twisted; b) CHECK that - Graco 1757978 | Owners Manual - Page 60
sure that you hear each tongue click into the buckle. DO NOT use the infant restraint if the harness does not latch in place. Call Graco at 1-800-345-4109. 28 - Graco 1757978 | Owners Manual - Page 61
harness tightener up and pull the strap from the š front of the seat š. 6. Snap harness clip pieces together ›. Position harness clip in middle that harness straps are not twisted. b) CHECK that the harness is snug. œ A snug strap should not allow any slack. It lies in a relatively straight - Graco 1757978 | Owners Manual - Page 62
must carefully follow the instructions provided by your vehicle manufacturer, in addition to the information in this manual. Before proceeding, be front passenger seat is used, slide the vehicle seat rearward as far as possible from the dashboard. If a rear seat is used, make sure the seat in front - Graco 1757978 | Owners Manual - Page 63
3. Thread the seat belt: Base with seat belt Belt MUST go under tongue Infant restraint with seat belt 4. Buckle the seat belt. Make sure the buckle tongue goes into the correct buckle ™. The seat belt should not be twisted or turned. ™ 31 - Graco 1757978 | Owners Manual - Page 64
5. Tighten the vehicle seat belt. Refer to your vehicle owners manual and the instructions in "5.2.2 SAFE Vehicle Belt Systems", p.23-24, on tightening your vehicle belt. To create a very tight installation, push down hard with your knee or free hand in the middle of - Graco 1757978 | Owners Manual - Page 65
extend LATCH to its maximum length. 2. Position base in vehicle seat as shown. 3. Thread LATCH through base belt path normally used for vehicle seat belt. Make sure that LATCH is UNDER tongue on base ˜. position. If it does not stay tight, try another seating position or contact Customer Service. 33 - Graco 1757978 | Owners Manual - Page 66
vehicle seat. Failure to properly recline the infant restraint on the vehicle seat increases the problems. If the infant restraint is too reclined, a crash could put too much force on a child's neck and shoulders. The infant restraint must be properly reclined according to the following instructions - Graco 1757978 | Owners Manual - Page 67
shows ˜. ˜ When using only the infant restraint, if there is still orange in the level indicator when the ™ infant restraint is resting on the vehicle seat then place a rolled towel under the infant restraint until ONLY blue shows ™. Readjust the vehicle - Graco 1757978 | Owners Manual - Page 68
belt or LATCH is fastened very tightly around the infant restraint/base –. — Holding the infant restraint near the vehicle belt path, TWIST AND PULL the seat forward and to both sides to make sure the vehicle belt or LATCH does not lengthen or loosen and the infant restraint does not easily - Graco 1757978 | Owners Manual - Page 69
in an airplane the same way as in an automobile. Notify the airline ahead of time that you intend to bring the seat on board. Use only in forward-facing aircraft seat. Follow the flight attendant's instructions about infant restraint placement. Do not use this infant restraint if the airplane - Graco 1757978 | Owners Manual - Page 70
REMOVE AND WASH INFANT RESTRAINT PAD, follow instructions in "6.1 Positioning Harness Straps", p. 26-27. Carefully remove the seat pad. Machine wash on delicate cycle and drip-dry. DO NOT USE BLEACH. Reverse steps to reinstall seat pad. Check that harness system is not twisted, and pull on harness - Graco 1757978 | Owners Manual - Page 71
Notes 39 - Graco 1757978 | Owners Manual - Page 72
Replacement Parts To purchase parts or accessories in the United States for your Graco product, please contact us at the following: www.gracobaby.com or 1-800-345-4109 40 - Graco 1757978 | Owners Manual - Page 73
INSTRUCCIONES PARA USO FUTURO. No instale ni use este sistema de seguridad para niños hasta que haya leído y entendido las instrucciones en este manual. NO USAR DEBIDAMENTE ESTE SISTEMA DE SEGURIDAD PARA NIÑOS AUMENTA EL RIESGO DE SUFRIR LESIONES SERIAS O FATALES EN UN ACCIDENTE O AL DETENERSE DE - Graco 1757978 | Owners Manual - Page 74
1.0 Advertencias a padres y otros usuarios 4-5 2.0 Información sobre el registro 6-7 2.1 Registro de su sistema de seguridad para niños 6 2.2 Información sobre el retiro de productos del mercado . . . .7 2.3 Si necesita ayuda 7 3.0 Funciones y componentes 8-14 3.1 Sacar y conectar la base 10 - Graco 1757978 | Owners Manual - Page 75
5.0 Ubicación del sistema de seguridad para niños . . . . . .20-25 5.1 Requisitos del asiento del vehículo 20 5.2 Requisitos del cinturón de seguridad del vehículo . . . . . .21 5.2.1 Sistemas PELIGROSOS de cinturones para vehículos 22 5.2.2 Sistemas SEGUROS de cinturones para vehículos .23 5.3 - Graco 1757978 | Owners Manual - Page 76
este sistema de seguridad infantil le parece muy fácil, es muy importante que LEA EL MANUAL DEL PROPIETARIO. El manual se encuentra en el bolsillo trasero del sistema de seguridad infantil. También debe leer el manual del propietario de su vehículo. La seguridad de su niño depende de: 1. Elegir una - Graco 1757978 | Owners Manual - Page 77
3. Sujetar a su niño de manera adecuada en el sistema de seguridad infantil. 4. Colocar el sistema de seguridad infantil/base en una posición orientada hacia atrás. 5. Colocar el cinturón de seguridad del vehículo o LATCH de manera correcta. 6. Reclinar de manera correcta el sistema de seguridad - Graco 1757978 | Owners Manual - Page 78
problemas de seguridad. Debe registrar este sistema para que lo podamos contactar en dicho caso. Envíe su nombre y apellido, dirección y números de serie y de modelo a: Graco Children's Products Inc. 150 Oaklands Blvd. Exton, PA 19341 o llame al 1-800-345-4109 o www.gracobaby.com 6 - Graco 1757978 | Owners Manual - Page 79
línea telefónica sobre seguridad en automóviles del gobierno de EE.UU. al 1-888-327-4236 (TTY:1-800-424-9153) o http://www.NHTSA.gov • Graco: 1-800-345-4109 o www.gracobaby.com 2.3 Si necesita ayuda En los EE.UU. o Canadá, por favor, comuníquese con el Departamento de Servicio al Cliente - Graco 1757978 | Owners Manual - Page 80
3.0 Funciones y componentes VISTA DELANTERA Manija Ranura para el arnés Traba del arnés Hebilla del arnés Botón de ajuste de la manija Gancho del cinturón del vehículo Lengüetas de la hebilla del arnés Cinturón de ajuste Cinturón del vehículo/recorrido del LATCH Barras de almacenamiento del - Graco 1757978 | Owners Manual - Page 81
Tensionador del arnés Indicador del nivel* Bolsillo del manual del propietario VISTA TRASERA Capota Manija de liberación Ranura para el arnés Traba de conexión *Indicador del nivel **Traba de seguridad Traba de seguridad** El - Graco 1757978 | Owners Manual - Page 82
3.1 Sacar y conectar la base Para sacar el sistema de seguridad para niños, apriete la manija de liberación en la parte trasera – del asiento y levante el sistema de seguridad para niños de la base como se indica –. Para poner el sistema de seguridad para niños en la base, empuje el sistema de - Graco 1757978 | Owners Manual - Page 83
3.3 Colocación de la capota 1. El sistema de seguridad para niños viene con cuatro (dos en ciertos modelos) piezas idénticas de soporte de la capota. Pase un soporte de la capota completa- mente a través del túnel cosido ™. 2. Deslice el extremo recto del segundo soporte en el extremo recto del - Graco 1757978 | Owners Manual - Page 84
3.4 Apoyacabezas (en ciertos modelos) Algunos bebés necesitan apoyo adicional para mantener la cabeza – y el cuerpo en una posición cómoda. Destrabe los costados y vuelva a trabarlos con las correas del arnés pasadas a través de las ranuras en el cojín –. Si su modelo no incluye un - Graco 1757978 | Owners Manual - Page 85
3.5 Armado de la almohadilla del asiento (ciertos modelos) Paso 1. – Envuelva el borde inferior de la almohadilla del asiento alrededor del extremo del asiento donde van los pies como se indica. Paso 2. — Envuelva el borde superior de la almohadilla del asiento alrededor del extremo del - Graco 1757978 | Owners Manual - Page 86
3.6 Bota para tiempo frío (en ciertos modelos) Algunos modelos vienen con una bota para tiempo frío. Para usarla, ponga elástico alrededor del fondo del asiento y coloque elástico alrededor de los ganchos del cinturón del vehículo como se indica . 3.7 Cubiertas de arnes (ciertos modelos) - Graco 1757978 | Owners Manual - Page 87
Y BASE HASTA QUE HAYA LEÍDO Y ENTIENDA LAS INSTRUCCIONES EN ESTE MANUAL Y EN EL MANUAL DEL PROPIETARIO DE SU VEHÍCULO. NO deje que otros instalen o usen fuerza y causar lesiones serias o la muerte de su niño.Consulte el manual del dueño del vehículo para obtener información sobre las bolsas de aire - Graco 1757978 | Owners Manual - Page 88
ÍCULO EN LUGAR DE LOS ASIENTOS DELANTEROS. En el caso de un vehículo con una bolsa de aire para el pasajero delantero, consulte el manual del propietario de su vehículo así como estas instrucciones para la instalación del sistema de seguridad para niños. • NUNCA DEJE A SU NIÑO SOLO - Graco 1757978 | Owners Manual - Page 89
SISTEMA DE SEGURIDAD PARA NIÑOS Y BASE a otra persona sin entregarles este manual. • NUNCA USE UN SISTEMA DE SEGURIDAD PARA NIÑOS Y BASE USADOS o • USAR SOLAMENTE CON COCHECITOS QUE SON PARTE DEL SISTEMA DE VIAJES GRACO. Consulte la hoja de instrucciones del cochecito para obtener más información - Graco 1757978 | Owners Manual - Page 90
4.3 Advertencias adicionales para el uso como transportador • PELIGRO DE CAÍDA: Los movimientos del niño pueden mover el transportador. NUNCA ponga el transportador cerca de los bordes de mesadas, mesas u otras superficies altas. Manténgase siempre cerca cuando el transportador no esté en el piso/ - Graco 1757978 | Owners Manual - Page 91
4.4 Limitaciones de peso y estatura NO USAR EL SISTEMA DE SEGURIDAD PARA NIÑOS DE MANERA APROPIADA DE ACUERDO AL TAMAÑO DE SU NIÑO PODRÍA AUMENTAR EL RIESGO DE QUE SUFRA LESIONES SERIAS O FATALES. Su niño DEBE cumplir con todos los requisitos: • PESO: 5-22 libras (2.3-10 Kg) • ESTATURA: 29 pulgadas - Graco 1757978 | Owners Manual - Page 92
niños. Si no está seguro sobre dónde colocar el sistema de seguridad para niños en su vehículo, consulte el manual del propietario del vehículo o llame a Graco al 1-800-345-4109. • Cuando sea posible, sujete el sistema de seguridad para niños en la posición – de asiento central directamente - Graco 1757978 | Owners Manual - Page 93
de los sistemas de cinturones de seguridad que no son seguros se parecen mucho a los que no presentan peligro. Si no está seguro, consulte el manual del propietario del vehículo o llame a Graco al 1-800-345-4109. 21 - Graco 1757978 | Owners Manual - Page 94
sistema de seguridad para niños. El LATCH se puede usar EN LUGAR DE el sistema de cinturone para vehículo. Por favor, consulte el manual del propietario del vehículo para obtener las ubicaciones donde debe instalarse el LATCH. • Cinturón de seguridad abdominal con retractor de traba de emergencia - Graco 1757978 | Owners Manual - Page 95
los otros requisitos de estas instrucciones y los que se incluyen en el manual del propietario de su vehículo. Se puede usar el LATCH en lugar de el sistema de seguridad del vehículo. Por favor, consulte el manual del propietario se el LATCH. • Cinturón de seguridad abdominal ajustado manualmente - Graco 1757978 | Owners Manual - Page 96
que el Traba de seguridad cinturón de seguridad del asiento de su vehículo pueda convertirse de otra manera como se describe en el manual del propietario del vehículo. Para instalar la traba de seguridad: 1/2 pulgada 1. Ajuste el cinturón empujando con fuerza el sistema de seguridad para ni - Graco 1757978 | Owners Manual - Page 97
de anclaje inferiores en el pliegue del asiento del vehículo. Si no están visibles, pueden estar marcados con el símbolo que sigue . Vea el manual del propietario de su vehículo para informarse sobre las ubicaciones exactas, la identificación de los anclajes y los requisitos de uso con el sistema de - Graco 1757978 | Owners Manual - Page 98
6.0 Usar el asiento de seguridad infantil 6.1 Colocación de las correas del arnés NO AJUSTAR DEBIDAMENTE LAS CORREAS DEL ARNÉS DEL NIÑO AUMENTA EL RIESGO DE LESIONES SERIAS O FATALES EN CASO DE UNA CURVA CERRADA, ACCIDENTE O PARADA REPENTINA. Las correas del arnés deben estar debidamente ajustadas - Graco 1757978 | Owners Manual - Page 99
5. Por detrás, saque las correas del arnés de los tensionadores del arnés. Por adelante, ˜ saque la correa de la ranura ˜. 6. Vuelva a insertar la correa en la ranura apropiada ™. Tensionadores del arnés ™ 7. Pase las correas por los tensionadores exactamente como se indica š. š 8. VERIFICACI - Graco 1757978 | Owners Manual - Page 100
la lengüeta en la hebilla. NO use el sistema de seguridad para niños si el arnés no se traba en su lugar. Llame a Graco al 1-800-345-4109. 28 - Graco 1757978 | Owners Manual - Page 101
5. Por detrás, pase la correa a través del tensionador del arnés para tensionar ™ las correas como se indica. Las correas restantes deberían tener la misma longitud ™. ASEGÚRESE que ambas correas estén planas y ajustadas sobre los hombros del niño. Para aflojar las correas, levante el š - Graco 1757978 | Owners Manual - Page 102
con el cinturón del vehículo Debe seguir detenidamente las instrucciones provistas por el fabricante de su vehículo, además de la información de este manual. Antes de seguir, asegúrese que ha leído y entendido la sección 5, "Ubicación del sistema de seguridad para niños" en las páginas 20 a 25 - Graco 1757978 | Owners Manual - Page 103
3. Pase el cinturón de seguridad: Base con cinturón de seguridad El cinturón DEBE pasar debajo de la lengüeta. Sistema de seguridad para niños con cinturón de seguridad 4. Trabe el cinturón del asiento. Asegúrese que la lengüeta de la hebilla pase por la hebilla correcta ™. El cinturón del vehí - Graco 1757978 | Owners Manual - Page 104
. Ajuste el cinturón de seguridad del vehículo. Consulte el manual del propietario del vehículo y las instrucciones en la sección "5.2.2. Sistemas SEGUROS de cinturones de seguridad para vehículo", página 23 y 24 sobre cómo ajustar - Graco 1757978 | Owners Manual - Page 105
6.4 Uso del LATCH para instalar la base 1. Para facilitar la instalación, extienda el LATCH hasta el máximo. Lengüeta ˜ 2. Ponga la base en el asiento del vehículo como se indica. 3. Pase el LATCH por el recorrido del cinturón en la base que normalmente se usa para el cinturón del asiento del - Graco 1757978 | Owners Manual - Page 106
6.5 Inclinación del sistema de seguridad para niños/base Es importante que su sistema de seguridad para niños/base esté debidamente reclinado para mayor seguridad del niño. En el costado de su sistema de seguridad para niños hay un indicador del nivel para ayudar a reclinar debidamente el sistema de - Graco 1757978 | Owners Manual - Page 107
Cuando usa la base: – Para bajar el pie; tire hacia abajo del fondo del pie hasta alcanzar el valor deseado para ajustar la inclinación –. Para levantar el pie; ponga la base en una superficie plana, empuje hacia adentro los dedos de la base y empuje hacia abajo la base — para ajustar la - Graco 1757978 | Owners Manual - Page 108
Verificación final de seguridad: Cada vez que sale en el automóvil con su niño, EMPUJE HACIA ABAJO lenta pero firmemente la – parte de arriba del sistema de seguridad para niños para asegurarse que el cinturón del vehículo o LATCH esté asegurado apretadamente alrededor de la base/sistema de - Graco 1757978 | Owners Manual - Page 109
7.0 Información adicional 7.1 Uso en aviones Instálelo en un avión de la misma manera que en un automóvil. Notifique a la compañía aérea por adelantado que va a usar el asiento abordo. Úselo solamente en un asiento del aeronave orientado hacia delante. Siga las instrucciones del personal de vuelo - Graco 1757978 | Owners Manual - Page 110
7.3 Limpieza y mantenimiento ! PARA SACAR Y LAVAR LA ALMOHADILLA DE SEGURIDAD DEL NIÑO, siga las instrucciones en la sección "6.1 Colocación de las correas del arnés", páginas 26 y 27. Saque cuidadosamente la almohadilla del asiento. Se lavan a máquina por separado en el ciclo delicado y se seca al - Graco 1757978 | Owners Manual - Page 111
Notas 39 - Graco 1757978 | Owners Manual - Page 112
Piezas de repuesto Para comprar repuestos o accesorios en los Estados Unidos para su producto Graco, por favor comuníquese con nosotros en: www.gracobaby.com o 1-800-345-4109 40
-
 1
1 -
 2
2 -
 3
3 -
 4
4 -
 5
5 -
 6
6 -
 7
7 -
8
-
9
-
10
-
11
-
12
-
13
-
14
-
15
-
16
-
17
-
18
-
19
-
20
-
21
-
22
-
23
-
24
-
25
-
26
-
27
-
28
-
29
-
30
-
31
-
32
-
33
-
34
-
35
-
36
-
37
-
38
-
39
-
40
-
41
-
42
-
43
-
44
-
45
-
46
-
47
-
48
-
49
-
50
-
51
-
52
-
53
-
54
-
55
-
56
-
57
-
58
-
59
-
60
-
61
-
62
-
63
-
64
-
65
-
66
-
67
-
68
-
69
-
70
-
71
-
72
-
73
-
74
-
75
-
76
-
77
-
78
-
79
-
80
-
81
-
82
-
83
-
84
-
85
-
86
-
87
-
88
-
89
-
90
-
91
-
92
-
93
-
94
-
95
-
96
-
97
-
98
-
99
-
100
-
101
-
102
-
103
-
104
-
105
-
106
-
107
-
108
-
109
-
110
-
111
-
112
 |
 |
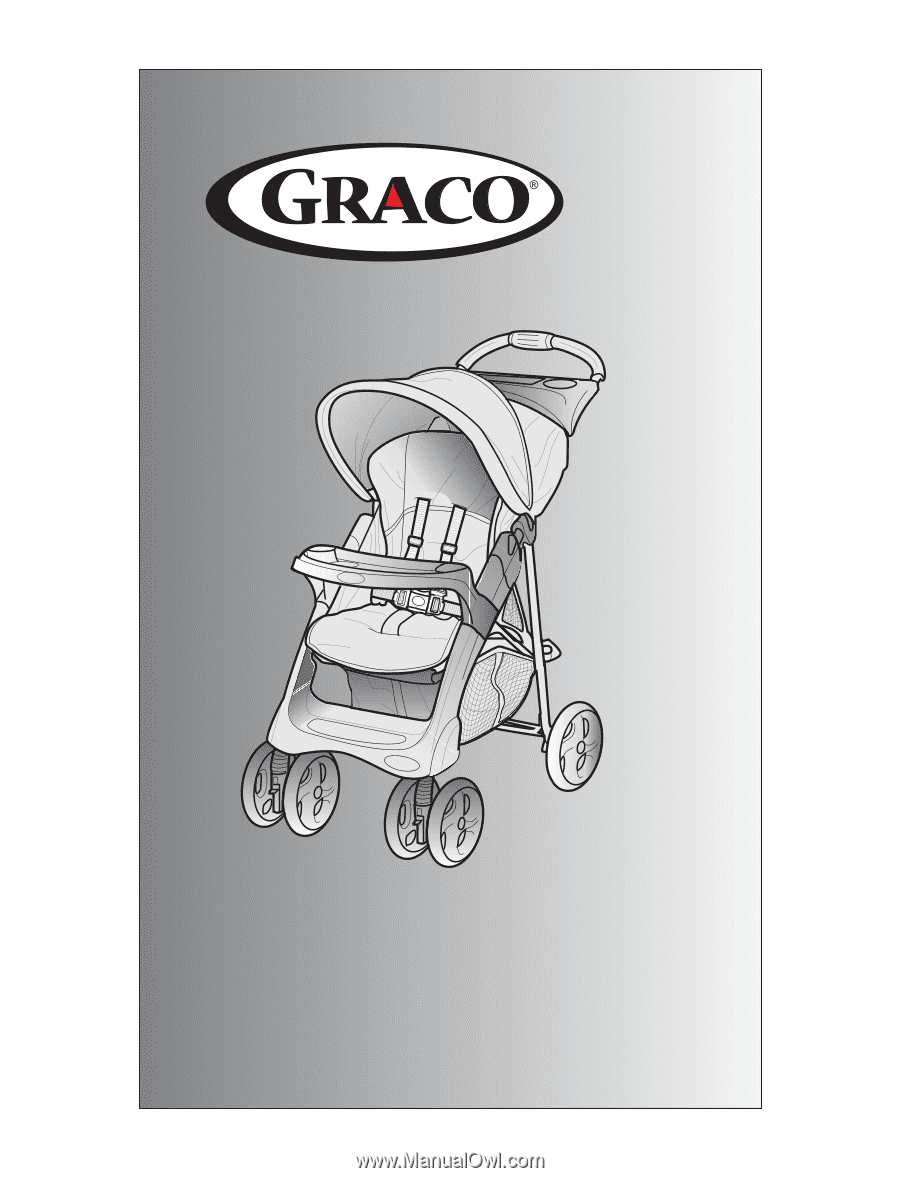
OWNER'S MANUAL
MANUEL D'UTILISATEUR
MANUAL DEL PROPIETARIO
www.gracobaby.com
©2005 Graco
ISPA085AB
08/05