Graco 3001643-043 Assembly Instructions - Page 1
Graco 3001643-043 - Sarah Classic Convertible Crib Manual
 |
UPC - 654582316341
View all Graco 3001643-043 manuals
Add to My Manuals
Save this manual to your list of manuals |
Page 1 highlights
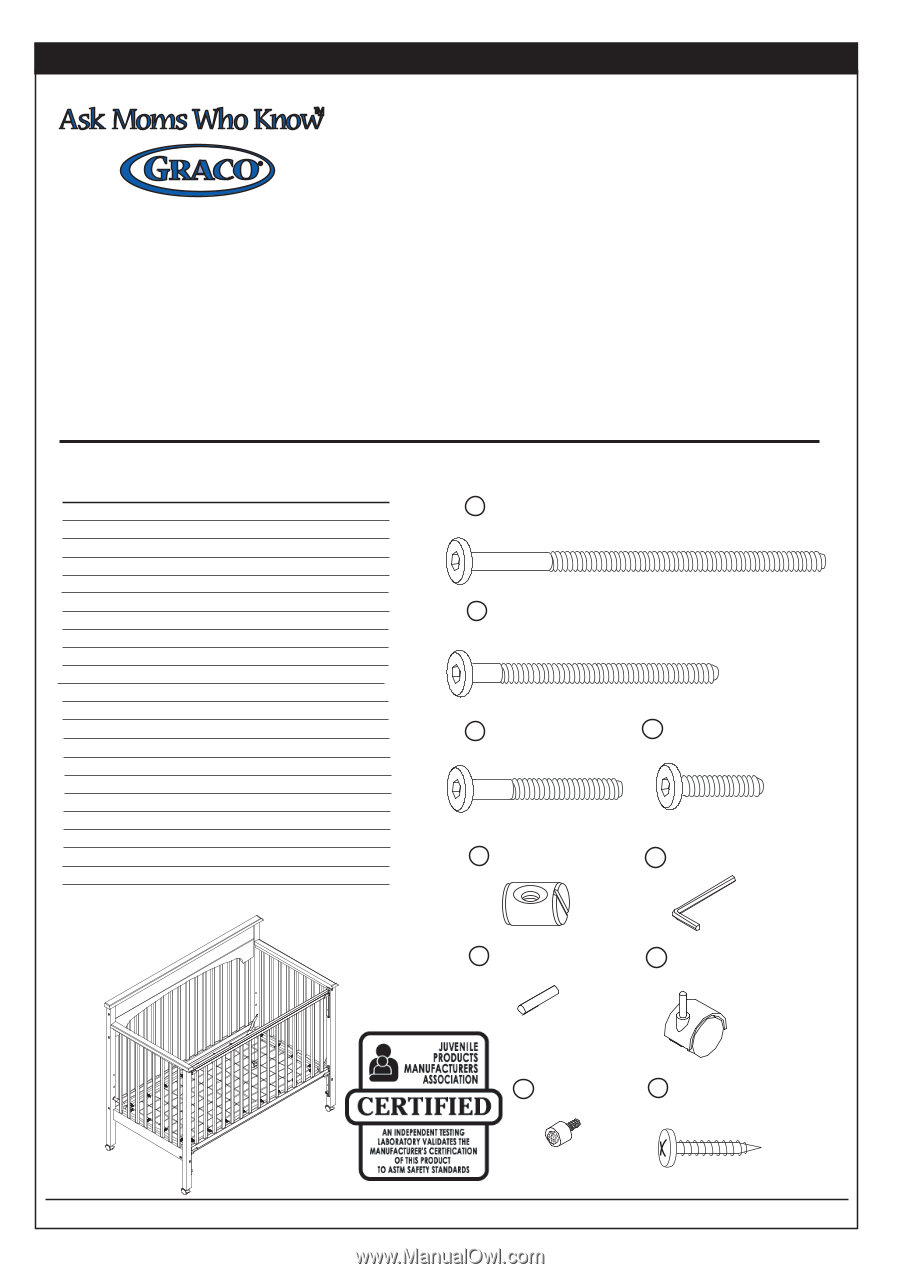
ASSEMBLY INSTRUCTIONS Convertible Crib Adult assembly required. Small parts may present prior to assembly. Enclosed please find simple step-by-step instructions to help you quickly assemble your product. Before you begin we recommend that you follow the steps below: 1. Please read the instructions thoroughly 2. Identify all parts and hardware. 3. You will need the following tools: Philips Head screw driver Flat head screw driver Hammer. To protect your parts during assembly please place them on a soft surface. To clean surface use only water on a damp cloth. Do not use window cleaners or cleaning abrasives as it will scratch the surface and could damage the protective coating. PARTS LIST REF. PART NAME QUANTITY A. Crib Ends(Top) 2 B. Crib Ends(Bottom) 2 C. Front Leg 2 D. Dropside Rail 1 E. Back Rail Top 1 F. Back Rail Middle 1 G. Back Rail Bottom 1 H. Back Rail Leg 2 I. Wooden connecting block 3 J. Bottom Stretcher 1 K. Metal Spring support platform 1 L. 3 1/4 " Bolt 14 M. 2 1/4" Bolt 2 N. 1 1/2" Bolt 4 O. 3/4" Bolt 4 P. Barrel Nuts 16 Q. Allen Wrench 1 R. Wood Dowels 30 S. Casters 4 T. Block brake 2 U. Wood Screws 3/4″ 12 Model shown is example only. Styles may vary. HARDWARE AND TOOLS DIAGRAM L 3 1/4" Bolt M 2 1/4" Bolt N 1 1/2" Bolt O 3/4" Bolt P Barrel Nuts Q Allen Wrench R Wood Dowel S Casters PRINTED IN CHINA T Block brake U Wood Screw 3/4″ LaJobi Industries. - 257 Prospect Plains Rd. Cranbury,NJ 08512-Phone: 888-266-2848 Bulletin No. A-RTAUPS01-00 1
-
 1
1 -
 2
2 -
 3
3 -
 4
4 -
 5
5 -
 6
6 -
 7
7 -
8
-
9
-
10
-
11
-
12
-
13
 |
 |