Graco 6J18CRN3 Owners Manual
Graco 6J18CRN3 - MetroLite Stroller - Carmen Manual
 |
UPC - 047406101443
View all Graco 6J18CRN3 manuals
Add to My Manuals
Save this manual to your list of manuals |
Graco 6J18CRN3 manual content summary:
- Graco 6J18CRN3 | Owners Manual - Page 1
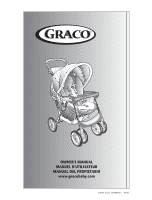
OWNER'S MANUAL MANUEL D'UTILISATEUR MANUAL DEL PROPIETARIO www.gracobaby.com ©2005 Graco ISPA083AD 09/05 - Graco 6J18CRN3 | Owners Manual - Page 2
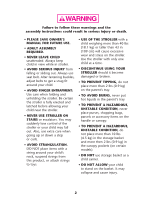
and the assembly instructions could result in serious injury or death. • PLEASE SAVE OWNER'S MANUAL FOR FUTURE USE. • ADULT ASSEMBLY REQUIRED. • NEVER LEAVE CHILD unattended. Always keep child in view while in stroller. • AVOID SERIOUS INJURY from falling or sliding out. Always use seat belt. After - Graco 6J18CRN3 | Owners Manual - Page 3
INFANT SAFESEAT™ CAR SEAT with this travel system. (Not intended for use with AUTOBABY (Europe only) and ASSURA infant car seats.) Improper use of this stroller with other manufacturers' car seats may result in serious injury or death. • READ THE MANUAL provided with your Graco car seat before using - Graco 6J18CRN3 | Owners Manual - Page 4
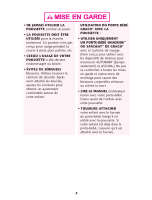
Manquer de suivre ces avertissements et les instructions d'assemblage peut entraîner de sérieuses blessures ou un décès. • VEUILLER GARDER LE MANUEL D'UTILISATEUR POUR USAGE ULTÉRIEUR. • ASSEMBLAGE PAR UN ADULTE REQUIS. • NE LAISSEZ - Graco 6J18CRN3 | Owners Manual - Page 5
et ASSURA.) Ne pas se conformer à toutes les mises en garde et instructions de montage peut causer des blessures corporelles sérieuses ou même la mort. • LIRE LE MANUEL d'utilisateur fourni avec votre porte-bébé Graco avant de l'utiliser avec cette poussette. • TOUJOURS ATTACHER votre enfant avec le - Graco 6J18CRN3 | Owners Manual - Page 6
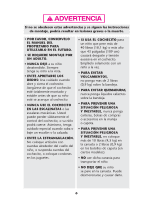
Si no se obedecen estas advertencias y se siguen las instrucciones de montaje, podría resultar en lesiones graves o la muerte. • POR FAVOR, CONSERVELO EL MANUEL DEL PROPIETARIO PARA UTILIZARLO EN EL FUTURO. • SE REQUIERE MONTAJE POR UN ADULTO. • NUNCA DEJE a su niño desatendido. Siempre tenga su ni - Graco 6J18CRN3 | Owners Manual - Page 7
de este cochecito con asientos para automóvil de otros fabricantes podría resultar en lesiones serias o la muerte. • LEA EL MANUAL incluido con su transportador Graco antes de usarlo con su cochecito. • ASEGURE SIEMPRE a su niño con el arnés del transportador cuando usa el transportador en - Graco 6J18CRN3 | Owners Manual - Page 8
parts are missing, manque des pièces, de armar su producto. call Customer communiquez avec notre Si falta alguna pieza, Service. service à la clientèle. llame al Departamento de Servicio al Cliente. Tools Required: Hammer Outils nécessaires: Marteau Herramienta necesaria: Martillo ALL - Graco 6J18CRN3 | Owners Manual - Page 9
• Ouvrir la poussette • Abrir el cochecito 1 SNAP! ENCLENCHEZ! ¡CHASQUIDO! 2 Carton • Boîte • Caja 3 Check that stroller is completely open (by trying to fold it) before continuing. SNAP! ENCLENCHEZ! ¡CHASQUIDO! Vérifiez que la poussette est completement dépliée (en essayant de la - Graco 6J18CRN3 | Owners Manual - Page 10
Basket • Le panier • La canasta 4 SNAP! ENCLENCHEZ! ¡CHASQUIDO! Holes and metal buttons on underside. Trous et boutons métallique en dessous. Agujeros y botones metálicos por debajo. 5 SNAP! ENCLENCHEZ! ¡CHASQUIDO! Align hooks with pegs, and pull back to attach. Alignez les crochets avec les - Graco 6J18CRN3 | Owners Manual - Page 11
6 SNAP! ENCLENCHEZ! ¡CHASQUIDO! 7 – — Pull lever to lower basket. Tirez le levier pour abaisser le panier. Tire la manija para bajar la canasta. 11 - Graco 6J18CRN3 | Owners Manual - Page 12
Footrest and Front Wheels • Le repose-pied et les roues avant • Reposapies y las ruedas delanteras 8 SNAP! ENCLENCHEZ! ¡CHASQUIDO! 2X 9 SNAP! ENCLENCHEZ! ¡CHASQUIDO! Pull sleeve back (on certain models) to reveal metal button. Check that wheels are securely attached by pulling on wheel - Graco 6J18CRN3 | Owners Manual - Page 13
trasero, verifique que el eje trasero esté bien conectado tirando del equipo de frenos. 10 SNAP! ENCLENCHEZ! ¡CHASQUIDO! Brake levers point toward rear of stroller. Leviers des freins vers l'arrière de la poussette. Las palancas del freno deben apuntar hacia la parte trasera del cochecito. 13 - Graco 6J18CRN3 | Owners Manual - Page 14
Rear Wheels • Les roues arrières • Las ruedas traseras 2X 2X BEFORE attaching wheel: Be sure to place stroller on top of a piece of card board or some other protective cover to prevent any damage to floor. Place wheel on rear axle, and set - Graco 6J18CRN3 | Owners Manual - Page 15
2X 12 SNAP! ENCLENCHEZ! ¡CHASQUIDO! 15 - Graco 6J18CRN3 | Owners Manual - Page 16
Child's Tray • Le plateau pour enfant • La bandeja del niño 13 14 15 16 To open Pour ouvrir Para abrir 16 - Graco 6J18CRN3 | Owners Manual - Page 17
. The release button and grip are the parts you will use to do the folding. Plastic straps will be hidden, but they actually fold the stroller. Le plateau pour parent inclut le mécanisme pour plier la poussette. Vous devriez localiser les pièces suivantes avant de l'attacher: Les onglets sur chaque - Graco 6J18CRN3 | Owners Manual - Page 18
17 18 SNAP! ENCLENCHEZ! ¡CHASQUIDO! Plastic straps must be to the rear. Les courroies de plastique doivent être à l'arrière. Las correas de plástico deben estar en la parte trasera. Check that parent's tray is securely attached by pulling up on parent's tray. Assurez-vous que le plateau pour parent - Graco 6J18CRN3 | Owners Manual - Page 19
pull plastic straps all the way up as in figure 20A; DO NOT leave straps as shown in 20B. Attaching plastic straps may unlatch stroller. Check that stroller is all the way open before continuing. Glissez les pochettes et remontez les courroies de plastique jusqu'en haut tel qu'illustré sur 20A - Graco 6J18CRN3 | Owners Manual - Page 20
To Secure Child • Attacher l'enfant • Para asegurar al niño 5 Point Harness • Harnais à 5 point • Arnés de 5 puntos 21 22 23 To adjust harness. To change shoulder harness slots see page 22. Pour ajuster le harnais. Pour changer des fentes de harnais d'épaule voir la page 22. Para ajustar el - Graco 6J18CRN3 | Owners Manual - Page 21
3 Point Buckle • Boucle à 3 point • Hebilla de 3 puntos 24 To convert to 3-pt harness. Pour convertir en harnais 3-points. Para convertirlo en un arnés de 3 puntos. 25 26 27 21 - Graco 6J18CRN3 | Owners Manual - Page 22
To Change Shoulder Harness Slots • Pour changer des dentes de harnais d'épaule • Para cambiar ranuras del arnés del hombro Shoulder harness anchor-larger child Harnais d 'ancrage à l 'épaule pour grand enfant Anclaje del arnés del hombro - niño grande Shoulder harness anchor-smaller child Harnais d - Graco 6J18CRN3 | Owners Manual - Page 23
Brakes • Les freins • Los frenos WARNING Always apply both brakes. Check that brakes are on by trying to push stroller. MISE EN GARDE Toujours utiliser les deux freins. Assurez-vous que les freins fonctionnent en essayant de pousser la poussette. ADVERTENCIA Siempre use ambos frenos. - Graco 6J18CRN3 | Owners Manual - Page 24
Swivel Wheels • Les roues pivotantes • Las ruedas giratorias 31 Front swivel wheels lock for use on uneven surfaces such as grass, stones or gravel. Les roues pivotantes avant se barrent pour un usage sur les surfaces irrégulières tel que le gazon, les cailloux ou le gravier. 32 Las ruedas - Graco 6J18CRN3 | Owners Manual - Page 25
deje que la tela se When making Lorsque vous faites des agarre en la traba. adjustments to the ajustements au siège de Cuando realiza stroller seat, make la poussette, s'assurer ajustes al asiento del sure child's head, que la tête de l'enfant, cochecito, asegúrese arms, and legs are les bras - Graco 6J18CRN3 | Owners Manual - Page 26
• Plier la poussette • Para plegar el cochecito Before folding stroller: 1) lock front swivel wheels, 2) adjust seat back to upright position and 3) apply brakes. Avant de replier la poussette: 1) verrouillez les roues pivotantes, 2) ajuster le dossier à la position assise et 3) appliquez les - Graco 6J18CRN3 | Owners Manual - Page 27
™ car seat with this travel system. (Not intended for use with AUTOBABY (Europe only) and ASSURA infant car seats.) If unsure of the model or for more information please call Graco's customer service number: 1-800-345-4109. Improper use of this stroller with other manufacturers' car seats may - Graco 6J18CRN3 | Owners Manual - Page 28
resultar en lesiones serias o la muerte. Lea el manual incluido con su transportador Graco antes de usarlo con su cochecito. • Asegure siempre l'attachement Traba de seguridad SNAP! ENCLENCHEZ! ¡CHASQUIDO! • Recline the stroller seat back to its lowest position. Fold the canopy. • Incliner le si - Graco 6J18CRN3 | Owners Manual - Page 29
so it is below latches on stroller handle as shown. Turn and lock latches. ALWAYS LOCK LATCHES OVER CAR SEAT. • Check that car seat is securely attached by pulling up on the car seat handle. • Appuyez sur le dispositif de retenue pour enfant vers le bas pour qu'il soit en-dessous des loquets - Graco 6J18CRN3 | Owners Manual - Page 30
/ O Certain models have two sets of latches, to allow for two recline positions. The car seat can be positioned below the bottom latch or between the two latches. ALWAYS LOCK LATCHES OVER CAR SEAT. Certains modèles ont deux jeux de loquets, permettant deux positions d'inclinaison. Le dispositif de - Graco 6J18CRN3 | Owners Manual - Page 31
40 • To remove car seat: unlock latches above car seat, squeeze release handle at back of car seat, and lift car seat out of the stroller. When car seat is not in use, latches should be in unlocked position, away from baby. • Pour enlever dispositif de retenue pour enfant, déverrouillez les - Graco 6J18CRN3 | Owners Manual - Page 32
Netting (on certain models) • Filet (sur certains modèles) • Malla (en ciertos modelos) 41 32 - Graco 6J18CRN3 | Owners Manual - Page 33
To Remove Seat Cover • Enlever la housse du siege • Para quitar la funda del asiento 42 43 44 Four plastic tabs under seat front. Quatre onglets de plastique sous l'avant du siège. Cuatro lengüetas de plástico debajo del asiento. 33 - Graco 6J18CRN3 | Owners Manual - Page 34
45 46 47 A stiffener rod is sewn into the fabric. It slides out of a plastic channel here. Une tringle rigide est cousue dans le tissu. Elle se glisse hors d'un conduit de plastique ici. Una varilla está cosida en la tela y sale de un canal de plástico de esta manera. 34 - Graco 6J18CRN3 | Owners Manual - Page 35
courroies aux épaules à travers le panneau du dossier. Para quitar las correas de los hombros, páselas a través del tablero. Pull straps back through seat slots. Straps remain attached to frame. Tirez les courroies à travers les fentes du siège. Les courroies restent attachées à l'armature. Pase las - Graco 6J18CRN3 | Owners Manual - Page 36
To Remove Canopy • Enlever le baldaquin • Para sacar la capota 50 51 52 Push tray down and pull tabs inward. Abaissez le plateau et retirez les onglets. Empuje la bandeja hacia abajo y saque las lengüetas. 36 - Graco 6J18CRN3 | Owners Manual - Page 37
53 54 55 Remove support wire and U tube from canopy (note orientation) before washing. Enlever le support et le tube en U du baldaquin (noter bien l'orientation) avant de laver le baldaquin. Saque el alambre de apoyo y el tubo en U de la capota (note la orientación) antes de lavarla. 37 - Graco 6J18CRN3 | Owners Manual - Page 38
, worn parts, torn material or stitching. Replace or repair the parts as needed. Use only Graco® replacement parts. • EXCESSIVE EXPOSURE TO SUN OR HEAT could cause fading or warping of parts. • IF STROLLER BECOMES WET, open canopy and allow to dry thoroughly before storing. • IF WHEEL SQUEAKS, use - Graco 6J18CRN3 | Owners Manual - Page 39
para determinar si hay tornillos flojos, piezas gastadas, material o costuras rotas. Cambie o repare las piezas según sea necesario. Use solamente repuestos marca Graco®. • EL CONTACTO EXCESIVO CON EL SOL o el calor podría causar que se destiña o se tuerzan algunas piezas. • SI EL COCHECITO SE MOJA - Graco 6J18CRN3 | Owners Manual - Page 40
). or/ou www.elfe.net Product Registration (USA) Inscription de votre produit (au Canada) Registro del producto (EE.UU.) To register your Graco product from within the U.S.A. visit us online at www.gracobaby.com/productregistration. We currently do not accept product registrations from those living
-
 1
1 -
 2
2 -
 3
3 -
 4
4 -
 5
5 -
 6
6 -
 7
7 -
8
-
9
-
10
-
11
-
12
-
13
-
14
-
15
-
16
-
17
-
18
-
19
-
20
-
21
-
22
-
23
-
24
-
25
-
26
-
27
-
28
-
29
-
30
-
31
-
32
-
33
-
34
-
35
-
36
-
37
-
38
-
39
-
40
 |
 |

OWNER'S MANUAL
MANUEL D'UTILISATEUR
MANUAL DEL PROPIETARIO
www.gracobaby.com
©2005 Graco
ISPA083AD
09/05