Haier CPN12XC9 Product Manual
Haier CPN12XC9 Manual
 |
UPC - 688057348919
View all Haier CPN12XC9 manuals
Add to My Manuals
Save this manual to your list of manuals |
Haier CPN12XC9 manual content summary:
- Haier CPN12XC9 | Product Manual - Page 1
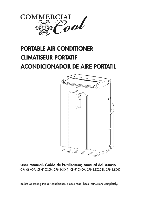
. 4t230 PORTABLE AIR CONDITIONER CLIMATISEUR PORTATIF ACONDICIONADOR DE AIRE PORTATIL ---------- User Manual, Guide de l'Ufilisaleur, Manual del Usario CPNOBXC9, CPN10XC9, CPN10XH9, CPN12XC9, CPN12XC9-E, CPN12XH9 Before operating this air conditioner, please read these instructions completely. - Haier CPN12XC9 | Product Manual - Page 2
Commercial Cool air conditioner. This manual contains useful information for you to maintain, operate, install and safely use your air conditioner. Your air conditioner cleans, cools and dehumidifies the air in your room to provide you with the ultimate level of comfort. Please read instructions - Haier CPN12XC9 | Product Manual - Page 3
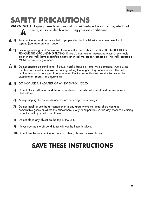
, repairs or adjustments. A 4) DO NOT USE AN ADAPTER OR AN EXTENSION CORD. 5) Do not block airflow around the air conditioner. The exhaust hose should be free of any obstructions. 6) Always unplug the air conditioner before servicing it or moving it. 7) Do not install or use the air conditioner in - Haier CPN12XC9 | Product Manual - Page 4
English Important Instructions • Please keep this manual in panel; it may cause electrical shock to the electronic parts inside and disable them or cause them to function improperly service center or local distributor. Thank you for purchasing our Commercial Cool product. Please read this manual - Haier CPN12XC9 | Product Manual - Page 5
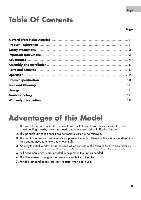
Word From Haier America Product Registration Safety Precautions Important Instructions Advantages Assembly and Installation Parts and Features Operation Product Specification Care and Cleaning Storage Troubleshooting Warranty Information English Page 1 1 2 3 4 5 5 7-9 10 1 1 1 1 1 1 12 Advantages - Haier CPN12XC9 | Product Manual - Page 6
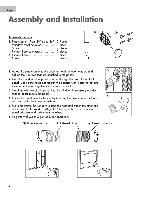
the plastic panel. Line up the holes and tighten the adapter with 4 screws that are Fc included in the kit. (Tighten screws from the front.) 3. Install the window plastic panel into the window. If necessary use duct tape to better secure the panel. B 4. Connect exhaust hose to the unit by - Haier CPN12XC9 | Product Manual - Page 7
4. Remote Control Cradle 5. Air Inlet 6. Casters 7. Air Filter 8. Water Outlet Drain 9. Power Supply Cord 2 4 7 POWER SUPPLY CORD I F. 9 F. TEST: WHEN THIS BUTTON IS PRESSED OR WHEN THERE IS A CURRENT LEAK, THE UNIT WILL NOT OPERATE. RESET: AFTER SOLVING THE PROBLEM, PRESS THE RESET BUTTON TO - Haier CPN12XC9 | Product Manual - Page 8
on this line or you may trip the fuse. Use a dedicated line for this air conditioner. 3. Do not place the air conditioner in direct sunlight or close to any heating appliances (ie. baseboard heaters, stoves, etc.) 4. Operate on a flat surface only. 5. Keep the unit free of any obstructions - Haier CPN12XC9 | Product Manual - Page 9
between °F and °C. NOTE: The temperature can be set between 61°F to 89°F. LCD Display When STOP indicator light turns on, the internal water tank has filled with condensed water and the air conditioner will turn off automatically. See 'Portable Air Conditioner Care" for directions on draining the - Haier CPN12XC9 | Product Manual - Page 10
speeds in the cool and fan mode: Low, Medium and High. In dehumidification mode, and room temperature is greater than 77°F, fan speed can be adjusted; otherwise fan speed is fixed to "low." 0 I.J.1On / Off Timer To set the Timer for a 1 to 24-hour delay until the air conditioner turns off: 1. When - Haier CPN12XC9 | Product Manual - Page 11
0XH9 CPN12XC9 CPN12XH9 CPN12XC9-E Voltabe and Frequency Input Power 800W Cooling Capacity Moisture Removal (pints/day) 80008TU 75 Refrigerant R-22/11Oz Timer Operating Temperature Range Unit Dimensions (WxDxH) 950W 10000BTU 115V/60Hz 900W COOL 950W HEAT 100008TU COOL 9000BTU HEAT 1200W - Haier CPN12XC9 | Product Manual - Page 12
plastic bag and store away. Troubleshooting If air conditioner does not operate: • replaced. • Check if the unit is in "Off" mode. • If the warning light is on, drain the water drain pipe by removing the plug. Air conditioner working but room not cooling: • Room may have appliances that produce heat - Haier CPN12XC9 | Product Manual - Page 13
a period of 12 months. Haler America will repair or replace (excluding labor costs) the sealed system and compressor (parts only) for an additional 4 year period. How can you get service? 1. Contact your nearest Haier America Authorized Service Depot. For the name of the Service Depot nearest you - Haier CPN12XC9 | Product Manual - Page 14
dehumidifie l'air dans votre salle pour vous fournir avec le niveau ultime de confort. S'il vous plait lkez soigneusement les instructions avant d'installer de service pendant la periode de votre garantie, les informations suivantes vous seront necessaries. Attachez le recu de ventes a ce guide et - Haier CPN12XC9 | Product Manual - Page 15
une fiche a trois broches, veuillez faire en sorte qu'un electricien qualifie en installe une. La prise murale DOIT etre mise a la masse. A 3) Ne pas UN ADAPTATEUR OU UNE RALLONGE. 5) Ne pas Geller ni bloquer le flux d'air autour de Pappareil et que rien ne bouche le tuyau de sortie. 6) Debrancher - Haier CPN12XC9 | Product Manual - Page 16
Francais Instructions Importantes • Veuillez conserver ce manuel en lieu sOr. • N'utilisez pas de sur ses performances. S'il y a un besoin de maintenance, veuillez contacter le centre de service local ou le distributeur local. Merci d'avoir achete ce produit Amana. Veuillez lire attentivement ce - Haier CPN12XC9 | Product Manual - Page 17
du Produit 1 Precautions de Surete 2 Important Instructions 3 Avantages 4 Parties et caracteristiques S Assemble et Installations 6 Operation 7-8 Specification du Produit 9 Soins et nettoyage 9 Emmagasinage 9 Detections d'un probleme 10 lmformations de la garantie 11 - Haier CPN12XC9 | Product Manual - Page 18
Francais Assemblee et Installation 0 Les accessoires inclus NO 1. Panneau en plastique - De 20" (50 cm) jusqu'a 46" (116 cm) 3 pieces :!1)( A 4,"' 2. Adaptateur du vitrage 1 pike 3. Vis 4 pieces 4. Connecteur du tuyau d' - Haier CPN12XC9 | Product Manual - Page 19
Parties et Caracteristiques 1. Bouche d'aeration 2. Tableau de commande 3. Poignee 4. Support de la telecommande 5. Entrée d'air 6. Roulettes 7. Filtre a air 8. Tuyau d'ecoulement de l'eau 9. Cordon d'alimentation 1 2 4 --- 6 ----Ez7: Francais CORDON D'AUMENTATION 9 F. t 4-4 TEST: LORSQUE CE - Haier CPN12XC9 | Product Manual - Page 20
Francais Fonctionnement NOTE: Attendez 24 heures pour mettre le climatiseur en marche si l'appareil a ete penche pour quelque raison que ce soit. C'est necessaire pour que les huiles et les liquifies de refroidissement se mettre en place et se stabiliser. 1. Apres avoir eteint l'appareil normalement - Haier CPN12XC9 | Product Manual - Page 21
pour passer de °F a °C et vice-versa. NOTE: La temperature peut etre *lee entre 61°F (16°C) a 89°F (32°C). 0 LCD Display Quand le voyant lumineux STOP s'allume, le reservoir d'eau interne est rempli d'eau condensee et s'eteindra automatiquement. Voir « Entretien du climatiseur portatif pour des - Haier CPN12XC9 | Product Manual - Page 22
. Ventilateur: Le signe apparait sur l'ecran LCD en mode ventilation. Chauffage: Le signe apparait sur l'ecran LCD en mode chauffage. (CPN10XH9 & CPN12XH9 Only) • Vitesses de ventilation II y a 3 vitesses *stables dans le mode refroidissement et ventilation: Low, Medium et High (Bas, Moyen et Fort - Haier CPN12XC9 | Product Manual - Page 23
day) 8000BTU 75 Refrigerant R-22/11Oz Timer Operating Temperature Range Unit Dimensions (WxDxH) 950W 10000BTU 115V/60Hz nr9a0rO0WW (coon (HEAT) 10000BTU (coop 9000BTU (HEAT) 1200W 12000BTU (cool.) 1180W (HEAT) 12000BTU (Coot) 10000BTU (HEAT) 80 R-22/12Oz 24 Hours 100 R-410A/20.5Oz (580g - Haier CPN12XC9 | Product Manual - Page 24
Guide du reservoir indiquant qu'il est plain, appelez le service. Le climatiseur en marche, mais la salle ne se la propre installation du tuyau d'echappement. • Deviez le courant d'air. Enlevez tous l'air n'echappe pas de la salle. • Les filtres peuvet eke bloques ou doivent etre netoyes • Le BTU de - Haier CPN12XC9 | Product Manual - Page 25
de la date d'achat (frais de main d'oeuvre non compris apres les 12 premiers mois de couverture). Si I'appareil est utilise commercialement ou en location, la par un centre de reparation agree Haier America. • Les dommages survenant suite a une installation incorrecte. • Les dommages survenant lors - Haier CPN12XC9 | Product Manual - Page 26
, de bojo consumo de energia y proclico de utilizer. Este manual contiene information Oil pare la instalation, operation, mantenimiento y use seguro de este producto. Su Atonditionador- de aire limpia, enfria y deshumidifica el aire de la habitation cis manera de obtener el mayor nivel de comfort - Haier CPN12XC9 | Product Manual - Page 27
A instrucciones de este manual. (Ver tabla) 2) Contacte a un service autorizado para la aire alrededor de la unidad. Incluso Ia manguera de salida debe estar libre de cualquier obstruccion. 6) Siempre desenchufe el acondicionador antes de realizar reparaciones o translados del mismo. 7) No instale - Haier CPN12XC9 | Product Manual - Page 28
es necesario realizar mantenimiento, pongase en contacto con el centro de reparaciones local o con el distribuidor local. Gracias por comprar nuestro producto Amana. Lea este manual con atenciOn antes de poner la unidad en funcionamiento y conservelo para futuras consultas. Abroche su recibo al - Haier CPN12XC9 | Product Manual - Page 29
de seguridad 2 Important Instructions 3 Ventajas 4 Partes y caracteristicas 5 Ensamble 12 Ventajas de este Modelo 1 Diselio exclusivo de manguera dual, que proporciona un enfriamiento mess poderoso y rapido que con el diseno con una solo manguera. 2. DirecciOn regulable del flujo de aire - Haier CPN12XC9 | Product Manual - Page 30
de su ventana y ajuste los 2 tornillos que est& unidos al panel. 2. Presione el adaptador redondo pare el panel de la ventana a troves de la parte posterior del panel de plastic°. Alinee los agujeros y ajuste el adaptador con los 4 tornillos que se encuentran incluidos en el juego. (Ajuste los - Haier CPN12XC9 | Product Manual - Page 31
Partes y Caracteristicas 1. Salida de aire 2. Panel de control 3. Manija 4. Soporte pars el control remoto 5. Entrada de aire 6. Ruedecillas 7. Filira de aire 8. Desaglie de la salida de aqua 9. Cable de alimentacion 2 4 6 E ------- Espana 3 CABLE DE ALIMENTACIoN aea I TEST (PRUEBA): CUANDO SE - Haier CPN12XC9 | Product Manual - Page 32
antes de reiniciarla asi se complete el ciclo del compresor. 2. Utilice un tomacorriente de 115 voltios/15 amperes pare el acondicionador de aire. No utilice otros artefactos electricos en este linea, de lo contrario pueden salter los fusibles. Utilice una linea exclusive para este acondicionador - Haier CPN12XC9 | Product Manual - Page 33
cuando se encuentra en modo calefaccion. (CPN10XH9 y CPN12XH9 Only) ® Velocidades del ventilador Hay 3 velocidades horas hasta que se encienda .1acondicionador de airs. 1. Cuando utilice el baton de y 89°F. Pantalla LCD Cuando la luz indicadora STOP (DETENER) se enciende, el tanque de agua - Haier CPN12XC9 | Product Manual - Page 34
cuando se encuentra en modo calefaccion. (CPN1OXH9 y CPN12XH9 Only) Os I Velocidades del ventilador Hay 3 hasta que se encienda el acondicionador de aire. 1. Cuando utilice el baton de 61*F y 89°F. 0 Pantalla LCD Cuando la luz indicadora STOP (DETENER) se enciende, el tanque de agua interno se - Haier CPN12XC9 | Product Manual - Page 35
CPN10XC9 CPN10XH9 CPN12XC9 CPN12XH9 CPN12XC9-E Voltage and Frequency Input Power 800W Cooling Capacity Moisture Removal (pints/day) 8000BTU 75 Refrigerant R-22/11Oz Timer Operating Temperature Range Unit Dimensions (WxDxH) 950W 10000BTU 115V/60Hz 900W (woo 950W (HEAT] 1000OBTU (coot - Haier CPN12XC9 | Product Manual - Page 36
Siempre desenchufe la unidad antes de limpiar. • El filtro de aire del Acondicionador necesita ser limpiado por lo menos una vez por semana para que la unidad pueda funcionar al maxim° de eficiencia. El filtro puede retirarse de la parte trasera deslizando hacia adelante. El filtro puede ser lavado - Haier CPN12XC9 | Product Manual - Page 37
Retire los obsteculos. • Todas las puertas y ventanas deben estar cerradas de manera que el aire &fa no escape. • El filtro de aire puede estar bloqueado o necesita limpieza. • La unidad BTU puede ser chica para la habitaci6n. • En dias de calor y humedad extrema los Acondicionadores pueden demorar - Haier CPN12XC9 | Product Manual - Page 38
• Datios realizados por un service o persona no Si fuese de use comercial o renta la garantia autorizada por Haier America. adicional limitada del del periodo de 12 meses. Haier America reparani o cambiara (excluyendo los costos por labor) el sistema sellado o compresor (partes solamente) por - Haier CPN12XC9 | Product Manual - Page 39
- Haier CPN12XC9 | Product Manual - Page 40
Customer Satisfaction Center" at 1.877-337-3639. DATED PROOF OF PURCHASE REQUIRED FOR WARRANTY SERVICE IMPORTANT Ne pas Reexpedier ce Produit au Magasin Pour tout problems concernant ce produit, veuillez contactor le service des consommatcurs 'Haler Customer Satisfaction Center' au 1-877-337-3639
-
 1
1 -
 2
2 -
 3
3 -
 4
4 -
 5
5 -
 6
6 -
 7
7 -
8
-
9
-
10
-
11
-
12
-
13
-
14
-
15
-
16
-
17
-
18
-
19
-
20
-
21
-
22
-
23
-
24
-
25
-
26
-
27
-
28
-
29
-
30
-
31
-
32
-
33
-
34
-
35
-
36
-
37
-
38
-
39
-
40
 |
 |
COMMERakld.
4t230
PORTABLE
AIR
CONDITIONER
CLIMATISEUR
PORTATIF
ACONDICIONADOR
DE
AIRE
PORTATIL
----------
User
Manual,
Guide
de
l'Ufilisaleur,
Manual
del
Usario
CPNOBXC9,
CPN10XC9,
CPN10XH9,
CPN12XC9,
CPN12XC9-E,
CPN12XH9
Before
operating
this
air
conditioner,
please
read
these
instructions
completely.