Haier ESA418J User Manual - Page 5
Installation Instructions - dimensions
 |
View all Haier ESA418J manuals
Add to My Manuals
Save this manual to your list of manuals |
Page 5 highlights
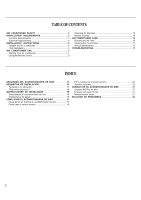
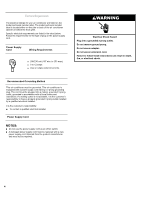
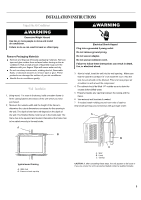
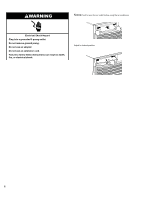
INSTALLATION INSTRUCTIONS Unpack the Air Conditioner Remove Packaging Materials ■ Remove and dispose of/recycle packaging materials. Remove tape and glue residue from surfaces before turning on the air conditioner. Rub a small amount of liquid dish soap over the adhesive with your fingers. Wipe with warm water and dry. ■ Do not use sharp instruments, rubbing alcohol, flammable fluids, or abrasive cleaners to remove tape or glue. These products can damage the surface of your air conditioner. ■ Handle the air conditioner gently. Wall Installation 1, Using wood, 1"or more in thickness, build a wooden frame to fit the casing/cabinet dimensions of the unit which you have purchased. 2, Measure the outside width and the height of the frame to determine the cutout dimensions necessary for the opening in the wall. The depth of the frame will depend on the depth of the wall. The finished frame must be set in the inside wall. The frame has to be squared and leveled. Remember the frame has to be nailed securely to the wall studs. A B typical wood framing A. Wall stud B. Frame or back-up strip 3 Now to install, insert the unit into the wall opening. Make sure that the cabinet is at least 1/2" inch inside the room. Also the side louvers should not be blocked. This is to have proper air circulation in and around the compressor. 4 The cabinet should be tilted 1/4" outside so as to drain the excess dehumidified water. 5 Properly insulate any opening between the casing and the frame. 6 Use external wall brackets if needed. 7 If needed,install molding around room side of cabinet. Seal small openings around window with gum-type sealer. A B C A. Wall B. Level C. Casing CAUTION: If, after completing these steps, the unit appears to be loose or if you are unsure the unit is properly installed,contact a qualified installer. 5
-
 1
1 -
 2
2 -
 3
3 -
 4
4 -
 5
5 -
 6
6 -
 7
7 -
 8
8 -
 9
9 -
 10
10 -
 11
11 -
12
-
13
-
14
-
15
-
16
-
17
-
18
-
19
-
20
-
21
-
22
-
23
-
24
 |
 |