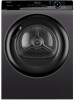
Haier HD100-A2939S User Manual
Haier HD100-A2939S Manual
 |
View all Haier HD100-A2939S manuals
Add to My Manuals
Save this manual to your list of manuals |
Haier HD100-A2939S manual content summary:
- Haier HD100-A2939S | User Manual - Page 1
User manual Heat-Pump-Dryer HD80-A2939 HD80-A2939S HD90-A2939 HD90-A2939S HD100-A2939 HD100-A2939S HD90-A3939 HD90-A3939S EN - Haier HD100-A2939S | User Manual - Page 2
you for purchasing a Haier Product. Please read this instruction carefully before using the appliance. The instruction contains important information which will guide you in order to have a safe and proper installation as well as daily use and maintenance. Keep this manual in a convenient place - Haier HD100-A2939S | User Manual - Page 3
information ...4 Installation pictures ...7 Intended use...8 Product description...9 Control panel...10 Programs...13 Consumption ...14 Suggestions and tips...15 Daily use...17 Care and cleaning...21 Troubleshooting ...24 Installation ...25 Technical data ...28 Customer Service ...30 3 - Haier HD100-A2939S | User Manual - Page 4
Remove all items such as lighters and matches from pockets. ▶ Fabric softeners, or similar products, should be used as specified by the fabric softener instructions. ▶ Do not use ore store any flammable sprays or flammable gas in close vicinity to the appliance. ▶ Do not place heavy objects or sources - Haier HD100-A2939S | User Manual - Page 5
EN 1-Safety information WARNING! Daily use ▶ Do not use the appliance to dry following items ▶ Items which are not washed. ▶ Items which have been contaminated with inflammable substances such as cooking oil, acetone, alcohol, benzine, petrol, kerosene, spot removers, turpentine, waxes, wax - Haier HD100-A2939S | User Manual - Page 6
. ▶ Do not use industrial chemicals to clean the appliance. ▶ If the supply cord is damaged, it must be replaced by the manufa- cturer, its service agent or similarly qualified persons in order to avoid a hazard. ▶ Do not try to repair the appliance by yourself.If a repair is needed, please contact - Haier HD100-A2939S | User Manual - Page 7
EN 12-1 12-2 12-3 2-Installation pictures two screws 12-7 12-8 12-11 12-10 12-9 12-13 12-12 7 - Haier HD100-A2939S | User Manual - Page 8
3-Intended use EN Intended use This appliance is intended for drying items which have been washed in a water solution and are marked on the manufacturer's care label as being suitable for tumble drying. It is designed exclusively for domestic use inside the house. It is not intended for commercial - Haier HD100-A2939S | User Manual - Page 9
the beep sounds. 5 Clean filter indicator Filters must be cleaned regularly. See Lint Filter Cleaning or Condenser Filter Cleaning section of the manual. Note: After each cycle, indicator will flash to remind cleaning the filters. English | 11 7 1 Water tank 2 Tumble dryer door 3 Control panel - Haier HD100-A2939S | User Manual - Page 10
5-Control pannel EN 5-1 2 5 13 14 4 15 3 9 10 7 12 11 6 1 8 Buzzer indicator Power 5.1 Delay button 5-2 Delay function allows users to delay the start time of the cycle. Press the button(Fig.5-2) to set the desired starting time (From 0 up to 12 hours). When activating,the indicator icon - Haier HD100-A2939S | User Manual - Page 11
,see Lint filter cleaning or Condenser filter cleaning section of this manual. Notice After each cycle, indicator will twinkle to remind cleaning is not included) ( F ig. 5-10). See Program Modes section of the manual for further information. 5-11 5-12 Dry Level 5.10 Power Turn the knob to any - Haier HD100-A2939S | User Manual - Page 12
water tank should be emptied (Fig. 5-14). Important: Empty the water tank after each drying cycle. See Empty the water tank section of the manual. 5.14 Display The display shows the remaining time, the delay time and other related information. 5-13 Childlock 5-14 5-15 Notice The remaining time is - Haier HD100-A2939S | User Manual - Page 13
through the drain hose when drying a full load using the Cotton program. This will avoid to empty the water tank during the cycle. **) I-Refresh is a Haier patent-owned function that aims to remover odors and wrinkles, as well as refresh clothes in a short time. By rotate and shake, wind blows in - Haier HD100-A2939S | User Manual - Page 14
is outstanding in terms of efficient energy consumption. These are guide values determined under standard conditions. The values may differ be dried, the residual moisture and the actual loading. Program Cotton / Linen (10kg A++) Cupboard Spin speed in rpm Restidual moisture in % Time in h:min 1000 - Haier HD100-A2939S | User Manual - Page 15
choose a different brand. In any case note the manufacturer's instructions. 8.4 Small amounts of filling In a quantity of less than 1.0 the door seal can remain effective for a long time. 8.6 Service flap Make sure that the service flap is always closed during operation. 8.7 Anti crease protection A - Haier HD100-A2939S | User Manual - Page 16
8-Suggestions and tips EN 8.10 Extra large pieces W hen cycle ends, if the desired dry level is not achieved , loosen up the laundry and dry again with the time program (TIMER ). 8.11 Especially delicate fabrics Textiles which can easily shrink or lose their shape, as well as silk stockings, - Haier HD100-A2939S | User Manual - Page 17
place small items uch as socks, bras etc. in a wash bag. ▶ Unfold bulky items of fabric such as bed sheets, table cloth etc. ▶ Follow the instructions on the laundry label and dry those garments that can be dried by machine. Tips: ▶ Separate white clothes from coloured ones. ▶ Bed linen and - Haier HD100-A2939S | User Manual - Page 18
9-Daily use EN Load Reference Bed sheet (single) Blended fabric clothes Jackets Jeans Overalls Pyjamas Shirts Socks T-Shirts Underwear Composition Cotton / Cotton / Cotton / / Blended fabrics Cotton Blended fabrics Average weight per item Approx. 800 g Approx. 800 g Approx. 800 g Approx. 800 g - Haier HD100-A2939S | User Manual - Page 19
EN 9-Daily use Notice PANEL Fabric softeners or similar products should be used as specified in the manufacturer's instructions. 9-8 9.6 Set program and start i-REFRESH Dry Level Delay Childl ock T emp. Wrinkle Free i-Re fres h 9-9 Cotton Remote Mix Wool Synthetics Quick Dry Timer Towel - Haier HD100-A2939S | User Manual - Page 20
9-Daily use Care chart Washing Washable up to 95°C normal process Washable up to 40°C normal process Washable up to 30°C normal process Wash by hand max. 40°C Bleaching Any bleaching allowed Drying Tumble drying possible normal temperature Line drying Ironing Iron at a maximum temperature up to 200 - Haier HD100-A2939S | User Manual - Page 21
EN 10-1 2 10-2 10-Care and cleaning 10.1 Lint filter cleaning Clean the lint filter after each dry cycle. 1. Remove the lint filter from the drum (Fig. 10-1). 2. Open up the lint filter (Fig. 10-2). 10-3 3. Remove the lint residuals from lint filter (Fig. 10-3). 10-4 4. Reinstall the cleaned lint fi - Haier HD100-A2939S | User Manual - Page 22
10-Care and cleaning 10.3 Empty the water tank During operation, steam is condensed into water and collected in the water tank. Empty the water tank after each drying cycle. 1. Pull out the water tank from its housing (Fig. 10-9). 2. Empty the water tank (Fig. 10-10). 9kg A++ i-REFRESH EN 10-9 - Haier HD100-A2939S | User Manual - Page 23
EN 11-Troubleshooting Many problems can be solved by yourself without specific expertise. please check all shown possibilities and follow below instructions before you contact an after sales service. See CUSTOMER SERVICE. WARNING! ▶ Before maintenance, turn off the appliance and disconnect the - Haier HD100-A2939S | User Manual - Page 24
11-Troubleshooting EN Troubleshooting without display-codes Problem Possible cause Possible solution Tumble dryer fails to operate. • Poor connection to the power • Check connection to the pow- supply. er supply. • Power failure. • Check - Haier HD100-A2939S | User Manual - Page 25
Installation Notice: all installation relevant pictures can be found at the beginning of this manual. 12.1 Preparation ▶ Remove all packages including the polystyrene base firstly. While cord is damaged, it must be replaced by the service agent (see warranty card) in order to avoid a hazard! 25 - Haier HD100-A2939S | User Manual - Page 26
machine is suitable for this purpose. Stacking information, as well as the corresponding mounting kit are available via your local dealer. The mounting instructions are supplied with the kit which thoroughly inform the installation steps. 12.7 level the dryer Level the dryer side to side(Fig.12 - Haier HD100-A2939S | User Manual - Page 27
EN 12-Installation 12.8 Draining Remove the black hose from the connection at the back of the dryer(Fig.12-11). Uncoil the drain hose (included with your dryer) and connect it to the black hose(Fig.12-12). Place the other end of the drain hose into a tub or standpipe(Fig.12-13). Temp. - Haier HD100-A2939S | User Manual - Page 28
13-Technical data EN Productfiche (acc. to EU 392/2012) Trade mark Model identifier Haier HD80-A2939 HD90-A2939 HD100-A2939 HD90-A3939 HD80-A2939S HD90-A2939S HD100-A2939S HD90-A3939S Rated capacity (kg) Kind of tumble drier Energy efficiency class Weighted Annual Energy Consumption (AEc in kWh/ - Haier HD100-A2939S | User Manual - Page 29
EN 13-Technical data 1) Based on 160 drying cycles of the standard cotton program at full and partial load, and the consumption of the low-power modes. Actual energy consumption per cycle will depend on how the appliance is used. 2) In case there is a power management system. 3) This program used - Haier HD100-A2939S | User Manual - Page 30
and the use of original spare parts. If you have a problem with your appliance, please first check section TROUBLESHOOTING. If you cannot find a solution there, please contact ▶ your local dealer or ▶ the Service & Support area at www.haier.com where you can find telephone numbers and FAQs and where - Haier HD100-A2939S | User Manual - Page 31
HD80-A2939/HD80-A2939S/HD90-A2939/HD90-A2939S/HD100-A2939/HD100-A2939S/HD90-A3939/HD90-A3939S
-
 1
1 -
 2
2 -
 3
3 -
 4
4 -
 5
5 -
 6
6 -
 7
7 -
8
-
9
-
10
-
11
-
12
-
13
-
14
-
15
-
16
-
17
-
18
-
19
-
20
-
21
-
22
-
23
-
24
-
25
-
26
-
27
-
28
-
29
-
30
-
31
 |
 |

EN
HD80-A2939
HD80-A2939S
HD90-A2939
HD90-A2939S
HD100-A2939
User manual
Heat-Pump-Dryer
HD100-A2939S
HD90-A3939
HD90-A3939S