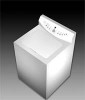
Haier RWT300AW User Manual
Haier RWT300AW Manual
 |
View all Haier RWT300AW manuals
Add to My Manuals
Save this manual to your list of manuals |
Haier RWT300AW manual content summary:
- Haier RWT300AW | User Manual - Page 1
Top Load Clothes Washer User Manual Model # RWT200AW, RWT300AW, RWT400AW Quality . Innovation . Style - Haier RWT300AW | User Manual - Page 2
complete stop before use. 14. Washer loading door must be closed when agitator and tub is spinning. 15. Do not operate your washer when parts are missi ng or parts are broken. 16. Do not use the washer for commercial clothes washing. 17. Do not operate washer unless all enclosure panels are properly - Haier RWT300AW | User Manual - Page 3
explode. SAVE THESE INSTRUCTIONS For Future Use DANGER Risk of child entrapment. Before you throw away your old washer, take off the door so that children may not easily get trapped inside. Thank you for using our Haier product. This easy-to-use manual Model number will guide you in getting the - Haier RWT300AW | User Manual - Page 4
Lid Switch 13 Care and Cleaning Guide 14 Cleaning and Maintenance 14 Moving and Vacationing 15 Storage of Your W asher 15 Tr oubleshooting 16 INSTALLA TION INSTRUCTIONS 18 Tools and Materials Required 18 Unpacking Your Washer 19 LevelingYour Washer 19 Steps for Installation 20 Electrical - Haier RWT300AW | User Manual - Page 5
OPERATING INSTRUCTIONS Parts and Features 7 8 1 9 2 3 4 5 6 English 10 11 12 13 14 15 1. Top Lid 2. Control Panel 3. Inner Wash Tub 4. Agitator 5. Cabinet 6. Control Panel Seat 7. Liquid Fabric Softener Dispenser 8. Door Switch 9. Bleach Injection Inlet 10. Cold Water Inlet Valve 11. Hot - Haier RWT300AW | User Manual - Page 6
or pause. During Pre-wash, Wash or Rinse, press this button to manually replenish water. Release to stop. Function automatically is inactive when water reaches overflow protection level. Speed Wash/Spin Select spin speed when program is in Normal or Delicate Casual cycle. Note: Flashing light - Haier RWT300AW | User Manual - Page 7
This is to select a wash process. Pre-wash will not work in the Hand Wash, Delicate Casual and Quick Wash Cycles. Water level indicator will shut off if only Spin is selected. Once a program is selected press the Process Select button to have Extra Rinse. The washer will add a Extra Rinse. Delay - Haier RWT300AW | User Manual - Page 8
of Cycles When the washer is powered on the Normal cycle is the default cycle. If other cycle is required press the cycle button for desired program. 3. Process Select Once the power is switched on the washing machine will automatically set the Normal cycle which will Wash, Rinse and Spin. If - Haier RWT300AW | User Manual - Page 9
spin after drain) after hand wash Pre-wash Wash Rinse Extra Rinse Spin 5 (first drain and then spin) 7 Pre-wash, Wash For heavily soiled clothes shirt cuffs and collars, Pre-wash Wash Rinse Extra Rinse Spin / Rinse, Spin first Pre-wash and then wash 4. Load Size After Wash Cycle selection - Haier RWT300AW | User Manual - Page 10
the running program, the washer will have to be reset. 10. Start/Pause Press this button when you want the machine to start. During operation press this button to pause and press it again to resume operation. Note: By opening the top lid will stop the machine except for water filling or draining. 9 - Haier RWT300AW | User Manual - Page 11
Wash About 38-44 English Note: Total time may be affected by water inlet and drain . Do not overload your washer. When loading wet items, agitator. Close the door properly after loading the clothes. If you keep the lid up, the agitation will not start. Proper Use of Deter gent: It is good washing - Haier RWT300AW | User Manual - Page 12
top of the agitator. Dispenser will automatically release liquid fabric softener at proper time during rinse cycle. Steps to use washer during its first spin or dispenser will automatically release the softener in to the wash load. Do not use powder form of softener into dispenser otherwise it will - Haier RWT300AW | User Manual - Page 13
during the operation of the washer: Tumbling sounds: This is normal as the heavy wet clothes in the Washer are continuously being tossed around. Air rushing noise: This happens when the Washer tub spins at very high RPM. Wash and Rinse cycles going on and off will also make clicking sounds. 12 - Haier RWT300AW | User Manual - Page 14
lint filter After cleaning, install the screen back onto the lint filter. Then put the lint filter back in the agitator barrel. Safety Lid Switch If for any reason you open the lid in the middle of the wash cycle, the washer will not spin and will shut off automatically. Once the lid is closed, the - Haier RWT300AW | User Manual - Page 15
, solvents or metal scouring pads. Some of these chemicals may dissolve, damage and/or discolor your washer. Remove pins or other sharp objects from clothes to prevent scratching of interior parts. Leave Lid open after you are done washing to allow inside of washer to dry and prevent bad odors. 14 - Haier RWT300AW | User Manual - Page 16
water supply faucet's and disconnect hoses. Drain water from all hoses. This will prevent from damaging due to water leakage if the hoses accidentally get ruptured or they become loose. Disconnect electrical plug. Dr y inner wash tub. If moving washer, disconnect drain hose. Turn the leveling legs - Haier RWT300AW | User Manual - Page 17
cycle, which has short soak period where your clothes are being soaked for ver y short period of time. You will not hear washer operation for a short period of time. When the soak time is over, it will due to not properly installing drain hose or fill hoses. Your home drain may be clogged or having - Haier RWT300AW | User Manual - Page 18
Guide - Normal Operating Sounds). Squealing Sound: Due to overloaded wash tub. Vibration Noise: Due to not leveling washer instructions You will need wash. Note: Tr ouble Codes E0 E1 E2 E4 17 Reason Top lid not closed during delay start sequence Blockage of drain hose Top lid not closed during wash - Haier RWT300AW | User Manual - Page 19
INSTALLATION INSTRUCTIONS Tools and Materials Required You will need to have following tools to help you in the installation of your W asher: Pliers W rench Tape Measure Gloves Level English Accessories Supplied 1. Hot & Cold water inlet hoses 2. Drain Hose Hook 3. Drain Hose Clamp 4. Outer Drain - Haier RWT300AW | User Manual - Page 20
placing your washer in its final position, you can level your washer. Leveling legs can be adjusted by turning them counterclockwise to raise your washer or turning them clockwise to lower your washer. High Low Warning: Leveling of washer is very important to prevent vibration during spin. 19 - Haier RWT300AW | User Manual - Page 21
leveling legs located on the bottom corners of the washer. The washer must be placed at room temperature. You must not place washer where the temperature is at below freezing. Installing Your Washer: Read installation instructions carefully before installation. Caution: If, after completing these - Haier RWT300AW | User Manual - Page 22
°F. (49°C- 60°C) for the soap to dissolve and to avoid soap residue remaining on clothes. 4. Using the drain hose clamp, attach the drain hose to the unit as shown below. Install the drain hose hook to the outer drain hose tube. 5. Plug in the Washer to a regular 115 volt / 60 Hz, 15 amp outlet. 21 - Haier RWT300AW | User Manual - Page 23
electric shock. Consult a qualified electrician or service person if the grounding instructions are not completely understood or if doubt exists as to whether the appliance is properly grounded. Wiring Requirements: The washer must - Haier RWT300AW | User Manual - Page 24
Damage from service other than an Haier will provide the transmission assembly. authorized Haier dealer or service center. Haier will provide the manual. Haier will provide the inner stainless steel Hoses, knobs, lint trays and all attachments, wash tub. accessories and disposable parts. - Haier RWT300AW | User Manual - Page 25
IMPORTANT Do Not Return This Product To The Store If you have a problem with this product, please contact the " Customer Satisfaction Center" at 1-877-337-3639. DATED PROOF OF PURCHASE REQUIRED FOR WARRANTY SERVICE 120 V, 60 Hz Made in China RWT200AW-01 Issued: JanuarY-06 America New York,
-
 1
1 -
 2
2 -
 3
3 -
 4
4 -
 5
5 -
 6
6 -
 7
7 -
8
-
9
-
10
-
11
-
12
-
13
-
14
-
15
-
16
-
17
-
18
-
19
-
20
-
21
-
22
-
23
-
24
-
25
 |
 |
