Hannspree HF235DPB User Manual - Page 13
FRONT PANEL CONTROL, Restore Brightness and Contrast defaults - model
 |
View all Hannspree HF235DPB manuals
Add to My Manuals
Save this manual to your list of manuals |
Page 13 highlights
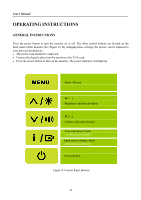
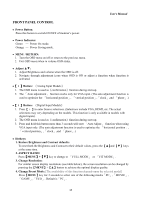
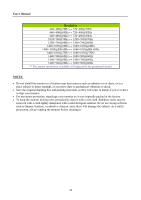
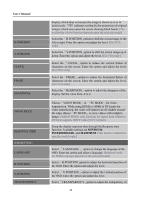
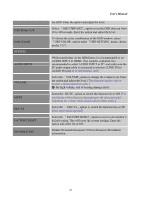
User's Manual FRONT PANEL CONTROL • Power Button: Press this button to switch ON/OFF of monitor's power. • Power Indicator: Green - Power On mode. Orange - Power Saving mode. • MENU / RETURN: 1. Turn the OSD menu on/off or return to the previous menu. 2. Exit OSD menu when in volume OSD status. • Adjust ▲▼: 1. Adjust Brightness and volume when the OSD is off. 2. Navigate through adjustment icons when OSD is ON or adjust a function when function is activated. •【 i 】Button: 《Analog Input Models》 1. The OSD menu is used as《confirmation》function during start-up. 2. The 「Auto adjustment」 function works only for VGA input. (The auto adjustment function is used to optimize the 「horizontal position」, 「vertical position」,「clock」,and 「phase」.) •【 i 】Button: 《Digital Input Models》 1. Press【 i 】to enter Source selections. (Selections include VGA, HDMI, etc. The actual selections may very depending on the models. This function is only available in models with digital inputs) 2. The OSD menu is used as《confirmation》function during start-up. 3. Press and hold this button more than 3 seconds will start 「Auto Adjust」 function when using VGA input only. (The auto adjustment function is used to optimize the 「horizontal position」, 「vertical position」,「clock」,and 「phase」.) • Hotkeys: 1. Restore Brightness and Contrast defaults: To reset both the Brightness and Contrast to their default values, press the 【▲】and 【▼】 keys at the same time. 2. ASPECT RATIO: Press【MENU key to change to 「FULL MODE」 or 「FIT MODE」. 3. Change Resolution: For similar screen display resolutions (see table below), the screen resolution can be changed by pressing the【MENU button to achieve the optimal display quality. 4. Change Preset Mode: [The availability of this function depends upon the selected model] Press【MENU】key for 3 seconds to select one of the following modes「PC」,「MOVIE」, 「GAME」,「ECO」. Default is「PC」. 13
-
 1
1 -
2
-
3
-
4
-
5
-
6
-
7
-
 8
8 -
 9
9 -
 10
10 -
 11
11 -
 12
12 -
 13
13 -
 14
14 -
 15
15 -
 16
16 -
 17
17 -
 18
18 -
19
-
20
-
21
-
22
-
23
 |
 |