Harman Kardon CP 45 Owners Manual
Harman Kardon CP 45 Manual
 |
View all Harman Kardon CP 45 manuals
Add to My Manuals
Save this manual to your list of manuals |
Harman Kardon CP 45 manual content summary:
- Harman Kardon CP 45 | Owners Manual - Page 1
AVR 245 AUDIO/VIDEO RECEIVER OWNER'S MANUAL - Harman Kardon CP 45 | Owners Manual - Page 2
or cable system is grounded so as to provide some protection against voltage surges and built-up static charges. Article 810 of the National Electrical Code, ANSI/NFPA 70, provides information with regard to proper grounding of the mast and supporting structure, grounding of the lead-in wire to an - Harman Kardon CP 45 | Owners Manual - Page 3
service center with a cord meeting factory specifications AVR 245 and the heat generated by the amplifiers, there is the remote factors beyond Harman Kardon's control, including user's authority to operate the equipment. Unpacking The carton and shipping materials used to protect your new receiver - Harman Kardon CP 45 | Owners Manual - Page 4
STAPLE INVOICE HERE 4 - Harman Kardon CP 45 | Owners Manual - Page 5
Size Menu 51 Speaker Crossover Menu 51 Delay Adjust Menu 52 Step Four - Setting Channel Output Levels Manually 53 Multiroom Operation 54 Installing a Multiroom System 54 Operating the Multiroom System 54 System Settings 55 Dim Function 55 Advanced Remote Control Functions 56 - Harman Kardon CP 45 | Owners Manual - Page 6
experience. In the years since our first single-channel component was introduced, Harman Kardon has offered a number of receiver models, each an improvement upon its predecessors, leading to the AVR 245, a 7.1-channel digital audio/video receiver that offers a wealth of listening and viewing options - Harman Kardon CP 45 | Owners Manual - Page 7
power outlet • Remote infrared (IR) input and output • Multiroom IR input Supplied Accessories The following accessory items are supplied with the AVR 245. If any of these items are missing, please contact Harman Kardon customer service at www.harmankardon.com. • System remote control • EzSet - Harman Kardon CP 45 | Owners Manual - Page 8
. Tone Mode: Press this button to access the tone controls (bass and treble). Use the ‹/› Navigation Buttons to make your selections. Speaker: Press this button to configure speaker sizes, that is, the low-frequency-range capability of each speaker. Channel Level Adjust: Press this button to set the - Harman Kardon CP 45 | Owners Manual - Page 9
Band Source Input Tuning Select Mode Digital Audio Inputs Analog Audio Inputs Video Inputs NOTE: To make it easier to follow the instructions throughout the manual that refer to this illustration, a copy of this page may be downloaded from the Product Support section at www.harmankardon.com - Harman Kardon CP 45 | Owners Manual - Page 10
jack to control the AVR and any source devices connected to the Remote IR Output from the remote zone. Video 1, Video 2, Video 3 and DVD Audio/Video Inputs: These jacks may be used to connect your video-capable source components (e.g., VCR, DVD player, cable TV box) to the receiver. Remember to - Harman Kardon CP 45 | Owners Manual - Page 11
in case Harman Kardon offers a software upgrade for the receiver at some time in the future. RS-232 Mode: Leave this switch popped out in the Operate position unless the AVR 245 is being upgraded. RS-232 Reset: This switch is only used during a software upgrade. A standard processor reset is - Harman Kardon CP 45 | Owners Manual - Page 12
Reset Component Video Monitor The Bridge/ DMP HDMI 1 Input HDMI Output Outputs Input HDMI 2 Input AC Power Cord RS-232 Serial Port RS-232 Mode Tape Remote Preamp Outputs IR Input Outputs Surround Back/ Multiroom Preamp Outputs Tape CD Inputs Inputs Multiroom Subwoofer Remote IR Input - Harman Kardon CP 45 | Owners Manual - Page 13
Press this button to select the 6-/8-Channel Inputs as the audio source. The receiver will use the video input and remote control codes for the last-selected video source. Test Tone: Press this button to activate the test tone for manual output-level calibration. TV/Video: This button has no effect - Harman Kardon CP 45 | Owners Manual - Page 14
Off Input Selectors 6-Channel Input Selector TV/Video Volume Control Multiroom Speaker Setup Navigation Set Delay Numeric Keys Memory Clear Preset Stations Selectors Disc Skip Macros Surround Mode Selectors Dim NOTE: To make it easier to follow the instructions throughout the manual that refer to - Harman Kardon CP 45 | Owners Manual - Page 15
surrounding this area of the remote - Channel Level, Speaker Setup, Digital Input or Delay. Digital Input Select: Press this button to select the specific digital audio input (or analog audio input) you used for the current source. Delay: Press this button to set delay times that compensate for - Harman Kardon CP 45 | Owners Manual - Page 16
EX, DTS-ES (Discrete and Matrix) and Logic 7 (7.1 modes). However, the surround back speakers are optional. In fact, the AVR 245 enables you to set up a 5.1-channel system in 16 your main listening area, and reassign the surround back channels for use with a multiroom system, in which you use the - Harman Kardon CP 45 | Owners Manual - Page 17
while you set up your system. Table 1 - Connection Color Guide Audio Connections Front (FL/FR) Center (C) Surround (SL/SR) Surround Back (SBL/SBR) Subwoofer (SUB) Digital Audio Connections Coaxial Optical Video Connections Component Y Composite S-Video HDMI™ Connections (switching - Harman Kardon CP 45 | Owners Manual - Page 18
on the receiver. See Figure 8. Dock your iPod (not included) in The Bridge, and you may listen to your audio materials through your high-performance audio system. You may even use the AVR 245 remote to control the iPod, with navigation messages displayed on the front panel and on a video display - Harman Kardon CP 45 | Owners Manual - Page 19
guide pin. Be careful to line up the plug correctly when you insert it into the jack on the receiver, source or video display. See Figure 11. Figure 14 - AM Antenna RS-232 Serial Port The RS-232 serial port on the AVR 245 is used only for data. If Harman Kardon releases a software upgrade for - Harman Kardon CP 45 | Owners Manual - Page 20
section. However, Harman Kardon recommends using the AVR 245 in a 5.1- or 7.1-channeCl configSUuB ration for optimal surround sound performancFeL. FR 30° 30° 90° SUB 90° SL SR 150° C 150° FL FR SB3L 0° 30° SBR Placement of Surround Speakers in a 5.1-Channel System The side - Harman Kardon CP 45 | Owners Manual - Page 21
need to follow the directions in the Advanced Features section for manual setup of the surround back speaker. Subwoofer Placement The subwoofer's location is less critical, since low-frequency sounds are omnidirectional. Placing the subwoofer close to a wall or in a corner will reinforce the low - Harman Kardon CP 45 | Owners Manual - Page 22
Setup section before connecting it to the Surround Back Left speaker outputs. Step Two - Connect the Subwoofer Connect the Subwoofer Output on the AVR 245 to the line-level input on your subwoofer. See Figure 18. Consult the manufacturer's guide for the subwoofer for additional information. AVR - Harman Kardon CP 45 | Owners Manual - Page 23
your receiver and remote control. However, you may connect any device to any source input. Table 2 - Recommended Source Component Connections Device Type AVR 245 Source Input Audio Connections Video Connections VCR, DVR, PVR, TiVo or other audio/video recorder Video 1 Cable TV, satellite TV - Harman Kardon CP 45 | Owners Manual - Page 24
Video Inputs Video 3 Source The Video 3 source is used for playback only, never recording. The remote control is programmed to accept codes that will operate a TV, but you may connect any audio/video source device to the Video 3 inputs and use the device's own remote to control it. If you receive - Harman Kardon CP 45 | Owners Manual - Page 25
to the Optical 2 digital audio input on the AVR 245, or use the 6-/8-channel inputs. See Figure 27. You will also need to make sure your video display is HDMI-capable, and for many source devices, the display must be HDCP-compliant (High-Bandwidth Digital Content Protection) in order to display - Harman Kardon CP 45 | Owners Manual - Page 26
to the AVR 245, and you will also need to consult the owner's guide for your television to learn the proper procedure for disabling or muting the audio. Figure 31 - HDMI Output If you used component video for any sources, connect the Component Video Monitor outputs on the receiver to one set of - Harman Kardon CP 45 | Owners Manual - Page 27
activated, then press another source selector, such as Video 1, the next time you press the DVD/CD Selector, the remote will return to the CD device mode. The AVR 245's remote is factory-programmed to control an iPod docked in The Bridge and many Harman Kardon DVD and CD players. If you have other - Harman Kardon CP 45 | Owners Manual - Page 28
to switch the remote's device mode. See pages 56-57 for instructions on these advanced programming functions. NOTE: The AVR 245 remote is preprogrammed to operate the transport controls of Harman Kardon DVD players when the AVR or the Video 2 (cable/satellite) or Video 3 (TV) source is selected - Harman Kardon CP 45 | Owners Manual - Page 29
on the remote (i.e., DVD/CD, TAPE/The Bridge, HDMI 1/HDMI 2, VID1, VID2, VID3 or VID4), the remote will switch modes so that it will only transmit the codes programmed to operate that device. In order to control the receiver, you will need to press the AVR button to return the remote to AVR mode. 29 - Harman Kardon CP 45 | Owners Manual - Page 30
should be able to turn on the receiver and view a blue screen on your video display. If necessary, reread the Installation Section before continuing. Configure the AVR 245 Using EzSet+ One of the most important and perhaps often overlooked aspects of setting up a home theater system is to calibrate - Harman Kardon CP 45 | Owners Manual - Page 31
42 - Plug EzSet+ microphone into receiver. Step Three - Make sure that the AVR 245 and the video display are turned on. Press the OSD Button to display the Master Menu. See Figures 40 and 41. Use the ⁄/¤ Buttons to move the cursor to the EzSet+ line, and then press the Set Button to select the EzSet - Harman Kardon CP 45 | Owners Manual - Page 32
on the remote, and the cursor will move to the BACK TO MASTER MENU line, giving you an opportunity to exit the on-screen menu system What EzSet+ Does EzSet+ will send test signals to the various speakers and perform the measurements described in this section, adjusting the AVR 245's settings to - Harman Kardon CP 45 | Owners Manual - Page 33
INITIAL SETUP Figure 51 - EzSet+ - Speaker Delay NOTE: The AVR 245 is also capable of setting a different type of delay, called A/V Sync Delay. A/V Sync Delay is used to compensate for lip sync problems that may occur when a video display device or set-top box causes delays while digital video - Harman Kardon CP 45 | Owners Manual - Page 34
video format, it is not processed or upscaled. Figure 55 - Input Setup Menu Screen for DMP/The Bridge source Since The Bridge is connected to the AVR using a dedicated audio connection, it isn't possible to select a different audio input for this source. However, there are several special settings - Harman Kardon CP 45 | Owners Manual - Page 35
Standby mode (but not completely off). When CHARGE IN ST-BY is set to OFF, the iPod will only charge when the AVR is turned on. NOTE: In order to access the DMP SETTING menu, you need to press the AVR Selector on the remote so that it operates the AVR 245. You may then press the OSD Button - Harman Kardon CP 45 | Owners Manual - Page 36
, VID2, VID3, VID4 or HDMI 1/HDMI 2), the remote will switch modes so that it will transmit only the codes programmed to operate that device. In order to control the receiver, you will need to press the AVR Button to return the remote to AVR mode. To turn the receiver off, press either the Standby - Harman Kardon CP 45 | Owners Manual - Page 37
: The AVR 245 does not have a conventional balance control. The EzSet+ process compensates for any characteristics of your room or speakers, and we recommend that you leave the settings as they are after EzSet+ has been run. However, you may manually adjust the levels of the left and right channels - Harman Kardon CP 45 | Owners Manual - Page 38
the semi-OSD, unless you have set the semi-OSD to OFF in the System Setup menu, as described in the Advanced Functions section. Audio Input Selection The AVR 245 is programmed at the factory to use the analog audio inputs for each source (except for the DVD, Video 2, HDMI 1 and HDMI 2 sources; see - Harman Kardon CP 45 | Owners Manual - Page 39
Connect the player's 6-channel analog audio outputs to the AVR's 6-/8-Channel Inputs and then select the CONVERT setting at the COMPONENT IN line to avoid inadvertently selecting the video signal from another device. d) Program the player's remote control codes into the HDMI 1 Input Selector. When - Harman Kardon CP 45 | Owners Manual - Page 40
the Direct Button first. 2. Press the Tuning Buttons on the front panel or remote to scan through the channels. Auto tuning mode is not available. 3. The AVR 245 is capable of storing up to 40 XM Radio preset channels. The presets are divided into five banks, denoted by the letters A through E, with - Harman Kardon CP 45 | Owners Manual - Page 41
input on the AVR 245 and the iPod is docked, you may play the audio materials on your iPod through your high-quality audio system, operate the iPod using the AVR remote or the AVR's front-panel controls, view navigation messages on the AVR's front panel or a connected video display, and charge - Harman Kardon CP 45 | Owners Manual - Page 42
that may be made. You are now ready to enjoy the best in home theater entertainment with your AVR 245. As you become more familiar with the receiver, you may wish to explore some of its advanced functions, which are described in the following section. Figure 76 - Select a Surround Mode (Remote) 42 - Harman Kardon CP 45 | Owners Manual - Page 43
Off icons will be lit when this mode is active. Press the Stereo Button on the remote repeatedly to select this mode. 3. Analog Surround Modes: One of the main benefits of a surround receiver such as the AVR 245 is its ability to process 2-channel audio signals to produce multichannel surround sound - Harman Kardon CP 45 | Owners Manual - Page 44
Dolby Digital 2.0 (2-channel) or PCM 2-channel mode. If the main title is playing and the letters in the Speaker/Channel Input Indicators are not lit for all speaker locations, look for an audio setup section in the disc's menu. Also, make sure your DVD player's audio output is set to the original - Harman Kardon CP 45 | Owners Manual - Page 45
in some low-resolution sources. Default Modes During initial use or after a processor reset, the AVR 245 will default to the Logic 7 Music mode for all analog and PCM audio inputs. Subsequently, when a source input is selected and an analog or PCM signal is received, the AVR will switch to the last - Harman Kardon CP 45 | Owners Manual - Page 46
An expansion of Dolby Pro Logic II that adds a surround back channel which may be played through one or two surround back speakers. The Dolby Pro Logic IIx modes may be selected not only with Dolby Digital bitstreams, but thanks to the AVR 245's post-processor, they may also be used with some DTS - Harman Kardon CP 45 | Owners Manual - Page 47
from two- or three-speaker mode, depending on how many physical speakers are in your system. • Dolby Digital (uses only two-speaker mode when signal does not contain center channel information) • Analog (2-channel) • Tuner • PCM (44.1kHz or 48kHz) Dolby Virtual Speaker Wide mode may be used with - Harman Kardon CP 45 | Owners Manual - Page 48
44.1kHz or 48kHz) Available only in 5- and 6-channel modes, creates a surround presentation suitable for music recordings. • DTS 2/2/.0 or .1, 3/2/.0 or .1 • DTS 96/24 • Analog (2-channel) • PCM (44.1kHz or 48kHz) Exclusive to Harman Kardon, Logic 7 enhances 2-channel and matrix-encoded See below - Harman Kardon CP 45 | Owners Manual - Page 49
which may usually be found in the owner's guide for the speakers or on the manufacturer's Web site. If necessary, contact the manufacturer to obtain the frequency range specification. Although the output-level setting portion of manual setup may be performed "by ear," we recommend that you purchase - Harman Kardon CP 45 | Owners Manual - Page 50
the surround back speakers. The AVR 245 is one of the few receivers in its class to include multiroom capability. With assignable surround back amplifier channels, setting up a multiroom system is more convenient than ever, no longer requiring an external amplifier to power the remote speakers. This - Harman Kardon CP 45 | Owners Manual - Page 51
82 - Speaker/Channel Input Indicators Speaker Crossover Menu On the Manual Setup menu, move the cursor to the SPEAKER X-OVER line and press the Set Button to display the Speaker Crossover menu. See Figure 83. Figure 83 - Speaker Crossover Menu Screen Setting the Speaker Crossover menu correctly - Harman Kardon CP 45 | Owners Manual - Page 52
to the previous display, or wait a few seconds for the AVR to return to normal operation on its own. Step Four - Setting Channel Output Levels Manually For a conventional 2-channel receiver, the balance control enables the user to control the stereo imaging by adjusting the relative loudness of the - Harman Kardon CP 45 | Owners Manual - Page 53
levels will be reset, and this setting will then revert to OFF. If you are using an external source to set your output levels, simply navigate to each channel and use the ⁄/¤ Buttons to adjust the level as desired. If you would like to set your levels using the AVR 245's internal test tone, you will - Harman Kardon CP 45 | Owners Manual - Page 54
the main AVR 245 remote control in the remote zone, or you may purchase a second-zone remote by contacting Harman Kardon customer service through our Web site. Operating the Multiroom System The AVR 245's multiroom system is accessed using the on-screen MULTI ROOM SETUP menu. Press the OSD Button to - Harman Kardon CP 45 | Owners Manual - Page 55
receiver is turned on 2. Press the Set Button on the front panel and hold it for about five seconds. A message indicating the current brightness setting (see above) will appear in the display. Use the front-panel ‹/› Buttons to change the setting. Advanced Remote Control Functions The AVR 245 remote - Harman Kardon CP 45 | Owners Manual - Page 56
AVR to control surround modes and other audio functions, you may operate the transport controls of your DVD player. Or while using the remote to control video functions on your TV, you may use your cable box to change channels and the AVR to control is to access the DMP SETTING menu (Figure 56) while - Harman Kardon CP 45 | Owners Manual - Page 57
optional Harman Kardon HE 1000, to the Remote IR Input jack. When you are using the AVR 245 in multiroom mode, you may connect an optional IR receiver, keypad or other control device to the Multiroom IR Input for remote control of the AVR 245 (and any sources connected to the AVR's Remote IR Output - Harman Kardon CP 45 | Owners Manual - Page 58
around power switch is red • Amplifier is in protection mode due to possible short • Amplifier is in protection mode due to internal problems • Check speaker wire connections for shorts at receiver and speaker ends • Contact your local Harman Kardon service center No sound from surround or center - Harman Kardon CP 45 | Owners Manual - Page 59
AVR 245 TECHNICAL SPECIFICATIONS Audio Section Stereo Mode Continuous Average Power (FTC) 65 Watts per channel, 20Hz-20kHz, @ - Harman Kardon CP 45 | Owners Manual - Page 60
shown is the preferred surround mode for PCM and Analog audio sources. Table A2 - Speaker/Channel Setting Defaults Source DVD HDMI 1 HDMI 2 Video 1 Video 2 Video 3 Video 4 The Bridge/ CD DMP Tape Tuner 6-/8- XM Channel Bass Manager: Global Left/Right Speaker Size Small Small Small Small - Harman Kardon CP 45 | Owners Manual - Page 61
Speaker/Channel Settings Source DVD HDMI 1 HDMI 2 Video 1 Video 2 Video 3 Video 4 The Bridge/DMP CD Tape Tuner 6-/8-Channel†† XM Bass Manager: Global/Independent N/A Left/Right Speaker Size N/A Center Speaker Size N/A Surround Speaker Size N/A Subwoofer N/A Left/Right Speaker Crossover - Harman Kardon CP 45 | Owners Manual - Page 62
Tape Cassette HDMI 1 HDMI 2 Table A7 - System Settings Feature Default Setting VFD Fade Time Out Off Volume Default Off Default Vol Set -25dB Semi OSD Time Out 5 seconds Full OSD Time Out 20 seconds Default Surr Mode On OSD Background Blue Your Setting Remote Control Code 62 - Harman Kardon CP 45 | Owners Manual - Page 63
61 62 63 64 65 66 67 68 69 70 Refer to the numbered buttons in Figure 89 when using the Function List. ® Figure 89 - Remote Control Function List Reference 63 - Harman Kardon CP 45 | Owners Manual - Page 64
- Channel - 20 OSD OSD Program OSD Live TV OSD OSD 21 M-Room Multiroom HD Mode 22 Vol Down Volume Down Volume Down Volume Down Volume Down Volume Down Volume Down 23 CH./Guide Channel Trim Title or Disc Menu Continuous Play Guide Info/Guide Info/Guide 24 Speaker/Menu Speaker Setup Menu - Harman Kardon CP 45 | Owners Manual - Page 65
AVR Function DVD CD/CD-R Tape VCR (VID1) 43 Memory Memory Audio Cancel FAV/Angle FAV Next Alt TV (VID3/VID4) Sleep (DMP) XM TheBridgeTM HDMI 1/2 Memory Tuning Up Angle/ controls are pressed while the remote is in AVR, Video 2 or Video 3 mode, the remote will automatically switch to DVD mode - Harman Kardon CP 45 | Owners Manual - Page 66
codes for your components into the remote. Table A9 - Remote Control Product Codes - TV TV Manufacturer/Brand Setup Code Number TV Manufacturer/Brand Setup Code EMERSON FUNAI FUTURETECH GE GOLDSTAR/LG GRUNDIG HALL MARK HARMAN KARDON HITACHI INFINITY INKEL JBL JC PENNEY JENSEN JVC KAWASHO KEC - Harman Kardon CP 45 | Owners Manual - Page 67
045 025 123 128 145 148 184 077 063 181 128 045 069 115 123 128 132 069 TV Manufacturer/Brand TERA THOMSON TMK TOSHIBA TOTEVISION VIDEO CONCEPTS VIDTECH WARDS YAMAHA YORK YUPITERU ZENITH ZONDA Setup Code Number 156 190 191 128 063 129 202 132 160 128 069 128 132 148 123 128 - Harman Kardon CP 45 | Owners Manual - Page 68
APPENDIX Table A10 - Remote Control Product Codes - VCR VCR Manufacturer/Brand Setup Code Number AIWA AKAI AMPRO ASA AUDIO DYNAMICS BROKSONIC CANDLE CANON CAPEHART CITIZEN CRAIG DAEWOO DAYTRON DBX DYNATECH EMERSON FISHER FUNAI GE GO VIDEO GOLDSTAR/LG HARMAN KARDON HITACHI JC PENNEY JENSEN JVC - Harman Kardon CP 45 | Owners Manual - Page 69
Table A11 - Remote Control Product Codes - CD CD Manufacturer/Brand Setup Code Number ADCOM AIWA AKAI AUDIO TECHNICA AUDIOACCESS AUDIOFILE BSR CALIFORNIA AUDIO CAPETRONIC CARRERA CARVER CASIO CLARINETTE DENON EMERSON FISHER FRABA FUNAI GE GENEXXA GOLDSTAR/LG HAITAI HARMAN KARDON HITACHI INKEL JC - Harman Kardon CP 45 | Owners Manual - Page 70
- Remote Control Product Codes - DVD DVD Manufacturer/Brand Setup Code Number APEX DIGITAL DENON GE GOLDSTAR/LG HARMAN KARDON JVC PRIMESTAR RCA RCA DSS REALISTIC SAMSUNG SATELLITE SERVICE CO SCIENTIFIC ATLANTA SONY STAR CHOICE DBS STARCAST SUPER GUIDE TELECOM TOSHIBA UNIDEN ZENITH 472 450 442 - Harman Kardon CP 45 | Owners Manual - Page 71
APPENDIX Table A14 - Remote Control Product Codes - TAPE Tape Manufacturer/Brand Setup Code Number HARMAN KARDON 001 Table A15 - Remote Control Product Codes - CBL CBL Manufacturer/Brand Setup Code Number ABC ALLEGRO AMERICAST ARCHER BELCOR CABLE STAR CITIZEN COLOUR VOICE DIGI EAGLE EASTERN - Harman Kardon CP 45 | Owners Manual - Page 72
® 250 Crossways Park Drive, Woodbury, New York 11797 www.harmankardon.com © 2006 Harman International Industries, Incorporated. All rights reserved. Part No. CQX1A1133Z
-
 1
1 -
 2
2 -
 3
3 -
 4
4 -
 5
5 -
 6
6 -
 7
7 -
8
-
9
-
10
-
11
-
12
-
13
-
14
-
15
-
16
-
17
-
18
-
19
-
20
-
21
-
22
-
23
-
24
-
25
-
26
-
27
-
28
-
29
-
30
-
31
-
32
-
33
-
34
-
35
-
36
-
37
-
38
-
39
-
40
-
41
-
42
-
43
-
44
-
45
-
46
-
47
-
48
-
49
-
50
-
51
-
52
-
53
-
54
-
55
-
56
-
57
-
58
-
59
-
60
-
61
-
62
-
63
-
64
-
65
-
66
-
67
-
68
-
69
-
70
-
71
-
72
 |
 |

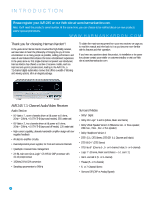
AVR 245
AUDIO/VIDEO RECEIVER
OWNER’S MANUAL