Harman Kardon AVR 1710 Owners Manual - Page 14
Types of Home Theater System Connections, and Making Connections - firmware
 |
View all Harman Kardon AVR 1710 manuals
Add to My Manuals
Save this manual to your list of manuals |
Page 14 highlights
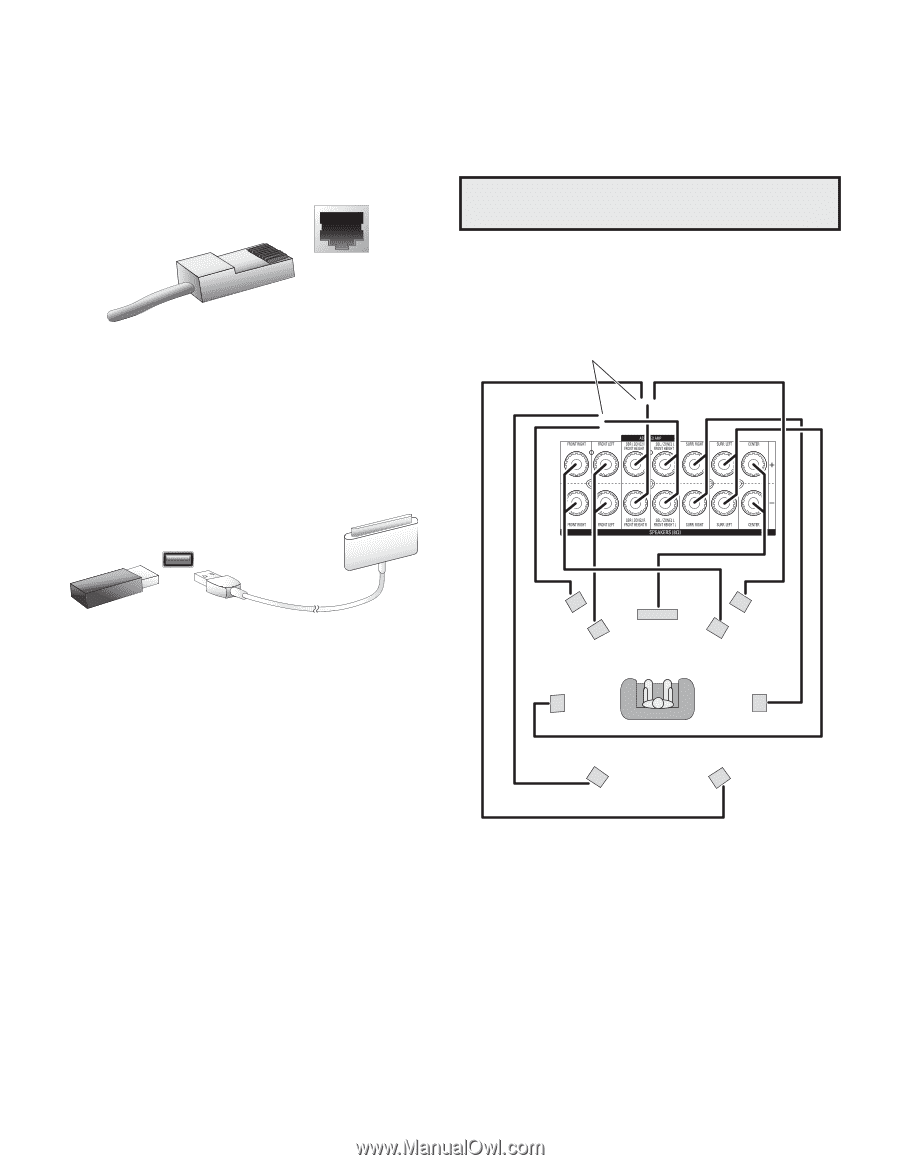
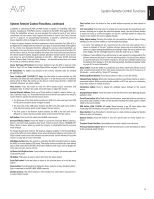
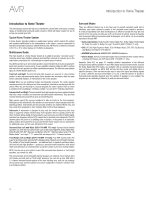
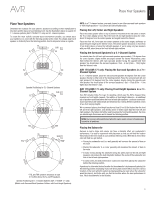
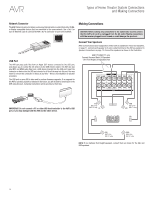
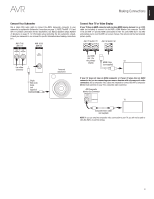
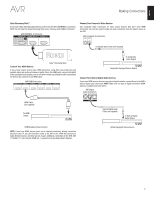
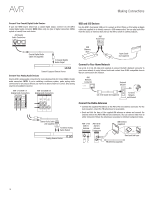
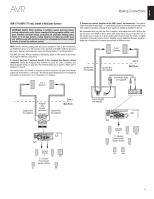
AVR Types of Home Theater System Connections and Making Connections Network Connector The AVR's Network connector allows you to enjoy Internet radio or content from other DLNAor Airplay-compatible devices that are connected to the same network. Use a Cat. 5 or Cat. 5E Ethernet cable to connect the AVR's RJ-45 connector to your home network. Making Connections CAUTION: Before making any connections to the audio/video receiver, ensure that the AVR's AC cord is unplugged from the AC outlet. Making connections with the receiver plugged in and turned on could damage the speakers. USB Port The AVR can play audio files from an Apple iOS® device connected to the USB port, and allows you to control the iOS device via the AVR remote control. The AVR can also play MP3 and WMA audio files from a USB device inserted into the USB port. Insert the connector or device into the USB port oriented so it fits all the way into the port. You may insert or remove the connector or device at any time - there is no installation or ejection procedure. The USB port on your AVR is also used to perform firmware upgrades. If an upgrade for the AVR's operating system is released in the future, you will be able to download it to the AVR using this port. Complete instructions will be provided at that time. Connect Your Speakers After you have placed your loudspeakers in the room as explained in Place Your Speakers, on page 11, connect each speaker to its color-coded terminal on the AVR as explained in Speaker Connections, on page 12. Connect the speakers as shown in the illustration. AVR 1710/AVR 171 only: Connect Surround Back L/R Speakers -OR- Front Height L/R Speakers Here IMPORTANT: Do not connect a PC or other USB host/controller to the AVR's USB port, or you may damage both the AVR and the other device. FHL (AVR 1710/ C FHR (AVR 1710/ AVR 171 only) FL FR AVR 171 only) SL SR SBL (AVR 1710/ AVR 171 only) SBR (AVR 1710/ AVR 171 only) NOTE: If you installed front height speakers, connect them as shown for the SBL and SBR speakers. 14
-
 1
1 -
2
-
3
-
4
-
5
-
6
-
7
-
8
-
 9
9 -
 10
10 -
 11
11 -
 12
12 -
 13
13 -
 14
14 -
 15
15 -
 16
16 -
 17
17 -
 18
18 -
 19
19 -
20
-
21
-
22
-
23
-
24
-
25
-
26
-
27
-
28
-
29
-
30
-
31
-
32
-
33
-
34
-
35
-
36
-
37
-
38
-
39
-
40
-
41
-
42
-
43
-
44
-
45
-
46
-
47
-
48
-
49
-
50
-
51
-
52
 |
 |