Hayward Salt & Swim 3C Salt & Swim Owner's Manual
Hayward Salt & Swim 3C Manual
 |
View all Hayward Salt & Swim 3C manuals
Add to My Manuals
Save this manual to your list of manuals |
Hayward Salt & Swim 3C manual content summary:
- Hayward Salt & Swim 3C | Salt & Swim Owner's Manual - Page 1
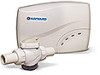
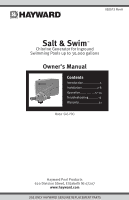
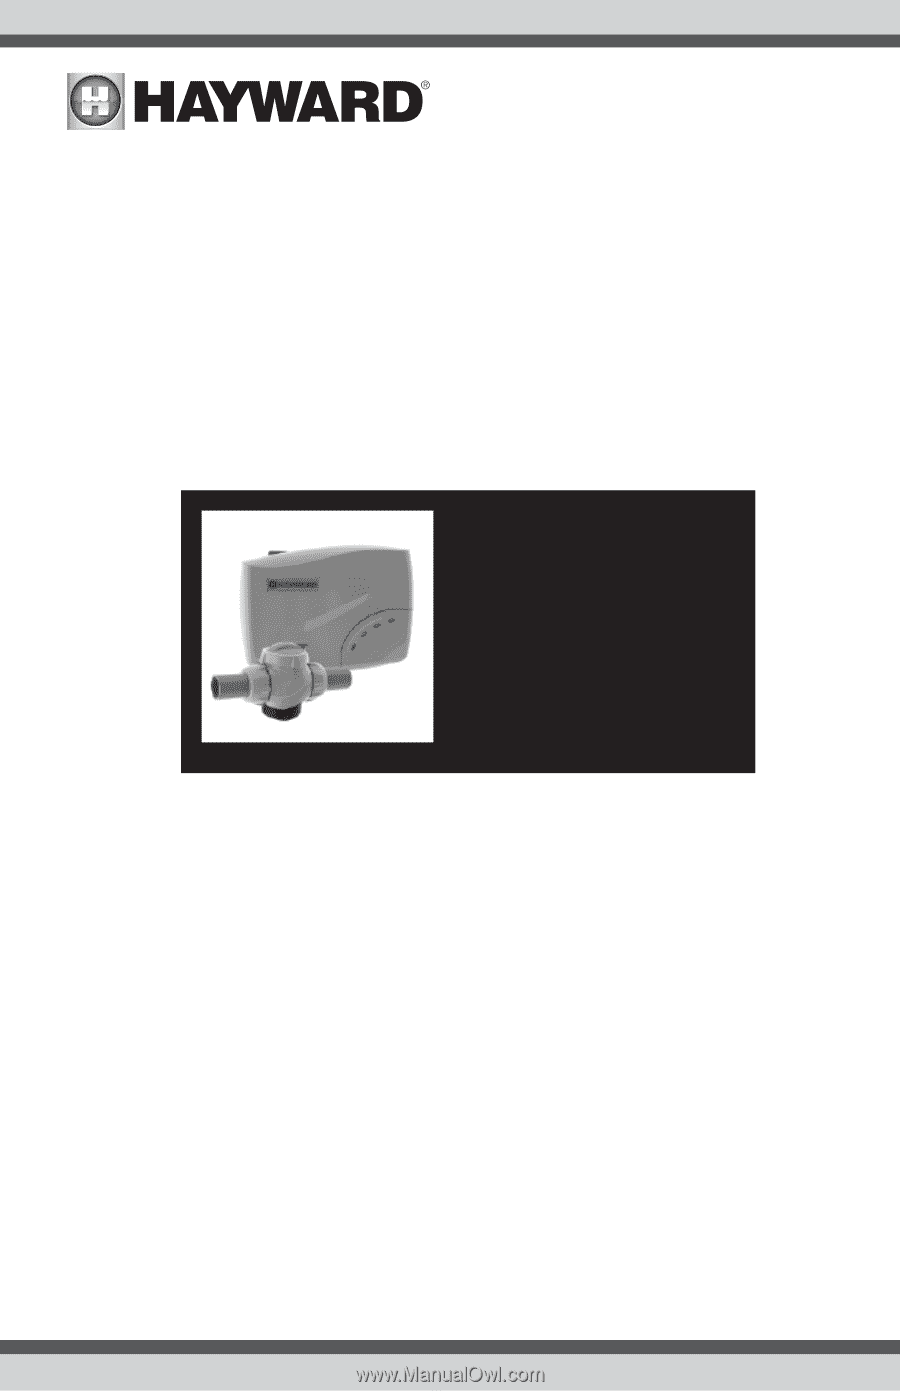
RevA Salt & SwimTM Chlorine Generator for Inground Swimming Pools up to 30,000 gallons Owner's Manual Contents Introduction 1 Installation 2-8 Operation 12-14 Troubleshooting........... 15 Warranty 21 Model: SAS-PRO Hayward Pool Products 620 Division Street, Elizabeth NJ 07207 www.hayward.com - Hayward Salt & Swim 3C | Salt & Swim Owner's Manual - Page 2
electric supply; provide a properly located outlet. • "CAUTION: To reduce the risk of electric shock, install at least 10 feet (3 meters) horizontally from the inside walls of a pool or spa/hot tub not smaller than No. 6 AWG. • SAVE THESE INSTRUCTIONS USE ONLY HAYWARD GENUINE REPLACEMENT PARTS - Hayward Salt & Swim 3C | Salt & Swim Owner's Manual - Page 3
& SwimTM is an automatic chlorine generation system for pool sanitization. It is designed for inground swimming pools up to 30,000 gallons only. The Salt & Swim is NOT to be used with above ground pools or with inground pools greater than 30,000 gallons. This SAS-PRO model is designed for use with - Hayward Salt & Swim 3C | Salt & Swim Owner's Manual - Page 4
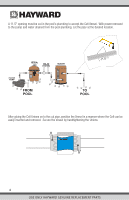
instructions. This ensures a quick, troublefree transfer to the Salt & Swim system. Salt & Swim Installation Follow the step by step instructions located on the Installation Quick Start Guide. Refer to the following sections for more detailed information. 2 USE ONLY HAYWARD GENUINE REPLACEMENT PARTS - Hayward Salt & Swim 3C | Salt & Swim Owner's Manual - Page 5
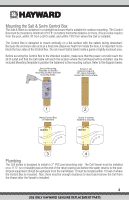
of the Control Box. Do not mount Salt & Swim inside a panel or tightly enclosed area. Before securing the Control Box to the intended location, make sure that the power cord will reach the GFCI outlet and that the Cell cable will reach the location where the Cell Vessel will be installed. Use the - Hayward Salt & Swim 3C | Salt & Swim Owner's Manual - Page 6
water drained from the pool plumbing, cut the pipe at the desired location. After gluing the Cell Unions on to the cut pipe, position the Vessel in a manner where the Cell can be easily inserted and removed. Secure the Vessel by handtightening the Unions. 4 USE ONLY HAYWARD GENUINE REPLACEMENT PARTS - Hayward Salt & Swim 3C | Salt & Swim Owner's Manual - Page 7
Remove the foam protector from the SAS-CELL. Fully cover Cell pins with supplied grease. Verify that the O-ring is attached to the Cell before inserting the Cell into the Cell Vessel as shown. 5 USE ONLY HAYWARD GENUINE REPLACEMENT PARTS - Hayward Salt & Swim 3C | Salt & Swim Owner's Manual - Page 8
is required at your location (see Local and NEC codes), a bonding lug is provided at the bottom of the Salt & Swim enclosure. Run an eight gauge (8 AWG) solid copper wire from the bonding lug to your pool's existing bonding loop. to Pool Bonding loop 6 USE ONLY HAYWARD GENUINE REPLACEMENT PARTS - Hayward Salt & Swim 3C | Salt & Swim Owner's Manual - Page 9
just once when a new Cell is installed. After the flow switch is initialized, the Salt & Swim will not perform this procedure again until the Cell is replaced. The Flow Switch Calibration procedure will require the user to cycle the pump on and off. Follow the instructions below: 1. Turn the filter - Hayward Salt & Swim 3C | Salt & Swim Owner's Manual - Page 10
Salt & Swim chlorine generator. Have your water tested or use pool water test strips and refer to the Chemistry Quick Start Guide contain chemistries that are deleterious to the life expectancy of the Cell. Saturation index The saturation index (Si) 8 OK USE ONLY HAYWARD GENUINE REPLACEMENT PARTS - Hayward Salt & Swim 3C | Salt & Swim Owner's Manual - Page 11
-3400 ppm (parts per million) with 3200 ppm being ideal. If the level is low, determine the number of gallons in the pool and add salt according to the chart on page 10. A low salt level will reduce the efficiency of the Salt & Swim and result in low chlorine production. A high salt level can cause - Hayward Salt & Swim 3C | Salt & Swim Owner's Manual - Page 12
POUNDS and (Kg) of SALT NEEDED FOR 3200PPM Current salt Gallons and (Liters) of Pool Water level 8,000 10,000 12,000 14,000 16,000 18,000 20,000 22, OK OK OK OK OK OK OK OK 3600+ Dilute Dilute Dilute Dilute Dilute Dilute Dilute Dilute Dilute Dilute 10 USE ONLY HAYWARD GENUINE REPLACEMENT PARTS - Hayward Salt & Swim 3C | Salt & Swim Owner's Manual - Page 13
11 USE ONLY HAYWARD GENUINE REPLACEMENT PARTS - Hayward Salt & Swim 3C | Salt & Swim Owner's Manual - Page 14
life. When this LED indicator is illuminated, there is a problem with the unit. Refer to the Troubleshooting section of this manual. Illuminates when unit is waiting for the filter pump to turn on or is in-between generating cycles as part of normal operation to maintain selected DAILY CHLORINE - Hayward Salt & Swim 3C | Salt & Swim Owner's Manual - Page 15
water temperature increases significantly, when there is higher than normal bather load or when the Salt & Swim Cell ages. You may need to lower the setting when the pool water temperature decreases significantly or there are long periods of inactivity. 13 USE ONLY HAYWARD GENUINE REPLACEMENT PARTS - Hayward Salt & Swim 3C | Salt & Swim Owner's Manual - Page 16
levels periodically. Most pools require less chlorine during cold weather and the DAILY CHLORINE OUTPUT should be lowered accordingly. Maintaining the Salt & Swim System The replaceable Cell uses the same electronic self cleaning technology as the popular Hayward Turbo Cell. In most cases this self - Hayward Salt & Swim 3C | Salt & Swim Owner's Manual - Page 17
Visit www.hayward.com or call 855-429-9274 for helpful information on operation, maintenance and troubleshooting your Salt & Swim Electronic Chlorine Generator. Common Problems and Solutions The Salt & Swim's various LEDs show the operation status as well as alert the user to any problems that may - Hayward Salt & Swim 3C | Salt & Swim Owner's Manual - Page 18
- Remove and inspect the Cell for scale. If the Cell is scaled, follow the directions on page 14 for Cell cleaning. 8. PROBLEM DETECTED LED illuminated AND a DAILY CHLORINE OUTPUT LED is blinking The Salt & Swim may display an error by illuminating the PROBLEM DETECTED LED and blinking one of - Hayward Salt & Swim 3C | Salt & Swim Owner's Manual - Page 19
for two minutes and then plugging it back in. 2. Inspect the cable that connects the cell to the system. Make sure the cable is secure and undamaged. 3. Contact Hayward Technical Service. 1. Recycle power to the Salt & Swim by unplugging the linecord for two minutes Inadequate and then plugging it - Hayward Salt & Swim 3C | Salt & Swim Owner's Manual - Page 20
18 USE ONLY HAYWARD GENUINE REPLACEMENT PARTS - Hayward Salt & Swim 3C | Salt & Swim Owner's Manual - Page 21
19 USE ONLY HAYWARD GENUINE REPLACEMENT PARTS - Hayward Salt & Swim 3C | Salt & Swim Owner's Manual - Page 22
20 USE ONLY HAYWARD GENUINE REPLACEMENT PARTS - Hayward Salt & Swim 3C | Salt & Swim Owner's Manual - Page 23
warrants its Salt & Swim chlorination products to be free of defects in materials and workmanship, under normal use and service as follows: Control Box - 2 year limited warranty, parts only SAS-CELL - 1 year limited warranty Hayward warrants all accessories and other replacement parts for the - Hayward Salt & Swim 3C | Salt & Swim Owner's Manual - Page 24
and CrystaLogic are trademarks of Hayward Industries, Inc. © 2012 Hayward Industries, Inc. All other trademarks not owned by Hayward are the property of their respective owners. Hayward is not in any way affiliated with or endorsed by those third parties. USE ONLY HAYWARD GENUINE REPLACEMENT PARTS
-
 1
1 -
 2
2 -
 3
3 -
 4
4 -
 5
5 -
 6
6 -
 7
7 -
8
-
9
-
10
-
11
-
12
-
13
-
14
-
15
-
16
-
17
-
18
-
19
-
20
-
21
-
22
-
23
-
24
 |
 |
Salt & Swim
Chlorine Generator for Inground
Swimming Pools up to 30,000 gallons
TM
Owner’s Manual
Model: SAS-PRO
Contents
Introduction
....................
1
Installation
..................
2-8
Operation
.................
12-14
Troubleshooting
...........
15
Warranty
........................
21
Hayward Pool Products
620 Division Street, Elizabeth NJ 07207
www.hayward.com
092513 RevA
USE ONLY HAYWARD GENUINE REPLACEMENT PARTS