HealthRider H 110i Treadmill English Manual
HealthRider H 110i Treadmill Manual
 |
View all HealthRider H 110i Treadmill manuals
Add to My Manuals
Save this manual to your list of manuals |
HealthRider H 110i Treadmill manual content summary:
- HealthRider H 110i Treadmill | English Manual - Page 1
holidays) OR E-MAIL US: [email protected] CAUTION Read all precautions and instructions in this manual before using this equipment. Save this manual for future reference. USER'S MANUAL Visit our website at www.proform.com Visit our website at www.healthrider.com Visit our website at - HealthRider H 110i Treadmill | English Manual - Page 2
have been placed on the treadmill. If a decal is missing or illegible, call the telephone number on the front cover of this manual and request a free replacement decal. Apply the decal in the location shown. Note: The decals may not be shown at actual size. HEALTHRIDER is a registered trademark of - HealthRider H 110i Treadmill | English Manual - Page 3
age of 35 or persons with pre-existing health problems. 2. It is the responsibility of the owner to ensure that all users of this treadmill are adequately informed of all warnings and precautions. 3. Use the treadmill only as described. 4. Place the treadmill on a level surface, with at least 8 ft - HealthRider H 110i Treadmill | English Manual - Page 4
cord immediately after use, before cleaning the treadmill, and before performing the maintenance and adjustment procedures de- scribed in this manual. Never remove the motor hood unless instructed to do so by an authorized service representative. Servicing other than the procedures in this - HealthRider H 110i Treadmill | English Manual - Page 5
using the treadmill. If you have questions after reading this manual, please see the front cover of this man- Before reading further, please review the drawing below and familiarize yourself with the labeled parts. Accessory Tray Handrail Storage Latch Console Key/Clip Walking Belt Foot Rail - HealthRider H 110i Treadmill | English Manual - Page 6
treadmill performance. If there is lubricant on top of the walking belt, simply wipe off the lubricant with a soft cloth and a mild, non-abrasive cleaner. Assembly requires the included hex keys drawing is the key number of the part, from the PART LIST near the end of the manual. The number after - HealthRider H 110i Treadmill | English Manual - Page 7
Housing Nuts (43). 3 32 45 43 13 32 45 13 52 32 43 32 4. Position the Base (52) as close to the front of the treadmill as possible, as shown. 4 See drawing 4a. Wrap the wire tie in the Right Upright (54) around the end of the Wire Harness (39). Then - HealthRider H 110i Treadmill | English Manual - Page 8
5. See the left inset drawing. Identify the two Frame Spacers (11). Open the included packet 5 of grease, and apply grease to both sides of both Frame Spacers. Then, identify the outer side of each Frame Spacer. Hold a Frame Spacer (11) between the Right Upright (54) and the Lift Frame (23), - HealthRider H 110i Treadmill | English Manual - Page 9
7. Set the Console (91) face-down on a soft sur- 7 face to avoid scratching the Console. Hold the Console Right Handrail (33), which has a large hole in the location shown, near the Console. Next, insert the console wire and tie into the Wire 85 Tie Bracket 7 10 hole in the side of the - HealthRider H 110i Treadmill | English Manual - Page 10
position. 12 48 Knob 10 Large Hole 53 Spring Collar Pin 13. Make sure that all parts are properly tightened before you use the treadmill. Keep the included hex keys in a secure place. A hex key is used to adjust the walking belt (see page 19). To protect the floor or carpet, place a mat under the - HealthRider H 110i Treadmill | English Manual - Page 11
ADJUSTMENT THE PRE-LUBRICATED WALKING BELT Your treadmill features a walking belt coated with highperformance lubricant. IMPORTANT: Never apply silicone spray or other substances to the walking belt or the walking platform. Such substances will deteriorate the walking belt and cause excessive wear - HealthRider H 110i Treadmill | English Manual - Page 12
of the treadmill as it guides you through an effective workout. To prevent damage to the walking platform, always wear clean athletic shoes while using the treadmill. During the first few minutes that the treadmill is used, inspect the alignment of the walking belt, and center the walking belt if - HealthRider H 110i Treadmill | English Manual - Page 13
the displays. When the key is inserted, the manual mode will be selected. If you have selected a speed program, reselect the manual mode by pressing the Program Select button repeatedly until only zeros appear in the displays. 3. Start the walking belt. To start the walking belt, press the Start - HealthRider H 110i Treadmill | English Manual - Page 14
elapsed time, the distance that you have walked or run, the speed of the walking belt, or the approximate number of calories you have finished exercising, remove the key from the console. Step onto the foot rails, press the Stop button, and adjust the incline of the treadmill to the lowest setting. - HealthRider H 110i Treadmill | English Manual - Page 15
way until the last segment ends. The walking belt will then slow to a stop. If the speed setting is too high or too low during the program, you can manually override the setting by pressing the Speed buttons. However, when the next segment begins, the treadmill will automatically adjust to the speed - HealthRider H 110i Treadmill | English Manual - Page 16
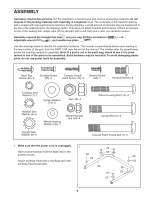
legs rather than your back. Raise the frame about halfway to the vertical position. 2. Move your right hand to the position shown and hold the treadmill firmly. Using your left hand, pull the latch knob to the left and hold it. Raise the frame until the catch is past the latch - HealthRider H 110i Treadmill | English Manual - Page 17
USE 1. Hold the upper end of the treadmill with your right hand as shown. Using your left hand, pull the latch knob to the left and hold it. Next, lower the frame until - HealthRider H 110i Treadmill | English Manual - Page 18
TROUBLESHOOTING Most treadmill problems can be solved by following the steps below. Find the symptom that applies, and follow the steps listed. If further assistance is needed, please see the front cover of this manual. PROBLEM: The power does not turn on SOLUTION: a. Make sure that the power - HealthRider H 110i Treadmill | English Manual - Page 19
in the power cord, insert the key, and run the treadmill for a few minutes. Repeat until the walking belt is properly tightened. b 2-3 in. Rear Roller Bolts c. If the walking belt still slows when walked on, see the front cover of this manual. PROBLEM: The walking belt is off-center or slips when - HealthRider H 110i Treadmill | English Manual - Page 20
important for persons over the age of 35 or persons with pre-existing health problems. The pulse sensor is not a medical device. Various factors may affect exercising at the proper intensity is the key to achieving results. You can use your heart rate as a guide to find the proper intensity level. - HealthRider H 110i Treadmill | English Manual - Page 21
SUGGESTED STRETCHES The correct form for several basic stretches is shown at the right. Move slowly as you stretch-never bounce. 1. Toe Touch Stretch Stand with your knees bent slightly and slowly bend forward from 1 your hips. Allow your back and shoulders to relax as you reach down toward - HealthRider H 110i Treadmill | English Manual - Page 22
DRAWING near the end of this manual. Key No. Qty. Description Key No. Qty. Description 1 2 Key/Clip Nut 6 mm Hex Key 4 mm Hex Key Roller Bracket Screw/ Front Platform Screw Hood Screw Screw Left Handrail Lift Frame Latch Pin Assembly Foot Rail Screw Base Pad Screw Walking Platform Bolt Belt Guide - HealthRider H 110i Treadmill | English Manual - Page 23
6 103 2 Description Incline Motor Nut, Lower Belt Guide 5 mm Hex Key M10 Lock Nut Releasable Tie Rear Foot, Right Filter Wire Power Cord Grommet Incline Motor Wire Front Roller Washer Cage Nut Caution Decal Key No. Qty. Description 104 1 105 2 * - * - * - * - * - * - * - French - HealthRider H 110i Treadmill | English Manual - Page 24
EXPLODED DRAWING A-Model No. HCTL34307.0 R0707A 24 25 75 27 21 42 60 36 29 95 25 67 44 25 10 64 93 50 78 6 4 25 19 75 27 19 44 21 42 89 3 46 83 95 11 41 19 62 101 41 31 56 25 28 71 19 41 25 101 68 41 76 86 51 10 28 50 78 11 95 44 93 74 55 104 36 95 61 44 10 - HealthRider H 110i Treadmill | English Manual - Page 25
EXPLODED DRAWING B-Model No. HCTL34307.0 R0707A 47 47 47 65 58 82 2 72 100 40 23 92 30 34 38 59 79 2 44 38 34 21 42 42 21 57 20 66 20 37 20 98 21 105 87 90 21 99 49 25 - HealthRider H 110i Treadmill | English Manual - Page 26
EXPLODED DRAWING C-Model No. HCTL34307.0 77 77 88 R0707A 10 10 10 33 10 7 85 102 22 10 10 102 10 5 8 8 10 7 85 102 39 77 5 5 8 5 77 8 24 48 10 3 4 80 53 54 1 11 9 14 2 2 11 52 103 13 32 32 43 43 35 49 9 63 16 26 39 63 69 45 63 70 16 26 69 63 84 26 - HealthRider H 110i Treadmill | English Manual - Page 27
EXPLODED DRAWING D-Model No. HCTL34307.0 R0707A 91 15 12 4 4 4 4 4 4 4 73 4 4 4 27 - HealthRider H 110i Treadmill | English Manual - Page 28
• the key number and description of the replacement parts(s) (see the PART LIST and the EXPLODED DRAWING near the end of this manual) LIMITED WARRANTY ICON OF CANADA, INC. (ICON) warrants this product to be free from defects in workmanship and material, under normal use and service conditions. The
-
 1
1 -
 2
2 -
 3
3 -
 4
4 -
 5
5 -
 6
6 -
 7
7 -
8
-
9
-
10
-
11
-
12
-
13
-
14
-
15
-
16
-
17
-
18
-
19
-
20
-
21
-
22
-
23
-
24
-
25
-
26
-
27
-
28
 |
 |

USER'S MANUAL
Model No. HCTL34307.0
Serial No.
Write the serial number in the space
above for future reference.
CAUTION
Read all precautions and instruc-
tions in this manual before using
this equipment. Save this manual
for future reference.
www.healthrider.com
Visit our website at
QUESTIONS?
As a manufacturer, we are com-
mitted to providing complete
customer satisfaction. If you
have questions, or if parts are
damaged or missing, PLEASE
CONTACT OUR CUSTOMER
SERVICE DEPARTMENT
DIRECTLY.
CALL TOLL-FREE:
1-888-936-4266
Mon.–Fri., 8:00 until 17:00 EST
(excluding holidays)
OR E-MAIL US:
Serial Number
Decal