HP 1022n HP LaserJet 1022nw - Wireless Getting Started Guide - Page 25
Network components for a Windows ad-hoc (peer-to-peer) network installation, Ready - laserjet ip address
 |
UPC - 829160711102
View all HP 1022n manuals
Add to My Manuals
Save this manual to your list of manuals |
Page 25 highlights
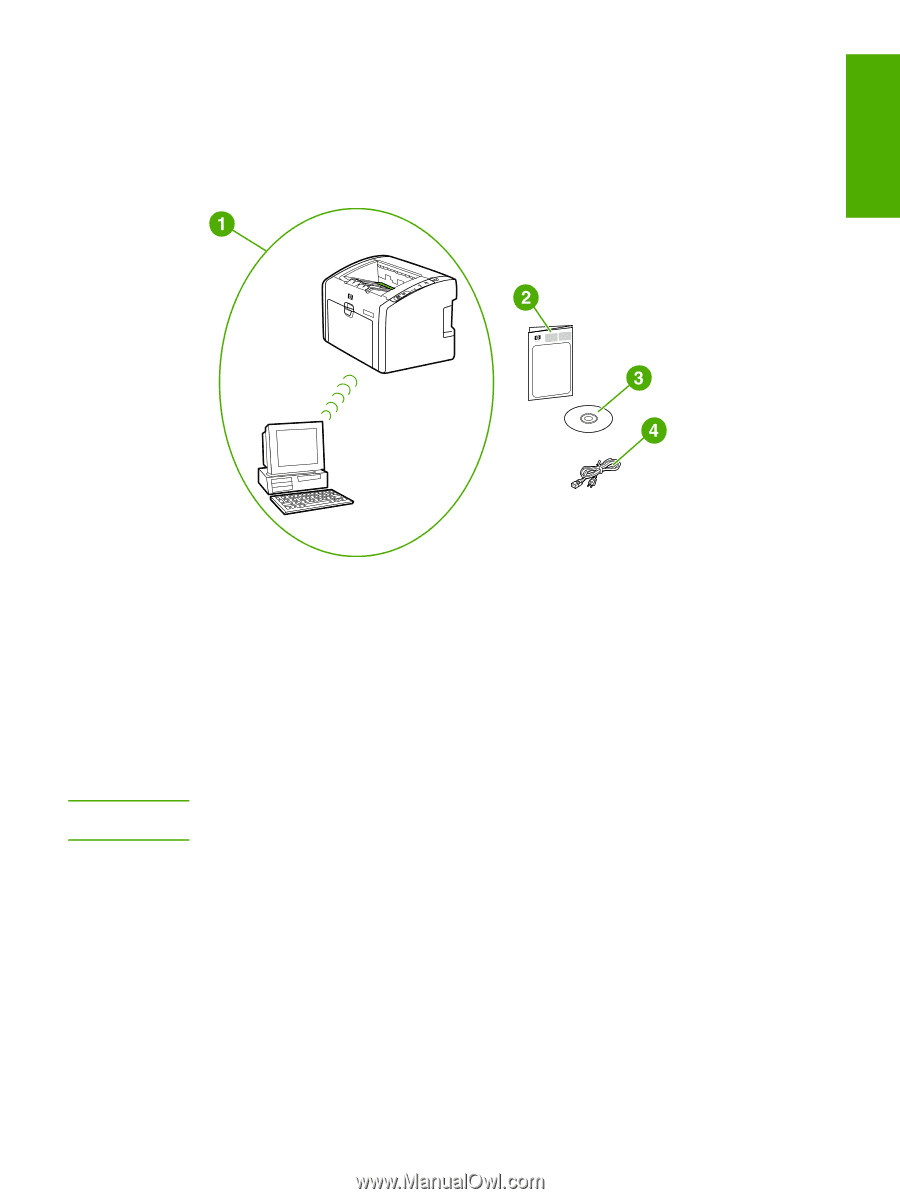
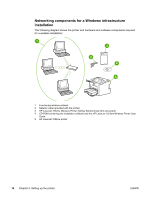
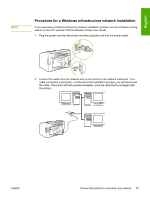
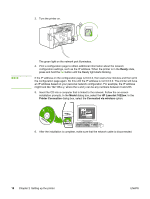
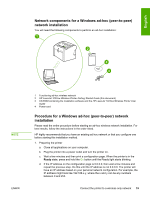
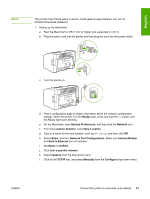
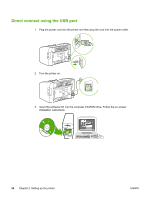
English Network components for a Windows ad-hoc (peer-to-peer) network installation You will need the following components to perform an ad-hoc installation: NOTE ENWW 1 Functioning ad-hoc wireless network 2 HP LaserJet 1022nw Wireless Printer Getting Started Guide (this document) 3 CD-ROM containing the installation software and the HP LaserJet 1022nw Wireless Printer User Guide 4 Power cord Procedure for a Windows ad-hoc (peer-to-peer) network installation Please read the entire procedure before starting an ad-hoc wireless network installation. For best results, follow the instructions in the order listed. HP highly recommends that you have an existing ad-hoc network or that you configure one before starting this installation method. 1. Preparing the printer a. Close all applications on your computer. b. Plug the printer into a power outlet and turn the printer on. c. Wait a few minutes and then print a configuration page. When the printer is in the Ready state, press and hold the GO button until the Ready light starts blinking. d. If the IP address on the configuration page is 0.0.0.0, then wait a few minutes and repeat the previous step. Do this until the IP address is not 0.0.0.0. The printer will have an IP address based on your personal network configuration. For example, the IP address might look like 192.168.x.y, where the x and y can be any numbers between 0 and 255. Connect the printer to a wireless only network 19
-
 1
1 -
2
-
3
-
4
-
5
-
6
-
7
-
8
-
9
-
10
-
11
-
12
-
13
-
14
-
15
-
16
-
17
-
18
-
19
-
 20
20 -
 21
21 -
 22
22 -
 23
23 -
 24
24 -
 25
25 -
 26
26 -
 27
27 -
 28
28 -
 29
29 -
 30
30 -
31
-
32
-
33
-
34
-
35
-
36
-
37
-
38
-
39
-
40
-
41
-
42
-
43
-
44
-
45
-
46
-
47
-
48
-
49
-
50
-
51
-
52
-
53
-
54
-
55
-
56
-
57
-
58
-
59
-
60
-
61
-
62
-
63
-
64
-
65
-
66
-
67
-
68
-
69
-
70
-
71
-
72
-
73
-
74
-
75
-
76
-
77
-
78
-
79
-
80
-
81
-
82
-
83
-
84
-
85
-
86
-
87
-
88
-
89
-
90
-
91
-
92
-
93
-
94
-
95
-
96
-
97
-
98
-
99
-
100
-
101
-
102
-
103
-
104
-
105
-
106
-
107
-
108
-
109
-
110
-
111
-
112
-
113
-
114
-
115
-
116
-
117
-
118
-
119
-
120
-
121
-
122
-
123
-
124
 |
 |