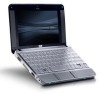
HP 2133 HP Business Notebook PC - Getting Started Guide - Windows XP - Enhance
HP 2133 - Mini-Note - C7-M 1.6 GHz ULV Manual
 |
UPC - 884420156444
View all HP 2133 manuals
Add to My Manuals
Save this manual to your list of manuals |
HP 2133 manual content summary:
- HP 2133 | HP Business Notebook PC - Getting Started Guide - Windows XP - Enhance - Page 1
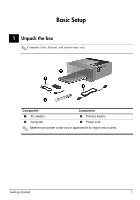
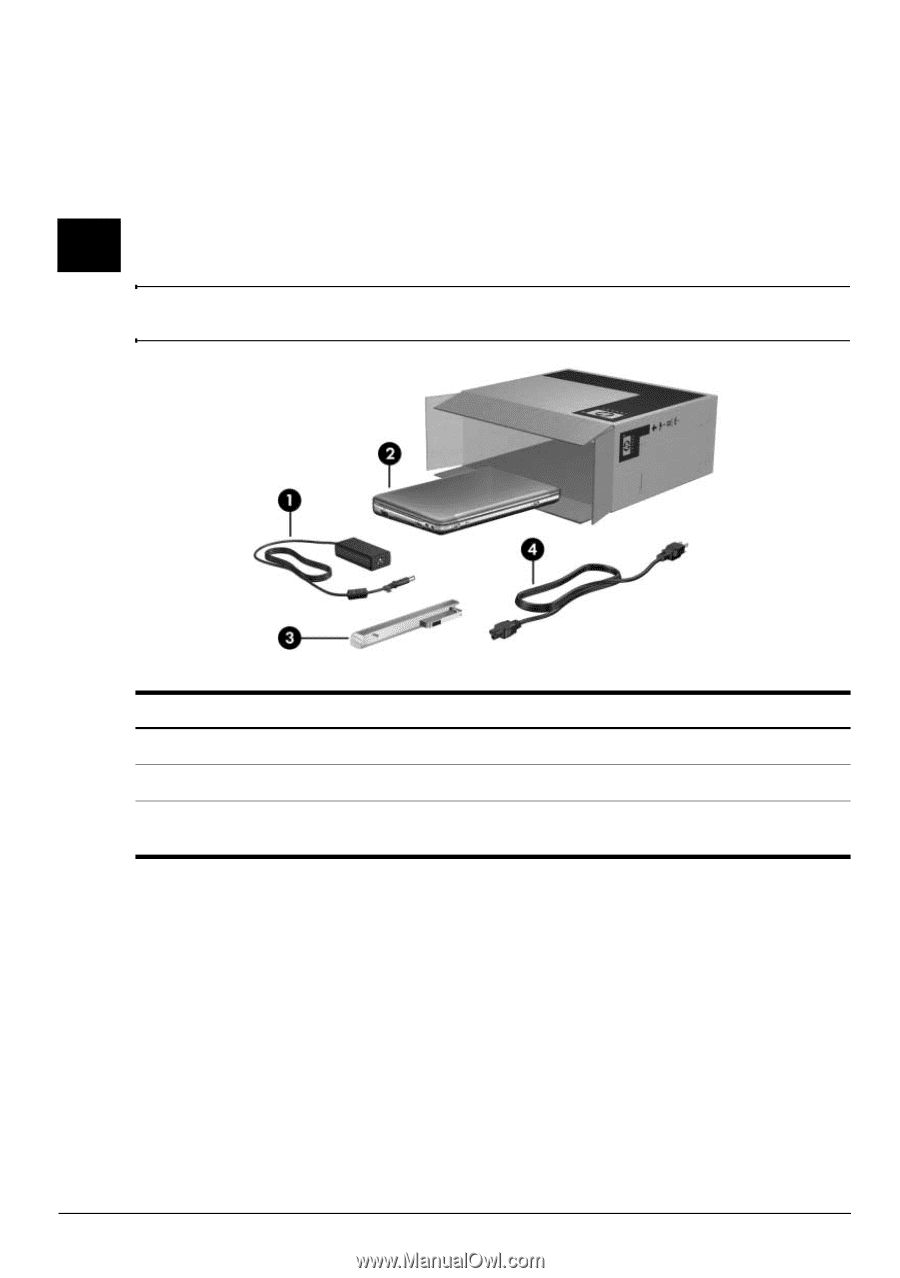
Basic Setup 1 Unpack the box ✎ Computer color, features, and options may vary. Component Component 1 AC adapter 3 Primary battery 2 Computer 4 Power cord ✎ Batteries and power cords vary in appearance by region and country. Getting Started 1 - HP 2133 | HP Business Notebook PC - Getting Started Guide - Windows XP - Enhance - Page 2
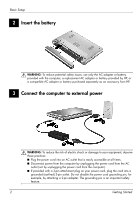
Å WARNING: To reduce potential safety issues, use only the AC adapter or battery provided with the computer, a replacement AC adapter or battery provided by HP, or a compatible AC adapter or battery purchased separately as an accessory from HP. 3 Connect the computer to external power Å WARNING: To - HP 2133 | HP Business Notebook PC - Getting Started Guide - Windows XP - Enhance - Page 3
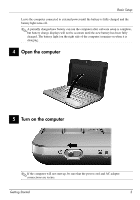
charge displays will not be accurate until the new battery has been fully charged. The battery light (on the right side of the computer) remains on when it is charging. 4 Open the computer 5 Turn on the computer ✎ If the computer will not start up, be sure that the power cord and AC adapter - HP 2133 | HP Business Notebook PC - Getting Started Guide - Windows XP - Enhance - Page 4
Basic Setup 6 Set up the software After the computer is turned on, the software setup process begins. The on-screen instructions guide you through setting up and registering your computer. After you respond to the setup prompt, you must complete the entire setup process without interruption. ✎ - HP 2133 | HP Business Notebook PC - Getting Started Guide - Windows XP - Enhance - Page 5
operating system, drivers, troubleshooting tools, and technical support. To access Help and Support, click Start, and then click Help and Support. For country- or region-specific support, see http://www.hp.com/support, select your country or region, and follow the on-screen instructions. Å WARNING - HP 2133 | HP Business Notebook PC - Getting Started Guide - Windows XP - Enhance - Page 6
What's Next? Turning off the computer To turn off your computer properly, follow these steps: 1. Save your work and close all programs. 2. Click Start, click Turn Off Computer, and then click Turn Off. ✎ If you have been registered to a network domain, the button you click will be called Shut Down - HP 2133 | HP Business Notebook PC - Getting Started Guide - Windows XP - Enhance - Page 7
information about the display panel on your notebook PC, see the HP Web site: http://www.hp.com/support Input power The power information in this section may be helpful if you plan to travel internationally with the computer. The computer operates on DC power, which can be supplied by an AC or a DC - HP 2133 | HP Business Notebook PC - Getting Started Guide - Windows XP - Enhance - Page 8
Product Information and Troubleshooting Operating environment The operating environment information computer, damage to a drive, or loss of information, remove the media from a drive before removing the drive from a drive bay, and before shipping, storing, or traveling with a drive. 3. Turn off and - HP 2133 | HP Business Notebook PC - Getting Started Guide - Windows XP - Enhance - Page 9
Troubleshooting Ä CAUTION: Avoid exposing a drive adapter display. To remove smudges and lint, frequently clean the display with a soft, damp, lint-free cloth. If the screen requires additional cleaning, use premoistened antistatic wipes or an antistatic screen cleaner. Cleaning the keyboard - HP 2133 | HP Business Notebook PC - Getting Started Guide - Windows XP - Enhance - Page 10
by HP for this computer. ■ If the computer is running on battery power or is plugged into an external power source other than an AC outlet, plug the computer into an AC outlet using the AC adapter. Be sure that the power cord and AC adapter connections are secure. The computer screen is blank If - HP 2133 | HP Business Notebook PC - Getting Started Guide - Windows XP - Enhance - Page 11
the computer air vents. Use the computer only on a hard, flat surface. Do not allow another hard surface, such as an adjoining optional printer, or a soft surface, such as pillows or rugs or clothing, to block airflow. Also, do not allow the AC adapter to contact the skin or a soft surface, such as - HP 2133 | HP Business Notebook PC - Getting Started Guide - Windows XP - Enhance - Page 12
Product Information and Troubleshooting The WLAN connection is not working If a WLAN connection is not did not address your problem, contact technical support. Click Start, click Help and Support, and then click Contact support to start a chat session with a support specialist. You can also - HP 2133 | HP Business Notebook PC - Getting Started Guide - Windows XP - Enhance - Page 13
Backup and Recovery Backing up your information You can only recover files that you have previously backed up. HP recommends that you use the Windows backup utility to create an entire hard drive backup as soon as you set up your computer. With the backup utility, you can perform the following tasks - HP 2133 | HP Business Notebook PC - Getting Started Guide - Windows XP - Enhance - Page 14
an optional external hard drive, to optical discs (CDs or DVDs), or to a network drive. ✎ This process screen instructions. Backing up all personal files and folders at one time When you perform a complete backup of the hard drive changes made after that time. HP recommends that you create recovery - HP 2133 | HP Business Notebook PC - Getting Started Guide - Windows XP - Enhance - Page 15
Next. 4. Follow the on-screen instructions. Performing a full system recovery Use the recovery discs provided with your notebook to perform a full system recovery: 1. If your computer works, back up all data files that you want to save onto removable media (for example, a CD or DVD). ✎ Data files - HP 2133 | HP Business Notebook PC - Getting Started Guide - Windows XP - Enhance - Page 16
Backup and Recovery 3. Turn the computer off by pressing and holding the power switch for approximately 5 seconds until the computer turns off. 4. Press the power switch to turn on the computer. 5. Follow the on-screen instructions. 16 Getting Started
-
 1
1 -
 2
2 -
 3
3 -
 4
4 -
 5
5 -
 6
6 -
 7
7 -
8
-
9
-
10
-
11
-
12
-
13
-
14
-
15
-
16
 |
 |
Getting Started
1
Basic Setup
1
Unpack the box
✎
Computer color, features, and options may vary.
Component
Component
1
AC adapter
3
Primary battery
2
Computer
4
Power cord
✎
Batteries and power cords vary in appearance by region and country.