HP 2840 HP Color LaserJet 2820/2830/2840 All-In-One - User Guide - Page 135
Scanning from the device control panel (Windows), Programming the device Scan to button - color laserjet scanner windows 7
 |
UPC - 829160742731
View all HP 2840 manuals
Add to My Manuals
Save this manual to your list of manuals |
Page 135 highlights
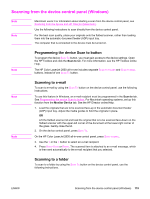
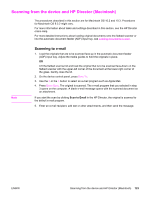
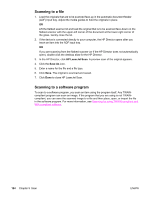
Scanning from the device control panel (Windows) Note Note Macintosh users: For information about starting a scan from the device control panel, see Scanning from the device and HP Director (Macintosh). Use the following instructions to scan directly from the device control panel. For the best scan quality, place your originals onto the flatbed scanner, rather than loading them into the automatic document feeder (ADF) input tray. The computer that is connected to the device must be turned on. Note Programming the device Scan to button To program the device SCAN TO button, you must gain access to the device settings. Open the HP Toolbox and click the Scan to tab. For more information, see the HP Toolbox online Help. The HP Color LaserJet 2830 all-in-one includes separate SCAN TO FOLDER and SCAN TO EMAIL buttons, instead of one SCAN TO button. Note Note Scanning to e-mail To scan to e-mail by using the SCAN TO button on the device control panel, use the following instructions. To use this feature in Windows, an e-mail recipient must be programmed in the Scan to tab. See Programming the device Scan to button. For Macintosh operating systems, set up this function from the Monitor Device tab. See the HP Director online Help. 1. Load the originals that are to be scanned face-up in the automatic document feeder (ADF) input tray. Adjust the media guides to hold the originals in place. OR Lift the flatbed scanner lid and load the original that is to be scanned face-down on the flatbed scanner with the upper-left corner of the document at the lower-right corner of the glass. Gently close the lid. 2. On the device control panel, press SCAN TO. On the HP Color LaserJet 2830 all-in-one control panel, press SCAN TO EMAIL. 3. Use the < or the > button to select an e-mail recipient. 4. Press START SCAN or ENTER. The scanned item is attached to an e-mail message, which is then sent automatically to the e-mail recipient that you selected. Scanning to a folder To scan to a folder by using the SCAN TO button on the device control panel, use the following instructions. ENWW Scanning from the device control panel (Windows) 119
-
 1
1 -
2
-
3
-
4
-
5
-
6
-
7
-
8
-
9
-
10
-
11
-
12
-
13
-
14
-
15
-
16
-
17
-
18
-
19
-
20
-
21
-
22
-
23
-
24
-
25
-
26
-
27
-
28
-
29
-
30
-
31
-
32
-
33
-
34
-
35
-
36
-
37
-
38
-
39
-
40
-
41
-
42
-
43
-
44
-
45
-
46
-
47
-
48
-
49
-
50
-
51
-
52
-
53
-
54
-
55
-
56
-
57
-
58
-
59
-
60
-
61
-
62
-
63
-
64
-
65
-
66
-
67
-
68
-
69
-
70
-
71
-
72
-
73
-
74
-
75
-
76
-
77
-
78
-
79
-
80
-
81
-
82
-
83
-
84
-
85
-
86
-
87
-
88
-
89
-
90
-
91
-
92
-
93
-
94
-
95
-
96
-
97
-
98
-
99
-
100
-
101
-
102
-
103
-
104
-
105
-
106
-
107
-
108
-
109
-
110
-
111
-
112
-
113
-
114
-
115
-
116
-
117
-
118
-
119
-
120
-
121
-
122
-
123
-
124
-
125
-
126
-
127
-
128
-
129
-
 130
130 -
 131
131 -
 132
132 -
 133
133 -
 134
134 -
 135
135 -
 136
136 -
 137
137 -
 138
138 -
 139
139 -
 140
140 -
141
-
142
-
143
-
144
-
145
-
146
-
147
-
148
-
149
-
150
-
151
-
152
-
153
-
154
-
155
-
156
-
157
-
158
-
159
-
160
-
161
-
162
-
163
-
164
-
165
-
166
-
167
-
168
-
169
-
170
-
171
-
172
-
173
-
174
-
175
-
176
-
177
-
178
-
179
-
180
-
181
-
182
-
183
-
184
-
185
-
186
-
187
-
188
-
189
-
190
-
191
-
192
-
193
-
194
-
195
-
196
-
197
-
198
-
199
-
200
-
201
-
202
-
203
-
204
-
205
-
206
-
207
-
208
-
209
-
210
-
211
-
212
-
213
-
214
-
215
-
216
-
217
-
218
-
219
-
220
-
221
-
222
-
223
-
224
-
225
-
226
-
227
-
228
-
229
-
230
-
231
-
232
-
233
-
234
-
235
-
236
-
237
-
238
-
239
-
240
-
241
-
242
-
243
-
244
-
245
-
246
-
247
-
248
-
249
-
250
-
251
-
252
-
253
-
254
-
255
-
256
-
257
-
258
-
259
-
260
-
261
-
262
-
263
-
264
-
265
-
266
-
267
-
268
-
269
-
270
-
271
-
272
-
273
-
274
-
275
-
276
-
277
-
278
-
279
-
280
-
281
-
282
-
283
-
284
-
285
-
286
-
287
-
288
-
289
-
290
-
291
-
292
-
293
-
294
-
295
-
296
-
297
-
298
-
299
-
300
-
301
-
302
-
303
-
304
-
305
-
306
-
307
-
308
-
309
-
310
-
311
-
312
-
313
-
314
-
315
-
316
-
317
-
318
-
319
-
320
-
321
-
322
-
323
-
324
-
325
-
326
-
327
-
328
-
329
-
330
-
331
-
332
-
333
-
334
 |
 |