HP 2840 HP Color LaserJet 2820/2830/2840 All-In-One - User Guide - Page 178
Scan: How do I?, Scan from the device control panel, Set up the Scan to button on the control panel
 |
UPC - 829160742731
View all HP 2840 manuals
Add to My Manuals
Save this manual to your list of manuals |
Page 178 highlights
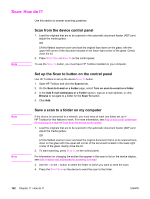
Scan: How do I? Use this section to answer scanning questions. Note Scan from the device control panel 1. Load the originals that are to be scanned in the automatic document feeder (ADF) and adjust the media guides. OR Lift the flatbed scanner cover and load the original face-down on the glass, with the upper-left corner of the document located in the lower-right corner of the glass. Gently close the lid. 2. Press START SCAN or SCAN TO on the control panel. To use the SCAN TO button, you must have HP Toolbox installed on your computer. Set up the Scan to button on the control panel Use HP Toolbox to set up the device SCAN TO button. 1. Open HP Toolbox and click the Scan to tab. 2. On the Scan to E-mail or a Folder page, select Turn on scan to e-mail or a folder. 3. In the Add E-mail Addresses or a Folder section, type an e-mail address, or click Browse to navigate to a folder for the Scan To button. 4. Click Add. Note Note Save a scan to a folder on my computer If the device is connected to a network, you must have at least one folder set up in HP Toolbox for this feature to work. For more information, see Add or edit e-mail addresses for scanning to e-mail or Scan from the device control panel. 1. Load the originals that are to be scanned in the automatic document feeder (ADF) and adjust the media guides. OR Lift the flatbed scanner cover and load the original document that is to be scanned facedown on the glass with the upper-left corner of the document located in the lower-right corner of the glass. Gently close the lid. 2. To start scanning, press SCAN TO on the control panel. For information on changing the entries that appear in the scan to list on the device display, see Add or edit e-mail addresses for scanning to e-mail. 3. Use the < or the > button to select the folder to which you want to send the scan. 4. Press the START SCAN on the device to send the scan to the folder. 162 Chapter 11 How do I? ENWW
-
 1
1 -
2
-
3
-
4
-
5
-
6
-
7
-
8
-
9
-
10
-
11
-
12
-
13
-
14
-
15
-
16
-
17
-
18
-
19
-
20
-
21
-
22
-
23
-
24
-
25
-
26
-
27
-
28
-
29
-
30
-
31
-
32
-
33
-
34
-
35
-
36
-
37
-
38
-
39
-
40
-
41
-
42
-
43
-
44
-
45
-
46
-
47
-
48
-
49
-
50
-
51
-
52
-
53
-
54
-
55
-
56
-
57
-
58
-
59
-
60
-
61
-
62
-
63
-
64
-
65
-
66
-
67
-
68
-
69
-
70
-
71
-
72
-
73
-
74
-
75
-
76
-
77
-
78
-
79
-
80
-
81
-
82
-
83
-
84
-
85
-
86
-
87
-
88
-
89
-
90
-
91
-
92
-
93
-
94
-
95
-
96
-
97
-
98
-
99
-
100
-
101
-
102
-
103
-
104
-
105
-
106
-
107
-
108
-
109
-
110
-
111
-
112
-
113
-
114
-
115
-
116
-
117
-
118
-
119
-
120
-
121
-
122
-
123
-
124
-
125
-
126
-
127
-
128
-
129
-
130
-
131
-
132
-
133
-
134
-
135
-
136
-
137
-
138
-
139
-
140
-
141
-
142
-
143
-
144
-
145
-
146
-
147
-
148
-
149
-
150
-
151
-
152
-
153
-
154
-
155
-
156
-
157
-
158
-
159
-
160
-
161
-
162
-
163
-
164
-
165
-
166
-
167
-
168
-
169
-
170
-
171
-
172
-
 173
173 -
 174
174 -
 175
175 -
 176
176 -
 177
177 -
 178
178 -
 179
179 -
 180
180 -
 181
181 -
 182
182 -
 183
183 -
184
-
185
-
186
-
187
-
188
-
189
-
190
-
191
-
192
-
193
-
194
-
195
-
196
-
197
-
198
-
199
-
200
-
201
-
202
-
203
-
204
-
205
-
206
-
207
-
208
-
209
-
210
-
211
-
212
-
213
-
214
-
215
-
216
-
217
-
218
-
219
-
220
-
221
-
222
-
223
-
224
-
225
-
226
-
227
-
228
-
229
-
230
-
231
-
232
-
233
-
234
-
235
-
236
-
237
-
238
-
239
-
240
-
241
-
242
-
243
-
244
-
245
-
246
-
247
-
248
-
249
-
250
-
251
-
252
-
253
-
254
-
255
-
256
-
257
-
258
-
259
-
260
-
261
-
262
-
263
-
264
-
265
-
266
-
267
-
268
-
269
-
270
-
271
-
272
-
273
-
274
-
275
-
276
-
277
-
278
-
279
-
280
-
281
-
282
-
283
-
284
-
285
-
286
-
287
-
288
-
289
-
290
-
291
-
292
-
293
-
294
-
295
-
296
-
297
-
298
-
299
-
300
-
301
-
302
-
303
-
304
-
305
-
306
-
307
-
308
-
309
-
310
-
311
-
312
-
313
-
314
-
315
-
316
-
317
-
318
-
319
-
320
-
321
-
322
-
323
-
324
-
325
-
326
-
327
-
328
-
329
-
330
-
331
-
332
-
333
-
334
 |
 |